


目录
请求时的RequestConfig详解(对请求的超时,代理,重定向等设置)
一.HttpClient的介绍
HttpClient是用于发送Http请求并处理响应的工具库,是网络通信的核心组件之一,通过这个工具能够实现与其他API接口或者HTTP端点交互。相较于传统的HttpURLConnection,HttpClient提供了更高效、灵活且功能丰富的API,支持现代HTTP协议特性(如HTTP/2)、连接池管理、异步请求等,适用于复杂的网络编程场景。
HttpClient的优势:
1.多协议支持
支持HTTP/1.1、HTTP/2,部分实现兼容WebSocket。
提供SSL/TLS加密通信,保障数据传输安全。
2.高效连接管理
连接池:复用TCP连接,减少频繁建立/断开连接的开销,提升性能。
超时控制:自定义连接超时、读取超时时间,避免阻塞。
重试机制:自动处理网络波动导致的请求失败。
3.异步与非阻塞
支持异步请求,适用于高并发场景,避免线程阻塞
HttpClient的应用场景:
1.微服务通信
2.服务间通过HTTP调用传递数据(如RESTful API)。
3.第三方API集成
4.调用微信支付、阿里云等外部服务的接口。
5.网络爬虫
6.自动化抓取网页或API数据。
7.测试工具开发
8.模拟客户端请求,验证服务端响应。
二.HttpClient发送请求的步骤
1.创建HttpClient对象。
2.创建请求方式的实例:创建请求方法的实例,并指定请求URL。如果需要发送GET请求,创建HttpGet对象;如果需要发送POST请求,创建HttpPost对象。
3.添加请求参数:如果需要发送请求参数,可调用HttpGet、HttpPost共同的setParams(HetpParams params)方法来添加请求参数;对于HttpPost对象而言,也可调用setEntity(HttpEntity entity)方法来设置请求参数。
4.发送Http请求:调用HttpClient对象的execute(HttpUriRequest request)发送请求,该方法返回一个HttpResponse。
5.获取返回的内容:调用HttpResponse的getAllHeaders()、getHeaders(String name)等方法可获取服务器的响应头;调用HttpResponse的getEntity()方法可获取HttpEntity对象,该对象包装了服务器的响应内容。程序可通过该对象获取服务器的响应内容。
6.释放资源:无论执行方法是否成功,都必须释放资源;
引入Maven依赖
        <dependency>
            <groupId>org.apache.httpcomponents</groupId>
            <artifactId>httpclient</artifactId>
            <version>4.5.13</version>
        </dependency>
<!--        可以使用最新版的,这里版本自定义-->
普通Get请求(没有携带参数)
这里发起请求设置在测试类里面,而接受这个请求我们就定义一个controller类,话不多说直接看代码
Controller层方法定义
@RestController
public class HttpClientController {
    @GetMapping("/test")
    public String test(){
        return "成功接收到请求";
    }
}
test发起请求
import org.apache.http.HttpEntity;
import org.apache.http.client.methods.CloseableHttpResponse;
import org.apache.http.client.methods.HttpGet;
import org.apache.http.impl.client.CloseableHttpClient;
import org.apache.http.impl.client.HttpClients;
import org.apache.http.util.EntityUtils;
import org.junit.jupiter.api.Test;
import org.springframework.boot.test.context.SpringBootTest;

import java.io.IOException;

@SpringBootTest
public class HttpClientTest {
    @Test
    public void test() throws IOException {

        CloseableHttpClient closeableHttpClient = HttpClients.createDefault();
        //HttpClients是用于创建HTTP客户端实例,包含连接池等基础配置
        HttpGet httpGet = new HttpGet("http://localhost:8080/test");
        //向本地的8080端口的test端点发起请求,HttpGet是构建一个get对象,里面包含了请求方法,URI,头信息等配置
        CloseableHttpResponse response = closeableHttpClient.execute(httpGet);
        //发起请求
        HttpEntity entity = response.getEntity();
        //接收请求返回的响应体
        System.out.println(EntityUtils.toString(entity));
        //通过EntityUtils将响应体内容转化为字符串

        //释放资源
        closeableHttpClient.close();
        response.close();
    }
}
说明:
1.HttpClients提供了一些静态方法用于创建和配置CloseableHttpClient 实例,它的作用就是配置一些连接池的信息和返回CloseableHttpClient对象
2.CloseableHttpClient提供了用于发送HTTP请求和接收响应的功能,下面我们调用了这个类里面的方法execute方法来向指定url发送请求
3.HttpGet是初始化一个GET请求,在里面指定我们要发起请求的路径,返回的HttpGet对象包含了请求路径,请求方法和头信息配置
4.HttpEntity是接收响应回来的内容,再通过EntityUtils.toString来将这个内容转换为字符串,这个方法会根据响应头的Content-Type来讲响应体自动编码为字符串,因为传过来的是JSON格式
Get请求携带请求参数和路径参数(Post也可用)
这里我就推荐一种最简单的方法就是字符串拼接,这里我为了方便就把查询参数和路径参数放在一起传了
import org.springframework.web.bind.annotation.GetMapping;
import org.springframework.web.bind.annotation.PathVariable;
import org.springframework.web.bind.annotation.RequestParam;
import org.springframework.web.bind.annotation.RestController;
@RestController
public class HttpClientController {
@GetMapping("/test/{id}")
public String test(@PathVariable int id, @RequestParam String param){
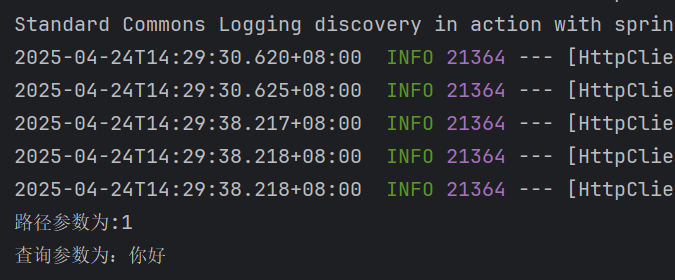
System.out.println("路径参数为:"+id);
System.out.println("查询参数为:"+param);
return "成功接收到请求";
}
}import org.apache.http.HttpEntity;
import org.apache.http.client.methods.CloseableHttpResponse;
import org.apache.http.client.methods.HttpGet;
import org.apache.http.impl.client.CloseableHttpClient;
import org.apache.http.impl.client.HttpClients;
import org.apache.http.util.EntityUtils;
import org.junit.jupiter.api.Test;
import org.springframework.boot.test.context.SpringBootTest;
import java.io.IOException;
@SpringBootTest
public class HttpClientTest {
@Test
public void test() throws IOException {
CloseableHttpClient closeableHttpClient = HttpClients.createDefault();
//HttpClients是用于创建HTTP客户端实例,包含连接池等基础配置
String s = "http://localhost:8080/test/1?param=你好";
HttpGet httpGet = new HttpGet(s);
//向本地的8080端口的test端点发起请求,HttpGet是构建一个get对象,里面包含了请求方法,URI,头信息等配置
CloseableHttpResponse response = closeableHttpClient.execute(httpGet);
//发起请求
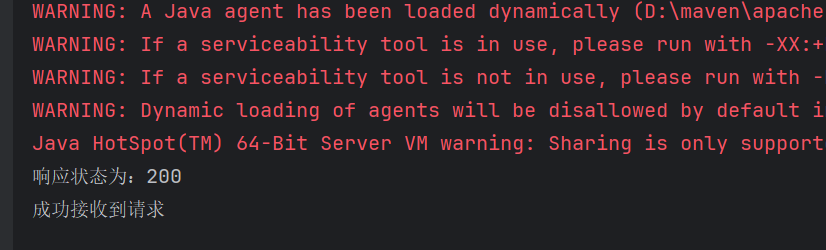
int code = response.getStatusLine().getStatusCode();//获取响应状态码
System.out.println("响应状态为:"+code);
HttpEntity entity = response.getEntity();
//接收请求返回的响应体
System.out.println(EntityUtils.toString(entity));
//通过EntityUtils将响应体内容转化为字符串
//释放资源
closeableHttpClient.close();
response.close();
}
}这里使用到了response.getStatusLine().getStatusCode(),这个的作用是获取响应的状态码
控制台输出
或者是第二种方式来设置,基于URIBuilder,步骤要多一点
import org.apache.http.HttpEntity;
import org.apache.http.client.methods.CloseableHttpResponse;
import org.apache.http.client.methods.HttpGet;
import org.apache.http.client.utils.URIBuilder;
import org.apache.http.impl.client.CloseableHttpClient;
import org.apache.http.impl.client.HttpClients;
import org.apache.http.util.EntityUtils;
import org.junit.jupiter.api.Test;
import org.springframework.boot.test.context.SpringBootTest;

import java.io.IOException;
import java.net.URI;
import java.net.URISyntaxException;

@SpringBootTest
public class HttpClientTest {
    @Test
    public void test() throws IOException, URISyntaxException {

        CloseableHttpClient closeableHttpClient = HttpClients.createDefault();
        //HttpClients是用于创建HTTP客户端实例,包含连接池等基础配置
        String s = "http://localhost:8080/test";
        URIBuilder builder = new URIBuilder(s);
        //创建一个URIBuilder对象
        builder.addParameter("param","你好");
        //设置查询参数
        URI build = builder.build();
        //通过URIBuilder对象创建一个URI对象
        HttpGet httpGet = new HttpGet(build);

        //向本地的8080端口的test端点发起请求,HttpGet是构建一个get对象,里面包含了请求方法,URI,头信息等配置
        CloseableHttpResponse response = closeableHttpClient.execute(httpGet);

        int code = response.getStatusLine().getStatusCode();//获取响应状态码
        System.out.println("响应状态为:"+code);
        //发起请求
        HttpEntity entity = response.getEntity();
        //接收请求返回的响应体
        System.out.println(EntityUtils.toString(entity));
        //通过EntityUtils将响应体内容转化为字符串

        //释放资源
        closeableHttpClient.close();
        response.close();
    }
}
Get方式设置请求头(Post也可用)
只需要调用HttpGet对象设置请求头就行了,通过键值对的方式来设置。
httpGet.setHeader("token","123456");在controller通过设置形参HttpServletRequest这个类就能接收到这个请求,在通过调用其getHeader方法就能拿到这个请求头的参数了
String token = httpServletRequest.getHeader("token");注意上面设置请求头和设置路径参数和设置查询参数对于Post也可用
Post请求设置请求体
fastjson依赖处理JSON对象和数据
这里就涉及到一个新的依赖fastjson,但是听说它的bug挺多的,这里你们可以使用其他的封装类,但是这个类是最方便的,上手最快的。
        <dependency>
            <groupId>com.alibaba</groupId>
            <artifactId>fastjson</artifactId>
            <version>1.2.76</version>
        </dependency>
test测试类
import com.alibaba.fastjson.JSONObject;
import org.apache.http.HttpEntity;
import org.apache.http.client.methods.CloseableHttpResponse;
import org.apache.http.client.methods.HttpPost;
import org.apache.http.entity.StringEntity;
import org.apache.http.impl.client.CloseableHttpClient;
import org.apache.http.impl.client.HttpClients;
import org.apache.http.util.EntityUtils;
import org.junit.jupiter.api.Test;
import org.springframework.boot.test.context.SpringBootTest;

import java.io.IOException;

@SpringBootTest
public class HttpClientTest {
    @Test
    public void test() throws IOException{

        CloseableHttpClient httpClient = HttpClients.createDefault();
        HttpPost httpPost = new HttpPost("http://localhost:8080/test");
        JSONObject jsonObject = new JSONObject();
        //创建一个JSON的对象
        jsonObject.put("username", "admin");
        jsonObject.put("password", "123456");
        //放置键值对到这个JSON对象中
        StringEntity stringEntity = new StringEntity(jsonObject.toString());
        //StringEntity构造函数传入一个字符串,同于表示一个请求体,不过是以字符串的形式表示的
        stringEntity.setContentEncoding("UTF-8");
        //设置请求体内容编码方式为UTF-8
        stringEntity.setContentType("application/json");
        //设置请求体的类型是json格式,告诉服务器要如何解析这个请求体
        httpPost.setEntity(stringEntity);
        //给httpPost设置请求体
        CloseableHttpResponse execute = httpClient.execute(httpPost);
        int statusCode = execute.getStatusLine().getStatusCode();
        HttpEntity entity = execute.getEntity();
        String string = EntityUtils.toString(entity);
        System.out.println(statusCode);
        System.out.println(string);
        httpClient.close();
        execute.close();
    }
}
controller层
这里我封装了一个Testdto类用于接收传来的请求体内容,注意要使用@RequestBody注解,用于自动封装到这个类里面(因为我们设置的是json格式)
import com.part1.DTO.Testdto;
import org.springframework.web.bind.annotation.*;
import java.io.IOException;
@RestController
public class HttpClientController {
@PostMapping("/test")
public String test(@RequestBody Testdto testdto) throws IOException {
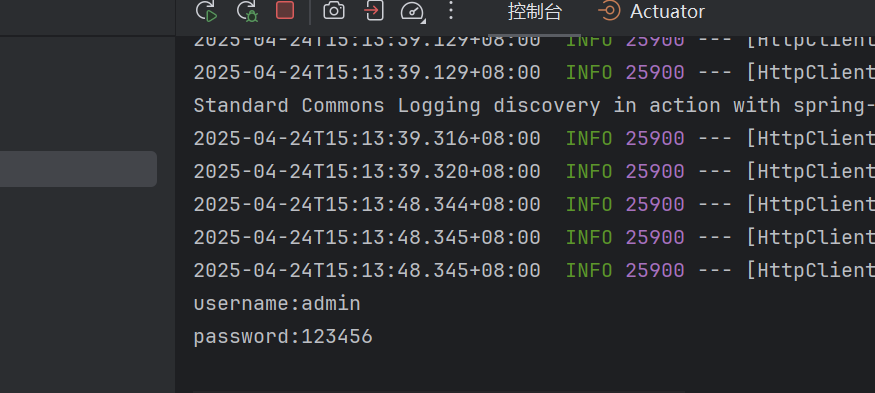
System.out.println("username:"+testdto.getUsername());
System.out.println("password:"+testdto.getPassword());
return "成功接收到请求";
}
}Testdto
public class Testdto {
    private String username;
    private String password;
    public Testdto() {}
    public Testdto(String username, String password) {
        this.username = username;
        this.password = password;
    }
    public String getUsername() {
        return username;
    }
    public String getPassword() {
       return password;
    }
}
输出
这时候有人就会问了:啊,主包主包为什么你的编码和请求体的类型不设置在请求头里面
我只能说也是可以的
        httpPost.setHeader("Content-type", "application/json");
        httpPost.setHeader("Content-Encoding", "UTF-8");
它能实现同样的效果
Post请求设置的主要思路
我们从上面的代码可以看见设置请求体的过程是挺麻烦的
它的主要思路就是从设置请求体开始就和get不同了,首先先创建一个JSON对象,在里面设置请求体的内容,然后讲这个字符串转成一个字符串给这个StringEntity类创建一个StringEntity的实例,这里又有人会问了,主包主包,你这个类用来干什么的,因为在下面的setEntity它接收的是一个HttpEntity接口,而StringEntity是HttpEntity的实现类。到此就算完成了请求体的封装
请求时的RequestConfig详解(对请求的超时,代理,重定向等设置)
RequestConfig核心配置项
| 配置项 | 方法 | 作用 | 默认值 |
|---|---|---|---|
| 连接超时 | setConnectTimeout(int timeout) | 建立与目标服务器的TCP连接的最大等待时间(毫秒)。超时则抛出 ConnectTimeoutException。 | 系统默认(通常无限) |
| Socket读取超时 | setSocketTimeout(int timeout) | 等待服务器返回数据的最大时间(毫秒)。超时则抛出 SocketTimeoutException。 | 系统默认(通常无限) |
| 从连接池获取连接的超时 | setConnectionRequestTimeout(int timeout) | 从连接池中获取可用连接的最大等待时间(毫秒)。超时则抛出 ConnectionPoolTimeoutException。 | 系统默认(通常无限) |
| 是否自动重定向 | setRedirectsEnabled(boolean enable) | 是否自动跟随HTTP重定向(如301/302)。 | true |
| 代理设置 | setProxy(HttpHost proxy) | 通过指定代理服务器发送请求(如new HttpHost("proxy.example.com", 8080))。 | null |
| 内容压缩 | setContentCompressionEnabled(boolean enable) | 是否接受压缩的响应内容(如GZIP)。 | true |
创建步骤
创建 RequestConfig 对象,使用 RequestConfig.custom() 链式配置参数,最后调用 .build() 生成实例
例如:
RequestConfig config = RequestConfig.custom()
    .setConnectTimeout(5000)          // 连接超时5秒
    .setSocketTimeout(5000)           // 数据读取超时5秒
    .setConnectionRequestTimeout(5000) // 从连接池获取连接超时5秒
    .setProxy(new HttpHost("proxy.example.com", 8080)) // 设置代理
    .setRedirectsEnabled(true)        // 允许自动重定向
    .build();
在将其配置在具体的请求上
HttpGet httpGet = new HttpGet("https://api.example.com/data");
httpGet.setConfig(config); // 应用自定义配置
HttpClient相关配置(配置文件)
#最大连接数
http.maxTotal=100
#设置到某个路由的最大连接数
http.defaultMaxPerRoute=20
#连接超时时间(单位毫秒)
http.connectTimeout=10000
#从连接池中获取到连接的最长时间(单位毫秒)
http.connectionRequestTimeout=5000
#数据传输的最长时间(单位毫秒)
http.socketTimeout=10000
#空闲永久连接检查间隔,官方推荐使用这个来检查永久链接的可用性,而不推荐每次请求的时候才去检查
http.validateAfterInactivity=2000
响应Response的相关方法
HttpEntity entity = response.getEntity();
//获取 HttpResponse 的实体内容(即响应的主体)。HttpEntity是包含响应数据的对象。
StatusLine statusLine = response.getStatusLine();
//获取响应的状态行(StatusLine 对象)。StatusLine包含了响应的HTTP状态码和状态消息。
int statusCode = statusLine.getStatusCode();
//从 HttpResponse 中直接获取响应的状态码
String reasonPhrase = statusLine.getReasonPhrase();

//获取指定名称的响应头信息。返回一个 Header 数组。
Header[] headers = response.getHeaders("Content-Type");

String responseBody = EntityUtils.toString(response.getEntity());
System.out.println(responseBody);
//将响应的 HttpEntity 转换为字符串。这是一个方便的方法,尤其在处理响应时,直接获取实体的字符串表示。

HttpVersion version = response.getProtocolVersion();
System.out.println("HTTP Version: " + version);
//获取响应使用的 HTTP 版本(如 HTTP/1.1 或 HTTP/2)。
HttpClient的快捷工具类(自定义封装)
import com.alibaba.fastjson.JSONObject;
import org.apache.http.NameValuePair;
import org.apache.http.client.config.RequestConfig;
import org.apache.http.client.entity.UrlEncodedFormEntity;
import org.apache.http.client.methods.CloseableHttpResponse;
import org.apache.http.client.methods.HttpGet;
import org.apache.http.client.methods.HttpPost;
import org.apache.http.client.utils.URIBuilder;
import org.apache.http.entity.StringEntity;
import org.apache.http.impl.client.CloseableHttpClient;
import org.apache.http.impl.client.HttpClients;
import org.apache.http.message.BasicNameValuePair;
import org.apache.http.util.EntityUtils;

import java.io.IOException;
import java.net.URI;
import java.util.ArrayList;
import java.util.List;
import java.util.Map;

/**
 * Http工具类
 */
public class HttpClientUtil {

    static final  int TIMEOUT_MSEC = 5 * 1000;

    /**
     * 发送GET方式请求
     * @param url
     * @param paramMap
     * @return
     */
    public static String doGet(String url,Map<String,String> paramMap){
        // 创建Httpclient对象
        CloseableHttpClient httpClient = HttpClients.createDefault();

        String result = "";
        CloseableHttpResponse response = null;

        try{
            URIBuilder builder = new URIBuilder(url);
            if(paramMap != null){
                for (String key : paramMap.keySet()) {
                    builder.addParameter(key,paramMap.get(key));
                    //通过这个addParameter给这个urlBuilder传入查询参数
                }
            }
            URI uri = builder.build();

            //创建GET请求
            HttpGet httpGet = new HttpGet(uri);

            //发送请求
            response = httpClient.execute(httpGet);

            //判断响应状态
            if(response.getStatusLine().getStatusCode() == 200){
                result = EntityUtils.toString(response.getEntity(),"UTF-8");
            }
        }catch (Exception e){
            e.printStackTrace();
        }finally {
            try {
                response.close();
                httpClient.close();
            } catch (IOException e) {
                e.printStackTrace();
            }
        }

        return result;
    }

    /**
     * 发送POST方式请求
     * @param url
     * @param paramMap
     * @return
     * @throws IOException
     */
    public static String doPost(String url, Map<String, String> paramMap) throws IOException {
        // 创建Httpclient对象
        CloseableHttpClient httpClient = HttpClients.createDefault();
        CloseableHttpResponse response = null;
        String resultString = "";

        try {
            // 创建Http Post请求
            HttpPost httpPost = new HttpPost(url);

            // 创建参数列表
            if (paramMap != null) {
                List<NameValuePair> paramList = new ArrayList();
                for (Map.Entry<String, String> param : paramMap.entrySet()) {
                    paramList.add(new BasicNameValuePair(param.getKey(), param.getValue()));
                }
                // 模拟表单
                UrlEncodedFormEntity entity = new UrlEncodedFormEntity(paramList);
                httpPost.setEntity(entity);
            }

            httpPost.setConfig(builderRequestConfig());

            // 执行http请求
            response = httpClient.execute(httpPost);

            resultString = EntityUtils.toString(response.getEntity(), "UTF-8");
        } catch (Exception e) {
            throw e;
        } finally {
            try {
                response.close();
            } catch (IOException e) {
                e.printStackTrace();
            }
        }

        return resultString;
    }

    /**
     * 发送POST方式请求
     * @param url
     * @param paramMap
     * @return
     * @throws IOException
     */
    public static String doPost4Json(String url, Map<String, String> paramMap) throws IOException {
        // 创建Httpclient对象
        CloseableHttpClient httpClient = HttpClients.createDefault();
        CloseableHttpResponse response = null;
        String resultString = "";

        try {
            // 创建Http Post请求
            HttpPost httpPost = new HttpPost(url);

            if (paramMap != null) {
                //构造json格式数据
                JSONObject jsonObject = new JSONObject();
                for (Map.Entry<String, String> param : paramMap.entrySet()) {
                    jsonObject.put(param.getKey(),param.getValue());
                }
                StringEntity entity = new StringEntity(jsonObject.toString(),"utf-8");
                //设置请求编码
                entity.setContentEncoding("utf-8");
                //设置数据类型
                entity.setContentType("application/json");
                httpPost.setEntity(entity);
            }

            httpPost.setConfig(builderRequestConfig());

            // 执行http请求
            response = httpClient.execute(httpPost);

            resultString = EntityUtils.toString(response.getEntity(), "UTF-8");
        } catch (Exception e) {
            throw e;
        } finally {
            try {
                response.close();
            } catch (IOException e) {
                e.printStackTrace();
            }
        }

        return resultString;
    }
    private static RequestConfig builderRequestConfig() {
        return RequestConfig.custom()
                .setConnectTimeout(TIMEOUT_MSEC)
                .setConnectionRequestTimeout(TIMEOUT_MSEC)
                .setSocketTimeout(TIMEOUT_MSEC).build();
    }

}
到这里HttpClient的大概的东西就讲完了,关于连接池的东西,主包道行太浅了没办法讲。
最后
本人的第四篇博客,以此来记录我的后端java学习。如文章中有什么问题请指出,非常感谢!!!


 被折叠的 条评论
为什么被折叠?
被折叠的 条评论
为什么被折叠?
 到【灌水乐园】发言


