


效果图
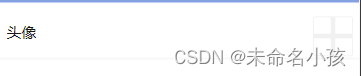
点击加号,选择图片
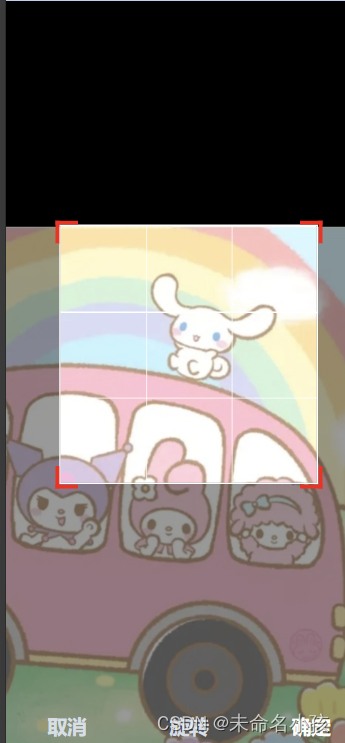
点击右下角确定

代码展示
将uni-file-picker组件和ksp-cropper组件修改,二次封装
(在上传时,使用了我自己的接口,可替换)
uni-file-picker组件和ksp-cropper组件下载地址,如下:
uni-file-picker 文件选择上传 - DCloud 插件市场
组件代码
<template>
	<view>
		<uni-file-picker :limit="limit" mode="grid" :fileMediatype="fileMediatype" :file-extname="fileType"
			@progress="progress" @success="success" @fail="fail" @select="select" @delete="delIMG"
			v-model="dataList"></uni-file-picker>
		<ksp-cropper v-if="localDataShowCropper" class="crop" mode="fixed" :width="250" :height="250" :maxWidth="1024"
			:maxHeight="1024" :url="currentImageUrl" @cancel="handleCancel" @ok="handleCropOk"></ksp-cropper>
	</view>
</template>
<script>
export default {
name: "sk-upload-crop",
props: {
limit: {
type: Number,
default: 1
},
fileType: {
type: Array,
default: function() {
return []
}
},
type: {
type: Number
},
// 默认数据,逗号隔开(用于保存和回显数据)
modelValue: {
type: String,
default: ''
},
showCropper: {
type: Boolean,
default: false
}
},
data() {
return {
// 用于展示数据
dataList: [],
fileMediatype: 'all',
currentImageUrl: '',
localDataShowCropper: this.showCropper,
};
},
created() {
let _this = this
const temList = _this.$util.isNull(_this.modelValue) ? [] : _this.modelValue.split(',')
temList.forEach((item, i) => {
_this.dataList.push({
'url': _this.$config.getConfig().fileBasePath + item
})
})
if (_this.fileType.indexOf("png") > -1) {
_this.fileMediatype = "image"
}
},
methods: {
select(e) {
const tempFilePaths = e.tempFilePaths;
if (tempFilePaths && tempFilePaths.length > 0) {
this.currentImageUrl = tempFilePaths[0];
this.localDataShowCropper = true;
}
},
handleCropOk(currentImageUrl) {
console.log('currentImageUrl',currentImageUrl)
let _this = this
let list = _this.$util.isNull(_this.modelValue) ? [] : _this.modelValue.split(',')
let dataList = _this.dataList
uni.uploadFile({
url: _this.$config.getConfig().reqBasePath + 'common003',
filePath: currentImageUrl.path,
name: 'imgUrl',
header: {
"requestType": "2",
"userToken": uni.getStorageSync("userToken")
},
formData: {
type: 37,
},
success: (res) => {
if (res.statusCode == 200) {
var jsonData = JSON.parse(res.data);
if (jsonData.returnCode == 0) {
let bean = jsonData.bean
dataList.push({
'url': _this.$config.getConfig().fileBasePath + bean.picUrl
})
list.push(bean.picUrl)
_this.dataList = dataList
_this.$emit('update:modelValue', list.toString());
} else {
uni.showToast({
icon: 'none',
position: 'bottom',
title: jsonData.returnMessage
});
}
}
}
});
this.localDataShowCropper = false;
},
handleCancel() {
this.clearData()
},
clearData() {
this.dataList = [];
this.currentImageUrl = '';
},
// 图片删除
delIMG(e) {
// 删除显示的数据
const num = this.dataList.findIndex(v => v.url === e.tempFilePath);
this.dataList.splice(num, 1);
// 删除保存的数据
let list = this.$util.isNull(this.modelValue) ? [] : this.modelValue.split(',')
const savePath = e.tempFilePath.replace(this.$config.getConfig().fileBasePath, '')
const num1 = list.findIndex(v => v === savePath);
list.splice(num1, 1);
this.$emit('update:modelValue', list.toString());
},
// 获取上传进度
progress(e) {
console.log('上传进度:', e)
},
// 上传成功
success(e) {
console.log('上传成功')
},
// 上传失败
fail(e) {
console.log('上传失败:', e)
}
}
}
</script><style scoped>
::v-deep .is-add {
background-color: white;
}
.crop {
position: fixed;
left: 0px;
z-index: 100;
}
</style>父页面使用
<SkUploadCrop ref="uploadCrop" v-else class="pic" :type="37" :limit="1"
						:fileType="$fileType.imageType" :showCropper="isShowingCropper" v-model="formData.img">
					</SkUploadCrop>


 680
680


 被折叠的 条评论
为什么被折叠?
被折叠的 条评论
为什么被折叠?
 到【灌水乐园】发言


