


修改hosts
vim /etc/ansible/hosts
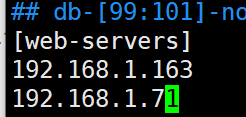
查看配置文件中刚刚修改的内容
[root@itlaoxin162 ~]# grep -v “^#” /etc/ansible/hosts |grep -v “^$”
[web-servers]
192.168.1.163
192.168.1.71
ansible远程执行命令测试
ping模块 主要用来检测网络的连通性
command模块,执行shell命令
使用ping检查‘web-servers’或者ansible节点的连通性。
[root@itlaoxin162 ~]# ansible -i /etc/ansible/hosts ‘web-servers’ -m ping
[WARNING]: Invalid characters were found in group names but not replaced, use
-vvvv to see details
192.168.1.163 | SUCCESS => {
“ansible_facts”: {
“discovered_interpreter_python”: “/usr/bin/python”
},
“changed”: false,
“ping”: “pong”
}
192.168.1.71 | SUCCESS => {
“ansible_facts”: {
“discovered_interpreter_python”: “/usr/bin/python”
},
“changed”: false,
“ping”: “pong”
}
[root@itlaoxin162 ~]#
这条命令我们也可以不指定hosts,效果是一样的,我们只要指定组即可
[root@itlaoxin162 ~]# ansible ‘web-servers’ -m ping
[WARNING]: Invalid characters were found in group names but not replaced, use
-vvvv to see details
192.168.1.71 | SUCCESS => {
“ansible_facts”: {
“discovered_interpreter_python”: “/usr/bin/python”
},
“changed”: false,
“ping”: “pong”
}
192.168.1.163 | SUCCESS => {
“ansible_facts”: {
“discovered_interpreter_python”: “/usr/bin/python”
},
“changed”: false,
“ping”: “pong”
}
[root@itlaoxin162 ~]#
有时候我们为了方便阅读也把主机组名写在最后面
web-servers 这个组名,放在最后面
[root@itlaoxin162 ~]# ansible -m command -a “uptime” ‘web-servers’
[WARNING]: Invalid characters were found in group names but not replaced, use
-vvvv to see details
192.168.1.71 | CHANGED | rc=0 >>
08:37:28 up 11 min, 3 users, load average: 0.02, 0.15, 0.17
192.168.1.163 | CHANGED | rc=0 >>
08:37:28 up 1:58, 5 users, load average: 0.00, 0.01, 0.05
[root@itlaoxin162 ~]#
案例1: 检查节点的内存情况
[root@itlaoxin162 ~]# ansible -m command -a "free -m " ‘web-servers’
[WARNING]: Invalid characters were found in group names but not replaced, use
-vvvv to see details
192.168.1.71 | CHANGED | rc=0 >>
total used free shared buff/cache available
Mem: 3770 826 2283 15 661 2709
Swap: 2047 0 2047
192.168.1.163 | CHANGED | rc=0 >>
total used free shared buff/cache available
Mem: 3770 892 1076 38 1802 2588
Swap: 2047 0 2047
[root@itlaoxin162 ~]#
案例2:给节点增加用户
[root@itlaoxin162 ~]# ansible -m command -a “useradd itoldxin” ‘web-servers’
[WARNING]: Invalid characters were found in group names but not replaced, use
-vvvv to see details
192.168.1.71 | CHANGED | rc=0 >>
192.168.1.163 | CHANGED | rc=0 >>
[root@itlaoxin162 ~]#
查看是否创建用户成功
[root@itlaoxin162 ~]# ansible -m command -a “id itoldxin” ‘web-servers’
[WARNING]: Invalid characters were found in group names but not replaced, use
-vvvv to see details
192.168.1.71 | CHANGED | rc=0 >>
uid=1001(itoldxin) gid=1001(itoldxin) 组=1001(itoldxin)
192.168.1.163 | CHANGED | rc=0 >>
uid=1001(itoldxin) gid=1001(itoldxin) 组=1001(itoldxin)
[root@itlaoxin162 ~]#
1. ansible的常用模块
1) ansible的3个远程模块的区别
-
command : ansible的默认模块,不指定-m参数的时候,使用的就是command模块; 常见的命令都可以使用,但命令的执行不是通过shell来执行的,所以< > | and & z这些操作都不可以,不支持管道,没法批量执行命令
-
shell模块: 使用shell模块的时候默认是通过/bin/sh来执行的,所以在终端输入的各种命令都可以使用
-
scripts模块
使用scripts模块可以在本地写一个脚本,在远程服务器上执行
案例1:使用shell模块的案例
[root@itlaoxin162 ~]# ansible -i /etc/ansible/hosts web-servers -m shell -a “source ~/.bash_profile && df -h|head -n 1”
[WARNING]: Invalid characters were found in group names but not replaced, use
-vvvv to see details
192.168.1.71 | CHANGED | rc=0 >>
文件系统 容量 已用 可用 已用% 挂载点
192.168.1.163 | CHANGED | rc=0 >>
文件系统 容量 已用 可用 已用% 挂载点
[root@itlaoxin162 ~]#
注意: shell也可以把一个脚本copy到远程端然后再执行,但这样的话就需要调用两次ansible,所以script的出现就解决了这个问题;
案例2:使用script 模块
先写一个脚本:
[root@itlaoxin162 ~]# cat !$
cat /etc/ansible/test.sh
#!/bin/bash
date
hostname
echo “大家好,我是互联网老辛,脚本执行成功”
[root@itlaoxin162 ~]#
执行查看结果:
[root@itlaoxin162 ~]# ansible -i /etc/ansible/hosts web-servers -m script -a “/etc/ansible/test.sh”
[WARNING]: Invalid characters were found in group names but not replaced, use
-vvvv to see details
192.168.1.71 | CHANGED => {
“changed”: true,
“rc”: 0,
“stderr”: “Shared connection to 192.168.1.71 closed.\r\n”,
“stderr_lines”: [
“Shared connection to 192.168.1.71 closed.”
],
“stdout”: “2021年 04月 21日 星期三 08:59:33 CST\r\nk8s-master\r\n大家好,我是互联网老辛,脚本执行成功\r\n”,
“stdout_lines”: [
“2021年 04月 21日 星期三 08:59:33 CST”,
“k8s-master”,
“大家好,我是互联网老辛,脚本执行成功”
]
}
192.168.1.163 | CHANGED => {
“changed”: true,
“rc”: 0,
“stderr”: “Shared connection to 192.168.1.163 closed.\r\n”,
“stderr_lines”: [
“Shared connection to 192.168.1.163 closed.”
],
“stdout”: “2021年 04月 21日 星期三 08:59:33 CST\r\nitlaoxin-163\r\n大家好,我是互联网老辛,脚本执行成功\r\n”,
“stdout_lines”: [
“2021年 04月 21日 星期三 08:59:33 CST”,
“itlaoxin-163”,
“大家好,我是互联网老辛,脚本执行成功”
]
}
[root@itlaoxin162 ~]#
可以看到已经执行成功
2) copy模块的使用
copy模块:实现主控端向目标主机拷贝文件,类似scp功能
案例1: 把ansible主机的/etc/hosts 拷贝到主机组机器中的/root/下
[root@itlaoxin162 ~]# ansible -i /etc/ansible/hosts web-servers -m copy -a “src=/etc/hosts dest=/root owner=root group=root mode=0777”
[WARNING]: Invalid characters were found in group names but not replaced, use
-vvvv to see details
192.168.1.71 | CHANGED => {
“ansible_facts”: {
“discovered_interpreter_python”: “/usr/bin/python”
},
“changed”: true,
“checksum”: “700a03c76a37e929d448b3be6419f4289d9314e6”,
“dest”: “/root/hosts”,
“gid”: 0,
“group”: “root”,
“md5sum”: “138004edd9d16f2818e20842fc1f273d”,
“mode”: “0777”,
“owner”: “root”,
“secontext”: “system_u:object_r:admin_home_t:s0”,
“size”: 183,
“src”: “/root/.ansible/tmp/ansible-tmp-1618966980.44-20046-203314294949142/source”,
“state”: “file”,
“uid”: 0
}
192.168.1.163 | CHANGED => {
“ansible_facts”: {
“discovered_interpreter_python”: “/usr/bin/python”
},
“changed”: true,
“checksum”: “700a03c76a37e929d448b3be6419f4289d9314e6”,
“dest”: “/root/hosts”,
“gid”: 0,
“group”: “root”,
“md5sum”: “138004edd9d16f2818e20842fc1f273d”,
“mode”: “0777”,
“owner”: “root”,
“secontext”: “system_u:object_r:admin_home_t:s0”,
“size”: 183,
“src”: “/root/.ansible/tmp/ansible-tmp-1618966980.45-20045-254958397204815/source”,
“state”: “file”,
“uid”: 0
}
[root@itlaoxin162 ~]#
查看是否执行成功:
[root@itlaoxin162 ~]# ansible -m command -a “ls /root/hosts” ‘web-servers’
[WARNING]: Invalid characters were found in group names but not replaced, use
-vvvv to see details
192.168.1.71 | CHANGED | rc=0 >>
/root/hosts
192.168.1.163 | CHANGED | rc=0 >>
/root/hosts
[root@itlaoxin162 ~]#
注意: command 不能使用ll命令,但可以使用ls -l的命令
[root@itlaoxin162 ~]# ansible -m command -a “ls -l /root/hosts” ‘web-servers’
[WARNING]: Invalid characters were found in group names but not replaced, use
-vvvv to see details
192.168.1.71 | CHANGED | rc=0 >>
-rwxrwxrwx. 1 root root 183 4月 21 09:03 /root/hosts
192.168.1.163 | CHANGED | rc=0 >>
-rwxrwxrwx. 1 root root 183 4月 21 09:03 /root/hosts
[root@itlaoxin162 ~]#
3. file模块
案例5 给文件设置权限
[root@itlaoxin162 ~]# ansible -i /etc/ansible/hosts web-servers -m file -a “path=/root/hosts mode=0755”
[WARNING]: Invalid characters were found in group names but not replaced, use
-vvvv to see details
192.168.1.71 | CHANGED => {
“ansible_facts”: {
“discovered_interpreter_python”: “/usr/bin/python”
},
“changed”: true,
“gid”: 0,
“group”: “root”,
“mode”: “0755”,
“owner”: “root”,
“path”: “/root/hosts”,
“secontext”: “system_u:object_r:admin_home_t:s0”,
“size”: 183,
“state”: “file”,
“uid”: 0
}
192.168.1.163 | CHANGED => {
“ansible_facts”: {
“discovered_interpreter_python”: “/usr/bin/python”
},
“changed”: true,
“gid”: 0,
“group”: “root”,
“mode”: “0755”,
“owner”: “root”,
“path”: “/root/hosts”,
“secontext”: “system_u:object_r:admin_home_t:s0”,
“size”: 183,
“state”: “file”,
“uid”: 0
}
[root@itlaoxin162 ~]#
查看权限:
[root@itlaoxin162 ~]# ansible -m command -a “ls -l /root/hosts” ‘web-servers’
[WARNING]: Invalid characters were found in group names but not replaced, use
-vvvv to see details
192.168.1.71 | CHANGED | rc=0 >>
-rwxr-xr-x. 1 root root 183 4月 21 09:03 /root/hosts
192.168.1.163 | CHANGED | rc=0 >>
-rwxr-xr-x. 1 root root 183 4月 21 09:03 /root/hosts
[root@itlaoxin162 ~]#
4. stat模块获取远程文件信息
案例6 获取文件信息
[root@itlaoxin162 ~]# ansible -i /etc/ansible/hosts web-servers -m stat -a “path=/root/hosts”
[WARNING]: Invalid characters were found in group names but not replaced, use
-vvvv to see details
192.168.1.71 | SUCCESS => {
“ansible_facts”: {
“discovered_interpreter_python”: “/usr/bin/python”
},
“changed”: false,
“stat”: {
“atime”: 1618966982.400622,
“attr_flags”: “”,
“attributes”: [],
“block_size”: 4096,
“blocks”: 8,
“charset”: “us-ascii”,
“checksum”: “700a03c76a37e929d448b3be6419f4289d9314e6”,
“ctime”: 1618967480.9315438,
“dev”: 64768,
“device_type”: 0,
“executable”: true,
“exists”: true,
“gid”: 0,
“gr_name”: “root”,
“inode”: 78337,
“isblk”: false,
“ischr”: false,
“isdir”: false,
“isfifo”: false,
“isgid”: false,
“islnk”: false,
“isreg”: true,
“issock”: false,
“isuid”: false,
“mimetype”: “text/plain”,
“mode”: “0755”,
“mtime”: 1618966981.7806218,
“nlink”: 1,
“path”: “/root/hosts”,
“pw_name”: “root”,
“readable”: true,
“rgrp”: true,
“roth”: true,
“rusr”: true,
“size”: 183,
“uid”: 0,
“version”: “693378940”,
“wgrp”: false,
“woth”: false,
“writeable”: true,
“wusr”: true,
“xgrp”: true,
“xoth”: true,
“xusr”: true
}
}
192.168.1.163 | SUCCESS => {
“ansible_facts”: {
“discovered_interpreter_python”: “/usr/bin/python”
},
“changed”: false,
“stat”: {
“atime”: 1618966982.6472814,
“attr_flags”: “”,
“attributes”: [],
“block_size”: 4096,
“blocks”: 8,
“charset”: “us-ascii”,
“checksum”: “700a03c76a37e929d448b3be6419f4289d9314e6”,
“ctime”: 1618967481.0644567,
“dev”: 64768,
“device_type”: 0,
“executable”: true,
“exists”: true,
“gid”: 0,
“gr_name”: “root”,
“inode”: 33662547,
“isblk”: false,
“ischr”: false,
“isdir”: false,
“isfifo”: false,
“isgid”: false,
“islnk”: false,
“isreg”: true,
“issock”: false,
“isuid”: false,
“mimetype”: “text/plain”,
“mode”: “0755”,
“mtime”: 1618966982.176287,
“nlink”: 1,
“path”: “/root/hosts”,
“pw_name”: “root”,
“readable”: true,
“rgrp”: true,
“roth”: true,
“rusr”: true,
“size”: 183,
“uid”: 0,
“version”: “1103139934”,
“wgrp”: false,
“woth”: false,
“writeable”: true,
“wusr”: true,
“xgrp”: true,
“xoth”: true,
“xusr”: true
}
}
5. get_url 模块
实现远程主机下载指定的url地址,支持sha256sum文件校验
案例7
ansible -i /etc/ansible/hosts web-servers -m get_url -a “url=https://dl.fedoraproject.org/pub/epel/epel-release-latest-7.noarch.rpm dest=/tmp/ mode=0440 force=yes”
注:url=https://xxx 的等号=前后不能有空格
扩展:查看force=yes的作用
6. yum模块
yum模块linux平台软件包管理。
yum模块可以提供的status状态: latest ,present,installed #这三个代表安装;removed, absent #这两个是卸载
案例8 使用yum模块安装httpd
ansible -i /etc/ansible/hosts web-servers -m yum -a “name=httpd state=latest”
7. cron模块远程管理主机crontab配置
案例9: 增加每30分钟执行 echo"我是互联网老辛"
ansible -i /etc/ansible/hosts web-servers -m cron -a “name=‘list dir’ minute=’*/30’ job=‘echo 我是互联网老辛”’”
8. service 远程管理主机系统服务模块
service模块常用参数:
(1)、name参数:此参数用于指定需要操作的服务名称,比如 nginx,httpd。
(2)、state参数:此参数用于指定服务的状态
比如,我们想要启动远程主机中的httpd,则可以将 state 的值设置为 started;
如果想要停止远程主机中的服务,则可以将 state 的值设置为 stopped。
此参数的可用值有 started、stopped、restarted(重启)、reloaded。
enabled参数:此参数用于指定是否将服务设置为开机 启动项,设置为 yes 表示将对应服务设置为开机启动,设置为 no 表示不会开机启动。
注:想使用service模块启动服务,被启动的服务,必须可以使用service 命令启动或关闭
案例10 使用service模块重启httpd
[root@itlaoxin162 ~]# ansible -i /etc/ansible/hosts web-servers -m service -a “name=httpd state=restarted”
9. user模块 管理远程主机的用户
案例11: 使用user模块创建一个用户itlaoxin
[root@itlaoxin162 ~]# ansible -i /etc/ansible/hosts web-servers -m user -a “name=itlaoxin state=present”
[WARNING]: Invalid characters were found in group names but not replaced, use
-vvvv to see details
192.168.1.71 | CHANGED => {
“ansible_facts”: {
“discovered_interpreter_python”: “/usr/bin/python”
},
“changed”: true,
“comment”: “”,
“create_home”: true,
“group”: 1002,
“home”: “/home/itlaoxin”,
“name”: “itlaoxin”,
“shell”: “/bin/bash”,
“state”: “present”,
“system”: false,
“uid”: 1002
}
192.168.1.163 | CHANGED => {
“ansible_facts”: {
“discovered_interpreter_python”: “/usr/bin/python”
},
“changed”: true,
“comment”: “”,
“create_home”: true,
“group”: 1002,
“home”: “/home/itlaoxin”,
“name”: “itlaoxin”,
“shell”: “/bin/bash”,
“state”: “present”,
“system”: false,
“uid”: 1002
}
[root@itlaoxin162 ~]#
playbooks的介绍
1) 在playbooks 中定义任务:
- name: task description #任务描述信息
module_name: module_args #需要使用的模块名字: 模块参数
2) ansible-playbook 执行 命令:
ansible-playbook site.yml
- playbook是由一个或多个"play"组成的列表。play的主要功能在于将事先归为一组的主机装扮成事先通过ansible中的task定义好的角色。
github上提供了大量的实例供大家参考: https://github.com/ansible/ansible-examples
先介绍下: Playbook常用文件夹作用:
-
files:存放需要同步到异地服务器的源码文件及配置文件;
-
handlers:当服务的配置文件发生变化时需要进行的操作,比如:重启服务,重新加载配置文件,handlers ['hændləz] 处理程序
-
meta:角色定义,可留空;
-
tasks:需要进行的执行的任务;
-
templates:用于执行lamp安装的模板文件,一般为脚本;
-
vars:本次安装定义的变量
搭建思路
思路:我们搭建lanp架构,大概需要:
yum 安装服务
service 启动
copy 把网站拷贝过去
在playbooks 中定义任务:
name: task description #任务描述信息
module_name: module_args #需要使用的模块名字:
github上提供了大量的实例供大家参考:
https://github.com/ansible/ansible-examples 4.2
使用Playbook批量部署多台LAMP环境步骤
我们可以在ansible服务器上安装LAMP环境,然后,再将配置文件通过ansible拷贝到远程主机上
第一步:安装httpd软件
[root@ansible ~]# yum -y install httpd -y
第二部:安装MySQL
[root@ansible ~]# yum install mariadb-server mariadb -y #安装mysql服务
[root@ansible ~]# mkdir -p /mysqldata/data/ #创建目录作为数据存放的位置
[root@ansible ~]# chown -R mysql:mysql /mysqldata/ #授权
[root@ansible ~]# vim /etc/my.cnf #改变数据存放目录改:
2 datadir=/var/lib/mysql
改为:2 datadir=/mydata/data/
[root@ansible data]# systemctl start mariadb
第三步:安装PHP和php-mysql模块
[root@ansible ~]# yum -y install php php-mysql
第四步:提供php的测试页
[root@ansible ~]# vim /var/www/html/index.php
[root@ansible ~]# cat /var/www/html/index.php
<?php phpinfo(); ?>[root@ansible ~]# systemctl reload httpd #启动httpd服务
httpd测试:http://192.168.43.162
确保已经出现上面的测试页,而且,要看到MySQL已经被整合进来了,才能进行下一步操作
第五;定义组名
[root@ansible ~]# vim /etc/ansible/hosts #还使用之前定义好的,这里不用修改
[webservers]
192.168.1.163
192.168.1.71
然后,将公钥信息复制到被控制节点,ansible和两个节点间通过ssh进行连接。下面3个命令之前已经做过,不用执行了。
[root@ansible ~]# ssh-keygen
[root@ansible ~]# ssh-copy-id root@192.168.1.163
[root@ansible ~]# ssh-copy-id root@192.168.1.71
第六:使用playbook创建一个LAMP构建的任务
1、创建相关文件
[root@ansible ~]# mkdir -pv /etc/ansible/lamp/roles/{prepare,httpd,mysql,php}/{tasks,files,templates,vars,meta,default,handlers}
我们将上面搭建成功的LAMP环境的httpd和MySQL的配置文件拷贝到对应目录下
[root@ansible ~]# cd /etc/ansible/ [root@ansible ansible]# cp /etc/httpd/conf/httpd.conf lamp/roles/httpd/files/
[root@ansible ansible]# cp /etc/my.cnf lamp/roles/mysql/files/
[root@ansible ansible]# 写prepare(前期准备)角色的playbooks
[root@ansible ansible]# vim lamp/roles/prepare/tasks/main.yml
[root@ansible ansible]# cat lamp/roles/prepare/tasks/main.yml
- name: delete yum config
shell: rm -rf /etc/yum.repos.d/* #删除原有的yum配置文件
- name: provide yumrepo file
shell: wget -O /etc/yum.repos.d/CentOS-Base.repo http://mirrors.aliyun.com/repo/Centos-7.repo #下载新的yum配置文件
- name: clean the yum repo
shell: yum clean all #清除原有的yum缓存信息
- name: clean the iptables
shell: iptables -F #清除原有防火墙规则,不然后可能上不了网
[root@ansible ansible]#
2、构建httpd的任务
[root@ansible ansible]# cd /etc/ansible/lamp/roles/
[root@ansible roles]# mv /var/www/html/index.php httpd/files/
[root@ansible roles]# vim httpd/tasks/main.yml
[root@ansible roles]# cat httpd/tasks/main.yml
[root@ansible roles]# cat httpd/tasks/main.yml
- name: web server install
yum: name=httpd state=present #安装httpd服务
- name: provide test page
copy: src=index.php dest=/var/www/html #提供测试页
- name: delete apache config
shell: rm -rf /etc/httpd/conf/httpd.conf #删除原有的apache配置文件,如果不删除,下面的copy任务是不会执行的,因为当源文件httpd.conf和目标文件一样时,copy命令是不执行的。如果copy命令不执行,那么notify将不调用handler。
- name: provide configuration file
copy: src=httpd.conf dest=/etc/httpd/conf/httpd.conf #提供httpd的配置文件
notify: restart httpd #当前面的copy复制成功后,通过notify通知名字为restart httpd的handlers运行
3、构建httpd的handlers
[root@ansible roles]# vim httpd/handlers/main.yml
[root@ansible roles]# cat httpd/handlers/main.yml
- name: restart httpd
service: name=httpd enabled=yes state=restarted
[root@ansible roles]#
4、部署我们的MariaDB数据库
创建MySQL服务的任务,需要安装MySQL服务,改变属主信息,启动MySQL
[root@ansible roles]# cd /etc/ansible/lamp/roles/
[root@ansible roles]# vim mysql/tasks/main.yml
[root@ansible roles]# cat mysql/tasks/main.yml
-name: install the mysql
yum: name=mariadb-server state=present #安装mysql服务
- name: mkdir date directory
shell: mkdir -p /mydata/data #创建挂载点目录
- name: provide configration file
copy: src=my.cnf dest=/etc/my.cnf #提供mysql的配置文件
- name: chage the owner
shell: chown -R mysql:mysql /mydata/ #更改属主和属组
- name: start mariadb
service: name=mariadb enabled=yes state=started #启动mysql服务
5、构建PHP的任务
[root@ansible roles]# vim php/tasks/main.yml
- name: install php
yum: name=php state=present #安装php
- name: install php-mysql
yum: name=php-mysql state=present #安装php与mysql交互的插件
6、定义整个的任务
[root@ansible roles]# cd /etc/ansible/lamp/roles/
[root@ansible roles]# vim site.yml
[root@ansible roles]# cat site.yml
- name: LAMP build
自我介绍一下,小编13年上海交大毕业,曾经在小公司待过,也去过华为、OPPO等大厂,18年进入阿里一直到现在。
深知大多数Java工程师,想要提升技能,往往是自己摸索成长或者是报班学习,但对于培训机构动则几千的学费,着实压力不小。自己不成体系的自学效果低效又漫长,而且极易碰到天花板技术停滞不前!
因此收集整理了一份《2024年Java开发全套学习资料》,初衷也很简单,就是希望能够帮助到想自学提升又不知道该从何学起的朋友,同时减轻大家的负担。

既有适合小白学习的零基础资料,也有适合3年以上经验的小伙伴深入学习提升的进阶课程,基本涵盖了95%以上Java开发知识点,真正体系化!
由于文件比较大,这里只是将部分目录截图出来,每个节点里面都包含大厂面经、学习笔记、源码讲义、实战项目、讲解视频,并且会持续更新!
如果你觉得这些内容对你有帮助,可以扫码获取!!(备注Java获取)

最后
由于篇幅限制,小编在此截出几张知识讲解的图解


《互联网大厂面试真题解析、进阶开发核心学习笔记、全套讲解视频、实战项目源码讲义》点击传送门即可获取!
ner
shell: chown -R mysql:mysql /mydata/ #更改属主和属组
- name: start mariadb
service: name=mariadb enabled=yes state=started #启动mysql服务
5、构建PHP的任务
[root@ansible roles]# vim php/tasks/main.yml
- name: install php
yum: name=php state=present #安装php
- name: install php-mysql
yum: name=php-mysql state=present #安装php与mysql交互的插件
6、定义整个的任务
[root@ansible roles]# cd /etc/ansible/lamp/roles/
[root@ansible roles]# vim site.yml
[root@ansible roles]# cat site.yml
- name: LAMP build
自我介绍一下,小编13年上海交大毕业,曾经在小公司待过,也去过华为、OPPO等大厂,18年进入阿里一直到现在。
深知大多数Java工程师,想要提升技能,往往是自己摸索成长或者是报班学习,但对于培训机构动则几千的学费,着实压力不小。自己不成体系的自学效果低效又漫长,而且极易碰到天花板技术停滞不前!
因此收集整理了一份《2024年Java开发全套学习资料》,初衷也很简单,就是希望能够帮助到想自学提升又不知道该从何学起的朋友,同时减轻大家的负担。[外链图片转存中…(img-k7n2yzU2-1713629868484)]
[外链图片转存中…(img-KC9kQuma-1713629868485)]
[外链图片转存中…(img-e55OHjU4-1713629868485)]
既有适合小白学习的零基础资料,也有适合3年以上经验的小伙伴深入学习提升的进阶课程,基本涵盖了95%以上Java开发知识点,真正体系化!
由于文件比较大,这里只是将部分目录截图出来,每个节点里面都包含大厂面经、学习笔记、源码讲义、实战项目、讲解视频,并且会持续更新!
如果你觉得这些内容对你有帮助,可以扫码获取!!(备注Java获取)
最后
由于篇幅限制,小编在此截出几张知识讲解的图解
[外链图片转存中…(img-dee9aQpV-1713629868485)]
[外链图片转存中…(img-JQyUtBqp-1713629868486)]
[外链图片转存中…(img-Hr7jwKx7-1713629868486)]
[外链图片转存中…(img-yBbruv6H-1713629868487)]
[外链图片转存中…(img-jSsMgnMH-1713629868487)]
《互联网大厂面试真题解析、进阶开发核心学习笔记、全套讲解视频、实战项目源码讲义》点击传送门即可获取!


 78
78

 被折叠的 条评论
为什么被折叠?
被折叠的 条评论
为什么被折叠?
 到【灌水乐园】发言


