// Prepare the bean factory for use in this context.
prepareBeanFactory(beanFactory);
try {
// Allows post-processing of the bean factory in context subclasses.
postProcessBeanFactory(beanFactory);
// Invoke factory processors registered as beans in the context.
invokeBeanFactoryPostProcessors(beanFactory);
// Register bean processors that intercept bean creation.
registerBeanPostProcessors(beanFactory);
// Initialize message source for this context.
initMessageSource();
// Initialize event multicaster for this context.
initApplicationEventMulticaster();
// Initialize other special beans in specific context subclasses.
onRefresh();
// Check for listener beans and register them.
registerListeners();
// Instantiate all remaining (non-lazy-init) singletons.
finishBeanFactoryInitialization(beanFactory);
// Last step: publish corresponding event.
finishRefresh();
}
catch (BeansException ex) {
if (logger.isWarnEnabled()) {
logger.warn("Exception encountered during context initialization - " +
"cancelling refresh attempt: " + ex);
}
// Destroy already created singletons to avoid dangling resources.
destroyBeans();
// Reset ‘active’ flag.
cancelRefresh(ex);
// Propagate exception to caller.
throw ex;
}
finally {
// Reset common introspection caches in Spring’s core, since we
// might not ever need metadata for singleton beans anymore…
resetCommonCaches();
}
}
}
这个方法不会陌生吧,之前已经分析过了,这里不再赘述,至此SpringBoot的容器就启动了,但是Tomcat启动是在哪里呢?run方法中也没有看到。实际上Tomcat的启动也是在refresh流程中,这个方法其中一步是调用了onRefresh方法,在Spring中这是一个没有实现的模板方法,而SpringBoot就通过这个方法完成了Tomcat的启动:
protected void onRefresh() {
super.onRefresh();
try {
createWebServer();
}
catch (Throwable ex) {
throw new ApplicationContextException(“Unable to start web server”, ex);
}
}
private void createWebServer() {
WebServer webServer = this.webServer;
ServletContext servletContext = getServletContext();
if (webServer == null && servletContext == null) {
ServletWebServerFactory factory = getWebServerFactory();
// 主要看这个方法
this.webServer = factory.getWebServer(getSelfInitializer());
}
else if (servletContext != null) {
try {
getSelfInitializer().onStartup(servletContext);
}
catch (ServletException ex) {
throw new ApplicationContextException(“Cannot initialize servlet context”, ex);
}
}
initPropertySources();
}
这里首先拿到TomcatServletWebServerFactory对象,通过该对象再去创建和启动Tomcat:
public WebServer getWebServer(ServletContextInitializer… initializers) {
if (this.disableMBeanRegistry) {
Registry.disableRegistry();
}
Tomcat tomcat = new Tomcat();
File baseDir = (this.baseDirectory != null) ? this.baseDirectory : createTempDir(“tomcat”);
tomcat.setBaseDir(baseDir.getAbsolutePath());
Connector connector = new Connector(this.protocol);
connector.setThrowOnFailure(true);
tomcat.getService().addConnector(connector);
customizeConnector(connector);
tomcat.setConnector(connector);
tomcat.getHost().setAutoDeploy(false);
configureEngine(tomcat.getEngine());
for (Connector additionalConnector : this.additionalTomcatConnectors) {
tomcat.getService().addConnector(additionalConnector);
}
prepareContext(tomcat.getHost(), initializers);
return getTomcatWebServer(tomcat);
}
上面的每一步都可以对比Tomcat的配置文件,需要注意默认只支持了http协议:
Connector connector = new Connector(this.protocol);
private String protocol = DEFAULT_PROTOCOL;
public static final String DEFAULT_PROTOCOL = “org.apache.coyote.http11.Http11NioProtocol”;
如果想要扩展的话则可以对additionalTomcatConnectors属性设置值,需要注意这个属性没有对应的setter方法,只有addAdditionalTomcatConnectors方法,也就是说我们只能通过实现BeanFactoryPostProcessor接口的postProcessBeanFactory方法,而不能通过BeanDefinitionRegistryPostProcessor的postProcessBeanDefinitionRegistry方法,因为前者可以通过传入的BeanFactory对象提前获取到TomcatServletWebServerFactory对象调用addAdditionalTomcatConnectors即可;而后者只能拿到BeanDefinition对象,该对象只能通过setter方法设置值。
事件驱动
Spring原本就提供了事件机制,而在SpringBoot中又对其进行扩展,通过发布订阅事件在容器的整个生命周期的不同阶段进行不同的操作。我们先来看看SpringBoot启动关闭的过程中默认会发布哪些事件,使用下面的代码即可:
@SpringBootApplication
public class SpringEventDemo {
public static void main(String[] args) {
new SpringApplicationBuilder(SpringEventDemo.class)
.listeners(event -> {
System.err.println(“接收到事件:” + event.getClass().getSimpleName());
})
.run()
.close();
}
}
这段代码会在控制台打印所有的事件名称,按照顺序如下:
- ApplicationStartingEvent:容器启动
- ApplicationEnvironmentPreparedEvent:环境准备好
- ApplicationContextInitializedEvent:上下文初始化完成
- ApplicationPreparedEvent:上下文准备好
- ContextRefreshedEvent:上下文刷新完
- ServletWebServerInitializedEvent:webServer初始化完成
- ApplicationStartedEvent:容器启动完成
- ApplicationReadyEvent:容器就绪
- ContextClosedEvent:容器关闭
以上是正常启动关闭,如果发生异常还有发布ApplicationFailedEvent事件。事件的发布遍布在整个容器的启动关闭周期中,事件发布对象刚刚我们也看到了是通过SPI加载的SpringApplicationRunListener实现类EventPublishingRunListener,同样事件监听器也是在spring.factories文件中配置的,默认实现了以下监听器:
org.springframework.context.ApplicationListener=
org.springframework.boot.ClearCachesApplicationListener,
org.springframework.boot.builder.ParentContextCloserApplicationListener,
org.springframework.boot.cloud.CloudFoundryVcapEnvironmentPostProcessor,
org.springframework.boot.context.FileEncodingApplicationListener,
org.springframework.boot.context.config.AnsiOutputApplicationListener,
org.springframework.boot.context.config.ConfigFileApplicationListener,
org.springframework.boot.context.config.DelegatingApplicationListener,
org.springframework.boot.context.logging.ClasspathLoggingApplicationListener,
org.springframework.boot.context.logging.LoggingApplicationListener,
org.springframework.boot.liquibase.LiquibaseServiceLocatorApplicationListener
可以看到有用于文件编码的(FileEncodingApplicationListener),有加载日志框架的(LoggingApplicationListener),还有加载配置的(ConfigFileApplicationListener)等等一系列监听器,SpringBoot也就是通过这系列监听器将必要的配置和组件加载到容器中来,这里不再详细分析,感兴趣的读者可以通过其实现的onApplicationEvent方法看到每个监听器究竟是监听的哪一个事件,当然事件发布和监听我们自己也是可以扩展的。
自动配置原理
SpringBoot最核心的还是自动配置,为什么它能做到开箱即用,不再需要我们手动使用@EnableXXX等注解来开启?这一切的答案就在@SpringBootApplication注解中:
@Target(ElementType.TYPE)
@Retention(RetentionPolicy.RUNTIME)
@Documented
@Inherited
@SpringBootConfiguration
@EnableAutoConfiguration
@ComponentScan(excludeFilters = { @Filter(type = FilterType.CUSTOM, classes = TypeExcludeFilter.class),
@Filter(type = FilterType.CUSTOM, classes = AutoConfigurationExcludeFilter.class) })
public @interface SpringBootApplication {}
这里重要的注解有三个:@SpringBootConfiguration、@EnableAutoConfiguration、@ComponentScan。@ComponentScan就不用再说了,@SpringBootConfiguration等同于@Configuration,而@EnableAutoConfiguration就是开启自动配置:
@AutoConfigurationPackage
@Import(AutoConfigurationImportSelector.class)
public @interface EnableAutoConfiguration {
}
@Import(AutoConfigurationPackages.Registrar.class)
public @interface AutoConfigurationPackage {
}
@AutoConfigurationPackage注解的作用就是将该注解所标记类所在的包作为自动配置的包,简单看看就行,主要看AutoConfigurationImportSelector,这个就是实现自动配置的核心类,注意这个类是实现的DeferredImportSelector接口。
在这个类中有一个selectImports方法。这个方法在我之前的文章这一次搞懂Spring事务注解的解析也有分析过,只是实现类不同,它同样会被ConfigurationClassPostProcessor类调用,先来看这个方法做了些什么:
public String[] selectImports(AnnotationMetadata annotationMetadata) {
if (!isEnabled(annotationMetadata)) {
return NO_IMPORTS;
}
AutoConfigurationMetadata autoConfigurationMetadata = AutoConfigurationMetadataLoader
.loadMetadata(this.beanClassLoader);
// 获取所有的自动配置类
AutoConfigurationEntry autoConfigurationEntry = getAutoConfigurationEntry(autoConfigurationMetadata,
annotationMetadata);
return StringUtils.toStringArray(autoConfigurationEntry.getConfigurations());
}
protected AutoConfigurationEntry getAutoConfigurationEntry(AutoConfigurationMetadata autoConfigurationMetadata,
AnnotationMetadata annotationMetadata) {
if (!isEnabled(annotationMetadata)) {
return EMPTY_ENTRY;
}
AnnotationAttributes attributes = getAttributes(annotationMetadata);
// SPI获取EnableAutoConfiguration为key的所有实现类
List configurations = getCandidateConfigurations(annotationMetadata, attributes);
configurations = removeDuplicates(configurations);
Set exclusions = getExclusions(annotationMetadata, attributes);
checkExcludedClasses(configurations, exclusions);
configurations.removeAll(exclusions);
// 把某些自动配置类过滤掉
configurations = filter(configurations, autoConfigurationMetadata);
fireAutoConfigurationImportEvents(configurations, exclusions);
// 包装成自动配置实体类
return new AutoConfigurationEntry(configurations, exclusions);
}
protected List getCandidateConfigurations(AnnotationMetadata metadata, AnnotationAttributes attributes) {
// SPI获取EnableAutoConfiguration为key的所有实现类
List configurations = SpringFactoriesLoader.loadFactoryNames(getSpringFactoriesLoaderFactoryClass(),
getBeanClassLoader());
Assert.notEmpty(configurations, "No auto configuration classes found in META-INF/spring.factories. If you "
- “are using a custom packaging, make sure that file is correct.”);
return configurations;
}
追踪源码最终可以看到也是从META-INF/spring.factories文件中拿到所有EnableAutoConfiguration对应的值(在spring-boot-autoconfigure中)并通过反射实例化,过滤后包装成AutoConfigurationEntry对象返回。
看到这里你应该会觉得自动配置的实现就是通过这个selectImports方法,但实际上这个方法通常并不会被调用到,而是会调用该类的内部类AutoConfigurationGroup的process和selectImports方法,前者同样是通过getAutoConfigurationEntry拿到所有的自动配置类,而后者这是过滤排序并包装后返回。
下面就来分析ConfigurationClassPostProcessor是怎么调用到这里的,直接进入processConfigBeanDefinitions方法:
public void processConfigBeanDefinitions(BeanDefinitionRegistry registry) {
List configCandidates = new ArrayList<>();
String[] candidateNames = registry.getBeanDefinitionNames();
for (String beanName : candidateNames) {
BeanDefinition beanDef = registry.getBeanDefinition(beanName);
if (beanDef.getAttribute(ConfigurationClassUtils.CONFIGURATION_CLASS_ATTRIBUTE) != null) {
if (logger.isDebugEnabled()) {
logger.debug("Bean definition has already been processed as a configuration class: " + beanDef);
}
}
else if (ConfigurationClassUtils.checkConfigurationClassCandidate(beanDef, this.metadataReaderFactory)) {
configCandidates.add(new BeanDefinitionHolder(beanDef, beanName));
}
}
// Return immediately if no @Configuration classes were found
if (configCandidates.isEmpty()) {
return;
}
// Sort by previously determined @Order value, if applicable
configCandidates.sort((bd1, bd2) -> {
int i1 = ConfigurationClassUtils.getOrder(bd1.getBeanDefinition());
int i2 = ConfigurationClassUtils.getOrder(bd2.getBeanDefinition());
return Integer.compare(i1, i2);
});
// Detect any custom bean name generation strategy supplied through the enclosing application context
SingletonBeanRegistry sbr = null;
if (registry instanceof SingletonBeanRegistry) {
sbr = (SingletonBeanRegistry) registry;
if (!this.localBeanNameGeneratorSet) {
BeanNameGenerator generator = (BeanNameGenerator) sbr.getSingleton(
AnnotationConfigUtils.CONFIGURATION_BEAN_NAME_GENERATOR);
if (generator != null) {
this.componentScanBeanNameGenerator = generator;
this.importBeanNameGenerator = generator;
}
}
}
if (this.environment == null) {
this.environment = new StandardEnvironment();
}
// Parse each @Configuration class
ConfigurationClassParser parser = new ConfigurationClassParser(
this.metadataReaderFactory, this.problemReporter, this.environment,
this.resourceLoader, this.componentScanBeanNameGenerator, registry);
Set candidates = new LinkedHashSet<>(configCandidates);
Set alreadyParsed = new HashSet<>(configCandidates.size());
do {
parser.parse(candidates);
parser.validate();
Set configClasses = new LinkedHashSet<>(parser.getConfigurationClasses());
configClasses.removeAll(alreadyParsed);
// Read the model and create bean definitions based on its content
if (this.reader == null) {
this.reader = new ConfigurationClassBeanDefinitionReader(
registry, this.sourceExtractor, this.resourceLoader, this.environment,
this.importBeanNameGenerator, parser.getImportRegistry());
}
this.reader.loadBeanDefinitions(configClasses);
alreadyParsed.addAll(configClasses);
// 省略。。。。
}
前面一大段主要是拿到合格的Configuration配置类,主要逻辑是在ConfigurationClassParser.parse方法中,该方法完成了对@Component、@Bean、@Import、@ComponentScans等注解的解析,这里主要看对@Import的解析,其它的读者可自行分析。一步步追踪,最终会进入到processConfigurationClass方法:
protected void processConfigurationClass(ConfigurationClass configClass) throws IOException {
if (this.conditionEvaluator.shouldSkip(configClass.getMetadata(), ConfigurationPhase.PARSE_CONFIGURATION)) {
return;
}
ConfigurationClass existingClass = this.configurationClasses.get(configClass);
if (existingClass != null) {
if (configClass.isImported()) {
if (existingClass.isImported()) {
existingClass.mergeImportedBy(configClass);
}
// Otherwise ignore new imported config class; existing non-imported class overrides it.
return;
}
else {
// Explicit bean definition found, probably replacing an import.
// Let’s remove the old one and go with the new one.
this.configurationClasses.remove(configClass);
this.knownSuperclasses.values().removeIf(configClass::equals);
}
}
// Recursively process the configuration class and its superclass hierarchy.
SourceClass sourceClass = asSourceClass(configClass);
do {
sourceClass = doProcessConfigurationClass(configClass, sourceClass);
}
while (sourceClass != null);
this.configurationClasses.put(configClass, configClass);
}
这里需要注意this.conditionEvaluator.shouldSkip方法的调用,这个方法就是进行Bean加载过滤的,即根据@Condition注解的匹配值判断是否加载该Bean,具体实现稍后分析,继续跟踪主流程doProcessConfigurationClass:
protected final SourceClass doProcessConfigurationClass(ConfigurationClass configClass, SourceClass sourceClass)
throws IOException {
省略…
// Process any @Import annotations
processImports(configClass, sourceClass, getImports(sourceClass), true);
省略…
return null;
}
这里就是完成对一系列注解的支撑,我省略掉了,主要看processImports方法,这个方法就是处理@Import注解的:
private void processImports(ConfigurationClass configClass, SourceClass currentSourceClass,
Collection importCandidates, boolean checkForCircularImports) {
if (importCandidates.isEmpty()) {
return;
}
if (checkForCircularImports && isChainedImportOnStack(configClass)) {
this.problemReporter.error(new CircularImportProblem(configClass, this.importStack));
}
else {
this.importStack.push(configClass);
try {
for (SourceClass candidate : importCandidates) {
if (candidate.isAssignable(ImportSelector.class)) {
// Candidate class is an ImportSelector -> delegate to it to determine imports
Class<?> candidateClass = candidate.loadClass(); ImportSelector selector = ParserStrategyUtils.instantiateClass(candidateClass, ImportSelector.class, this.environment, this.resourceLoader, this.registry); if (selector instanceof DeferredImportSelector) { this.deferredImportSelectorHandler.handle(configClass, (DeferredImportSelector) selector); } else { String[] importClassNames = selector.selectImports(currentSourceClass.getMetadata()); Collection importSourceClasses = asSourceClasses(importClassNames); processImports(configClass, currentSourceClass, importSourceClasses, false); } } else if (candidate.isAssignable(ImportBeanDefinitionRegistrar.class)) { Class<?> candidateClass = candidate.loadClass();
ImportBeanDefinitionRegistrar registrar =
ParserStrategyUtils.instantiateClass(candidateClass, ImportBeanDefinitionRegistrar.class,
this.environment, this.resourceLoader, this.registry);
configClass.addImportBeanDefinitionRegistrar(registrar, currentSourceClass.getMetadata());
}
else {
this.importStack.registerImport(
currentSourceClass.getMetadata(), candidate.getMetadata().getClassName());
processConfigurationClass(candidate.asConfigClass(configClass));
}
}
}
}
}
刚刚我提醒过AutoConfigurationImportSelector是实现DeferredImportSelector接口的,如果不是该接口的实现类则是直接调用selectImports方法,反之则是调用DeferredImportSelectorHandler.handle方法:
private List deferredImportSelectors = new ArrayList<>();
public void handle(ConfigurationClass configClass, DeferredImportSelector importSelector) {
DeferredImportSelectorHolder holder = new DeferredImportSelectorHolder(
configClass, importSelector);
if (this.deferredImportSelectors == null) {
DeferredImportSelectorGroupingHandler handler = new DeferredImportSelectorGroupingHandler();
handler.register(holder);
handler.processGroupImports();
}
else {
this.deferredImportSelectors.add(holder);
}
}
首先创建了一个DeferredImportSelectorHolder对象,如果是第一次执行则是添加到deferredImportSelectors属性中,等到ConfigurationClassParser.parse的最后调用process方法:
public void parse(Set configCandidates) {
省略…
this.deferredImportSelectorHandler.process();
}
public void process() {
List deferredImports = this.deferredImportSelectors;
this.deferredImportSelectors = null;
try {
if (deferredImports != null) {
DeferredImportSelectorGroupingHandler handler = new DeferredImportSelectorGroupingHandler();
deferredImports.sort(DEFERRED_IMPORT_COMPARATOR);
deferredImports.forEach(handler::register);
handler.processGroupImports();
}
}
finally {
this.deferredImportSelectors = new ArrayList<>();
}
}
反之则是直接执行,首先通过register拿到AutoConfigurationGroup对象:
public void register(DeferredImportSelectorHolder deferredImport) {
Class<? extends Group> group = deferredImport.getImportSelector()
.getImportGroup();
DeferredImportSelectorGrouping grouping = this.groupings.computeIfAbsent(
(group != null ? group : deferredImport),
key -> new DeferredImportSelectorGrouping(createGroup(group)));
grouping.add(deferredImport);
this.configurationClasses.put(deferredImport.getConfigurationClass().getMetadata(),
deferredImport.getConfigurationClass());
}
public Class<? extends Group> getImportGroup() {
return AutoConfigurationGroup.class;
}
然后在processGroupImports方法中进行真正的处理:
public void processGroupImports() {
for (DeferredImportSelectorGrouping grouping : this.groupings.values()) {
grouping.getImports().forEach(entry -> {
ConfigurationClass configurationClass = this.configurationClasses.get(
entry.getMetadata());
try {
processImports(configurationClass, asSourceClass(configurationClass),
asSourceClasses(entry.getImportClassName()), false);
}
catch (BeanDefinitionStoreException ex) {
throw ex;
}
catch (Throwable ex) {
throw new BeanDefinitionStoreException(
“Failed to process import candidates for configuration class [” +
configurationClass.getMetadata().getClassName() + “]”, ex);
}
});
}
}
public Iterable<Group.Entry> getImports() {
for (DeferredImportSelectorHolder deferredImport : this.deferredImports) {
this.group.process(deferredImport.getConfigurationClass().getMetadata(),
deferredImport.getImportSelector());
}
return this.group.selectImports();
}
在getImports方法中就完成了对process和selectImports方法的调用,拿到自动配置类后再递归调用调用processImports方法完成对自动配置类的加载。至此,自动配置的加载过程就分析完了,下面是时序图:

Condition注解原理
在自动配置类中有很多Condition相关的注解,以AOP为例:
Configuration(proxyBeanMethods = false)
@ConditionalOnProperty(prefix = “spring.aop”, name = “auto”, havingValue = “true”, matchIfMissing = true)
public class AopAutoConfiguration {
@Configuration(proxyBeanMethods = false)
@ConditionalOnClass(Advice.class)
static class AspectJAutoProxyingConfiguration {
@Configuration(proxyBeanMethods = false)
@EnableAspectJAutoProxy(proxyTargetClass = false)
@ConditionalOnProperty(prefix = “spring.aop”, name = “proxy-target-class”, havingValue = “false”,
matchIfMissing = false)
static class JdkDynamicAutoProxyConfiguration {
}
@Configuration(proxyBeanMethods = false)
@EnableAspectJAutoProxy(proxyTargetClass = true)
@ConditionalOnProperty(prefix = “spring.aop”, name = “proxy-target-class”, havingValue = “true”,
matchIfMissing = true)
static class CglibAutoProxyConfiguration {
}
}
@Configuration(proxyBeanMethods = false)
@ConditionalOnMissingClass(“org.aspectj.weaver.Advice”)
@ConditionalOnProperty(prefix = “spring.aop”, name = “proxy-target-class”, havingValue = “true”,
matchIfMissing = true)
static class ClassProxyingConfiguration {
ClassProxyingConfiguration(BeanFactory beanFactory) {
if (beanFactory instanceof BeanDefinitionRegistry) {
BeanDefinitionRegistry registry = (BeanDefinitionRegistry) beanFactory;
AopConfigUtils.registerAutoProxyCreatorIfNecessary(registry);
AopConfigUtils.forceAutoProxyCreatorToUseClassProxying(registry);
}
}
}
}
这里就能看到@ConditionalOnProperty、@ConditionalOnClass、@ConditionalOnMissingClass,另外还有@ConditionalOnBean、@ConditionalOnMissingBean等等很多条件匹配注解。这些注解表示条件匹配才会加载该Bean,以@ConditionalOnProperty为例,表明配置文件中符合条件才会加载对应的Bean,prefix表示在配置文件中的前缀,name表示配置的名称,havingValue表示配置为该值时才匹配,matchIfMissing则是表示没有该配置是否默认加载对应的Bean。其它注解可类比理解记忆,下面主要来分析该注解的实现原理。
这里注解点进去看会发现每个注解上都标注了@Conditional注解,并且value值都对应一个类,比如OnBeanCondition,而这些类都实现了Condition接口,看看其继承体系:

上面只展示了几个实现类,但实际上Condition的实现类是非常多的,我们还可以自己实现该接口来扩展@Condition注解。
Condition接口中有一个matches方法,这个方法返回true则表示匹配。该方法在ConfigurationClassParser中多处都有调用,也就是刚刚我提醒过的shouldSkip方法,具体实现是在ConditionEvaluator类中:
public boolean shouldSkip(@Nullable AnnotatedTypeMetadata metadata, @Nullable ConfigurationPhase phase) {
if (metadata == null || !metadata.isAnnotated(Conditional.class.getName())) {
return false;
}
自我介绍一下,小编13年上海交大毕业,曾经在小公司待过,也去过华为、OPPO等大厂,18年进入阿里一直到现在。
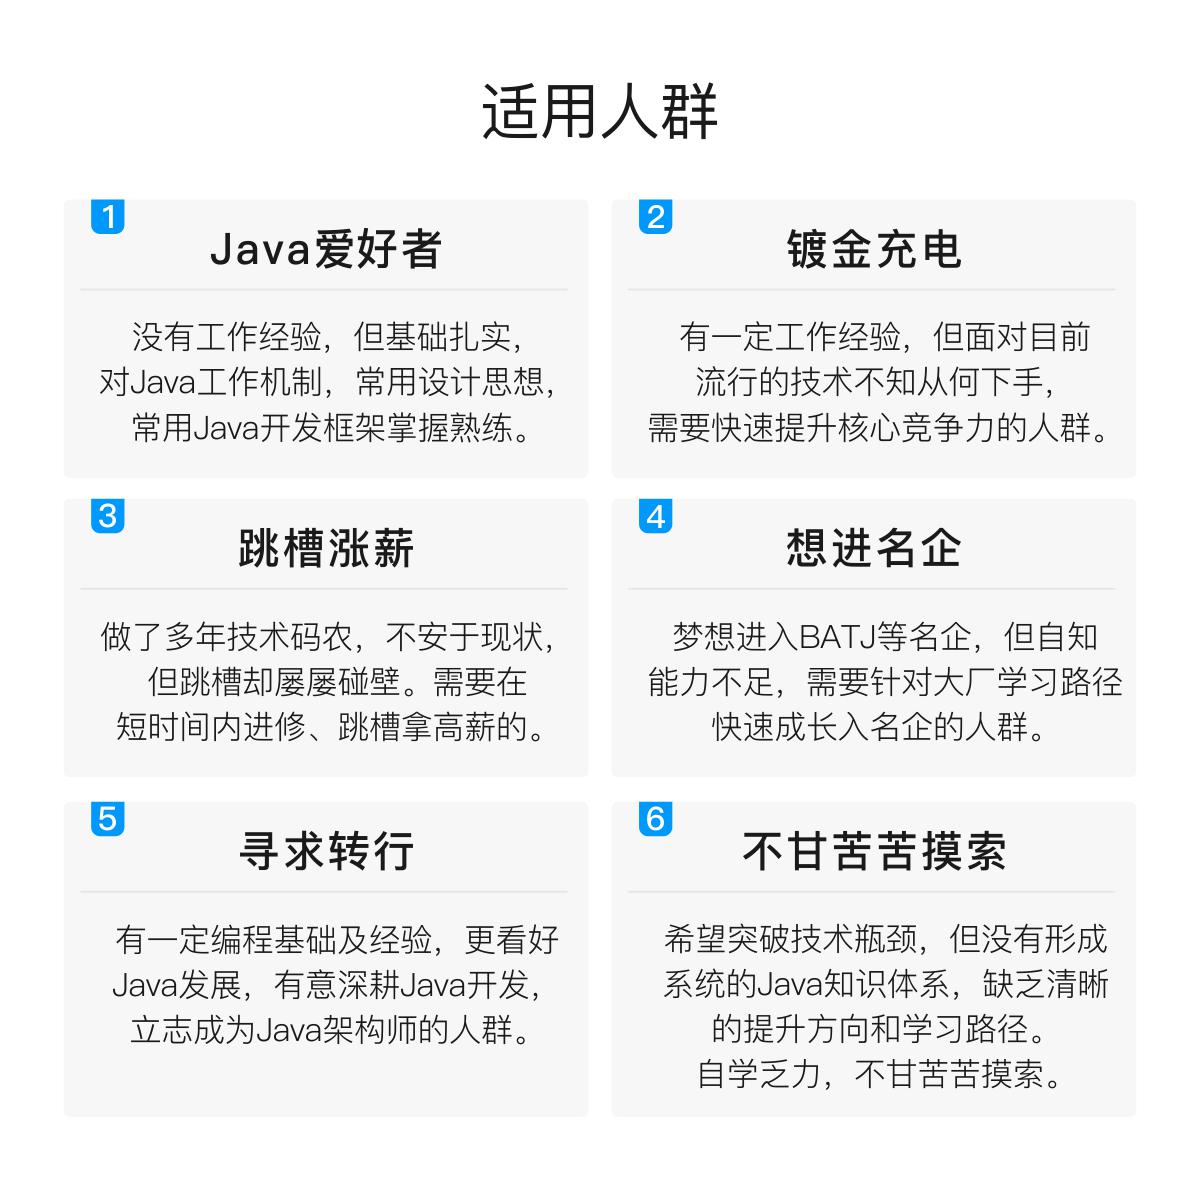
深知大多数Java工程师,想要提升技能,往往是自己摸索成长或者是报班学习,但对于培训机构动则几千的学费,着实压力不小。自己不成体系的自学效果低效又漫长,而且极易碰到天花板技术停滞不前!
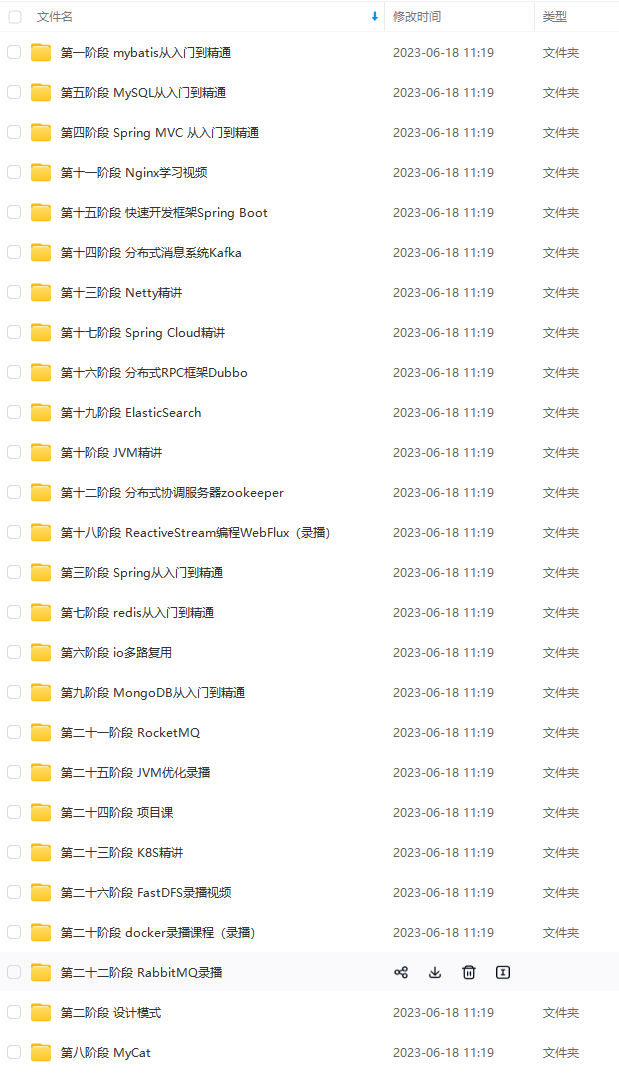
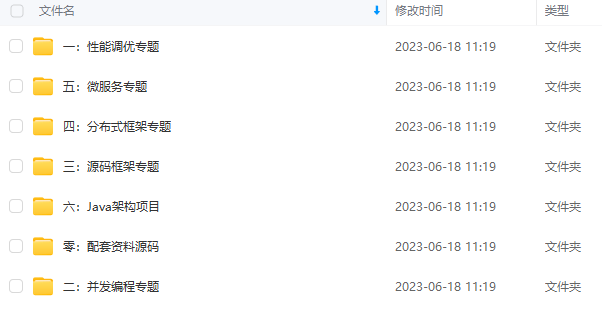
因此收集整理了一份《2024年Java开发全套学习资料》,初衷也很简单,就是希望能够帮助到想自学提升又不知道该从何学起的朋友,同时减轻大家的负担。


既有适合小白学习的零基础资料,也有适合3年以上经验的小伙伴深入学习提升的进阶课程,基本涵盖了95%以上Java开发知识点,真正体系化!
由于文件比较大,这里只是将部分目录截图出来,每个节点里面都包含大厂面经、学习笔记、源码讲义、实战项目、讲解视频,并且会持续更新!
如果你觉得这些内容对你有帮助,可以扫码获取!!(备注Java获取)

最后
分享一些系统的面试题,大家可以拿去刷一刷,准备面试涨薪。
这些面试题相对应的技术点:
- JVM
- MySQL
- Mybatis
- MongoDB
- Redis
- Spring
- Spring boot
- Spring cloud
- Kafka
- RabbitMQ
- Nginx
- …
大类就是:
- Java基础
- 数据结构与算法
- 并发编程
- 数据库
- 设计模式
- 微服务
- 消息中间件


《互联网大厂面试真题解析、进阶开发核心学习笔记、全套讲解视频、实战项目源码讲义》点击传送门即可获取!
oot
- Spring cloud
- Kafka
- RabbitMQ
- Nginx
- …
大类就是:
- Java基础
- 数据结构与算法
- 并发编程
- 数据库
- 设计模式
- 微服务
- 消息中间件
[外链图片转存中…(img-Ojt1MEHl-1712997807089)]
[外链图片转存中…(img-mGCKZdhV-1712997807089)]
[外链图片转存中…(img-McIxRirh-1712997807090)]
[外链图片转存中…(img-rgaiYJu5-1712997807090)]
[外链图片转存中…(img-wmfn7uhn-1712997807090)]
[外链图片转存中…(img-5EHKjkE9-1712997807091)]
[外链图片转存中…(img-6JbDqf3x-1712997807091)]
[外链图片转存中…(img-cIMBoSXp-1712997807091)]
[外链图片转存中…(img-BEaBlfgg-1712997807091)]
《互联网大厂面试真题解析、进阶开发核心学习笔记、全套讲解视频、实战项目源码讲义》点击传送门即可获取!


 被折叠的 条评论
为什么被折叠?


