


private float mRadius;
private int mOuterCircleColor, mMiddleCircleColor, mInnerCircleColor;
private Paint mPaint;
public CircleView(Context context) {
this(context, null);
}
public CircleView(Context context, AttributeSet attrs) {
this(context, attrs, 0);
}
public CircleView(Context context, AttributeSet attrs, int defStyleAttr) {
super(context, attrs, defStyleAttr);
initData(context, attrs);
}
private void initData(Context context, AttributeSet attrs) {
//1. 自定义属性的声明与获取
TypedArray typedArray = context.obtainStyledAttributes(attrs, R.styleable.CircleView);
mRadius = typedArray.getDimension(R.styleable.CircleView_circle_radius, getResources().getDimension(R.dimen.avatar_size));
mOuterCircleColor = typedArray.getColor(R.styleable.CircleView_outer_circle_color, getResources().getColor(R.color.purple_500));
mMiddleCircleColor = typedArray.getColor(R.styleable.CircleView_middle_circle_color, getResources().getColor(R.color.purple_500));
mInnerCircleColor = typedArray.getColor(R.styleable.CircleView_inner_circle_color, getResources().getColor(R.color.purple_500));
typedArray.recycle();
mPaint = new Paint(Paint.ANTI_ALIAS_FLAG);
mPaint.setStyle(Paint.Style.FILL);
mPaint.setColor(mOuterCircleColor);
}
//2. 重写测量阶段相关方法(onMeasure());
//由于不需要自定义 View 的尺寸,所以不用重写该方法
// @Override
// protected void onMeasure(int widthMeasureSpec, int heightMeasureSpec) {
// super.onMeasure(widthMeasureSpec, heightMeasureSpec);
// }
//3. 重写布局阶段相关方法(onLayout()(仅 ViewGroup 需要重写));
//由于没有子 View 需要布局,所以不用重写该方法
// @Override
// protected void onLayout(boolean changed, int left, int top, int right, int bottom) {
// super.onLayout(changed, left, top, right, bottom);
// }
//4. 重写绘制阶段相关方法(onDraw() 绘制主体、dispatchDraw() 绘制子 View 和 onDrawForeground() 绘制前景);
@Override
protected void onDraw(Canvas canvas) {
mPaint.setColor(mOuterCircleColor);
canvas.drawCircle(mRadius, mRadius, mRadius, mPaint);
mPaint.setColor(mMiddleCircleColor);
canvas.drawCircle(mRadius, mRadius, mRadius * 2/3, mPaint);
mPaint.setColor(mInnerCircleColor);
canvas.drawCircle(mRadius, mRadius, mRadius/3, mPaint);
}
}
//3. 在 xml 中应用 CircleView
<?xml version="1.0" encoding="utf-8"?><com.smart.a03_view_custom_view_example.custom_view_only_draw.CircleView
android:layout_width=“wrap_content”
android:layout_height=“wrap_content”
app:circle_radius=“@dimen/padding_ninety_six”
app:inner_circle_color=“@color/yellow_500”
app:middle_circle_color=“@color/cyan_500”
app:outer_circle_color=“@color/green_500” />
最终效果如下:

此时,即使你在 xml 中将 CircleView 的宽、高声明为「match_parent」,你会发现最终的显示效果都是一样的。
主要原因是:默认情况下,View 的 onMeasure() 方法在通过 setMeasuredDimension() 告知父 View 自己的期望尺寸时,会调用 getDefaultSize() 方法。在 getDefaultSize() 方法中,又会调用 getSuggestedMinimumWidth() 和 getSuggestedMinimumHeight() 获取建议的最小宽度和最小高度,并根据最小尺寸和父 View 对自己的尺寸要求进行修正。最主要的是,在 getDefaultSize() 方法中修正的时候,会将 MeasureSpec.AT_MOST 和 MeasureSpec.EXACTLY 一视同仁,直接返回父 View 对 View 的尺寸要求:
//1. 默认 onMeasure 的处理
protected void onMeasure(int widthMeasureSpec, int heightMeasureSpec) {
setMeasuredDimension(getDefaultSize(getSuggestedMinimumWidth(), widthMeasureSpec),
getDefaultSize(getSuggestedMinimumHeight(), heightMeasureSpec));
}
//2. getSuggestedMinimumWidth()
protected int getSuggestedMinimumWidth() {
return (mBackground == null) ? mMinWidth : max(mMinWidth, mBackground.getMinimumWidth());
}
//3. getSuggestedMinimumHeight()
protected int getSuggestedMinimumHeight() {
return (mBackground == null) ? mMinHeight : max(mMinHeight, mBackground.getMinimumHeight());
}
//4. getDefaultSize()
public static int getDefaultSize(int size, int measureSpec) {
int result = size;
int specMode = MeasureSpec.getMode(measureSpec);
int specSize = MeasureSpec.getSize(measureSpec);
switch (specMode) {
case MeasureSpec.UNSPECIFIED:
result = size;
break;
case MeasureSpec.AT_MOST:
case MeasureSpec.EXACTLY:
//MeasureSpec.AT_MOST、MeasureSpec.EXACTLY 一视同仁
result = specSize;
break;
}
return result;
}
正是因为在 getDefaultSize() 方法中处理的时候,将 MeasureSpec.AT_MOST 和 MeasureSpec.EXACTLY 一视同仁,所以才有了上面「在 xml 中应用 CircleView 的时候,无论将 CircleView 的尺寸设置为 match_parent 还是 wrap_content 效果都一样」的现象。
具体分析如下:
| 开发者对 View 的尺寸要求 | View 的父 View 对 View 的尺寸要求 | View 的期望尺寸 |
|---|---|---|
| android:layout_width=“wrap_content” | ||
| android:layout_height=“wrap_content” | MeasureSpec.AT_MOST | |
| specSize | specSize | |
| android:layout_width=“match_parent” | ||
| android:layout_height=“match_parent” | MeasureSpec.EXACTLY | |
| specSize | specSize |
注:
上表中,「View 的父 View 对 View 的尺寸要求」是 View 的父 View 根据「开发者对子 View 的尺寸要求」、「自己的父 View(View 的父 View 的父 View) 对自己的尺寸要求」和「自己的可用空间」计算出自己对子 View 的尺寸要求。
另外,由执行结果可知,上表中的 specSize 实际上等于 View 的尺寸:
2019-08-13 17:28:26.855 16024-16024/com.smart.a03_view_custom_view_example E/TAG: Width(getWidth()): 1080 Height(getHeight()): 1584
4.1.2 自定义 View ——自定义 View 的尺寸和绘制内容
自定义 View,它的内容是「三个半径不同、颜色不同的同心圆」,效果图如下:

- 自定义属性的声明与获取
//1.1 在 xml 中自定义 View 属性
<?xml version="1.0" encoding="utf-8"?>//1.2 在 View 构造函数中获取自定义 View 属性
TypedArray typedArray = context.obtainStyledAttributes(attrs, R.styleable.CircleView);
mRadius = typedArray.getDimension(R.styleable.CircleView_circle_radius, getResources().getDimension(R.dimen.avatar_size));
mOuterCircleColor = typedArray.getColor(R.styleable.CircleView_outer_circle_color, getResources().getColor(R.color.purple_500));
mMiddleCircleColor = typedArray.getColor(R.styleable.CircleView_middle_circle_color, getResources().getColor(R.color.purple_500));
mInnerCircleColor = typedArray.getColor(R.styleable.CircleView_inner_circle_color, getResources().getColor(R.color.purple_500));
typedArray.recycle();
- 重写测量阶段相关方法(onMeasure())
//2. onMeasure()
@Override
protected void onMeasure(int widthMeasureSpec, int heightMeasureSpec) {
//2.1 根据 View 特点或业务需求计算出 View 的尺寸
mWidth = (int)(mRadius * 2);
mHeight = (int)(mRadius * 2);
//2.2 通过 resolveSize() 方法修正结果
mWidth = resolveSize(mWidth, widthMeasureSpec);
mHeight = resolveSize(mHeight, heightMeasureSpec);
//2.3 通过 setMeasuredDimension() 保存 View 的期望尺寸(通过 setMeasuredDimension() 告知父 View 的期望尺寸)
setMeasuredDimension(mWidth, mHeight);
}
- 重写布局阶段相关方法(onLayout()(仅 ViewGroup 需要重写))
由于没有子 View 需要布局,所以,不用重写该方法。
- 重写绘制阶段相关方法(onDraw() 绘制主体、dispatchDraw() 绘制子 View 和 onDrawForeground() 绘制前景)
//4. 重写 onDraw() 方法,自定义 View 内容
@Override
protected void onDraw(Canvas canvas) {
mPaint.setColor(mOuterCircleColor);
canvas.drawCircle(mRadius, mRadius, mRadius, mPaint);
mPaint.setColor(mMiddleCircleColor);
canvas.drawCircle(mRadius, mRadius, mRadius * 2/3, mPaint);
mPaint.setColor(mInnerCircleColor);
canvas.drawCircle(mRadius, mRadius, mRadius/3, mPaint);
}
- onTouchEvent()
由于 View 不需要和用户交互,所以,不用重写该方法。
- onInterceptTouchEvent()(仅 ViewGroup 有此方法)
ViewGroup 的方法。
完整代码如下:
//1. 自定义属性的声明
<?xml version="1.0" encoding="utf-8"?>//2. MeasuredCircleView
public class MeasuredCircleView extends View {
private int mWidth, mHeight;
private float mRadius;
private int mOuterCircleColor, mMiddleCircleColor, mInnerCircleColor;
private Paint mPaint;
public MeasuredCircleView(Context context) {
this(context, null);
}
public MeasuredCircleView(Context context, AttributeSet attrs) {
this(context, attrs, 0);
}
public MeasuredCircleView(Context context, AttributeSet attrs, int defStyleAttr) {
super(context, attrs, defStyleAttr);
initData(context, attrs);
}
private void initData(Context context, AttributeSet attrs) {
//1. 自定义属性的声明与获取
TypedArray typedArray = context.obtainStyledAttributes(attrs, R.styleable.CircleView);
mRadius = typedArray.getDimension(R.styleable.CircleView_circle_radius, getResources().getDimension(R.dimen.avatar_size));
mOuterCircleColor = typedArray.getColor(R.styleable.CircleView_outer_circle_color, getResources().getColor(R.color.purple_500));
mMiddleCircleColor = typedArray.getColor(R.styleable.CircleView_middle_circle_color, getResources().getColor(R.color.purple_500));
mInnerCircleColor = typedArray.getColor(R.styleable.CircleView_inner_circle_color, getResources().getColor(R.color.purple_500));
typedArray.recycle();
mPaint = new Paint(Paint.ANTI_ALIAS_FLAG);
mPaint.setStyle(Paint.Style.FILL);
mPaint.setColor(mOuterCircleColor);
}
//2. 重写测量阶段相关方法(onMeasure());
//由于不需要自定义 View 的尺寸,所以不用重写该方法
@Override
protected void onMeasure(int widthMeasureSpec, int heightMeasureSpec) {
//2.1 根据 View 特点或业务需求计算出 View 的尺寸
mWidth = (int)(mRadius * 2);
mHeight = (int)(mRadius * 2);
//2.2 通过 resolveSize() 方法修正结果
mWidth = resolveSize(mWidth, widthMeasureSpec);
mHeight = resolveSize(mHeight, heightMeasureSpec);
//2.3 通过 setMeasuredDimension() 保存 View 的期望尺寸(通过 setMeasuredDimension() 告知父 View 的期望尺寸)
setMeasuredDimension(mWidth, mHeight);
}
//3. 重写布局阶段相关方法(onLayout()(仅 ViewGroup 需要重写));
//由于没有子 View 需要布局,所以不用重写该方法
// @Override
// protected void onLayout(boolean changed, int left, int top, int right, int bottom) {
// super.onLayout(changed, left, top, right, bottom);
// }
//4. 重写绘制阶段相关方法(onDraw() 绘制主体、dispatchDraw() 绘制子 View 和 onDrawForeground() 绘制前景);
@Override
protected void onDraw(Canvas canvas) {
mPaint.setColor(mOuterCircleColor);
canvas.drawCircle(mRadius, mRadius, mRadius, mPaint);
mPaint.setColor(mMiddleCircleColor);
canvas.drawCircle(mRadius, mRadius, mRadius * 2/3, mPaint);
mPaint.setColor(mInnerCircleColor);
canvas.drawCircle(mRadius, mRadius, mRadius/3, mPaint);
}
}
//3. 在 xml 中应用 MeasuredCircleView
<?xml version="1.0" encoding="utf-8"?><com.smart.a03_view_custom_view_example.custom_view_measure_draw.MeasuredCircleView
android:layout_width=“match_parent”
android:layout_height=“match_parent”
app:circle_radius=“@dimen/padding_ninety_six”
app:inner_circle_color=“@color/yellow_500”
app:middle_circle_color=“@color/cyan_500”
app:outer_circle_color=“@color/green_500” />
最终效果如下:

当在 xml 中将 MeasuredCircleView 的宽、高声明为「match_parent」时,显示效果跟 CircleView 显示效果一样。
| 开发者对 View 的尺寸要求 | View 的父 View 对 View 的尺寸要求 | View 的期望尺寸 |
|---|---|---|
| android:layout_width=“match_parent” | ||
| android:layout_height=“match_parent” | MeasureSpec.EXACTLY | |
| specSize | specSize |
但是,当在 xml 中将 MeasuredCircleView 的宽、高声明为「wrap_content」时,显示效果是下面这个样子:

其实,也很好理解:
| 开发者对 View 的尺寸要求 | View 的父 View 对 View 的尺寸要求 | View 的期望尺寸 |
|---|---|---|
| android:layout_width=“wrap_content” | ||
| android:layout_height=“wrap_content” | MeasureSpec.AT_MOST | |
| specSize | if(childSize < specSize) childSize | |
| if(childSize > specSize) specSize |
4.2 自定义 ViewGroup
自定义 ViewGroup,标签布局,效果图如下:
无论是自定义 View 还是自定义 ViewGroup,大致的流程都是一样的:
- 自定义属性的声明与获取;
- 重写测量阶段相关方法(onMeasure());
- 重写布局阶段相关方法(onLayout()(仅 ViewGroup 需要重写));
- 重写绘制阶段相关方法(onDraw() 绘制主体、dispatchDraw() 绘制子 View 和 onDrawForeground() 绘制前景);
- onTouchEvent();
- onInterceptTouchEvent()(仅 ViewGroup 有此方法);
只不过,大多数情况下,ViewGroup 不需要「自定义属性」和「重写绘制阶段相关方法」,但有些时候还是需要的,如,开发者想在 ViewGroup 的所有子 View 上方绘制一些内容,就可以通过重写 ViewGroup 的 onDrawForeground() 来实现。
- 自定义属性的声明与获取
在自定义 ViewGroup 中「自定义属性的声明与获取」的方法与在自定义 View 中「自定义属性的声明与获取」的方法一样,且因为大多数情况下,在自定义 ViewGroup 中是不需要自定义属性的,所以,在这里就不自定义属性了。
- 重写测量阶段相关方法(onMeasure())
//2. 重写测量阶段相关方法(onMeasure());
@Override
protected void onMeasure(int widthMeasureSpec, int heightMeasureSpec) {
//2.1 解析 ViewGroup 的父 View 对 ViewGroup 的尺寸要求
int widthMode = MeasureSpec.getMode(widthMeasureSpec);
int widthSize = MeasureSpec.getSize(widthMeasureSpec);
int heightMode = MeasureSpec.getMode(widthMeasureSpec);
int heightSize = MeasureSpec.getSize(widthMeasureSpec);
//2.2 ViewGroup 根据「开发者在 xml 中写的对 ViewGroup 子 View 的尺寸要求」、「自己的父 View(ViewGroup 的父 View)对自己的尺寸要求」和
//「自己的可用空间」计算出自己对子 View 的尺寸要求,并将该尺寸要求通过子 View 的 measure() 方法传给子 View,让子 View 测量自己(View)的期望尺寸
int widthUsed = 0;
int heightUsed = getPaddingTop();
int lineHeight = 0;
int lineWidthUsed = getPaddingLeft();
int maxRight = widthSize - getPaddingRight();
for (int i = 0; i < getChildCount(); i++) {
View child = getChildAt(i);
measureChildWithMargins(child, widthMeasureSpec, 0, heightMeasureSpec, heightUsed);
//是否需要换行
if(widthMode != MeasureSpec.UNSPECIFIED && (lineWidthUsed + child.getMeasuredWidth() > maxRight)){
lineWidthUsed = getPaddingLeft();
heightUsed += lineHeight + mRowSpace;
lineHeight = 0;
measureChildWithMargins(child, widthMeasureSpec, 0, heightMeasureSpec, heightUsed);
}
//2.3 ViewGroup 暂时保存子 View 的尺寸,以便布局阶段和绘制阶段使用
Rect childBound;
if(mChildrenBounds.size() <= i){
childBound = new Rect();
mChildrenBounds.add(childBound);
}else{
childBound = mChildrenBounds.get(i);
}
//此处不能用 child.getxxx() 获取子 View 的尺寸值,因为子 View 只是量了尺寸,还没有布局,这些值都是 0
// childBound.set(child.getLeft(), child.getTop(), child.getRight(), child.getBottom());
childBound.set(lineWidthUsed, heightUsed, lineWidthUsed + child.getMeasuredWidth(), heightUsed + child.getMeasuredHeight());
lineWidthUsed += child.getMeasuredWidth() + mItemSpace;
widthUsed = Math.max(lineWidthUsed, widthUsed);
lineHeight = Math.max(lineHeight, child.getMeasuredHeight());
}
//2.4 ViewGroup 将「根据子 View 的实际尺寸计算出的自己(ViewGroup)的尺寸」结合「自己父 View 对自己的尺寸要求」进行修正,并通
//过 setMeasuredDimension() 方法告知父 View 自己的期望尺寸
int measuredWidth = resolveSize(widthUsed, widthMeasureSpec);
int measuredHeight = resolveSize((heightUsed + lineHeight + getPaddingBottom()), heightMeasureSpec);
setMeasuredDimension(measuredWidth, measuredHeight);
}
//重写generateLayoutParams()
//2.2.1 在自定义 ViewGroup 中调用 measureChildWithMargins() 方法计算 ViewGroup 对子 View 的尺寸要求时,
//必须在 ViewGroup 中重写 generateLayoutParams() 方法,因为 measureChildWithMargins() 方法中用到了 MarginLayoutParams,
//如果不重写 generateLayoutParams() 方法,那调用 measureChildWithMargins() 方法时,MarginLayoutParams 就为 null,
//所以在自定义 ViewGroup 中调用 measureChildWithMargins() 方法时,必须重写 generateLayoutParams() 方法。
@Override
public LayoutParams generateLayoutParams(AttributeSet attrs) {
return new MarginLayoutParams(getContext(), attrs);
}
- 重写布局阶段相关方法(onLayout()(仅 ViewGroup 需要重写))
//3. 重写布局阶段相关方法(onLayout()(仅 ViewGroup 需要重写));
@Override
protected void onLayout(boolean changed, int l, int t, int r, int b) {
for (int i = 0; i < getChildCount(); i++) {
//应用测量阶段计算出的子 View 的尺寸值布局子 View
View child = getChildAt(i);
Rect childBound = mChildrenBounds.get(i);
child.layout(childBound.left, childBound.top, childBound.right, childBound.bottom);
}
}
- 重写绘制阶段相关方法(onDraw() 绘制主体、dispatchDraw() 绘制子 View 和 onDrawForeground() 绘制前景)
默认情况下,自定义 ViewGroup 时是不需要重写任何绘制阶段的方法的,因为 ViewGroup 的角色是容器,一个透明的容器,它只是用来盛放子 View 的。
注意:
- 默认情况下,系统会自动调用 View Group 的 dispatchDraw() 方法,所以不需要重写该方法;
- 出于效率的考虑,ViewGroup 默认会绕过 draw() 方法,换而直接执行 dispatchDraw(),以此来简化绘制流程。所以如果你自定义了一个 ViewGroup ,并且需要在它的除 dispatchDraw() 方法以外的任何一个绘制方法内绘制内容,你可能会需要调用 View.setWillNotDraw(false) 方法来切换到完整的绘制流程(是「可能」而不是「必须」的原因是,有些 ViewGroup 是已经调用过 setWillNotDraw(false) 了的,例如 ScrollView)。除了可以通过调用 View.setWillNotDraw(false) 方法来切换到完整的绘制流程之外,你还可以通过给 ViewGroup 设置背景来切换到完整的绘制流程。
- onTouchEvent()
由于 ViewGroup 不需要和用户交互,所以,不用重写该方法。
- onInterceptTouchEvent()(仅 ViewGroup 有此方法)
由于 ViewGroup 不需要和用户交互且 ViewGroup 不需要拦截子 View 的 MotionEvent,所以,不用重写该方法。
完整代码如下:
//1. TabLayout
public class TabLayout extends ViewGroup {
private ArrayList
private int mItemSpace;
private int mRowSpace;
public TabLayout(Context context) {
this(context, null);
}
public TabLayout(Context context, AttributeSet attrs) {
this(context, attrs, 0);
}
public TabLayout(Context context, AttributeSet attrs, int defStyleAttr) {
super(context, attrs, defStyleAttr);
initData();
}
private void initData(){
mChildrenBounds = new ArrayList<>();
mItemSpace = (int)getResources().getDimension(R.dimen.padding_small);
mRowSpace = (int)getResources().getDimension(R.dimen.padding_small);
}
//2. 重写测量阶段相关方法(onMeasure());
@Override
protected void onMeasure(int widthMeasureSpec, int heightMeasureSpec) {
//2.1 解析 ViewGroup 的父 View 对 ViewGroup 的尺寸要求
int widthMode = MeasureSpec.getMode(widthMeasureSpec);
int widthSize = MeasureSpec.getSize(widthMeasureSpec);
int heightMode = MeasureSpec.getMode(widthMeasureSpec);
int heightSize = MeasureSpec.getSize(widthMeasureSpec);
//2.2 ViewGroup 根据「开发者在 xml 中写的对 ViewGroup 子 View 的尺寸要求」、「自己的父 View(ViewGroup 的父 View)对自己的尺寸要求」和
//「自己的可用空间」计算出自己对子 View 的尺寸要求,并将该尺寸要求通过子 View 的 measure() 方法传给子 View,让子 View 测量自己(View)的期望尺寸
int widthUsed = 0;
int heightUsed = getPaddingTop();
int lineHeight = 0;
int lineWidthUsed = getPaddingLeft();
int maxRight = widthSize - getPaddingRight();
for (int i = 0; i < getChildCount(); i++) {
View child = getChildAt(i);
measureChildWithMargins(child, widthMeasureSpec, 0, heightMeasureSpec, heightUsed);
//是否需要换行
if(widthMode != MeasureSpec.UNSPECIFIED && (lineWidthUsed + child.getMeasuredWidth() > maxRight)){
lineWidthUsed = getPaddingLeft();
heightUsed += lineHeight + mRowSpace;
lineHeight = 0;
measureChildWithMargins(child, widthMeasureSpec, 0, heightMeasureSpec, heightUsed);
}
//2.3 ViewGroup 暂时保存子 View 的尺寸,以便布局阶段和绘制阶段使用
Rect childBound;
if(mChildrenBounds.size() <= i){
childBound = new Rect();
mChildrenBounds.add(childBound);
}else{
childBound = mChildrenBounds.get(i);
}
//此处不能用 child.getxxx() 获取子 View 的尺寸值,因为子 View 只是量了尺寸,还没有布局,这些值都是 0
// childBound.set(child.getLeft(), child.getTop(), child.getRight(), child.getBottom());
childBound.set(lineWidthUsed, heightUsed, lineWidthUsed + child.getMeasuredWidth(), heightUsed + child.getMeasuredHeight());
lineWidthUsed += child.getMeasuredWidth() + mItemSpace;
widthUsed = Math.max(lineWidthUsed, widthUsed);
lineHeight = Math.max(lineHeight, child.getMeasuredHeight());
}
//2.4 ViewGroup 将「根据子 View 的实际尺寸计算出的自己(ViewGroup)的尺寸」结合「自己父 View 对自己的尺寸要求」进行修正,并通
//过 setMeasuredDimension() 方法告知父 View 自己的期望尺寸
int measuredWidth = resolveSize(widthUsed, widthMeasureSpec);
int measuredHeight = resolveSize((heightUsed + lineHeight + getPaddingBottom()), heightMeasureSpec);
setMeasuredDimension(measuredWidth, measuredHeight);
}
//2.2.1 在自定义 ViewGroup 中调用 measureChildWithMargins() 方法计算 ViewGroup 对子 View 的尺寸要求时,
//必须在 ViewGroup 中重写 generateLayoutParams() 方法,因为 measureChildWithMargins() 方法中用到了 MarginLayoutParams,
//如果不重写 generateLayoutParams() 方法,那调用 measureChildWithMargins() 方法时,MarginLayoutParams 就为 null,
//所以在自定义 ViewGroup 中调用 measureChildWithMargins() 方法时,必须重写 generateLayoutParams() 方法。
@Override
public LayoutParams generateLayoutParams(AttributeSet attrs) {
return new MarginLayoutParams(getContext(), attrs);
}
//3. 重写布局阶段相关方法(onLayout()(仅 ViewGroup 需要重写));
@Override
protected void onLayout(boolean changed, int l, int t, int r, int b) {
for (int i = 0; i < getChildCount(); i++) {
//应用测量阶段计算出的子 View 的尺寸值布局子 View
View child = getChildAt(i);
Rect childBound = mChildrenBounds.get(i);
child.layout(childBound.left, childBound.top, childBound.right, childBound.bottom);
}
}
@Override
public boolean onInterceptHoverEvent(MotionEvent event) {
return super.onInterceptHoverEvent(event);
}
@Override
public boolean onTouchEvent(MotionEvent event) {
return super.onTouchEvent(event);
}
}
//2. 在 xml 中应用 TabLayout
<?xml version="1.0" encoding="utf-8"?><com.smart.a04_view_custom_viewgroup_example.custom_layout.TabLayout
android:id=“@+id/tag_layout”
android:layout_width=“match_parent”
android:layout_height=“match_parent”
android:background=“@color/grey_400”
android:padding=“@dimen/padding_small”>
…
</com.smart.a04_view_custom_viewgroup_example.custom_layout.TabLayout>
最终效果如下:

5. 相关问题
5.1 大方向
- Activity、Window、View 之间的关系
- View 是如何显示出来的?
- View 是如何显示出来的?
- View 新增子 View 的时候是将子 View 添加到原来的 View Tree,那 Toast 显示的时候呢?它是怎样显示的?
- View(ViewGroup) 布局、绘制流程
- View(ViewGroup) 事件分发
5.2 小细节
自我介绍一下,小编13年上海交大毕业,曾经在小公司待过,也去过华为、OPPO等大厂,18年进入阿里一直到现在。
深知大多数初中级Android工程师,想要提升技能,往往是自己摸索成长或者是报班学习,但对于培训机构动则近万的学费,着实压力不小。自己不成体系的自学效果低效又漫长,而且极易碰到天花板技术停滞不前!
因此收集整理了一份《2024年Android移动开发全套学习资料》,初衷也很简单,就是希望能够帮助到想自学提升又不知道该从何学起的朋友,同时减轻大家的负担。
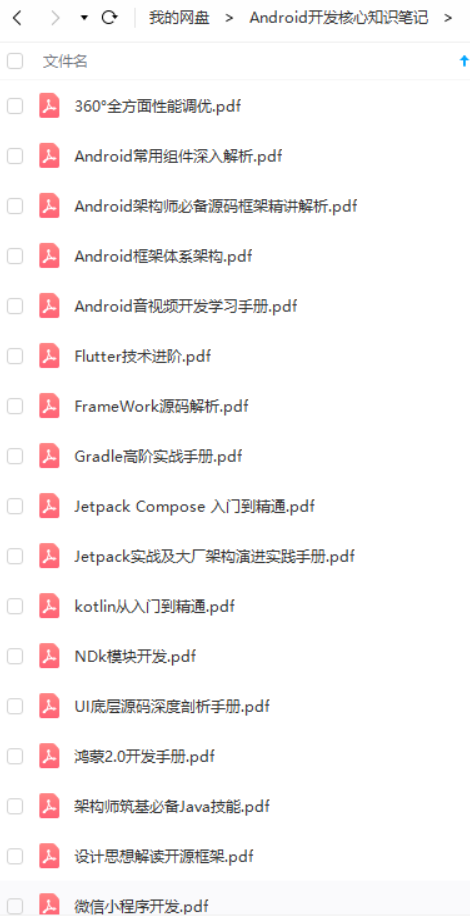
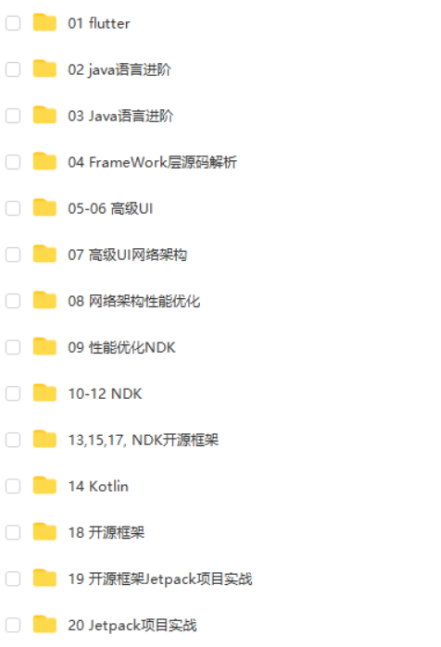

既有适合小白学习的零基础资料,也有适合3年以上经验的小伙伴深入学习提升的进阶课程,基本涵盖了95%以上Android开发知识点,真正体系化!
由于文件比较大,这里只是将部分目录截图出来,每个节点里面都包含大厂面经、学习笔记、源码讲义、实战项目、讲解视频,并且会持续更新!
如果你觉得这些内容对你有帮助,可以扫码获取!!(备注:Android)

总结
写到这里也结束了,在文章最后放上一个小小的福利,以下为小编自己在学习过程中整理出的一个关于Flutter的学习思路及方向,从事互联网开发,最主要的是要学好技术,而学习技术是一条慢长而艰苦的道路,不能靠一时激情,也不是熬几天几夜就能学好的,必须养成平时努力学习的习惯,更加需要准确的学习方向达到有效的学习效果。
由于内容较多就只放上一个大概的大纲,需要更及详细的学习思维导图的
还有高级UI、性能优化、架构师课程、NDK、混合式开发(ReactNative+Weex)微信小程序、Flutter全方面的Android进阶实践技术资料,并且还有技术大牛一起讨论交流解决问题。

《Android学习笔记总结+移动架构视频+大厂面试真题+项目实战源码》,点击传送门即可获取!
伴深入学习提升的进阶课程,基本涵盖了95%以上Android开发知识点,真正体系化!**
由于文件比较大,这里只是将部分目录截图出来,每个节点里面都包含大厂面经、学习笔记、源码讲义、实战项目、讲解视频,并且会持续更新!
如果你觉得这些内容对你有帮助,可以扫码获取!!(备注:Android)
总结
写到这里也结束了,在文章最后放上一个小小的福利,以下为小编自己在学习过程中整理出的一个关于Flutter的学习思路及方向,从事互联网开发,最主要的是要学好技术,而学习技术是一条慢长而艰苦的道路,不能靠一时激情,也不是熬几天几夜就能学好的,必须养成平时努力学习的习惯,更加需要准确的学习方向达到有效的学习效果。
由于内容较多就只放上一个大概的大纲,需要更及详细的学习思维导图的
还有高级UI、性能优化、架构师课程、NDK、混合式开发(ReactNative+Weex)微信小程序、Flutter全方面的Android进阶实践技术资料,并且还有技术大牛一起讨论交流解决问题。
[外链图片转存中…(img-dfsvgn3T-1712194864147)]


 1115
1115


 被折叠的 条评论
为什么被折叠?
被折叠的 条评论
为什么被折叠?
 到【灌水乐园】发言


