


//热门强大的图片加载器
implementation ‘com.github.bumptech.glide:glide:4.11.0’
annotationProcessor ‘com.github.bumptech.glide:compiler:4.11.0’
//Google Material控件,以及迁移到AndroidX下一些控件的依赖
implementation ‘com.google.android.material:material:1.2.0’
然后在android闭包下指定JDK版本为1.8
compileOptions {
sourceCompatibility = 1.8
targetCompatibility = 1.8
}
添加位置如下图所示:

然后点击右上角Sync进行同步,到这里gradle就配置完成了。
然后打开AndroidManifest.xml,在里面配置如下权限:
添加位置如下图所示:

这里还有一个要适配,那就是在Android10.0时增加了作用域存储,因此我这个不用这个作用域存储,所以在你的application标签下增加这样一句话
android:requestLegacyExternalStorage=“true”

首先打开项目中的styles.xml,在里面增加一个样式:
然后在layout包下新建一个dialog_bottom.xml,里面的代码如下:
<?xml version="1.0" encoding="utf-8"?><LinearLayout xmlns:android=“http://schemas.android.com/apk/res/android”
android:layout_width=“match_parent”
android:layout_height=“wrap_content”
android:background=“#FFF”
android:orientation=“vertical”>
<TextView
android:id=“@+id/tv_take_pictures”
android:layout_width=“match_parent”
android:layout_height=“wrap_content”
android:foreground=“?android:attr/selectableItemBackground”
android:gravity=“center”
android:padding=“16dp”
android:text=“拍照”
android:textColor=“#000” />
<View
android:layout_width=“match_parent”
android:layout_height=“0.5dp”
android:background=“#EEEEEE” />
<TextView
android:id=“@+id/tv_open_album”
android:layout_width=“match_parent”
android:layout_height=“wrap_content”
android:foreground=“?android:attr/selectableItemBackground”
android:gravity=“center”
android:padding=“16dp”
android:text=“打开相册”
android:textColor=“#000” />
<View
android:layout_width=“match_parent”
android:layout_height=“1dp”
android:background=“#EEEEEE” />
<TextView
android:id=“@+id/tv_cancel”
android:layout_width=“match_parent”
android:layout_height=“wrap_content”
android:background=“#FFF”
android:foreground=“?android:attr/selectableItemBackground”
android:gravity=“center”
android:padding=“16dp”
android:text=“取消”
android:textColor=“#000” />
这是一个弹窗的布局文件,里面提供你选择拍照、打开相册、取消。而且从命名来看,这是一个底部弹窗。所以需要一个地方去触发这个弹窗从屏幕底部出现。下面打开activity_main.xml,修改代码后如下所示:
<?xml version="1.0" encoding="utf-8"?><LinearLayout xmlns:android=“http://schemas.android.com/apk/res/android”
xmlns:app=“http://schemas.android.com/apk/res-auto”
xmlns:tools=“http://schemas.android.com/tools”
android:layout_width=“match_parent”
android:layout_height=“match_parent”
android:gravity=“center”
android:orientation=“vertical”
tools:context=“.MainActivity”>
<com.google.android.material.imageview.ShapeableImageView
android:id=“@+id/iv_head”
android:layout_width=“200dp”
android:layout_height=“200dp”
android:onClick=“changeAvatar”
android:src=“@mipmap/ic_launcher”
app:shapeAppearanceOverlay=“@style/circleImageStyle” />
这里我用了一个ShapeableImageView,这是material库里面的一个控件,你只要知道它比普通的ImageView要🐮🍺就可以了,想要详细了解的看看Android Material UI控件之ShapeableImageView。
这里我指定了app:shapeAppearanceOverlay=“@style/circleImageStyle”,也就是说它变成了一个圆形图片控件。
布局就写完了。
进入到MainActivity,先声明变量
//权限请求
private RxPermissions rxPermissions;
先写一个Toast提示方法。
/**
-
Toast提示
-
@param msg
*/
private void showMsg(String msg) {
Toast.makeText(this, msg, Toast.LENGTH_SHORT).show();
}
然后可以写一个checkVersion()方法,用于检查当前的Android版本,并且给你提示。
/**
- 检查版本
*/
private void checkVersion() {
//Android6.0及以上版本
if (Build.VERSION.SDK_INT >= Build.VERSION_CODES.M) {
//如果你是在Fragment中,则把this换成getActivity()
rxPermissions = new RxPermissions(this);
//权限请求
rxPermissions.request(Manifest.permission.CAMERA, Manifest.permission.WRITE_EXTERNAL_STORAGE)
.subscribe(granted -> {
if (granted) {//申请成功
showMsg(“已获取权限”);
} else {//申请失败
showMsg(“权限未开启”);
}
});
} else {
//Android6.0以下
showMsg(“无需请求动态权限”);
}
}
然后你要在onCreate()中调用checkVersion()。使用户一进入这个页面就进行检查版本和授权。
不过这里还要防范一个问题,那就是假如用户没有通过权限。再创建一个变量
//是否拥有权限
private boolean hasPermissions = false;
然后赋值

只有权限全部通过授权之后才会是true。
如果我没有猜错的话,你的activity_main.xml中还有一个地方报错。
不过不要担心,先增加两个变量
//底部弹窗
private BottomSheetDialog bottomSheetDialog;
//弹窗视图
private View bottomView;
然后新增一个changeAvatar()方法,里面的代码如下:
/**
-
更换头像
-
@param view
*/
public void changeAvatar(View view) {
bottomSheetDialog = new BottomSheetDialog(this);
bottomView = getLayoutInflater().inflate(R.layout.dialog_bottom, null);
bottomSheetDialog.setContentView(bottomView);
bottomSheetDialog.getWindow().findViewById(R.id.design_bottom_sheet).setBackgroundColor(Color.TRANSPARENT);
TextView tvTakePictures = bottomView.findViewById(R.id.tv_take_pictures);
TextView tvOpenAlbum = bottomView.findViewById(R.id.tv_open_album);
TextView tvCancel = bottomView.findViewById(R.id.tv_cancel);
//拍照
tvTakePictures.setOnClickListener(v -> {
showMsg(“拍照”);
bottomSheetDialog.cancel();
});
//打开相册
tvOpenAlbum.setOnClickListener(v -> {
showMsg(“打开相册”);
bottomSheetDialog.cancel();
});
//取消
tvCancel.setOnClickListener(v -> {
bottomSheetDialog.cancel();
});
bottomSheetDialog.show();
}
这个方法就是配置弹窗的视图,并且绑定视图中的控件,设置点击事件。现在你再去看你的activity_main.xml布局,就不会报错了。并且如果你现在运行的话,当你点击图片是底部会出现弹窗。然后点击弹窗中的三个控件,或者弹窗外阴影区域都会关闭弹窗。
这里我会添加两个工具类,用来协助我们开发。
在com.llw.changeavatar下新建一个utils包,在这个包下新建一个BitmapUtils类,里面的代码如下:
package com.llw.changeavatar.utils;
import android.graphics.Bitmap;
import android.graphics.BitmapFactory;
import android.graphics.Canvas;
import android.graphics.LinearGradient;
import android.graphics.Paint;
import android.graphics.PorterDuff;
import android.graphics.PorterDuffXfermode;
import android.graphics.RadialGradient;
import android.graphics.RectF;
import android.graphics.Shader;
import android.util.Base64;
import java.io.ByteArrayOutputStream;
import java.io.IOException;
import java.io.InputStream;
import java.net.HttpURLConnection;
import java.net.MalformedURLException;
import java.net.URL;
/**
- Bitmap工具类
*/
public class BitmapUtils {
/**
-
bitmap转为base64
-
@param bitmap
-
@return
*/
public static String bitmapToBase64(Bitmap bitmap) {
String result = null;
ByteArrayOutputStream baos = null;
try {
if (bitmap != null) {
baos = new ByteArrayOutputStream();
bitmap.compress(Bitmap.CompressFormat.JPEG, 100, baos);
baos.flush();
baos.close();
byte[] bitmapBytes = baos.toByteArray();
result = Base64.encodeToString(bitmapBytes, Base64.DEFAULT);
}
} catch (IOException e) {
e.printStackTrace();
} finally {
try {
if (baos != null) {
baos.flush();
baos.close();
}
} catch (IOException e) {
e.printStackTrace();
}
}
return result;
}
/**
-
base64转为bitmap
-
@param base64Data
-
@return
*/
public static Bitmap base64ToBitmap(String base64Data) {
byte[] bytes = Base64.decode(base64Data, Base64.DEFAULT);
return BitmapFactory.decodeByteArray(bytes, 0, bytes.length);
}
/**
-
url转bitmap
-
@param url
-
@return
*/
public static Bitmap urlToBitmap(final String url){
final Bitmap[] bitmap = {null};
new Thread(() -> {
URL imageurl = null;
try {
imageurl = new URL(url);
} catch (MalformedURLException e) {
e.printStackTrace();
}
try {
HttpURLConnection conn = (HttpURLConnection)imageurl.openConnection();
conn.setDoInput(true);
conn.connect();
InputStream is = conn.getInputStream();
bitmap[0] = BitmapFactory.decodeStream(is);
is.close();
} catch (IOException e) {
e.printStackTrace();
}
}).start();
return bitmap[0];
}
}
然后再新建一个CameraUtils类,代码如下;
package com.llw.changeavatar.utils;
import android.annotation.TargetApi;
import android.content.ContentUris;
import android.content.ContentValues;
import android.content.Context;
import android.content.Intent;
import android.database.Cursor;
import android.graphics.Bitmap;
import android.graphics.BitmapFactory;
import android.graphics.Matrix;
import android.media.ExifInterface;
import android.net.Uri;
import android.os.Build;
import android.os.Environment;
import android.provider.DocumentsContract;
import android.provider.MediaStore;
import android.util.Log;
import android.widget.ImageView;
import java.io.ByteArrayInputStream;
import java.io.ByteArrayOutputStream;
import java.io.File;
import java.io.IOException;
/**
- 相机、相册工具类
*/
public class CameraUtils {
/**
-
相机Intent
-
@param context
-
@param outputImagePath
-
@return
*/
public static Intent getTakePhotoIntent(Context context, File outputImagePath) {
// 激活相机
Intent intent = new Intent(MediaStore.ACTION_IMAGE_CAPTURE);
// 判断存储卡是否可以用,可用进行存储
if (hasSdcard()) {
if (Build.VERSION.SDK_INT < Build.VERSION_CODES.N) {
// 从文件中创建uri
Uri uri = Uri.fromFile(outputImagePath);
intent.putExtra(MediaStore.EXTRA_OUTPUT, uri);
} else {
//兼容android7.0 使用共享文件的形式
ContentValues contentValues = new ContentValues(1);
contentValues.put(MediaStore.Images.Media.DATA, outputImagePath.getAbsolutePath());
Uri uri = context.getApplicationContext().getContentResolver().insert(MediaStore.Images.Media.EXTERNAL_CONTENT_URI, contentValues);
intent.putExtra(MediaStore.EXTRA_OUTPUT, uri);
}
}
return intent;
}
/**
-
相册Intent
-
@return
*/
public static Intent getSelectPhotoIntent() {
Intent intent = new Intent(“android.intent.action.GET_CONTENT”);
intent.setType(“image/*”);
return intent;
}
/**
- 判断sdcard是否被挂载
*/
public static boolean hasSdcard() {
return Environment.getExternalStorageState().equals(
Environment.MEDIA_MOUNTED);
}
/**
- 4.4及以上系统处理图片的方法
*/
@TargetApi(Build.VERSION_CODES.KITKAT)
public static String getImageOnKitKatPath(Intent data, Context context) {
String imagePath = null;
Uri uri = data.getData();
Log.d(“uri=intent.getData :”, “” + uri);
if (DocumentsContract.isDocumentUri(context, uri)) {
//数据表里指定的行
String docId = DocumentsContract.getDocumentId(uri);
Log.d(“getDocumentId(uri) :”, “” + docId);
Log.d(“uri.getAuthority() :”, “” + uri.getAuthority());
if (“com.android.providers.media.documents”.equals(uri.getAuthority())) {
String id = docId.split(“:”)[1];
String selection = MediaStore.Images.Media._ID + “=” + id;
imagePath = getImagePath(MediaStore.Images.Media.EXTERNAL_CONTENT_URI, selection, context);
} else if (“com.android.providers.downloads.documents”.equals(uri.getAuthority())) {
Uri contentUri = ContentUris.withAppendedId(Uri.parse(“content://downloads/public_downloads”), Long.valueOf(docId));
imagePath = getImagePath(contentUri, null, context);
}
} else if (“content”.equalsIgnoreCase(uri.getScheme())) {
imagePath = getImagePath(uri, null, context);
}
return imagePath;
}
/**
- 通过uri和selection来获取真实的图片路径,从相册获取图片时要用
*/
public static String getImagePath(Uri uri, String selection, Context context) {
String path = null;
Cursor cursor = context.getContentResolver().query(uri, null, selection, null, null);
if (cursor != null) {
if (cursor.moveToFirst()) {
path = cursor.getString(cursor.getColumnIndex(MediaStore.Images.Media.DATA));
}
cursor.close();
}
return path;
}
/**
-
更改图片显示角度
-
@param filepath
-
@param orc_bitmap
-
@param iv
*/
public static void ImgUpdateDirection(String filepath, Bitmap orc_bitmap, ImageView iv) {
//图片旋转的角度
int digree = 0;
//根据图片的filepath获取到一个ExifInterface的对象
ExifInterface exif = null;
try {
exif = new ExifInterface(filepath);
if (exif != null) {
// 读取图片中相机方向信息
int ori = exif.getAttributeInt(ExifInterface.TAG_ORIENTATION, ExifInterface.ORIENTATION_UNDEFINED);
// 计算旋转角度
switch (ori) {
case ExifInterface.ORIENTATION_ROTATE_90:
digree = 90;
break;
case ExifInterface.ORIENTATION_ROTATE_180:
digree = 180;
break;
case ExifInterface.ORIENTATION_ROTATE_270:
digree = 270;
break;
default:
digree = 0;
break;
}
}
//如果图片不为0
if (digree != 0) {
// 旋转图片
Matrix m = new Matrix();
m.postRotate(digree);
orc_bitmap = Bitmap.createBitmap(orc_bitmap, 0, 0, orc_bitmap.getWidth(),
orc_bitmap.getHeight(), m, true);
}
if (orc_bitmap != null) {
iv.setImageBitmap(orc_bitmap);
}
} catch (IOException e) {
e.printStackTrace();
exif = null;
}
}
/**
- 4.4以下系统处理图片的方法
*/
public static String getImageBeforeKitKatPath(Intent data, Context context) {
Uri uri = data.getData();
String imagePath = getImagePath(uri, null, context);
return imagePath;
}
/**
-
比例压缩
-
@param image
-
@return
*/
public static Bitmap compression(Bitmap image) {
ByteArrayOutputStream outputStream = new ByteArrayOutputStream();
image.compress(Bitmap.CompressFormat.JPEG, 100, outputStream);
//判断如果图片大于1M,进行压缩避免在生成图片(BitmapFactory.decodeStream)时溢出
if (outputStream.toByteArray().length / 1024 > 1024) {
//重置outputStream即清空outputStream
outputStream.reset();
//这里压缩50%,把压缩后的数据存放到baos中
image.compress(Bitmap.CompressFormat.JPEG, 50, outputStream);
}
ByteArrayInputStream inputStream = new ByteArrayInputStream(outputStream.toByteArray());
BitmapFactory.Options options = new BitmapFactory.Options();
//开始读入图片,此时把options.inJustDecodeBounds 设回true了
options.inJustDecodeBounds = true;
Bitmap bitmap = BitmapFactory.decodeStream(inputStream, null, options);
options.inJustDecodeBounds = false;
int outWidth = options.outWidth;
int outHeight = options.outHeight;
//现在主流手机比较多是800*480分辨率,所以高和宽我们设置为
float height = 800f;//这里设置高度为800f
float width = 480f;//这里设置宽度为480f
//缩放比。由于是固定比例缩放,只用高或者宽其中一个数据进行计算即可
int zoomRatio = 1;//be=1表示不缩放
if (outWidth > outHeight && outWidth > width) {//如果宽度大的话根据宽度固定大小缩放
zoomRatio = (int) (options.outWidth / width);
} else if (outWidth < outHeight && outHeight > height) {//如果高度高的话根据宽度固定大小缩放
zoomRatio = (int) (options.outHeight / height);
}
if (zoomRatio <= 0) {
zoomRatio = 1;
}
options.inSampleSize = zoomRatio;//设置缩放比例
options.inPreferredConfig = Bitmap.Config.RGB_565;//降低图片从ARGB888到RGB565
//重新读入图片,注意此时已经把options.inJustDecodeBounds 设回false了
inputStream = new ByteArrayInputStream(outputStream.toByteArray());
//压缩好比例大小后再进行质量压缩
bitmap = BitmapFactory.decodeStream(inputStream, null, options);
return bitmap;
}
}
工具类里面都有注释,我就不多说了。
声明变量
//存储拍完照后的图片
自我介绍一下,小编13年上海交大毕业,曾经在小公司待过,也去过华为、OPPO等大厂,18年进入阿里一直到现在。
深知大多数初中级Android工程师,想要提升技能,往往是自己摸索成长或者是报班学习,但对于培训机构动则近万的学费,着实压力不小。自己不成体系的自学效果低效又漫长,而且极易碰到天花板技术停滞不前!
因此收集整理了一份《2024年Android移动开发全套学习资料》,初衷也很简单,就是希望能够帮助到想自学提升又不知道该从何学起的朋友,同时减轻大家的负担。
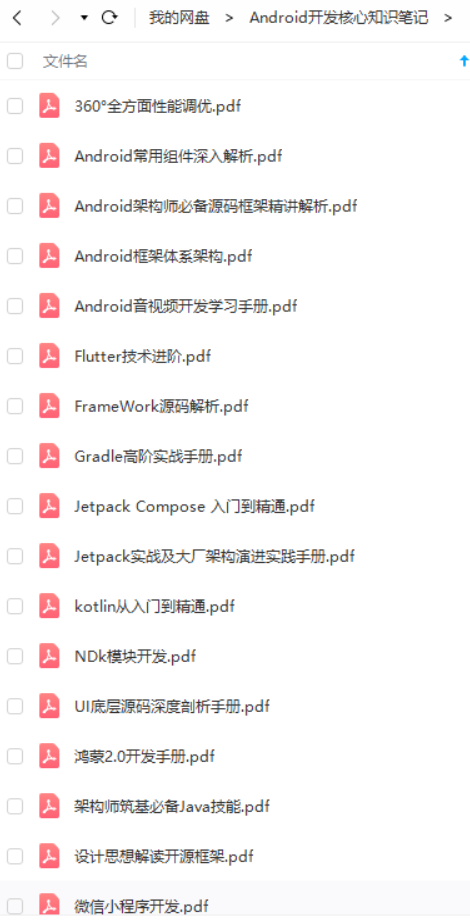
既有适合小白学习的零基础资料,也有适合3年以上经验的小伙伴深入学习提升的进阶课程,基本涵盖了95%以上Android开发知识点,真正体系化!
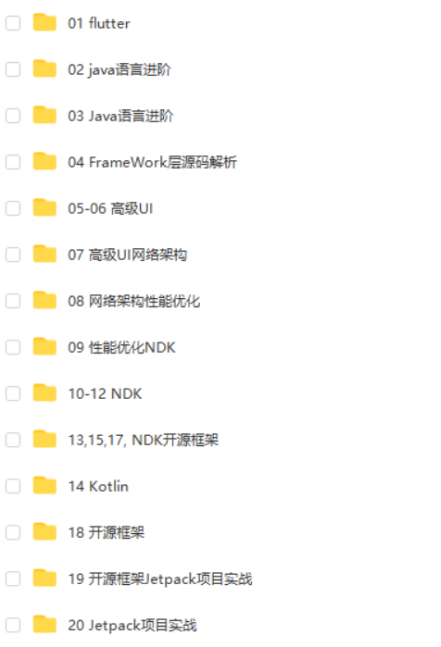
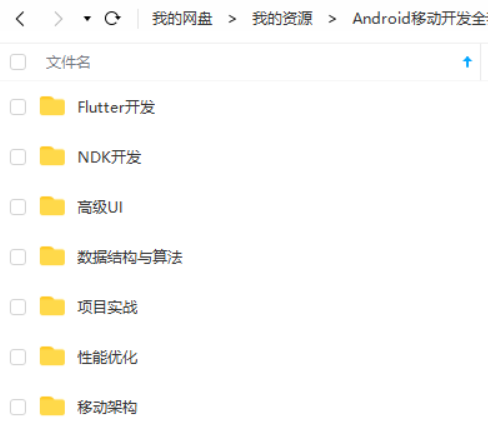
由于文件比较大,这里只是将部分目录截图出来,每个节点里面都包含大厂面经、学习笔记、源码讲义、实战项目、讲解视频,并且会持续更新!
如果你觉得这些内容对你有帮助,可以扫码获取!!(备注:Android)

最后
Android学习是一条漫长的道路,我们要学习的东西不仅仅只有表面的 技术,还要深入底层,弄明白下面的 原理,只有这样,我们才能够提高自己的竞争力,在当今这个竞争激烈的世界里立足。
人生不可能一帆风顺,有高峰自然有低谷,要相信,那些打不倒我们的,终将使我们更强大,要做自己的摆渡人。
资源持续更新中,欢迎大家一起学习和探讨。
《互联网大厂面试真题解析、进阶开发核心学习笔记、全套讲解视频、实战项目源码讲义》点击传送门即可获取!
deStream(inputStream, null, options);
return bitmap;
}
}
工具类里面都有注释,我就不多说了。
声明变量
//存储拍完照后的图片
自我介绍一下,小编13年上海交大毕业,曾经在小公司待过,也去过华为、OPPO等大厂,18年进入阿里一直到现在。
深知大多数初中级Android工程师,想要提升技能,往往是自己摸索成长或者是报班学习,但对于培训机构动则近万的学费,着实压力不小。自己不成体系的自学效果低效又漫长,而且极易碰到天花板技术停滞不前!
因此收集整理了一份《2024年Android移动开发全套学习资料》,初衷也很简单,就是希望能够帮助到想自学提升又不知道该从何学起的朋友,同时减轻大家的负担。
[外链图片转存中…(img-oUvYwjSD-1712685398223)]
[外链图片转存中…(img-FB9Ack0q-1712685398223)]
[外链图片转存中…(img-gGC6N4fg-1712685398223)]
[外链图片转存中…(img-lSVdMlc2-1712685398224)]
[外链图片转存中…(img-eBpn7vv6-1712685398224)]
既有适合小白学习的零基础资料,也有适合3年以上经验的小伙伴深入学习提升的进阶课程,基本涵盖了95%以上Android开发知识点,真正体系化!
由于文件比较大,这里只是将部分目录截图出来,每个节点里面都包含大厂面经、学习笔记、源码讲义、实战项目、讲解视频,并且会持续更新!
如果你觉得这些内容对你有帮助,可以扫码获取!!(备注:Android)
最后
Android学习是一条漫长的道路,我们要学习的东西不仅仅只有表面的 技术,还要深入底层,弄明白下面的 原理,只有这样,我们才能够提高自己的竞争力,在当今这个竞争激烈的世界里立足。
人生不可能一帆风顺,有高峰自然有低谷,要相信,那些打不倒我们的,终将使我们更强大,要做自己的摆渡人。
资源持续更新中,欢迎大家一起学习和探讨。
《互联网大厂面试真题解析、进阶开发核心学习笔记、全套讲解视频、实战项目源码讲义》点击传送门即可获取!


 502
502

 被折叠的 条评论
为什么被折叠?
被折叠的 条评论
为什么被折叠?
 到【灌水乐园】发言


