


ps:springboot该篇用的2.0.0.RELEASE,java1.8
然后创建WebSocketConfig.java :
import org.springframework.beans.factory.annotation.Autowired;
import org.springframework.context.annotation.Configuration;
import org.springframework.messaging.simp.config.ChannelRegistration;
import org.springframework.messaging.simp.config.MessageBrokerRegistry;
import org.springframework.web.socket.config.annotation.*;
/**
-
@Author : JCccc
-
@CreateTime : 2020/8/26
-
@Description :
**/
@Configuration
@EnableWebSocketMessageBroker
public class WebSocketConfig implements WebSocketMessageBrokerConfigurer {
@Autowired
GetHeaderParamInterceptor getHeaderParamInterceptor;
@Override
public void registerStompEndpoints(StompEndpointRegistry registry) {
registry.addEndpoint(“/ws”).setAllowedOrigins(“*”)
.withSockJS();
//暴露多个节点,就一样直接addEndpoint 就可以
// registry.addEndpoint(“/alone”) .setAllowedOrigins(“*”)
// .withSockJS();
}
@Override
public void configureMessageBroker(MessageBrokerRegistry registry) {
//如果不使用rabbitmq作为消息代理,那么只需要暴露简单节点即可
// 默认的Simple Broker
// registry.enableSimpleBroker(“/topic”,“/user”);
// registry.setApplicationDestinationPrefixes(“/app”);
// 使用RabbitMQ做为消息代理,替换默认的Simple Broker
//定义了服务端接收地址的前缀,也即客户端给服务端发消息的地址前缀,@SendTo(XXX) 也可以重定向
registry.setUserDestinationPrefix(“/user”); //这是给sendToUser使用,前端订阅需要加上/user
registry.setApplicationDestinationPrefixes(“/app”); //这是给客户端推送消息到服务器使用 ,推送的接口加上/app
// "STOMP broker relay"处理所有消息将消息发送到外部的消息代理
registry.enableStompBrokerRelay(“/exchange”,“/topic”,“/queue”,“/amq/queue”)
.setVirtualHost(“JCChost”) //对应自己rabbitmq里的虚拟host
.setRelayHost(“localhost”)
.setClientLogin(“root”)
.setClientPasscode(“root”)
.setSystemLogin(“root”)
.setSystemPasscode(“root”)
.setSystemHeartbeatSendInterval(5000)
.setSystemHeartbeatReceiveInterval(4000);
}
/**
-
采用自定义拦截器,获取connect时候传递的参数
-
@param registration
*/
@Override
public void configureClientInboundChannel(ChannelRegistration registration) {
registration.interceptors(getHeaderParamInterceptor);
}
}
WebSocketConfig 代码简析及注意点 :
1.@EnableWebSocketMessageBroker
这个注解作用是为了 是程序能够识别出 连接了 暴露的stomp节点 发送过来的 请求。 配合 @MessageMapping 是用 。(后面有介绍)
2.registry.addEndpoint(“/ws”)
这就是暴露节点,就是可以让客户端连接到websocket的节点。 如果需要暴露多个,就一样使用registry.addEndpoint(“/XXX”)即可。
3.configureMessageBroker
配置消息代理,前言说到我们该篇会使用rabbitmq来作为消息代理,所以咱们配置的代码就是使用的rabbitmq。
如果不想整合rabbitmq的话,单纯开启简单的消息代理,两三行代码即可。
registry.enableSimpleBroker(“/topic”,“/queue”);
registry.setApplicationDestinationPrefixes(“/app”);
registry.setUserDestinationPrefix(“/user”);
registry.enableSimpleBroker(“/topic”,“/queue”) :
意思是在暴露的节点上,消息代理即将会处理 前缀为 /topic 和 /queue 的请求消息。 (可以理解为,服务端给客户端推送消息使用)
registry.setApplicationDestinationPrefixes(“/app”) :
意思是客户端程序访问服务器,需带有/app 前缀,那么这些带有/app的消息就会匹配到@MessageMapping注解的方法上。
(可以理解为客户端向服务端推送消息使用)
registry.setUserDestinationPrefix(“/user”) :
这个就比较好玩,就是服务端指定给用户一对一推送消息,使用 sendToUser 方法时,会帮我们默认拼接上 /user,所以客户端也需要订阅相关的/user前缀的主题才能正常接收。(后面代码还会介绍到)
而我们该篇是使用rabbitmq作为消息代理,所以咱们的代码是:
这些代码就没啥还解释了,上面都说了核心的几个代码意义了,其余就是连接rabbbitmq的一些相关信息,账号密码,虚拟host等。
registry.setUserDestinationPrefix(“/user”); //这是给sendToUser使用,前端订阅需要加上/user
registry.setApplicationDestinationPrefixes(“/app”); //这是给客户端推送消息到服务器使用 ,推送的接口加上/app
// "STOMP broker relay"处理所有消息将消息发送到外部的消息代理
registry.enableStompBrokerRelay(“/exchange”,“/topic”,“/queue”,“/amq/queue”)
.setVirtualHost(“JCChost”)
.setRelayHost(“localhost”)
.setClientLogin(“root”)
.setClientPasscode(“root”)
.setSystemLogin(“root”)
.setSystemPasscode(“root”)
.setSystemHeartbeatSendInterval(5000)
.setSystemHeartbeatReceiveInterval(4000);
再来看 configureClientInboundChannel ,
这个就比较关键,使用客户端绑定配置,咱们绑定了一个拦截器 getHeaderParamInterceptor ,从命名看就知道,就是为了拦截一些参数。
没错,为了识别客户端连接到咱们的websocket上,到底是谁? 我们该篇采取的就是,让客户端连接时携带自己的个人唯一识别信息过来,在建立连接时,取出该参数,为其实现用户信息认证设置。
需要创建GetHeaderParamInterceptor.java:
import org.springframework.messaging.Message;
import org.springframework.messaging.MessageChannel;
import org.springframework.messaging.simp.SimpMessageHeaderAccessor;
import org.springframework.messaging.simp.stomp.StompCommand;
import org.springframework.messaging.simp.stomp.StompHeaderAccessor;
import org.springframework.messaging.support.ChannelInterceptorAdapter;
import org.springframework.messaging.support.MessageHeaderAccessor;
import org.springframework.stereotype.Component;
import java.util.LinkedList;
import java.util.Map;
/**
-
@Author : JCccc
-
@CreateTime : 2020/8/26
-
@Description :
**/
@Component
public class GetHeaderParamInterceptor extends ChannelInterceptorAdapter {
@Override
public Message<?> preSend(Message<?> message, MessageChannel channel) {
StompHeaderAccessor accessor = MessageHeaderAccessor.getAccessor(message, StompHeaderAccessor.class);
if (StompCommand.CONNECT.equals(accessor.getCommand())) {
Object raw = message.getHeaders().get(SimpMessageHeaderAccessor.NATIVE_HEADERS);
if (raw instanceof Map) {
Object name = ((Map) raw).get(“username”); //取出客户端携带的参数
System.out.println(name);
if (name instanceof LinkedList) {
// 设置当前访问的认证用户
accessor.setUser(new UserPrincipal(((LinkedList) name).get(0).toString()));
}
}
}
return message;
}
}
为了完成用户信息的设置,需要使用到Principal ,所以我们还需要创建 UserPrincipal.java:
import java.security.Principal;
/**
-
@Author : JCccc
-
@CreateTime : 2020/8/26
-
@Description :
**/
public class UserPrincipal implements Principal {
private final String name;
public UserPrincipal(String name) {
this.name = name;
}
@Override
public String getName() {
return name;
}
}
ok,也就是说关于websocket的配置,我们创建了上面的三个文件(继续敲代码前,先自己回顾一下这三个东西的作用):

接下来,我们需要为项目整合上 RabbitMQ。
创建MyRabbitConfig.java:
提前说下,这个关于rabbitmq的所有东西,我暂且都配置在这里。
import cn.jc.springbootwebsocketdemo.service.ChatService;
import org.springframework.amqp.core.*;
import org.springframework.amqp.rabbit.connection.CachingConnectionFactory;
import org.springframework.amqp.rabbit.connection.ConnectionFactory;
import org.springframework.amqp.rabbit.core.ChannelAwareMessageListener;
import org.springframework.amqp.rabbit.core.RabbitTemplate;
import org.springframework.amqp.rabbit.listener.SimpleMessageListenerContainer;
import org.springframework.amqp.rabbit.support.CorrelationData;
import org.springframework.beans.factory.annotation.Autowired;
import org.springframework.context.annotation.Bean;
import org.springframework.context.annotation.Configuration;
/**
-
@Author : JCccc
-
@CreateTime : 2019/9/3
-
@Description :
**/
@Configuration
public class MyRabbitConfig {
@Autowired
ChatService chatService;
//绑定键
public final static String msgTopicKey = “topic.public”;
//队列
public final static String msgTopicQueue = “topicQueue”;
@Bean
public Queue topicQueue() {
return new Queue(MyRabbitConfig.msgTopicQueue,true);
}
@Bean
TopicExchange exchange() {
return new TopicExchange(“topicWebSocketExchange”,true,false);
}
//将firstQueue和topicExchange绑定,而且绑定的键值为topic.man
//这样只要是消息携带的路由键是topic.man,才会分发到该队列
@Bean
Binding bindingExchangeMessage() {
return BindingBuilder.bind(topicQueue()).to(exchange()).with(msgTopicKey);
}
@Bean
public ConnectionFactory connectionFactory() {
CachingConnectionFactory connectionFactory = new CachingConnectionFactory(“127.0.0.1”, 5672);
connectionFactory.setUsername(“root”);
connectionFactory.setPassword(“root”);
connectionFactory.setVirtualHost(“JCChost”);
connectionFactory.setPublisherConfirms(true); // 发送消息回调,必须要设置
connectionFactory.setPublisherReturns(true);
return connectionFactory;
}
@Bean
public RabbitTemplate createRabbitTemplate(ConnectionFactory connectionFactory){
RabbitTemplate rabbitTemplate = new RabbitTemplate();
rabbitTemplate.setConnectionFactory(connectionFactory);
//设置开启Mandatory,才能触发回调函数,无论消息推送结果怎么样都强制调用回调函数
rabbitTemplate.setMandatory(true);
rabbitTemplate.setConfirmCallback(new RabbitTemplate.ConfirmCallback() {
@Override
public void confirm(CorrelationData correlationData, boolean ack, String cause) {
System.out.println("ConfirmCallback: "+“相关数据:”+correlationData);
System.out.println("ConfirmCallback: "+“确认情况:”+ack);
System.out.println("ConfirmCallback: "+“原因:”+cause);
}
});
rabbitTemplate.setReturnCallback(new RabbitTemplate.ReturnCallback() {
@Override
public void returnedMessage(org.springframework.amqp.core.Message message, int replyCode, String replyText, String exchange, String routingKey) {
System.out.println("ReturnCallback: "+“消息:”+message);
System.out.println("ReturnCallback: "+“回应码:”+replyCode);
System.out.println("ReturnCallback: "+“回应信息:”+replyText);
System.out.println("ReturnCallback: "+“交换机:”+exchange);
System.out.println("ReturnCallback: "+“路由键:”+routingKey);
}
});
return rabbitTemplate;
}
/**
-
接受消息的监听,这个监听会接受消息队列topicQueue的消息
-
针对消费者配置
-
@return
*/
@Bean
public SimpleMessageListenerContainer messageContainer() {
SimpleMessageListenerContainer container = new SimpleMessageListenerContainer(connectionFactory());
container.setQueues(topicQueue());
container.setExposeListenerChannel(true);
container.setMaxConcurrentConsumers(1);
container.setConcurrentConsumers(1);
container.setAcknowledgeMode(AcknowledgeMode.MANUAL); //设置确认模式手工确认
container.setMessageListener(new ChannelAwareMessageListener() {
public void onMessage(Message message, com.rabbitmq.client.Channel channel) throws Exception {
byte[] body = message.getBody();
String msg = new String(body);
System.out.println("rabbitmq收到消息 : " +msg);
Boolean sendToWebsocket = chatService.sendMsg(msg);
if (sendToWebsocket){
System.out.println(“消息处理成功! 已经推送到websocket!”);
channel.basicAck(message.getMessageProperties().getDeliveryTag(), true); //确认消息成功消费
}
}
});
return container;
}
}
看到这么多代码是不是一下子有点懵,没事,看我的MyRabbitConfig代码简析 :
1.连接rabbitmq代码

2.简单使用一下主题交换机

(其实可以配置更多的交换机,对于使用rabbitmq方面,完全没接触过的小伙伴,不妨先看看这篇文章,《Springboot 整合RabbitMq ,用心看完这一篇就够了》 链接: https://blog.csdn.net/qq_35387940/article/details/100514134)
3.配置生产者推送消息触发的回调函数

4.消费者监听器,采取开启手动确认

ok,到这里我们可以看到整合上rabbitmq的相关内容,完毕。

那么还有接收消息使用到的实体类,处理消息的业务类,也就是
ChatMessage.java:
这里实体类比较简单,大家可以自己扩展符合自己消息内容场景的。
/**
-
@Author : JCccc
-
@CreateTime : 2020/8/26
-
@Description :
**/
public class ChatMessage {
private MessageType type;
private String content;
private String sender;
private String to;
public enum MessageType {
CHAT,
JOIN,
LEAVE
}
@Override
public String toString() {
return “ChatMessage{” +
“type=” + type +
“, content='” + content + ‘’’ +
“, sender='” + sender + ‘’’ +
“, to='” + to + ‘’’ +
‘}’;
}
public MessageType getType() {
return type;
}
public void setType(MessageType type) {
this.type = type;
}
public String getContent() {
return content;
}
public void setContent(String content) {
this.content = content;
}
public String getSender() {
return sender;
}
public void setSender(String sender) {
this.sender = sender;
}
public String getTo() {
return to;
}
public void setTo(String to) {
this.to = to;
}
}
然后是ChatService.java:
import cn.jc.springbootwebsocketdemo.model.ChatMessage;
import com.alibaba.fastjson.JSONObject;
import org.springframework.beans.factory.annotation.Autowired;
import org.springframework.messaging.MessagingException;
import org.springframework.messaging.simp.SimpMessageSendingOperations;
import org.springframework.stereotype.Service;
/**
-
@Author : JCccc
-
@CreateTime : 2020/8/26
-
@Description :
**/
@Service
public class ChatService {
@Autowired
private SimpMessageSendingOperations simpMessageSendingOperations;
public Boolean sendMsg(String msg) {
try {
JSONObject msgJson = JSONObject.parseObject(msg);
if (msgJson.getString(“to”).equals(“all”) && msgJson.getString(“type”).equals(ChatMessage.MessageType.CHAT.toString())){
simpMessageSendingOperations.convertAndSend(“/topic/public”, msgJson);
}else if (msgJson.getString(“to”).equals(“all”) && msgJson.getString(“type”).equals(ChatMessage.MessageType.JOIN.toString())) {
simpMessageSendingOperations.convertAndSend(“/topic/public”, msgJson);
}else if(msgJson.getString(“to”).equals(“all”) && msgJson.getString(“type”).equals(ChatMessage.MessageType.LEAVE.toString())) {
simpMessageSendingOperations.convertAndSend(“/topic/public”, msgJson);
}else if (!msgJson.getString(“to”).equals(“all”) && msgJson.getString(“type”).equals(ChatMessage.MessageType.CHAT.toString())){
simpMessageSendingOperations.convertAndSendToUser(msgJson.getString(“to”),“/topic/msg”, msgJson);
}
} catch (MessagingException e) {
e.printStackTrace();
return false;
}
return true;
}
}
这个很关键,该实例的点对点推送消息,群发的处理代码都在这个业务处理类里面了,
那么也是稍微做下代码简析:

简单点就是 convertAndSend 和 convertAndSendToUser的使用, 一个是群发,一个是单发(单发会在主题前拼接/user)
还有使用到的json转换工具类,其实也就是fastjosn的方法:
import com.alibaba.fastjson.JSON;
import com.alibaba.fastjson.JSONObject;
/**
-
@Author : JCccc
-
@CreateTime : 2020/8/26
-
@Description :
**/
public final class JsonUtil {
/**
-
把Java对象转换成json字符串
-
@param object 待转化为JSON字符串的Java对象
-
@return json 串 or null
*/
public static String parseObjToJson(Object object) {
String string = null;
try {
string = JSONObject.toJSONString(object);
} catch (Exception e) {
System.out.println(e.getMessage());
}
return string;
}
/**
-
将Json字符串信息转换成对应的Java对象
-
@param json json字符串对象
-
@param c 对应的类型
*/
public static T parseJsonToObj(String json, Class c) {
try {
JSONObject jsonObject = JSON.parseObject(json);
return JSON.toJavaObject(jsonObject, c);
} catch (Exception e) {
System.out.println(e.getMessage());
}
return null;
}
}
这一小段咱们完成了这几个文件:

好了,到这里,我们后端的代码也就完成了。
噢对了,还有我们的一个较为关键的,使用@MessageMapping 的 controller,
创建ChatController.java:
import cn.jc.springbootwebsocketdemo.model.ChatMessage;
import cn.jc.springbootwebsocketdemo.util.JsonUtil;
import org.springframework.amqp.rabbit.core.RabbitTemplate;
import org.springframework.beans.factory.annotation.Autowired;
import org.springframework.messaging.handler.annotation.MessageMapping;
import org.springframework.messaging.handler.annotation.Payload;
import org.springframework.stereotype.Controller;
import org.springframework.web.bind.annotation.GetMapping;
import org.springframework.web.bind.annotation.RequestParam;
import org.springframework.web.bind.annotation.ResponseBody;
import java.security.Principal;
/**
-
@Author : JCccc
-
@CreateTime : 2020/8/26
-
@Description :
**/
@Controller
public class ChatController {
@Autowired
private RabbitTemplate rabbitTemplate;
/**
-
服务端推送给单人的接口
-
@param uid
-
@param content
*/
@ResponseBody
@GetMapping(“/sendToOne”)
public void sendToOne(@RequestParam(“uid”) String uid,@RequestParam(“content”) String content ){
ChatMessage chatMessage=new ChatMessage();
chatMessage.setType(ChatMessage.MessageType.CHAT);
chatMessage.setContent(content);
chatMessage.setTo(uid);
chatMessage.setSender(“系统消息”);
rabbitTemplate.convertAndSend(“topicWebSocketExchange”,“topic.public”, JsonUtil.parseObjToJson(chatMessage));
}
/**
-
接收 客户端传过来的消息 通过setSender和type 来判别时单发还是群发
-
@param chatMessage
-
@param principal
*/
@MessageMapping(“/chat.sendMessageTest”)
public void sendMessageTest(@Payload ChatMessage chatMessage, Principal principal) {
try {
String name = principal.getName();
chatMessage.setSender(name);
rabbitTemplate.convertAndSend(“topicWebSocketExchange”,“topic.public”, JsonUtil.parseObjToJson(chatMessage));
} catch (Exception e) {
System.out.println(e.getMessage());
}
}
/**
-
接收 客户端传过来的消息 上线消息
-
@param chatMessage
*/
@MessageMapping(“/chat.addUser”)
public void addUser(@Payload ChatMessage chatMessage) {
System.out.println(“有用户加入到了websocket 消息室” + chatMessage.getSender());
try {
System.out.println(chatMessage.toString());
rabbitTemplate.convertAndSend(“topicWebSocketExchange”,“topic.public”, JsonUtil.parseObjToJson(chatMessage));
} catch (Exception e) {
System.out.println(e.getMessage());
}
}
}
我们也稍微做个代码简析:

那么为了做个简单的实力测试,我们也搞了点页面:
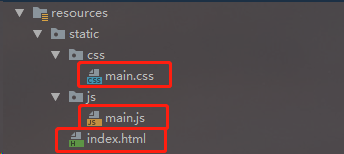
main.css:
- {
-webkit-box-sizing: border-box;
-moz-box-sizing: border-box;
box-sizing: border-box;
}
html,body {
height: 100%;
overflow: hidden;
}
body {
margin: 0;
padding: 0;
font-weight: 400;
font-family: “Helvetica Neue”, Helvetica, Arial, sans-serif;
font-size: 1rem;
line-height: 1.58;
color: #333;
background-color: #f4f4f4;
height: 100%;
}
body:before {
height: 50%;
width: 100%;
position: absolute;
top: 0;
left: 0;
background: #128ff2;
content: “”;
z-index: 0;
}
.clearfix:after {
display: block;
content: “”;
clear: both;
}
.hidden {
display: none;
}
.form-control {
width: 100%;
min-height: 38px;
font-size: 15px;
border: 1px solid #c8c8c8;
}
.form-group {
margin-bottom: 15px;
}
input {
padding-left: 10px;
outline: none;
}
h1, h2, h3, h4, h5, h6 {
margin-top: 20px;
margin-bottom: 20px;
}
h1 {
font-size: 1.7em;
}
a {
color: #128ff2;
}
button {
box-shadow: none;
border: 1px solid transparent;
font-size: 14px;
outline: none;
line-height: 100%;
white-space: nowrap;
vertical-align: middle;
padding: 0.6rem 1rem;
border-radius: 2px;
transition: all 0.2s ease-in-out;
cursor: pointer;
min-height: 38px;
}
button.default {
background-color: #e8e8e8;
color: #333;
box-shadow: 0 2px 2px 0 rgba(0, 0, 0, 0.12);
}
button.primary {
background-color: #128ff2;
box-shadow: 0 2px 2px 0 rgba(0, 0, 0, 0.12);
color: #fff;
}
button.accent {
background-color: #ff4743;
box-shadow: 0 2px 2px 0 rgba(0, 0, 0, 0.12);
color: #fff;
}
#username-page {
text-align: center;
}
.username-page-container {
background: #fff;
box-shadow: 0 1px 11px rgba(0, 0, 0, 0.27);
border-radius: 2px;
width: 100%;
max-width: 500px;
display: inline-block;
margin-top: 42px;
vertical-align: middle;
position: relative;
padding: 35px 55px 35px;
min-height: 250px;
position: absolute;
top: 50%;
left: 0;
right: 0;
margin: 0 auto;
margin-top: -160px;
}
.username-page-container .username-submit {
margin-top: 10px;
}
#chat-page {
position: relative;
height: 100%;
}
.chat-container {
max-width: 700px;
margin-left: auto;
margin-right: auto;
background-color: #fff;
box-shadow: 0 1px 11px rgba(0, 0, 0, 0.27);
margin-top: 30px;
height: calc(100% - 60px);
max-height: 600px;
position: relative;
}
#chat-page ul {
list-style-type: none;
background-color: #FFF;
margin: 0;
overflow: auto;
overflow-y: scroll;
padding: 0 20px 0px 20px;
height: calc(100% - 150px);
}
#chat-page #messageForm {
padding: 20px;
}
#chat-page ul li {
line-height: 1.5rem;
padding: 10px 20px;
margin: 0;
border-bottom: 1px solid #f4f4f4;
}
#chat-page ul li p {
margin: 0;
}
#chat-page .event-message {
width: 100%;
text-align: center;
clear: both;
}
#chat-page .event-message p {
color: #777;
font-size: 14px;
word-wrap: break-word;
}
#chat-page .chat-message {
padding-left: 68px;
position: relative;
}
#chat-page .chat-message i {
position: absolute;
width: 42px;
height: 42px;
overflow: hidden;
left: 10px;
display: inline-block;
vertical-align: middle;
font-size: 18px;
最后
自我介绍一下,小编13年上海交大毕业,曾经在小公司待过,也去过华为、OPPO等大厂,18年进入阿里一直到现在。
深知大多数初中级Android工程师,想要提升技能,往往是自己摸索成长,自己不成体系的自学效果低效漫长且无助。
因此收集整理了一份《2024年Web前端开发全套学习资料》,初衷也很简单,就是希望能够帮助到想自学提升又不知道该从何学起的朋友,同时减轻大家的负担。
既有适合小白学习的零基础资料,也有适合3年以上经验的小伙伴深入学习提升的进阶课程,基本涵盖了95%以上Android开发知识点!不论你是刚入门Android开发的新手,还是希望在技术上不断提升的资深开发者,这些资料都将为你打开新的学习之门!
如果你觉得这些内容对你有帮助,需要这份全套学习资料的朋友可以戳我获取!!
由于文件比较大,这里只是将部分目录截图出来,每个节点里面都包含大厂面经、学习笔记、源码讲义、实战项目、讲解视频,并且会持续更新!
#fff;
box-shadow: 0 1px 11px rgba(0, 0, 0, 0.27);
margin-top: 30px;
height: calc(100% - 60px);
max-height: 600px;
position: relative;
}
#chat-page ul {
list-style-type: none;
background-color: #FFF;
margin: 0;
overflow: auto;
overflow-y: scroll;
padding: 0 20px 0px 20px;
height: calc(100% - 150px);
}
#chat-page #messageForm {
padding: 20px;
}
#chat-page ul li {
line-height: 1.5rem;
padding: 10px 20px;
margin: 0;
border-bottom: 1px solid #f4f4f4;
}
#chat-page ul li p {
margin: 0;
}
#chat-page .event-message {
width: 100%;
text-align: center;
clear: both;
}
#chat-page .event-message p {
color: #777;
font-size: 14px;
word-wrap: break-word;
}
#chat-page .chat-message {
padding-left: 68px;
position: relative;
}
#chat-page .chat-message i {
position: absolute;
width: 42px;
height: 42px;
overflow: hidden;
left: 10px;
display: inline-block;
vertical-align: middle;
font-size: 18px;
最后
自我介绍一下,小编13年上海交大毕业,曾经在小公司待过,也去过华为、OPPO等大厂,18年进入阿里一直到现在。
深知大多数初中级Android工程师,想要提升技能,往往是自己摸索成长,自己不成体系的自学效果低效漫长且无助。
因此收集整理了一份《2024年Web前端开发全套学习资料》,初衷也很简单,就是希望能够帮助到想自学提升又不知道该从何学起的朋友,同时减轻大家的负担。
[外链图片转存中…(img-tQYJHECL-1714954752871)]
[外链图片转存中…(img-3X2zURzX-1714954752871)]
[外链图片转存中…(img-ZGGDOGmC-1714954752872)]
既有适合小白学习的零基础资料,也有适合3年以上经验的小伙伴深入学习提升的进阶课程,基本涵盖了95%以上Android开发知识点!不论你是刚入门Android开发的新手,还是希望在技术上不断提升的资深开发者,这些资料都将为你打开新的学习之门!
如果你觉得这些内容对你有帮助,需要这份全套学习资料的朋友可以戳我获取!!
由于文件比较大,这里只是将部分目录截图出来,每个节点里面都包含大厂面经、学习笔记、源码讲义、实战项目、讲解视频,并且会持续更新!


 2038
2038


 被折叠的 条评论
为什么被折叠?
被折叠的 条评论
为什么被折叠?
 到【灌水乐园】发言


