


class Promise {

  constructor(executor) {

    //调用执行器函数

    executor(resolve, reject)

  }

}
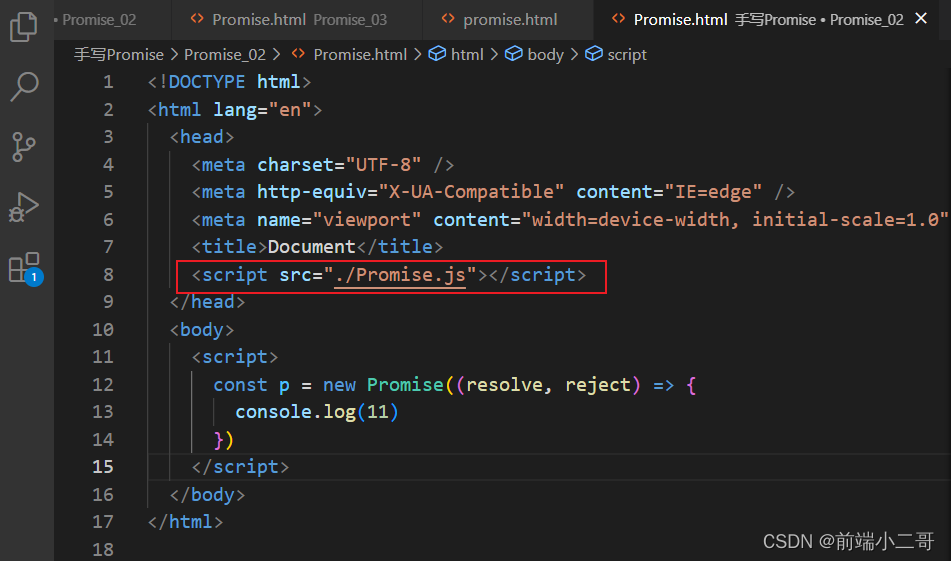
我们将此js代码引入一个html页面覆盖内置的Promise测试此功能;如果能正常打印11即为成功;
实现以上功能以后我们接着定义构造器函数(executor)内部的两个处理Promise状态的函数resolve 和 reject,在定义两个状态处理函数前我们要先初始化Promise的初始状态为pending(待定),而且要先定义resolve 和 reject函数执行成功的结果和执行失败的原因;
代码示例如下:
class Promise {

  constructor(executor) {

    this.state = 'pending'//Promise初始状态

    this.value = undefined//执行成功的结果

    this.reason = undefine//执行失败的结果

    //调用执行器函数

    executor(resolve, reject)

  }

}
在定义Promise的两个改变状态的函数前我们需要了解Promise/A+规范的关于状态凝固的概念,即resolve和reject函数处理Promise状态是不可逆的,即执行完函数改变Promise状态后不能再次改变Promise的状态即状态凝固了;
基于规范的状态改变的不可逆性,我们需要在函数内部加上判断条件,即当Promise的状态为pending时才能进入代码块执行代码;代码示例如下:
class Promise {

  constructor(executor) {

    this.state = 'pending' //Promise初始状态

    this.value = undefined //执行成功的结果

    this.reason = undefine //执行失败的结果


    // 定义resolve函数

    const resolve = (value) => {

      if (this.state === 'pending') {

        this.state = 'fulfiled'

        this.value = value

      }

    }

    //定义reject函数

    const reject = (reason) => {

      if (this.state === 'pending') {

        this.state = 'rejected'

        this.reason = reason

      }

      //调用执行器函数

      executor(resolve, reject)

    }

  }

}
实现以上功能后,我们需要对代码进行优化,即执行器函数调用时,可能发生一些未知的错误,为了避免程序因为抛出错误导致程序崩溃,我们将执行器函数调用放到try-catch语句中;
优化后代码如下:
//捕获Promise状态发生错误的第三种方式

     try {

      //调用执行器函数

        executor(resolve, reject)

     } catch (err) {

      	reject(err)

     }
=============================================================================
在Promise状态发生改变后,无论成功后者失败,都会触发then内部的回调函数;然后根据Promise改变后的状态,去判断是执行成功的回调函数还是失败的回调函数;代码示例如下:
class Promise {

  constructor(executor) {

    this.state = 'pending' //Promise初始状态

    this.value = undefined //执行成功的结果

    this.reason = undefine //执行失败的结果


    // 定义resolve函数

    const resolve = (value) => {

      if (this.state === 'pending') {

        this.state = 'fulfiled'

        this.value = value

      }

    }

    //定义reject函数

    const reject = (reason) => {

      if (this.state === 'pending') {

        this.state = 'rejected'

        this.reason = reason

      }


      //调用执行器函数

      executor(resolve, reject)

    }

  }


  then(onResolved, onRejected) {

    //Promise状态为resolved时

    if (this.state === 'resolved') {

      onResolved(this.value)

    }


    //Promise状态为rejected时

    if (this.state === 'rejected') {

      onRejected(this.reason)

    }

  }

}
定义完then()方法后进行测试,发现在执行resolve或者执行reject函数改变Promise状态时,如果函数的调用是异步的,就会导致在调用then方法时,异步的代码还未执行,Promise状态还是pending,就无法执行then方法内部的成功和失败的回调函数;
测试失败的demo如下:
var myP = new Promise(function(resolve, reject){

    console.log('执行')

    setTimeout(function(){

        reject(3)

    }, 1000)

});


myP.then(function(res){

    console.log(res)

},function(err){

    console.log(err)

});
因为以上reject(3) ,在定时器里面是异步的,而then()方法是同步的,所以控制台并未打印出3;执行流程如下图所示;
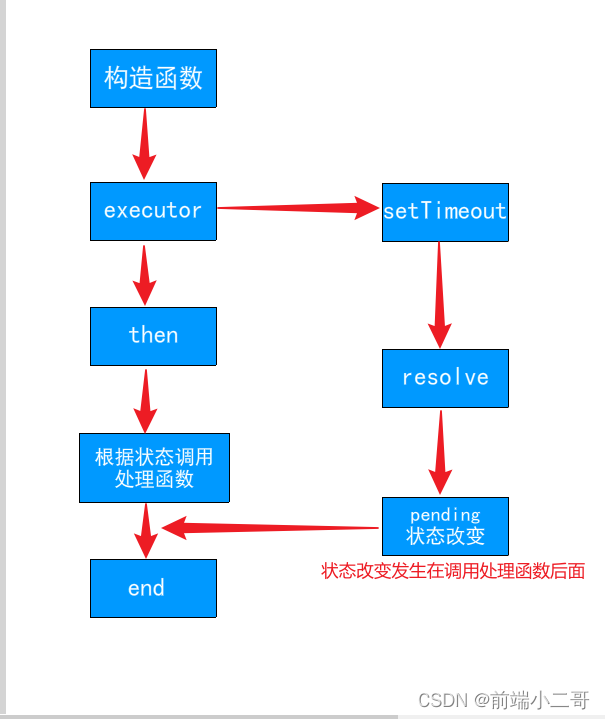
解决此问题思路,在then方法内若判断Promise状态是pending,说明改变Promise状态的函数是异步的,还未执行,此时我们直接将失败和成功后调用的回调函数存到一个数组中,当执行完异步队列中的改变Promise状态的函数时再进行调用;优化后的then()
then(onResolved, onRejected) {

    //Promise状态为resolved时

    if (this.state === 'resolved') {

      onResolved(this.value)

    }


    //Promise状态为rejected时

    if (this.state === 'rejected') {

      onRejected(this.reason)

    }


    // 如果状态为pending,将回调函数存如数组

    if (this.state === 'pending') {

      //将执行成功的回调函数存入数组

      this.resolvedCallback.push(() => {

        onResolved(this.value)

      })

    }

    //将执行失败的回调函数存入数组

    this.rejectedCallback.push(() => {

      onRejected(this.reason)

    })

  }
以上的resolvedCallback、rejectedCallback为定义的两个空数组;将回调函数存入数组后,在执行异步队列中的函数时,遍历数组,然后再执行数组中存的成功或失败的回调函数;
优化resolve和reject函数后的完整代码如下所示;
class Promise {
constructor(executor) {
this.state = 'pending' //Promise初始状态
this.value = undefined //执行成功的结果
this.reason = undefine //执行失败的结果
# 最后
**自我介绍一下,小编13年上海交大毕业,曾经在小公司待过,也去过华为、OPPO等大厂,18年进入阿里一直到现在。**
**深知大多数初中级Android工程师,想要提升技能,往往是自己摸索成长,自己不成体系的自学效果低效漫长且无助。**
**因此收集整理了一份《2024年Web前端开发全套学习资料》,初衷也很简单,就是希望能够帮助到想自学提升又不知道该从何学起的朋友,同时减轻大家的负担。**

**既有适合小白学习的零基础资料,也有适合3年以上经验的小伙伴深入学习提升的进阶课程,基本涵盖了95%以上Android开发知识点!不论你是刚入门Android开发的新手,还是希望在技术上不断提升的资深开发者,这些资料都将为你打开新的学习之门!**
[**如果你觉得这些内容对你有帮助,需要这份全套学习资料的朋友可以戳我获取!!**](https://bbs.csdn.net/topics/618191877)
**由于文件比较大,这里只是将部分目录截图出来,每个节点里面都包含大厂面经、学习笔记、源码讲义、实战项目、讲解视频,并且会持续更新!**
17)]
[外链图片转存中...(img-hL6cCJw7-1715250424317)]
[外链图片转存中...(img-YTXN5vDQ-1715250424317)]
**既有适合小白学习的零基础资料,也有适合3年以上经验的小伙伴深入学习提升的进阶课程,基本涵盖了95%以上Android开发知识点!不论你是刚入门Android开发的新手,还是希望在技术上不断提升的资深开发者,这些资料都将为你打开新的学习之门!**
[**如果你觉得这些内容对你有帮助,需要这份全套学习资料的朋友可以戳我获取!!**](https://bbs.csdn.net/topics/618191877)
**由于文件比较大,这里只是将部分目录截图出来,每个节点里面都包含大厂面经、学习笔记、源码讲义、实战项目、讲解视频,并且会持续更新!**


 5830
5830

 被折叠的 条评论
为什么被折叠?
被折叠的 条评论
为什么被折叠?
 到【灌水乐园】发言


