


popLeft: 0,
popWidth: 0,
open: false,
dataSource: [1, 2, 3],
popTop: 0,
selectItem: {},
isSelectCompany: false,
pageIndex: 1,
pageSize: 10
};
componentDidMount() {
this.props.onRef && this.props.onRef(this);
setTimeout(() => {
this.handleGetDom();
}, 100);
// this.handleGetDom();
}
handleGetDom = () => {
let _this = this;
Taro.createSelectorQuery()
.select(“.fuzzy-query .weui-input”)
.boundingClientRect(function(rect) {
// rect.id; // 节点的ID
// rect.dataset; // 节点的dataset
// rect.left; // 节点的左边界坐标
// rect.right; // 节点的右边界坐标
// rect.top; // 节点的上边界坐标
// rect.bottom; // 节点的下边界坐标
// rect.width; // 节点的宽度
// rect.height; // 节点的高度
_this.setState({
popLeft: rect.left,
popWidth: rect.width,
popTop: rect.height
});
})
.exec();
};
//选中某一项时触发
handleClick = (e, item) => {
console.log(e, “e”);
e.stopPropagation();
e.preventDefault();
this.setState(
{
open: false,
applicantName: item.name,
selectItem: item
},
() => {
const { open } = this.state;
this.props.searchCompanyLibraryList &&
this.props.searchCompanyLibraryList(item.name, open);
}
);
};
//当输入框发生变化时
handleChange = async keyWord => {
var company = keyWord.detail.value;
//先编码
var value = encodeURI(keyWord.detail.value);
console.log(value, “value”);
//如果少于2个字符,是不调用接口的,此时不显示公司公司列表弹窗,且将数据清空
if (company.length < 2) {
this.setState(
{
applicantName: company,
open: false,
dataSource: [],
pageIndex: 1
},
() => {
const { open } = this.state;
this.props.searchCompanyLibraryList &&
this.props.searchCompanyLibraryList(company, open);
}
);
Taro.showToast({
title: “请输入不少于两个字符”,
icon: “none”,
mask: true
});
} else {
const { pageIndex, pageSize, dataSource, open } = this.state;
let params = { keyWord: decodeURI(value), pageSize, pageIndex };
const data = await searchCompanyLibrary(params);
this.setState(
{
open: true,
applicantName: company,
dataSource: data.data.data,
pageIndex: 1
},
() => {
const { open } = this.state;
this.props.searchCompanyLibraryList &&
this.props.searchCompanyLibraryList(company, open);
}
);
}
};
//触底函数
onScrollToUpper = async () => {
console.log(“我在触底”);
const { pageIndex, pageSize, dataSource, applicantName } = this.state;
let applicantNameList = encodeURI(applicantName);
let params = {
keyWord: decodeURI(applicantNameList),
pageSize,
pageIndex: pageIndex + 1
};
const data = await searchCompanyLibrary(params);
console.log(dataSource, “dataSource”);
console.log(data.data.data, “data”);
this.setState({
// open: true,
// applicantName: applicantName,
dataSource: […dataSource, …data.data.data],
pageIndex: pageIndex + 1
});
};
render() {
const {
applicantName,
popLeft,
popWidth,
open,
popTop,
dataSource
} = this.state;
console.log(dataSource, “dataSource”);
const scrollStyle = {
zIndex: 100,
height: “250px”
};
const { placeholder = “请输入”, title = “”, clear = false } = this.props;
return (
<View
className=“position-relative fuzzy-query”
id=“fuzzy-query”
onRef={node => (this.fuzzyWrap = node)}
<View
className={
clear && applicantName
-
? “search-input-show-clear”
- “search-input-wrap”
}
<Input
placeholderStyle=“color:#f8f8f8”
className=“search-input”
value={applicantName}
onChange={this.handleChange}
placeholder={placeholder}
{clear && applicantName && (
className="at-input__icon "
onClick={() =>
this.setState({
applicantName: “”,
dataSource: [],
open: false
})
}
<span className="taro-text at-icon
at-icon-close-circle at-input__icon-close">
)}
<View
style={{ top: ${popTop * 2}px }}
className={
open
-
? “show-fuzzy-pop position-absolute fuzzy-query-pop”
- “position-absolute fuzzy-query-pop”
}
<ScrollView
scrollY
style={scrollStyle}
scrollWithAnimation
onScrollToLower={this.onScrollToUpper}
// 使用箭头函数的时候 可以这样写 onScrollToUpper={this.onScrollToUpper}
<View
style={{
paddingLeft: ${popLeft - 12}px,
width: ${popWidth}px
}}
{dataSource.length > 0 &&
dataSource.map(item => {
return (
<AtListItem
title={item.name}
onClick={e => this.handleClick(e, item, “selectItem”)}
/>
);
})}
);
}
}
export default FuzzyQuery;
样式部分
.fuzzy-query{
.at-list::after{border-top:0;}
.fuzzy-query-pop{
// border: 1px solid #e8e8e8;
box-sizing: border-box;
z-index:100;
width: 100%;
background: #fff;
// opacity: 0;
max-height:0;
overflow: hidden;
transition:max-height 0.5s ;
.at-list__item{
padding:20px;
font-size: 28px;
}
.at-list__item::after{left:0;}
}
.show-fuzzy-pop{
max-height:800px;
z-index: 100;
// overflow-y: scroll;
}
.input-wrap{
margin-left: 32px;
color:#333;
font-size: 28px;
.input-item{
position: relative;
padding:24px 0 ;
&::after{
content: ‘’;
position: absolute;
-webkit-transform-origin: center;
-ms-transform-origin: center;
transform-origin: center;
-webkit-box-sizing: border-box;
box-sizing: border-box;
pointer-events: none;
top: -50%;
left: -50%;
right: -50%;
bottom: -50%;
border: 0 solid #d6e4ef;
-webkit-transform: scale(0.5);
-ms-transform: scale(0.5);
transform: scale(0.5);
border-bottom-width: 1PX;
}}
.input_title{
width:172px;
margin-right: 16px;
}
.search-input-wrap{width:calc(100% - 172px);position: relative;
.fuzzy-clear{position: absolute;right:0;width:32px;height:32px}}
.search-input-show-clear{width:480.12px;position: relative;
.fuzzy-clear{position: absolute;right:0;width:32px;height:32px}}
input::-webkit-input-placeholder {
color: rgb(204,204,204);
}
input::-moz-placeholder {
/* Mozilla Firefox 19+ */
color: rgb(204,204,204);
}
input:-moz-placeholder {
/* Mozilla Firefox 4 to 18 */
color: rgb(204,204,204);
}
input:-ms-input-placeholder {
/* Internet Explorer 10-11 */
color: rgb(204,204,204);
}
}
}
实现思路介绍(接口调用在子组件执行还是父组件)
const { pageIndex, pageSize, dataSource, open } = this.state;
let params = { keyWord: decodeURI(value), pageSize, pageIndex };
const data = await searchCompanyLibrary(params);
总结1
子组件中进行接口的调用并进行页面的渲染
实现思路介绍(get请求传入中文页面获取不到参数)
最后
自我介绍一下,小编13年上海交大毕业,曾经在小公司待过,也去过华为、OPPO等大厂,18年进入阿里一直到现在。
深知大多数初中级Android工程师,想要提升技能,往往是自己摸索成长,自己不成体系的自学效果低效漫长且无助。
因此收集整理了一份《2024年Web前端开发全套学习资料》,初衷也很简单,就是希望能够帮助到想自学提升又不知道该从何学起的朋友,同时减轻大家的负担。
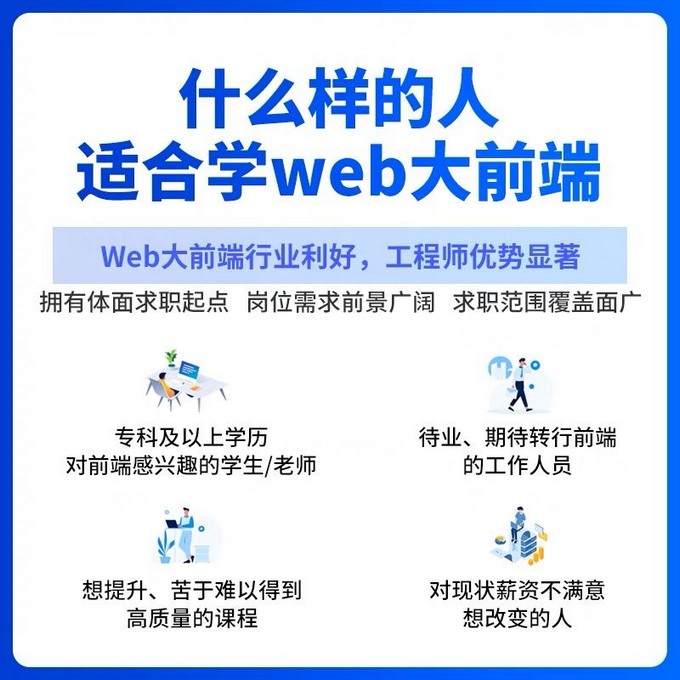
既有适合小白学习的零基础资料,也有适合3年以上经验的小伙伴深入学习提升的进阶课程,基本涵盖了95%以上Android开发知识点!不论你是刚入门Android开发的新手,还是希望在技术上不断提升的资深开发者,这些资料都将为你打开新的学习之门!
如果你觉得这些内容对你有帮助,需要这份全套学习资料的朋友可以戳我获取!!
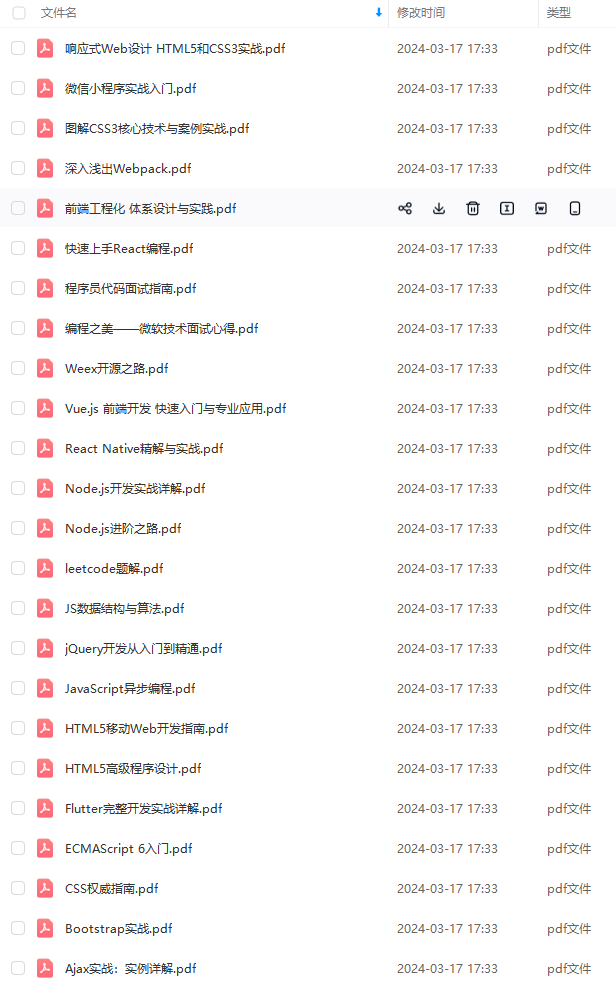
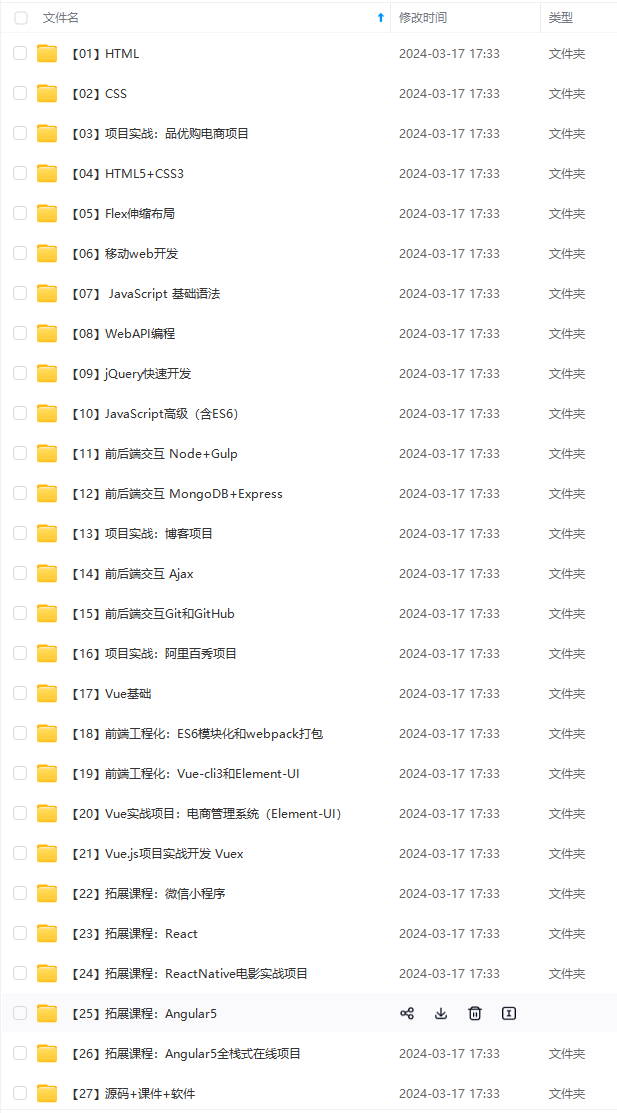
由于文件比较大,这里只是将部分目录截图出来,每个节点里面都包含大厂面经、学习笔记、源码讲义、实战项目、讲解视频,并且会持续更新!
行接口的调用并进行页面的渲染
实现思路介绍(get请求传入中文页面获取不到参数)
最后
自我介绍一下,小编13年上海交大毕业,曾经在小公司待过,也去过华为、OPPO等大厂,18年进入阿里一直到现在。
深知大多数初中级Android工程师,想要提升技能,往往是自己摸索成长,自己不成体系的自学效果低效漫长且无助。
因此收集整理了一份《2024年Web前端开发全套学习资料》,初衷也很简单,就是希望能够帮助到想自学提升又不知道该从何学起的朋友,同时减轻大家的负担。
[外链图片转存中…(img-uWewoIT7-1715802831349)]
[外链图片转存中…(img-1yNGdESJ-1715802831349)]
[外链图片转存中…(img-YBh4t6ly-1715802831350)]
既有适合小白学习的零基础资料,也有适合3年以上经验的小伙伴深入学习提升的进阶课程,基本涵盖了95%以上Android开发知识点!不论你是刚入门Android开发的新手,还是希望在技术上不断提升的资深开发者,这些资料都将为你打开新的学习之门!
如果你觉得这些内容对你有帮助,需要这份全套学习资料的朋友可以戳我获取!!
由于文件比较大,这里只是将部分目录截图出来,每个节点里面都包含大厂面经、学习笔记、源码讲义、实战项目、讲解视频,并且会持续更新!


 1万+
1万+


 被折叠的 条评论
为什么被折叠?
被折叠的 条评论
为什么被折叠?
 到【灌水乐园】发言


