


先自我介绍一下,小编浙江大学毕业,去过华为、字节跳动等大厂,目前阿里P7
深知大多数程序员,想要提升技能,往往是自己摸索成长,但自己不成体系的自学效果低效又漫长,而且极易碰到天花板技术停滞不前!
因此收集整理了一份《2024年最新Java开发全套学习资料》,初衷也很简单,就是希望能够帮助到想自学提升又不知道该从何学起的朋友。
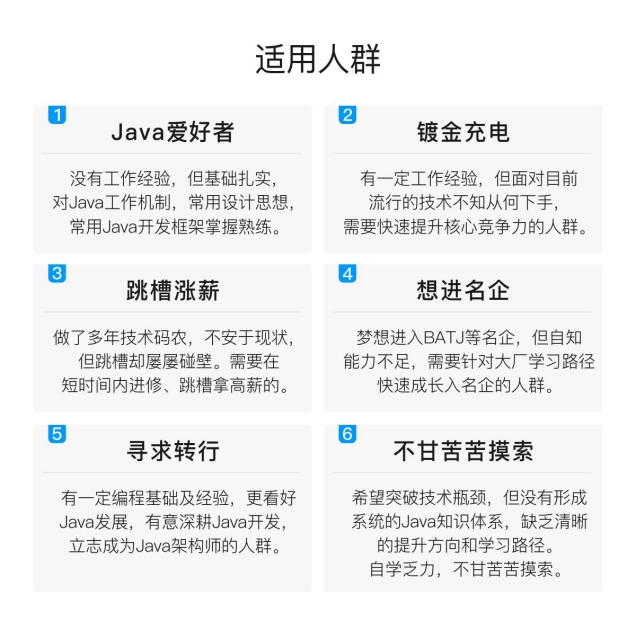


既有适合小白学习的零基础资料,也有适合3年以上经验的小伙伴深入学习提升的进阶课程,涵盖了95%以上Java开发知识点,真正体系化!
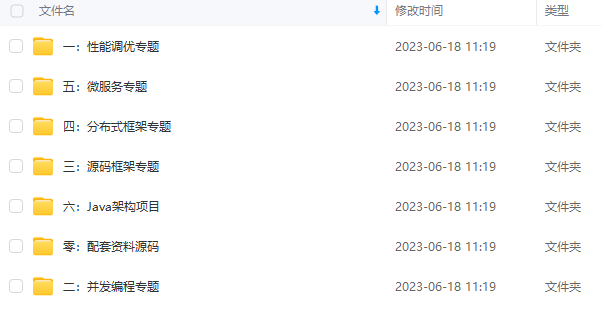
由于文件比较多,这里只是将部分目录截图出来,全套包含大厂面经、学习笔记、源码讲义、实战项目、大纲路线、讲解视频,并且后续会持续更新
如果你需要这些资料,可以添加V获取:vip1024b (备注Java)

正文
上面的配置,我们是按照包的位置来扫描的。也就是说,Bean 必须放在指定的扫描位置,否则,即使你有 @Service 注解,也扫描不到。
除了按照包的位置来扫描,还有另外一种方式,就是根据注解来扫描。例如如下配置:
@Configuration
@ComponentScan(basePackages = “org.javaboy.javaconfig”,useDefaultFilters = true,excludeFilters = {@ComponentScan.Filter(type = FilterType.ANNOTATION,classes = Controller.class)})
public class JavaConfig {
}
这个配置表示扫描 org.javaboy.javaconfig 下的所有 Bean,但是除了 Controller。
3.6.3 XML 配置自动化扫描
<context:component-scan base-package=“org.javaboy.javaconfig”/>
上面这行配置表示扫描 org.javaboy.javaconfig 下的所有 Bean。当然也可以按照类来扫描。
XML 配置完成后,在 Java 代码中加载 XML 配置即可。
public class XMLTest {
public static void main(String[] args) {
ClassPathXmlApplicationContext ctx = new ClassPathXmlApplicationContext(“applicationContext.xml”);
UserService userService = ctx.getBean(UserService.class);
List list = userService.getAllUser();
System.out.println(list);
}
}
也可以在 XML 配置中按照注解的类型进行扫描:
<context:component-scan base-package=“org.javaboy.javaconfig” use-default-filters=“true”>
<context:exclude-filter type=“annotation” expression=“org.springframework.stereotype.Controller”/>
</context:component-scan>
3.6.4 对象注入
自动扫描时的对象注入有三种方式:
-
@Autowired
-
@Resources
-
@Injected
@Autowired 是根据类型去查找,然后赋值,这就有一个要求,这个类型只可以有一个对象,否则就会报错。@Resources 是根据名称去查找,默认情况下,定义的变量名,就是查找的名称,当然开发者也可以在 @Resources 注解中手动指定。所以,如果一个类存在多个实例,那么就应该使用 @Resources 去注入,如果非常使用 @Autowired,也是可以的,此时需要配合另外一个注解,@Qualifier,在 @Qualifier 中可以指定变量名,两个一起用(@Qualifier 和 @Autowired)就可以实现通过变量名查找到变量。
@Service
public class UserService {
@Autowired
UserDao userDao;
public String hello() {
return userDao.hello();
}
public List getAllUser() {
List users = new ArrayList<>();
for (int i = 0; i < 10; i++) {
users.add(“javaboy:” + i);
}
return users;
}
}
条件注解就是在满足某一个条件的情况下,生效的配置。
3.7.1 条件注解
首先在 Windows 中如何获取操作系统信息?Windows 中查看文件夹目录的命令是 dir,Linux 中查看文件夹目录的命令是 ls,我现在希望当系统运行在 Windows 上时,自动打印出 Windows 上的目录展示命令,Linux 运行时,则自动展示 Linux 上的目录展示命令。
首先定义一个显示文件夹目录的接口:
public interface ShowCmd {
String showCmd();
}
然后,分别实现 Windows 下的实例和 Linux 下的实例:
public class WinShowCmd implements ShowCmd {
@Override
public String showCmd() {
return “dir”;
}
}
public class LinuxShowCmd implements ShowCmd {
@Override
public String showCmd() {
return “ls”;
}
}
接下来,定义两个条件,一个是 Windows 下的条件,另一个是 Linux 下的条件。
public class WindowsCondition implements Condition {
@Override
public boolean matches(ConditionContext context, AnnotatedTypeMetadata metadata) {
return context.getEnvironment().getProperty(“os.name”).toLowerCase().contains(“windows”);
}
}
public class LinuxCondition implements Condition {
@Override
public boolean matches(ConditionContext context, AnnotatedTypeMetadata metadata) {
return context.getEnvironment().getProperty(“os.name”).toLowerCase().contains(“linux”);
}
}
接下来,在定义 Bean 的时候,就可以去配置条件注解了。
@Configuration
public class JavaConfig {
@Bean(“showCmd”)
@Conditional(WindowsCondition.class)
ShowCmd winCmd() {
return new WinShowCmd();
}
@Bean(“showCmd”)
@Conditional(LinuxCondition.class)
ShowCmd linuxCmd() {
return new LinuxShowCmd();
}
}
这里,一定要给两个 Bean 取相同的名字,这样在调用时,才可以自动匹配。然后,给每一个 Bean 加上条件注解,当条件中的 matches 方法返回 true 的时候,这个 Bean 的定义就会生效。
public class JavaMain {
public static void main(String[] args) {
AnnotationConfigApplicationContext ctx = new AnnotationConfigApplicationContext(JavaConfig.class);
ShowCmd showCmd = (ShowCmd) ctx.getBean(“showCmd”);
System.out.println(showCmd.showCmd());
}
}
条件注解有一个非常典型的使用场景,就是多环境切换。
3.7.2 多环境切换
开发中,如何在 开发/生产/测试 环境之间进行快速切换?Spring 中提供了 Profile 来解决这个问题,Profile 的底层就是条件注解。这个从 @Profile 注解的定义就可以看出来:
@Target({ElementType.TYPE, ElementType.METHOD})
@Retention(RetentionPolicy.RUNTIME)
@Documented
@Conditional(ProfileCondition.class)
public @interface Profile {
/**
- The set of profiles for which the annotated component should be registered.
*/
String[] value();
}
class ProfileCondition implements Condition {
@Override
public boolean matches(ConditionContext context, AnnotatedTypeMetadata metadata) {
MultiValueMap<String, Object> attrs = metadata.getAllAnnotationAttributes(Profile.class.getName());
if (attrs != null) {
for (Object value : attrs.get(“value”)) {
if (context.getEnvironment().acceptsProfiles(Profiles.of((String[]) value))) {
return true;
}
}
return false;
}
return true;
}
}
我们定义一个 DataSource:
public class DataSource {
private String url;
private String username;
private String password;
@Override
public String toString() {
return “DataSource{” +
“url='” + url + ‘’’ +
“, username='” + username + ‘’’ +
“, password='” + password + ‘’’ +
‘}’;
}
public String getUrl() {
return url;
}
public void setUrl(String url) {
this.url = url;
}
public String getUsername() {
return username;
}
public void setUsername(String username) {
this.username = username;
}
public String getPassword() {
return password;
}
public void setPassword(String password) {
this.password = password;
}
}
然后,在配置 Bean 时,通过 @Profile 注解指定不同的环境:
@Bean(“ds”)
@Profile(“dev”)
DataSource devDataSource() {
DataSource dataSource = new DataSource();
dataSource.setUrl(“jdbc:mysql://127.0.0.1:3306/dev”);
dataSource.setUsername(“root”);
dataSource.setPassword(“123”);
return dataSource;
}
@Bean(“ds”)
@Profile(“prod”)
DataSource prodDataSource() {
DataSource dataSource = new DataSource();
dataSource.setUrl(“jdbc:mysql://192.158.222.33:3306/dev”);
dataSource.setUsername(“jkldasjfkl”);
dataSource.setPassword(“jfsdjflkajkld”);
return dataSource;
}
最后,在加载配置类,注意,需要先设置当前环境,然后再去加载配置类:
public class JavaMain {
public static void main(String[] args) {
AnnotationConfigApplicationContext ctx = new AnnotationConfigApplicationContext();
ctx.getEnvironment().setActiveProfiles(“dev”);
ctx.register(JavaConfig.class);
ctx.refresh();
DataSource ds = (DataSource) ctx.getBean(“ds”);
System.out.println(ds);
}
}
这个是在 Java 代码中配置的。环境的切换,也可以在 XML 文件中配置,如下配置在 XML 文件中,必须放在其他节点后面。
启动类中设置当前环境并加载配置:
public class Main {
public static void main(String[] args) {
ClassPathXmlApplicationContext ctx = new ClassPathXmlApplicationContext();
ctx.getEnvironment().setActiveProfiles(“prod”);
ctx.setConfigLocation(“applicationContext.xml”);
ctx.refresh();
DataSource dataSource = (DataSource) ctx.getBean(“dataSource”);
System.out.println(dataSource);
}
}
3.8.1 Bean 的作用域
在 XML 配置中注册的 Bean,或者用 Java 配置注册的 Bean,如果我多次获取,获取到的对象是否是同一个?
public class Main {
public static void main(String[] args) {
ClassPathXmlApplicationContext ctx = new ClassPathXmlApplicationContext(“applicationContext.xml”);
User user = ctx.getBean(“user”, User.class);
User user2 = ctx.getBean(“user”, User.class);
System.out.println(user==user2);
}
}
如上,从 Spring 容器中多次获取同一个 Bean,默认情况下,获取到的实际上是同一个实例。当然我们可以自己手动配置。
通过在 XML 节点中,设置 scope 属性,我们可以调整默认的实例个数。scope 的值为 singleton(默认),表示这个 Bean 在 Spring 容器中,是以单例的形式存在,如果 scope 的值为 prototype,表示这个 Bean 在 Spring 容器中不是单例,多次获取将拿到多个不同的实例。
除了 singleton 和 prototype 之外,还有两个取值,request 和 session。这两个取值在 web 环境下有效。这是在 XML 中的配置,我们也可以在 Java 中配置。
@Configuration
public class JavaConfig {
@Bean
@Scope(“prototype”)
SayHello sayHello() {
return new SayHello();
}
}
在 Java 代码中,我们可以通过 @Scope 注解指定 Bean 的作用域。
当然,在自动扫描配置中,也可以指定 Bean 的作用域。
@Repository
@Scope(“prototype”)
public class UserDao {
public String hello() {
return “userdao”;
}
}
3.8.2 id 和 name 的区别
在 XML 配置中,我们可以看到,即可以通过 id 给 Bean 指定一个唯一标识符,也可以通过 name 来指定,大部分情况下这两个作用是一样的,有一个小小区别:
name 支持取多个。多个 name 之间,用 , 隔开:
此时,通过 user、user1、user2、user3 都可以获取到当前对象:
public class Main {
public static void main(String[] args) {
ClassPathXmlApplicationContext ctx = new ClassPathXmlApplicationContext(“applicationContext.xml”);
User user = ctx.getBean(“user”, User.class);
User user2 = ctx.getBean(“user2”, User.class);
System.out.println(user);
System.out.println(user2);
}
}
而 id 不支持有多个值。如果强行用 , 隔开,它还是一个值。例如如下配置:
这个配置表示 Bean 的名字为 user,user1,user2,user3,具体调用如下:
public class Main {
public static void main(String[] args) {
ClassPathXmlApplicationContext ctx = new ClassPathXmlApplicationContext(“applicationContext.xml”);
User user = ctx.getBean(“user,user1,user2,user3”, User.class);
User user2 = ctx.getBean(“user,user1,user2,user3”, User.class);
System.out.println(user);
System.out.println(user2);
}
}
3.8.3 混合配置
混合配置就是 Java 配置+XML 配置。混用的话,可以在 Java 配置中引入 XML 配置。
@Configuration
@ImportResource(“classpath:applicationContext.xml”)
public class JavaConfig {
}
在 Java 配置中,通过 @ImportResource 注解可以导入一个 XML 配置。
Aware 接口,从字面上理解就是感知捕获。单纯的一个 Bean 是没有知觉的。
在 3.6.4 节的场景中,之所以 UserDao 能够注入到 UserService ,有一个前提,就是它两个都是被 Spring 容器管理的。如果直接 new 一个 UserService,这是没用的,因为 UserService 没有被 Spring 容器管理,所以也不会给它里边注入 Bean。
在实际开发中,我们可能会遇到一些类,需要获取到容器的详细信息,那就可以通过 Aware 接口来实现。
Aware 是一个空接口,有很多实现类:
这些实现的接口,有一些公共特性:
-
都是以 Aware 结尾
-
都继承自 Aware
-
接口内均定义了一个 set 方法
每一个子接口均提供了一个 set 方法,方法的参数就是当前 Bean 需要感知的内容,因此我们需要在 Bean 中声明相关的成员变量来接受这个参数。接收到这个参数后,就可以通过这个参数获取到容器的详细信息了。
@Component
public class SayHello implements ApplicationContextAware {
private ApplicationContext applicationContext;
public String sayHello(String name) {
//判断容器中是否存在某个 Bean
boolean userDao = applicationContext.containsBean(“userDao333”);
System.out.println(userDao);
return "hello " + name;
}
@Override
public void setApplicationContext(ApplicationContext applicationContext) throws BeansException {
this.applicationContext = applicationContext;
}
}
Aop(Aspect Oriented Programming),面向切面编程,这是对面向对象思想的一种补充。
面向切面编程,就是在程序运行时,不改变程序源码的情况下,动态的增强方法的功能,常见的使用场景非常多:
-
日志
-
事务
-
数据库操作
-
…
这些操作中,无一例外,都有很多模板化的代码,而解决模板化代码,消除臃肿就是 Aop 的强项。
在 Aop 中,有几个常见的概念:
| 概念 | 说明 |
| :-- | :-- |
| 切点 | 要添加代码的地方,称作切点 |
| 通知(增强) | 通知就是向切点动态添加的代码 |
| 切面 | 切点+通知 |
| 连接点 | 切点的定义 |
5.1.1 Aop 的实现
在 Aop 实际上集基于 Java 动态代理来实现的。
Java 中的动态代理有两种实现方式:
-
cglib
-
jdk
基于 JDK 的动态代理。
1.定义一个计算器接口:
public interface MyCalculator {
int add(int a, int b);
}
2.定义计算机接口的实现:
public class MyCalculatorImpl implements MyCalculator {
public int add(int a, int b) {
return a+b;
}
}
3.定义代理类
public class CalculatorProxy {
public static Object getInstance(final MyCalculatorImpl myCalculator) {
return Proxy.newProxyInstance(CalculatorProxy.class.getClassLoader(), myCalculator.getClass().getInterfaces(), new InvocationHandler() {
/**
-
@param proxy 代理对象
-
@param method 代理的方法
-
@param args 方法的参数
-
@return
-
@throws Throwable
*/
public Object invoke(Object proxy, Method method, Object[] args) throws Throwable {
System.out.println(method.getName()+“方法开始执行啦…”);
Object invoke = method.invoke(myCalculator, args);
System.out.println(method.getName()+“方法执行结束啦…”);
return invoke;
}
});
}
}
Proxy.newProxyInstance 方法接收三个参数,第一个是一个 classloader,第二个是代理多项实现的接口,第三个是代理对象方法的处理器,所有要额外添加的行为都在 invoke 方法中实现。
Spring 中的 Aop 的通知类型有 5 种:
-
前置通知
-
后置通知
-
异常通知
-
返回通知
-
环绕通知
具体实现,这里的案例和 5.2 中的一样,依然是给计算器的方法增强功能。
首先,在项目中,引入 Spring 依赖(这次需要引入 Aop 相关的依赖):
org.springframework
spring-context
5.1.9.RELEASE
org.aspectj
aspectjweaver
1.9.5
org.aspectj
aspectjrt
1.9.5
接下来,定义切点,这里介绍两种切点的定义方式:
-
使用自定义注解
-
使用规则
其中,使用自定义注解标记切点,是侵入式的,所以这种方式在实际开发中不推荐,仅作为了解,另一种使用规则来定义切点的方式,无侵入,一般推荐使用这种方式。
自定义注解
首先自定义一个注解:
@Target(ElementType.METHOD)
@Retention(RetentionPolicy.RUNTIME)
public @interface Action {
}
然后在需要拦截的方法上,添加该注解,在 add 方法上添加了 @Action 注解,表示该方法将会被 Aop 拦截,而其他未添加该注解的方法则不受影响。
@Component
public class MyCalculatorImpl {
@Action
public int add(int a, int b) {
return a + b;
}
public void min(int a, int b) {
System.out.println(a + “-” + b + “=” + (a - b));
}
}
接下来,定义增强(通知、Advice):
@Component
@Aspect//表示这是一个切面
public class LogAspect {
/**
-
@param joinPoint 包含了目标方法的关键信息
-
@Before 注解表示这是一个前置通知,即在目标方法执行之前执行,注解中,需要填入切点
*/
@Before(value = “@annotation(Action)”)
public void before(JoinPoint joinPoint) {
Signature signature = joinPoint.getSignature();
String name = signature.getName();
System.out.println(name + “方法开始执行了…”);
}
/**
-
后置通知
-
@param joinPoint 包含了目标方法的所有关键信息
-
@After 表示这是一个后置通知,即在目标方法执行之后执行
*/
@After(“@annotation(Action)”)
public void after(JoinPoint joinPoint) {
Signature signature = joinPoint.getSignature();
String name = signature.getName();
System.out.println(name + “方法执行结束了…”);
}
/**
-
@param joinPoint
-
@@AfterReturning 表示这是一个返回通知,即有目标方法有返回值的时候才会触发,该注解中的 returning 属性表示目标方法返回值的变量名,这个需要和参数一一对应吗,注意:目标方法的返回值类型要和这里方法返回值参数的类型一致,否则拦截不到,如果想拦截所有(包括返回值为 void),则方法返回值参数可以为 Object
*/
@AfterReturning(value = “@annotation(Action)”,returning = “r”)
public void returing(JoinPoint joinPoint,Integer r) {
Signature signature = joinPoint.getSignature();
String name = signature.getName();
System.out.println(name + “方法返回:”+r);
}
/**
-
异常通知
-
@param joinPoint
-
@param e 目标方法所抛出的异常,注意,这个参数必须是目标方法所抛出的异常或者所抛出的异常的父类,只有这样,才会捕获。如果想拦截所有,参数类型声明为 Exception
*/
@AfterThrowing(value = “@annotation(Action)”,throwing = “e”)
public void afterThrowing(JoinPoint joinPoint,Exception e) {
Signature signature = joinPoint.getSignature();
String name = signature.getName();
System.out.println(name + “方法抛异常了:”+e.getMessage());
}
/**
-
环绕通知
-
环绕通知是集大成者,可以用环绕通知实现上面的四个通知,这个方法的核心有点类似于在这里通过反射执行方法
-
@param pjp
-
@return 注意这里的返回值类型最好是 Object ,和拦截到的方法相匹配
*/
@Around(“@annotation(Action)”)
public Object around(ProceedingJoinPoint pjp) {
Object proceed = null;
try {
//这个相当于 method.invoke 方法,我们可以在这个方法的前后分别添加日志,就相当于是前置/后置通知
proceed = pjp.proceed();
} catch (Throwable throwable) {
throwable.printStackTrace();
}
return proceed;
}
}
通知定义完成后,接下来在配置类中,开启包扫描和自动代理:
@Configuration
@ComponentScan
@EnableAspectJAutoProxy//开启自动代理
public class JavaConfig {
}
然后,在 Main 方法中,开启调用:
public class Main {
public static void main(String[] args) {
AnnotationConfigApplicationContext ctx = new AnnotationConfigApplicationContext(JavaConfig.class);
MyCalculatorImpl myCalculator = ctx.getBean(MyCalculatorImpl.class);
myCalculator.add(3, 4);
myCalculator.min(3, 4);
}
}
再来回顾 LogAspect 切面,我们发现,切点的定义不够灵活,之前的切点是直接写在注解里边的,这样,如果要修改切点,每个方法上都要修改,因此,我们可以将切点统一定义,然后统一调用。
@Component
@Aspect//表示这是一个切面
public class LogAspect {
/**
- 可以统一定义切点
*/
@Pointcut(“@annotation(Action)”)
public void pointcut() {
}
/**
-
@param joinPoint 包含了目标方法的关键信息
-
@Before 注解表示这是一个前置通知,即在目标方法执行之前执行,注解中,需要填入切点
*/
@Before(value = “pointcut()”)
public void before(JoinPoint joinPoint) {
Signature signature = joinPoint.getSignature();
String name = signature.getName();
System.out.println(name + “方法开始执行了…”);
}
/**
-
后置通知
-
@param joinPoint 包含了目标方法的所有关键信息
-
@After 表示这是一个后置通知,即在目标方法执行之后执行
*/
@After(“pointcut()”)
public void after(JoinPoint joinPoint) {
Signature signature = joinPoint.getSignature();
String name = signature.getName();
System.out.println(name + “方法执行结束了…”);
}
/**
-
@param joinPoint
-
@@AfterReturning 表示这是一个返回通知,即有目标方法有返回值的时候才会触发,该注解中的 returning 属性表示目标方法返回值的变量名,这个需要和参数一一对应吗,注意:目标方法的返回值类型要和这里方法返回值参数的类型一致,否则拦截不到,如果想拦截所有(包括返回值为 void),则方法返回值参数可以为 Object
*/
@AfterReturning(value = “pointcut()”,returning = “r”)
public void returing(JoinPoint joinPoint,Integer r) {
Signature signature = joinPoint.getSignature();
String name = signature.getName();
System.out.println(name + “方法返回:”+r);
}
/**
-
异常通知
-
@param joinPoint
-
@param e 目标方法所抛出的异常,注意,这个参数必须是目标方法所抛出的异常或者所抛出的异常的父类,只有这样,才会捕获。如果想拦截所有,参数类型声明为 Exception
*/
@AfterThrowing(value = “pointcut()”,throwing = “e”)
public void afterThrowing(JoinPoint joinPoint,Exception e) {
Signature signature = joinPoint.getSignature();
String name = signature.getName();
System.out.println(name + “方法抛异常了:”+e.getMessage());
}
/**
-
环绕通知
-
环绕通知是集大成者,可以用环绕通知实现上面的四个通知,这个方法的核心有点类似于在这里通过反射执行方法
-
@param pjp
-
@return 注意这里的返回值类型最好是 Object ,和拦截到的方法相匹配
*/
@Around(“pointcut()”)
public Object around(ProceedingJoinPoint pjp) {
Object proceed = null;
try {
//这个相当于 method.invoke 方法,我们可以在这个方法的前后分别添加日志,就相当于是前置/后置通知
proceed = pjp.proceed();
} catch (Throwable throwable) {
throwable.printStackTrace();
}
return proceed;
}
}
但是,大家也注意到,使用注解是侵入式的,我们还可以继续优化,改为非侵入式的。重新定义切点,新切点的定义就不在需要 @Action 注解了,要拦截的目标方法上也不用添加 @Action 注解。下面这种方式是更为通用的拦截方式:
@Component
@Aspect//表示这是一个切面
public class LogAspect {
/**
- 可以统一定义切点
*/
@Pointcut(“@annotation(Action)”)
public void pointcut2() {
}
/**
-
可以统一定义切点
-
第一个 * 表示要拦截的目标方法返回值任意(也可以明确指定返回值类型
-
第二个 * 表示包中的任意类(也可以明确指定类
-
第三个 * 表示类中的任意方法
-
最后面的两个点表示方法参数任意,个数任意,类型任意
*/
@Pointcut(“execution(* org.javaboy.aop.commons..(…))”)
public void pointcut() {
}
/**
-
@param joinPoint 包含了目标方法的关键信息
-
@Before 注解表示这是一个前置通知,即在目标方法执行之前执行,注解中,需要填入切点
*/
@Before(value = “pointcut()”)
public void before(JoinPoint joinPoint) {
Signature signature = joinPoint.getSignature();
String name = signature.getName();
System.out.println(name + “方法开始执行了…”);
}
/**
-
后置通知
-
@param joinPoint 包含了目标方法的所有关键信息
-
@After 表示这是一个后置通知,即在目标方法执行之后执行
*/
@After(“pointcut()”)
public void after(JoinPoint joinPoint) {
Signature signature = joinPoint.getSignature();
String name = signature.getName();
System.out.println(name + “方法执行结束了…”);
}
/**
-
@param joinPoint
-
@@AfterReturning 表示这是一个返回通知,即有目标方法有返回值的时候才会触发,该注解中的 returning 属性表示目标方法返回值的变量名,这个需要和参数一一对应吗,注意:目标方法的返回值类型要和这里方法返回值参数的类型一致,否则拦截不到,如果想拦截所有(包括返回值为 void),则方法返回值参数可以为 Object
*/
@AfterReturning(value = “pointcut()”,returning = “r”)
public void returing(JoinPoint joinPoint,Integer r) {
Signature signature = joinPoint.getSignature();
String name = signature.getName();
System.out.println(name + “方法返回:”+r);
}
/**
-
异常通知
-
@param joinPoint
-
@param e 目标方法所抛出的异常,注意,这个参数必须是目标方法所抛出的异常或者所抛出的异常的父类,只有这样,才会捕获。如果想拦截所有,参数类型声明为 Exception
*/
@AfterThrowing(value = “pointcut()”,throwing = “e”)
public void afterThrowing(JoinPoint joinPoint,Exception e) {
Signature signature = joinPoint.getSignature();
String name = signature.getName();
System.out.println(name + “方法抛异常了:”+e.getMessage());
}
/**
-
环绕通知
-
环绕通知是集大成者,可以用环绕通知实现上面的四个通知,这个方法的核心有点类似于在这里通过反射执行方法
-
@param pjp
-
@return 注意这里的返回值类型最好是 Object ,和拦截到的方法相匹配
*/
@Around(“pointcut()”)
public Object around(ProceedingJoinPoint pjp) {
Object proceed = null;
try {
//这个相当于 method.invoke 方法,我们可以在这个方法的前后分别添加日志,就相当于是前置/后置通知
proceed = pjp.proceed();
} catch (Throwable throwable) {
throwable.printStackTrace();
}
return proceed;
}
}
org.springframework
spring-context
5.1.9.RELEASE
org.aspectj
aspectjweaver
1.9.5
org.aspectj
aspectjrt
1.9.5
接下来,定义通知/增强,但是单纯定义自己的行为即可,不再需要注解:
public class LogAspect {
public void before(JoinPoint joinPoint) {
Signature signature = joinPoint.getSignature();
String name = signature.getName();
System.out.println(name + “方法开始执行了…”);
}
public void after(JoinPoint joinPoint) {
Signature signature = joinPoint.getSignature();
String name = signature.getName();
System.out.println(name + “方法执行结束了…”);
}
public void returing(JoinPoint joinPoint,Integer r) {
Signature signature = joinPoint.getSignature();
String name = signature.getName();
System.out.println(name + “方法返回:”+r);
}
public void afterThrowing(JoinPoint joinPoint,Exception e) {
Signature signature = joinPoint.getSignature();
String name = signature.getName();
System.out.println(name + “方法抛异常了:”+e.getMessage());
}
public Object around(ProceedingJoinPoint pjp) {
Object proceed = null;
try {
//这个相当于 method.invoke 方法,我们可以在这个方法的前后分别添加日志,就相当于是前置/后置通知
proceed = pjp.proceed();
} catch (Throwable throwable) {
throwable.printStackTrace();
}
return proceed;
}
}
接下来在 spring 中配置 Aop:
aop:config
<aop:pointcut id=“pc1” expression=“execution(* org.javaboy.aop.commons..(…))”/>
<aop:aspect ref=“logAspect”>
<aop:before method=“before” pointcut-ref=“pc1”/>
<aop:after method=“after” pointcut-ref=“pc1”/>
<aop:after-returning method=“returing” pointcut-ref=“pc1” returning=“r”/>
<aop:after-throwing method=“afterThrowing” pointcut-ref=“pc1” throwing=“e”/>
<aop:around method=“around” pointcut-ref=“pc1”/>
</aop:aspect>
</aop:config>
最后,在 Main 方法中加载配置文件:
public class Main {
public static void main(String[] args) {
ClassPathXmlApplicationContext ctx = new ClassPathXmlApplicationContext(“applicationContext.xml”);
MyCalculatorImpl myCalculator = ctx.getBean(MyCalculatorImpl.class);
myCalculator.add(3, 4);
myCalculator.min(5, 6);
}
}
JdbcTemplate 是 Spring 利用 Aop 思想封装的 JDBC 操作工具。
6.1 准备
创建一个新项目,添加如下依赖:
org.springframework
spring-jdbc
5.1.9.RELEASE
org.springframework
spring-context
5.1.9.RELEASE
mysql
mysql-connector-java
8.0.17
准备数据库:
CREATE DATABASE /!32312 IF NOT EXISTS/test01 /*!40100 DEFAULT CHARACTER SET utf8mb4 COLLATE utf8mb4_general_ci / /!80016 DEFAULT ENCRYPTION=‘N’ */;
USE test01;
/*Table structure for table user */
DROP TABLE IF EXISTS user;
CREATE TABLE user (
id int(11) NOT NULL AUTO_INCREMENT,
username varchar(255) COLLATE utf8mb4_general_ci DEFAULT NULL,
address varchar(255) COLLATE utf8mb4_general_ci DEFAULT NULL,
PRIMARY KEY (id)
) ENGINE=InnoDB DEFAULT CHARSET=utf8mb4 COLLATE=utf8mb4_general_ci;
准备一个实体类:
public class User {
private Integer id;
private String username;
private String address;
@Override
public String toString() {
return “User{” +
“id=” + id +
“, username='” + username + ‘’’ +
“, address='” + address + ‘’’ +
‘}’;
}
public Integer getId() {
return id;
}
public void setId(Integer id) {
this.id = id;
}
public String getUsername() {
return username;
}
public void setUsername(String username) {
this.username = username;
}
public String getAddress() {
return address;
}
public void setAddress(String address) {
this.address = address;
}
}
6.2 Java 配置
提供一个配置类,在配置类中配置 JdbcTemplate:
@Configuration
public class JdbcConfig {
@Bean
DataSource dataSource() {
DriverManagerDataSource dataSource = new DriverManagerDataSource();
dataSource.setDriverClassName(“com.mysql.cj.jdbc.Driver”);
dataSource.setUsername(“root”);
dataSource.setPassword(“123”);
dataSource.setUrl(“jdbc:mysql:///test01”);
return dataSource;
}
@Bean
JdbcTemplate jdbcTemplate() {
return new JdbcTemplate(dataSource());
}
}
这里,提供两个 Bean,一个是 DataSource 的 Bean,另一个是 JdbcTemplate 的 Bean,JdbcTemplate 的配置非常容易,只需要 new 一个 Bean 出来,然后配置一下 DataSource 就i可以。
public class Main {
private JdbcTemplate jdbcTemplate;
@Before
public void before() {
AnnotationConfigApplicationContext ctx = new AnnotationConfigApplicationContext(JdbcConfig.class);
jdbcTemplate = ctx.getBean(JdbcTemplate.class);
}
@Test
public void insert() {
jdbcTemplate.update(“insert into user (username,address) values (?,?);”, “javaboy”, “www.javaboy.org”);
}
@Test
public void update() {
jdbcTemplate.update(“update user set username=? where id=?”, “javaboy123”, 1);
}
@Test
public void delete() {
jdbcTemplate.update(“delete from user where id=?”, 2);
}
@Test
public void select() {
User user = jdbcTemplate.queryForObject(“select * from user where id=?”, new BeanPropertyRowMapper(User.class), 1);
System.out.println(user);
}
}
在查询时,如果使用了 BeanPropertyRowMapper,要求查出来的字段必须和 Bean 的属性名一一对应。如果不一样,则不要使用 BeanPropertyRowMapper,此时需要自定义 RowMapper 或者给查询的字段取别名。
- 给查询出来的列取别名:
@Test
public void select2() {
User user = jdbcTemplate.queryForObject(“select id,username as name,address from user where id=?”, new BeanPropertyRowMapper(User.class), 1);
System.out.println(user);
}
2.自定义 RowMapper
@Test
public void select3() {
User user = jdbcTemplate.queryForObject(“select * from user where id=?”, new RowMapper() {
public User mapRow(ResultSet resultSet, int i) throws SQLException {
int id = resultSet.getInt(“id”);
String username = resultSet.getString(“username”);
String address = resultSet.getString(“address”);
User u = new User();
u.setId(id);
u.setName(username);
u.setAddress(address);
return u;
}
}, 1);
System.out.println(user);
}
查询多条记录,方式如下:
@Test
public void select4() {
List list = jdbcTemplate.query(“select * from user”, new BeanPropertyRowMapper<>(User.class));
System.out.println(list);
}
6.3 XML 配置
以上配置,也可以通过 XML 文件来实现。通过 XML 文件实现只是提供 JdbcTemplate 实例,剩下的代码还是 Java 代码,就是 JdbcConfig 被 XML 文件代替而已。
配置完成后,加载该配置文件,并启动:
public class Main {
private JdbcTemplate jdbcTemplate;
@Before
public void before() {
ClassPathXmlApplicationContext ctx = new ClassPathXmlApplicationContext(“applicationContext.xml”);
jdbcTemplate = ctx.getBean(JdbcTemplate.class);
}
@Test
public void insert() {
jdbcTemplate.update(“insert into user (username,address) values (?,?);”, “javaboy”, “www.javaboy.org”);
}
@Test
public void update() {
jdbcTemplate.update(“update user set username=? where id=?”, “javaboy123”, 1);
}
@Test
public void delete() {
jdbcTemplate.update(“delete from user where id=?”, 2);
}
@Test
public void select() {
User user = jdbcTemplate.queryForObject(“select * from user where id=?”, new BeanPropertyRowMapper(User.class), 1);
System.out.println(user);
}
@Test
public void select4() {
List list = jdbcTemplate.query(“select * from user”, new BeanPropertyRowMapper<>(User.class));
System.out.println(list);
}
@Test
public void select2() {
User user = jdbcTemplate.queryForObject(“select id,username as name,address from user where id=?”, new BeanPropertyRowMapper(User.class), 1);
System.out.println(user);
}
@Test
public void select3() {
User user = jdbcTemplate.queryForObject(“select * from user where id=?”, new RowMapper() {
public User mapRow(ResultSet resultSet, int i) throws SQLException {
int id = resultSet.getInt(“id”);
String username = resultSet.getString(“username”);
String address = resultSet.getString(“address”);
User u = new User();
u.setId(id);
u.setName(username);
u.setAddress(address);
return u;
}
}, 1);
System.out.println(user);
}
}
Spring 中的事务主要是利用 Aop 思想,简化事务的配置,可以通过 Java 配置也可以通过 XML 配置。
准备工作:
我们通过一个转账操作来看下 Spring 中的事务配置。
首先准备 SQL:
CREATE DATABASE /!32312 IF NOT EXISTS/test01 /*!40100 DEFAULT CHARACTER SET utf8mb4 COLLATE utf8mb4_general_ci / /!80016 DEFAULT ENCRYPTION=‘N’ */;
USE test01;
/*Table structure for table account */
DROP TABLE IF EXISTS account;
CREATE TABLE account (
id int(11) NOT NULL AUTO_INCREMENT,
username varchar(255) COLLATE utf8mb4_general_ci DEFAULT NULL,
money int(11) DEFAULT NULL,
PRIMARY KEY (id)
) ENGINE=InnoDB AUTO_INCREMENT=3 DEFAULT CHARSET=utf8mb4 COLLATE=utf8mb4_general_ci;
/*Data for the table account */
insert into account(id,username,money) values (1,‘zhangsan’,1000),(2,‘lisi’,1000);
然后配置 JdbcTemplate ,JdbcTemplate 的配置和第 6 小节一致。
然后,提供转账操作的方法:
写在最后
为了这次面试,也收集了很多的面试题!
以下是部分面试题截图

网上学习资料一大堆,但如果学到的知识不成体系,遇到问题时只是浅尝辄止,不再深入研究,那么很难做到真正的技术提升。
需要这份系统化的资料的朋友,可以添加V获取:vip1024b (备注Java)

一个人可以走的很快,但一群人才能走的更远!不论你是正从事IT行业的老鸟或是对IT行业感兴趣的新人,都欢迎加入我们的的圈子(技术交流、学习资源、职场吐槽、大厂内推、面试辅导),让我们一起学习成长!
public void update() {
jdbcTemplate.update(“update user set username=? where id=?”, “javaboy123”, 1);
}
@Test
public void delete() {
jdbcTemplate.update(“delete from user where id=?”, 2);
}
@Test
public void select() {
User user = jdbcTemplate.queryForObject(“select * from user where id=?”, new BeanPropertyRowMapper(User.class), 1);
System.out.println(user);
}
@Test
public void select4() {
List list = jdbcTemplate.query(“select * from user”, new BeanPropertyRowMapper<>(User.class));
System.out.println(list);
}
@Test
public void select2() {
User user = jdbcTemplate.queryForObject(“select id,username as name,address from user where id=?”, new BeanPropertyRowMapper(User.class), 1);
System.out.println(user);
}
@Test
public void select3() {
User user = jdbcTemplate.queryForObject(“select * from user where id=?”, new RowMapper() {
public User mapRow(ResultSet resultSet, int i) throws SQLException {
int id = resultSet.getInt(“id”);
String username = resultSet.getString(“username”);
String address = resultSet.getString(“address”);
User u = new User();
u.setId(id);
u.setName(username);
u.setAddress(address);
return u;
}
}, 1);
System.out.println(user);
}
}
Spring 中的事务主要是利用 Aop 思想,简化事务的配置,可以通过 Java 配置也可以通过 XML 配置。
准备工作:
我们通过一个转账操作来看下 Spring 中的事务配置。
首先准备 SQL:
CREATE DATABASE /!32312 IF NOT EXISTS/test01 /*!40100 DEFAULT CHARACTER SET utf8mb4 COLLATE utf8mb4_general_ci / /!80016 DEFAULT ENCRYPTION=‘N’ */;
USE test01;
/*Table structure for table account */
DROP TABLE IF EXISTS account;
CREATE TABLE account (
id int(11) NOT NULL AUTO_INCREMENT,
username varchar(255) COLLATE utf8mb4_general_ci DEFAULT NULL,
money int(11) DEFAULT NULL,
PRIMARY KEY (id)
) ENGINE=InnoDB AUTO_INCREMENT=3 DEFAULT CHARSET=utf8mb4 COLLATE=utf8mb4_general_ci;
/*Data for the table account */
insert into account(id,username,money) values (1,‘zhangsan’,1000),(2,‘lisi’,1000);
然后配置 JdbcTemplate ,JdbcTemplate 的配置和第 6 小节一致。
然后,提供转账操作的方法:
写在最后
为了这次面试,也收集了很多的面试题!
以下是部分面试题截图
[外链图片转存中…(img-1uuQ2eap-1713571946913)]
网上学习资料一大堆,但如果学到的知识不成体系,遇到问题时只是浅尝辄止,不再深入研究,那么很难做到真正的技术提升。
需要这份系统化的资料的朋友,可以添加V获取:vip1024b (备注Java)
[外链图片转存中…(img-M0GzCNm8-1713571946914)]
一个人可以走的很快,但一群人才能走的更远!不论你是正从事IT行业的老鸟或是对IT行业感兴趣的新人,都欢迎加入我们的的圈子(技术交流、学习资源、职场吐槽、大厂内推、面试辅导),让我们一起学习成长!


 8815
8815


 被折叠的 条评论
为什么被折叠?
被折叠的 条评论
为什么被折叠?
 到【灌水乐园】发言


