


…
Activity的启动过程很复杂,最终是有ActivityThread中的performLaunchActivity方法来完成的,看上图源码可以看出performLaunchActivity是通过类加载器获得Activity的实例的。然后调动Activity的attach方法为其关联运行过程中所依赖的一系列上下文环境变量。
在Activity的attach方法里,
-
系统会创建Activity所属的Window对象并为其设置回调接口,这里Window对象实际上是PhoneWindow。
-
给Activity初始化各种参数,如mUiThread等
-
给PhoneWindow设置WindowManager,实际上设置的是WindowManagerImpl:
下图给出一部分源码,有兴趣的同学还是直接看源码。
…
mWindow = new PhoneWindow(this, window, activityConfigCallback);
mWindow.setWindowControllerCallback(this);
mWindow.setCallback(this);
mWindow.setOnWindowDismissedCallback(this);
mWindow.getLayoutInflater().setPrivateFactory(this);
if (info.softInputMode != WindowManager.LayoutParams.SOFT_INPUT_STATE_UNSPECIFIED) {
mWindow.setSoftInputMode(info.softInputMode);
}
if (info.uiOptions != 0) {
mWindow.setUiOptions(info.uiOptions);
}
mUiThread = Thread.currentThread();
mMainThread = aThread;
mInstrumentation = instr;
mToken = token;
mIdent = ident;
mApplication = application;
mIntent = intent;
mReferrer = referrer;
mComponent = intent.getComponent();
mActivityInfo = info;
mTitle = title;
mParent = parent;
mEmbeddedID = id;
mLastNonConfigurationInstances = lastNonConfigurationInstances;
if (voiceInteractor != null) {
if (lastNonConfigurationInstances != null) {
mVoiceInteractor = lastNonConfigurationInstances.voiceInteractor;
} else {
mVoiceInteractor = new VoiceInteractor(voiceInteractor, this, this,
Looper.myLooper());
}
}
mWindow.setWindowManager(
(WindowManager)context.getSystemService(Context.WINDOW_SERVICE),
mToken, mComponent.flattenToString(),
(info.flags & ActivityInfo.FLAG_HARDWARE_ACCELERATED) != 0);
if (mParent != null) {
mWindow.setContainer(mParent.getWindow());
}
mWindowManager = mWindow.getWindowManager();
mCurrentConfig = config;\
mWindow.setColorMode(info.colorMode);
…
由于Activity实现了Window的Callback接口,因此当Window接收到外界的状态改变时就会回调Activity的方法。Callback接口中的方法很多,但是有几个却是我们都非常熟悉的,比如onAttachedToWindow、onDetachedFromWindow、dispatchTouchEvent,等等。
public interface Callback {
public boolean dispatchKeyEvent(KeyEvent event);
public boolean dispatchKeyShortcutEvent(KeyEvent event);
public boolean dispatchTouchEvent(MotionEvent event);
public boolean dispatchTrackballEvent(MotionEvent event);
public boolean dispatchGenericMotionEvent(MotionEvent event);
…
到这里Window已经创建完成了,但是像之前文章说过的一样,只有Window其实只是一个空的架子,还需要View才能真正是出现视图。Activity的视图是怎么加到Window中的呢?这里就得说道一个我们很熟悉的方法setContentView。
…
/**
-
Set the activity content from a layout resource. The resource will be
-
inflated, adding all top-level views to the activity.
-
@param layoutResID Resource ID to be inflated.
-
@see #setContentView(android.view.View)
-
@see #setContentView(android.view.View, android.view.ViewGroup.LayoutParams)
*/
public void setContentView(@LayoutRes int layoutResID) {
getWindow().setContentView(layoutResID);
initWindowDecorActionBar();
}
…
从Activity的setContentView方法我们可以清楚的看到,getWindow()返回的实际上是上面创建的PhoneWindow,也就是它会调用PhoneWindow的setContentView,在该方法中会创建DecorView并完成布局视图的填充。下面我们看下PhoneWindow的setContentView的源码。
@Override
public void setContentView(View view, ViewGroup.LayoutParams params) {
// Note: FEATURE_CONTENT_TRANSITIONS may be set in the process of installing the window
// decor, when theme attributes and the like are crystalized. Do not check the feature
// before this happens.
if (mContentParent == null) {
installDecor();
} else if (!hasFeature(FEATURE_CONTENT_TRANSITIONS)) {
mContentParent.removeAllViews();
}
if (hasFeature(FEATURE_CONTENT_TRANSITIONS)) {
view.setLayoutParams(params);
final Scene newScene = new Scene(mContentParent, view);
transitionTo(newScene);
} else {
mContentParent.addView(view, params);
}
mContentParent.requestApplyInsets();
final Callback cb = getCallback();
if (cb != null && !isDestroyed()) {
cb.onContentChanged();
}
mContentParentExplicitlySet = true;
}
通过上面的源码我们能清楚的看到大概分为以几个步骤:
-
如果没有DecorView,则需要创建,否则移除其中的mContentParent中所有的View。
-
将View添加到DecorView的mContentParent中。
-
回调Activity的onContentChanged方法通知Activity视图已经发生改变。
经过上面几个步骤,DecorView就创建完并初始化成功了。Activity的布局文件也已经成功添加到了DecorView的mContentParent中,但是这个时候DecorView还没有被WindowManager正式添加到Window中。这里需要正确理解Window的概念,Window更多表示的是一种抽象的功能集合,虽然说早在Activity的attach方法中Window就已经被创建了,但是这个时候由于DecorView并没有被WindowManager识别,所以这个时候的Window无法提供具体功能,因为它还无法接收外界的输入信息。在ActivityThread的handleResumeActivity方法中,首先会调用Activity的onResume方法,接着会调用Activity的makeVisible(),正是在makeVisible方法中,DecorView真正地完成了添加和显示这两个过程,到这里Activity的视图才能被用户看到。
void makeVisible() {
if (!mWindowAdded) {
ViewManager wm = getWindowManager();
wm.addView(mDecor, getWindow().getAttributes());
mWindowAdded = true;
}
mDecor.setVisibility(View.VISIBLE);
}
2. Dialog中的Window的创建过程
Dialog的Window的创建过程跟Activity的很相似,大体有以下几个步骤。
-1. 创建Window
Dialog的Window的创建同样是PhoneWindow,这个剩下的跟Activity还是很类似的。具体看下下面的源码。
Dialog(@NonNull Context context, @StyleRes int themeResId, boolean createContextThemeWrapper) {
if (createContextThemeWrapper) {
if (themeResId == ResourceId.ID_NULL) {
final TypedValue outValue = new TypedValue();
context.getTheme().resolveAttribute(R.attr.dialogTheme, outValue, true);
themeResId = outValue.resourceId;
}
mContext = new ContextThemeWrapper(context, themeResId);
} else {
mContext = context;
}
mWindowManager = (WindowManager) context.getSystemService(Context.WINDOW_SERVICE);
final Window w = new PhoneWindow(mContext);
mWindow = w;
w.setCallback(this);
w.setOnWindowDismissedCallback(this);
w.setOnWindowSwipeDismissedCallback(() -> {
if (mCancelable) {
cancel();
}
});
w.setWindowManager(mWindowManager, null, null);
w.setGravity(Gravity.CENTER);
mListenersHandler = new ListenersHandler(this);
}
-2. 初始化DecorView并将Dialog的界面添加到DecorView中
这个过程跟Activity也是类似的,也是通过Window去添加指定的布局。
/**
-
Set the screen content from a layout resource. The resource will be
-
inflated, adding all top-level views to the screen.
-
@param layoutResID Resource ID to be inflated.
*/
public void setContentView(@LayoutRes int layoutResID) {
mWindow.setContentView(layoutResID);
}
-3. 将DecorView添加到Window中并显示
Dialog的show方法中,会通过WindowManager将DecorView添加到Window中,源码如下
…
mDecor = mWindow.getDecorView();
…
mWindowManager.addView(mDecor, l);
mShowing = true;
…
其实从上面的三个步骤能看出,Dialog的Window创建过程跟Activity的很类似,几乎没有多少区别。当Dialog关闭时,会通过WindowManager来移除DecorView。
普通的Dialog有个不同之处,就是必须要使用Activity的Context,如果使用Application的Context会报错。这个地方是因为普通的Dialog需要token,而token一般是Activity才会有,这个时候如果一定要用Application的Context,需要Dialog是系统的Window才行,这就需要一开始设置Window的type,一般选择TYPE_SYSTEM_OVERLAY指定Window的类型为系统Window。
3 Toast的Window创建过程
Toast和Dialog不同,它的工作过程就稍显复杂。首先Toast也是基于Window来实现的,但是由于Toast具有定时取消这一功能,所以系统采用了Handler。在Toast的内部有两类IPC过程,第一类是Toast访问NotificationManagerService,第二类是Notification-ManagerService回调Toast里的TN接口。关于IPC的一些知识,可以移步Android中的IPC方式。为了便于描述,下面将NotificationManagerService简称为NMS。
Toast属于系统Window,它内部的视图由两种方式指定,一种是系统默认的样式,另一种是通过setView方法来指定一个自定义View,不管如何,它们都对应Toast的一个View类型的内部成员mNextView。Toast提供了show和cancel分别用于显示和隐藏Toast,它们的内部是一个IPC过程,下面我们看下show方法跟cancel方法。
/**
- Show the view for the specified duration.
*/
public void show() {
if (mNextView == null) {
throw new RuntimeException(“setView must have been called”);
}
INotificationManager service = getService();
String pkg = mContext.getOpPackageName();
TN tn = mTN;
tn.mNextView = mNextView;
try {
service.enqueueToast(pkg, tn, mDuration);
} catch (RemoteException e) {
// Empty
}
}
/**
-
Close the view if it’s showing, or don’t show it if it isn’t showing yet.
-
You do not normally have to call this. Normally view will disappear on its own
-
after the appropriate duration.
*/
public void cancel() {
mTN.cancel();
}
从上面的代码可以看到,显示和隐藏Toast都需要通过NMS来实现,由于NMS运行在系统的进程中,所以只能通过远程调用的方式来显示和隐藏Toast。需要注意的是TN这个类,它是一个Binder类,在Toast和NMS进行IPC的过程中,当NMS处理Toast的显示或隐藏请求时会跨进程回调TN中的方法,这个时候由于TN运行在Binder线程池中,所以需要通过Handler将其切换到当前线程中。这里的当前线程是指发送Toast请求所在的线程。注意,由于这里使用了Handler,所以这意味着Toast无法在没有Looper的线程中弹出,这是因为Handler需要使用Looper才能完成切换线程的功能.
从上面源码show方法我们可以看到,Toast的显示调用了NMS的enqueueToast方法。enqueueToast方法有三个参数,分别是:pkg当前应用包名、tn远程回调和mDuration显示时长。
enqueueToast首先将Toast请求封装为ToastRecord对象并将其添加到一个名为mToastQueue的队列中。mToastQueue其实是一个ArrayList。对于非系统应用来说,mToastQueue中最多能同时存在50个ToastRecord,这样做是为了防止DOS(DenialofService)。如果不这么做,试想一下,如果我们通过大量的循环去连续弹出Toast,这将会导致其他应用没有机会弹出Toast,那么对于其他应用的Toast请求,系统的行为就是拒绝服务,这就是拒绝服务攻击的含义,这种手段常用于网络攻击中。
// Limit the number of toasts that any given package except the android
// package can enqueue. Prevents DOS attacks and deals with leaks.
if (!isSystemToast) {
int count = 0;
final int N = mToastQueue.size();
for (int i=0; i<N; i++) {
final ToastRecord r = mToastQueue.get(i);
if (r.pkg.equals(pkg)) {
count++;
if (count >= MAX_PACKAGE_NOTIFICATIONS) {
Slog.e(TAG, "Package has already posted " + count
- " toasts. Not showing more. Package=" + pkg);
return;
}
}
}
}
// If it’s at index 0, it’s the current toast. It doesn’t matter if it’s
// new or just been updated. Call back and tell it to show itself.
// If the callback fails, this will remove it from the list, so don’t
// assume that it’s valid after this.
if (index == 0) {
showNextToastLocked();
}
正常情况下,一个应用不可能达到上限,当ToastRecord被添加到mToastQueue中后,NMS就会通过showNextToastLocked方法来显示当前的Toast。下面的代码很好理解,需要注意的是,Toast的显示是由ToastRecord的callback来完成的,这个callback实际上就是Toast中的TN对象的远程Binder,通过callback来访问TN中的方法是需要跨进程来完成的,最终被调用的TN中的方法会运行在发起Toast请求的应用的Binder线程池中。
@GuardedBy(“mToastQueue”)
void showNextToastLocked() {
ToastRecord record = mToastQueue.get(0);
while (record != null) {
if (DBG) Slog.d(TAG, “Show pkg=” + record.pkg + " callback=" + record.callback);
try {
record.callback.show(record.token);
scheduleTimeoutLocked(record);
return;
} catch (RemoteException e) {
Slog.w(TAG, "Object died trying to show notification " + record.callback
- " in package " + record.pkg);
// remove it from the list and let the process die
int index = mToastQueue.indexOf(record);
if (index >= 0) {
mToastQueue.remove(index);
}
keepProcessAliveIfNeededLocked(record.pid);
if (mToastQueue.size() > 0) {
record = mToastQueue.get(0);
} else {
record = null;
}
}
}
}
从上面的源码可以看到,Toast显示之后,通过scheduleTimeoutLocked来发送一个延时消息,时长当然是根据一开始设置的时间。具体看下代码:
@GuardedBy(“mToastQueue”)
private void scheduleTimeoutLocked(ToastRecord r)
{
mHandler.removeCallbacksAndMessages®;
Message m = Message.obtain(mHandler, MESSAGE_TIMEOUT, r);
long delay = r.duration == Toast.LENGTH_LONG ? LONG_DELAY : SHORT_DELAY;
mHandler.sendMessageDelayed(m, delay);
}
上面LONG_DELAY是3.5s,SHORT_DELAY是2s。延时过后,NMS会通过cancelToastLocked来隐藏Toast并从mToastQueue中移除,我们看下源码就能清楚的了解这个过程,下面是cancelToastLocked方法,可以看到移除Toast之后如果mToastQueue有Toast又调用了showNextToastLocked方法。
@GuardedBy(“mToastQueue”)
void cancelToastLocked(int index) {
ToastRecord record = mToastQueue.get(index);
try {
record.callback.hide();
自我介绍一下,小编13年上海交大毕业,曾经在小公司待过,也去过华为、OPPO等大厂,18年进入阿里一直到现在。
深知大多数初中级Android工程师,想要提升技能,往往是自己摸索成长或者是报班学习,但对于培训机构动则近万的学费,着实压力不小。自己不成体系的自学效果低效又漫长,而且极易碰到天花板技术停滞不前!
因此收集整理了一份《2024年Android移动开发全套学习资料》,初衷也很简单,就是希望能够帮助到想自学提升又不知道该从何学起的朋友,同时减轻大家的负担。
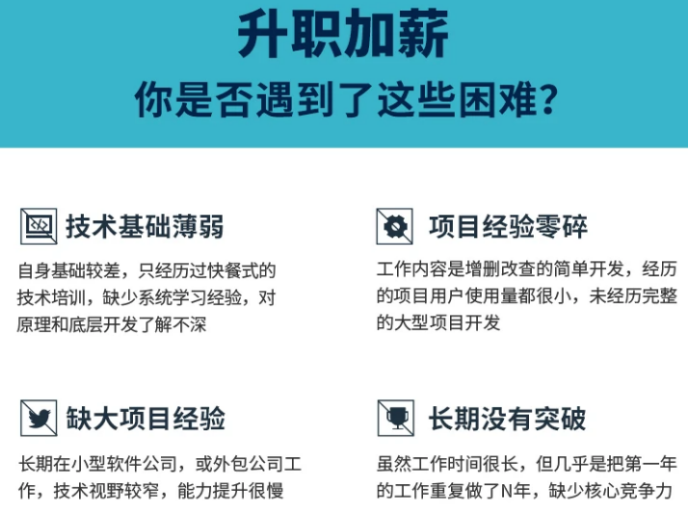

既有适合小白学习的零基础资料,也有适合3年以上经验的小伙伴深入学习提升的进阶课程,基本涵盖了95%以上Android开发知识点,真正体系化!
由于文件比较大,这里只是将部分目录截图出来,每个节点里面都包含大厂面经、学习笔记、源码讲义、实战项目、讲解视频,并且会持续更新!
如果你觉得这些内容对你有帮助,可以扫码获取!!(备注:Android)

学习路线+知识梳理
花了很长时间,就为了整理这张详细的知识路线脑图。当然由于时间有限、能力也都有限,毕竟嵌入式全体系实在太庞大了,包括我那做嵌入式的同学,也不可能什么都懂,有些东西可能没覆盖到,不足之处,还希望小伙伴们一起交流补充,一起完善进步。
这次就分享到这里吧,下篇见。
《互联网大厂面试真题解析、进阶开发核心学习笔记、全套讲解视频、实战项目源码讲义》点击传送门即可获取!
-pWto322h-1713679697987)]
[外链图片转存中…(img-fK77dz9V-1713679697988)]
[外链图片转存中…(img-0Sj5NckH-1713679697989)]
[外链图片转存中…(img-mXk5WKZX-1713679697990)]
既有适合小白学习的零基础资料,也有适合3年以上经验的小伙伴深入学习提升的进阶课程,基本涵盖了95%以上Android开发知识点,真正体系化!
由于文件比较大,这里只是将部分目录截图出来,每个节点里面都包含大厂面经、学习笔记、源码讲义、实战项目、讲解视频,并且会持续更新!
如果你觉得这些内容对你有帮助,可以扫码获取!!(备注:Android)
学习路线+知识梳理
花了很长时间,就为了整理这张详细的知识路线脑图。当然由于时间有限、能力也都有限,毕竟嵌入式全体系实在太庞大了,包括我那做嵌入式的同学,也不可能什么都懂,有些东西可能没覆盖到,不足之处,还希望小伙伴们一起交流补充,一起完善进步。
这次就分享到这里吧,下篇见。
《互联网大厂面试真题解析、进阶开发核心学习笔记、全套讲解视频、实战项目源码讲义》点击传送门即可获取!


 2880
2880

 被折叠的 条评论
为什么被折叠?
被折叠的 条评论
为什么被折叠?
 到【灌水乐园】发言


