


-
package com.scott.db;
-
import java.util.ArrayList;
-
import java.util.List;
-
import android.content.ContentValues;
-
import android.content.Context;
-
import android.database.Cursor;
-
import android.database.sqlite.SQLiteDatabase;
-
public class DBManager {
-
private DBHelper helper;
-
private SQLiteDatabase db;
-
public DBManager(Context context) {
-
helper = new DBHelper(context);
-
//因为getWritableDatabase内部调用了mContext.openOrCreateDatabase(mName, 0, mFactory);
-
//所以要确保context已初始化,我们可以把实例化DBManager的步骤放在Activity的onCreate里
-
db = helper.getWritableDatabase();
-
}
-
/**
-
* add persons
-
* @param persons
-
*/
-
public void add(List persons) {
-
db.beginTransaction(); //开始事务
-
try {
-
for (Person person : persons) {
-
db.execSQL(“INSERT INTO person VALUES(null, ?, ?, ?)”, new Object[]{person.name, person.age, person.info});
-
}
-
db.setTransactionSuccessful(); //设置事务成功完成
-
} finally {
-
db.endTransaction(); //结束事务
-
}
-
}
-
/**
-
* update person’s age
-
* @param person
-
*/
-
public void updateAge(Person person) {
-
ContentValues cv = new ContentValues();
-
cv.put(“age”, person.age);
-
db.update(“person”, cv, “name = ?”, new String[]{person.name});
-
}
-
/**
-
* delete old person
-
* @param person
-
*/
-
public void deleteOldPerson(Person person) {
-
db.delete(“person”, “age >= ?”, new String[]{String.valueOf(person.age)});
-
}
-
/**
-
* query all persons, return list
-
* @return List
-
*/
-
public List query() {
-
ArrayList persons = new ArrayList();
-
Cursor c = queryTheCursor();
-
while (c.moveToNext()) {
-
Person person = new Person();
-
person._id = c.getInt(c.getColumnIndex(“_id”));
-
person.name = c.getString(c.getColumnIndex(“name”));
-
person.age = c.getInt(c.getColumnIndex(“age”));
-
person.info = c.getString(c.getColumnIndex(“info”));
-
persons.add(person);
-
}
-
c.close();
-
return persons;
-
}
-
/**
-
* query all persons, return cursor
-
* @return Cursor
-
*/
-
public Cursor queryTheCursor() {
-
Cursor c = db.rawQuery(“SELECT * FROM person”, null);
-
return c;
-
}
-
/**
-
* close database
-
*/
-
public void closeDB() {
-
db.close();
-
}
-
}
package com.scott.db;
import java.util.ArrayList;
import java.util.List;
import android.content.ContentValues;
import android.content.Context;
import android.database.Cursor;
import android.database.sqlite.SQLiteDatabase;
public class DBManager {
private DBHelper helper;
private SQLiteDatabase db;
public DBManager(Context context) {
helper = new DBHelper(context);
//因为getWritableDatabase内部调用了mContext.openOrCreateDatabase(mName, 0, mFactory);
//所以要确保context已初始化,我们可以把实例化DBManager的步骤放在Activity的onCreate里
db = helper.getWritableDatabase();
}
/**
-
add persons
-
@param persons
*/
public void add(List persons) {
db.beginTransaction(); //开始事务
try {
for (Person person : persons) {
db.execSQL(“INSERT INTO person VALUES(null, ?, ?, ?)”, new Object[]{person.name, person.age, person.info});
}
db.setTransactionSuccessful(); //设置事务成功完成
} finally {
db.endTransaction(); //结束事务
}
}
/**
-
update person’s age
-
@param person
*/
public void updateAge(Person person) {
ContentValues cv = new ContentValues();
cv.put(“age”, person.age);
db.update(“person”, cv, “name = ?”, new String[]{person.name});
}
/**
-
delete old person
-
@param person
*/
public void deleteOldPerson(Person person) {
db.delete(“person”, “age >= ?”, new String[]{String.valueOf(person.age)});
}
/**
-
query all persons, return list
-
@return List
*/
public List query() {
ArrayList persons = new ArrayList();
Cursor c = queryTheCursor();
while (c.moveToNext()) {
Person person = new Person();
person._id = c.getInt(c.getColumnIndex(“_id”));
person.name = c.getString(c.getColumnIndex(“name”));
person.age = c.getInt(c.getColumnIndex(“age”));
person.info = c.getString(c.getColumnIndex(“info”));
persons.add(person);
}
c.close();
return persons;
}
/**
-
query all persons, return cursor
-
@return Cursor
*/
public Cursor queryTheCursor() {
Cursor c = db.rawQuery(“SELECT * FROM person”, null);
return c;
}
/**
- close database
*/
public void closeDB() {
db.close();
}
}
我们在DBManager构造方法中实例化DBHelper并获取一个SQLiteDatabase对象,作为整个应用的数据库实例;在添加多个Person信息时,我们采用了事务处理,确保数据完整性;最后我们提供了一个closeDB方法,释放数据库资源,这一个步骤在我们整个应用关闭时执行,这个环节容易被忘记,所以朋友们要注意。
我们获取数据库实例时使用了getWritableDatabase()方法,也许朋友们会有疑问,在getWritableDatabase()和getReadableDatabase()中,你为什么选择前者作为整个应用的数据库实例呢?在这里我想和大家着重分析一下这一点。
我们来看一下SQLiteOpenHelper中的getReadableDatabase()方法:
[java] view plain copy print ?
-
public synchronized SQLiteDatabase getReadableDatabase() {
-
if (mDatabase != null && mDatabase.isOpen()) {
-
// 如果发现mDatabase不为空并且已经打开则直接返回
-
return mDatabase;
-
}
-
if (mIsInitializing) {
-
// 如果正在初始化则抛出异常
-
throw new IllegalStateException(“getReadableDatabase called recursively”);
-
}
-
// 开始实例化数据库mDatabase
-
try {
-
// 注意这里是调用了getWritableDatabase()方法
-
return getWritableDatabase();
-
} catch (SQLiteException e) {
-
if (mName == null)
-
throw e; // Can’t open a temp database read-only!
-
Log.e(TAG, “Couldn’t open " + mName + " for writing (will try read-only):”, e);
-
}
-
// 如果无法以可读写模式打开数据库 则以只读方式打开
-
SQLiteDatabase db = null;
-
try {
-
mIsInitializing = true;
-
String path = mContext.getDatabasePath(mName).getPath();// 获取数据库路径
-
// 以只读方式打开数据库
-
db = SQLiteDatabase.openDatabase(path, mFactory, SQLiteDatabase.OPEN_READONLY);
-
if (db.getVersion() != mNewVersion) {
-
throw new SQLiteException("Can’t upgrade read-only database from version " + db.getVersion() + " to "
-
+ mNewVersion + ": " + path);
-
}
-
onOpen(db);
-
Log.w(TAG, “Opened " + mName + " in read-only mode”);
-
mDatabase = db;// 为mDatabase指定新打开的数据库
-
return mDatabase;// 返回打开的数据库
-
} finally {
-
mIsInitializing = false;
-
if (db != null && db != mDatabase)
-
db.close();
-
}
-
}
public synchronized SQLiteDatabase getReadableDatabase() {
if (mDatabase != null && mDatabase.isOpen()) {
// 如果发现mDatabase不为空并且已经打开则直接返回
return mDatabase;
}
if (mIsInitializing) {
// 如果正在初始化则抛出异常
throw new IllegalStateException(“getReadableDatabase called recursively”);
}
// 开始实例化数据库mDatabase
try {
// 注意这里是调用了getWritableDatabase()方法
return getWritableDatabase();
} catch (SQLiteException e) {
if (mName == null)
throw e; // Can’t open a temp database read-only!
Log.e(TAG, “Couldn’t open " + mName + " for writing (will try read-only):”, e);
}
// 如果无法以可读写模式打开数据库 则以只读方式打开
SQLiteDatabase db = null;
try {
mIsInitializing = true;
String path = mContext.getDatabasePath(mName).getPath();// 获取数据库路径
// 以只读方式打开数据库
db = SQLiteDatabase.openDatabase(path, mFactory, SQLiteDatabase.OPEN_READONLY);
if (db.getVersion() != mNewVersion) {
throw new SQLiteException("Can’t upgrade read-only database from version " + db.getVersion() + " to "
- mNewVersion + ": " + path);
}
onOpen(db);
Log.w(TAG, “Opened " + mName + " in read-only mode”);
mDatabase = db;// 为mDatabase指定新打开的数据库
return mDatabase;// 返回打开的数据库
} finally {
mIsInitializing = false;
if (db != null && db != mDatabase)
db.close();
}
}
在getReadableDatabase()方法中,首先判断是否已存在数据库实例并且是打开状态,如果是,则直接返回该实例,否则试图获取一个可读写模式的数据库实例,如果遇到磁盘空间已满等情况获取失败的话,再以只读模式打开数据库,获取数据库实例并返回,然后为mDatabase赋值为最新打开的数据库实例。既然有可能调用到getWritableDatabase()方法,我们就要看一下了:
[java] view plain copy print ?
-
public synchronized SQLiteDatabase getWritableDatabase() {
-
if (mDatabase != null && mDatabase.isOpen() && !mDatabase.isReadOnly()) {
-
// 如果mDatabase不为空已打开并且不是只读模式 则返回该实例
-
return mDatabase;
-
}
-
if (mIsInitializing) {
-
throw new IllegalStateException(“getWritableDatabase called recursively”);
-
}
-
// If we have a read-only database open, someone could be using it
-
// (though they shouldn’t), which would cause a lock to be held on
-
// the file, and our attempts to open the database read-write would
-
// fail waiting for the file lock. To prevent that, we acquire the
-
// lock on the read-only database, which shuts out other users.
-
boolean success = false;
-
SQLiteDatabase db = null;
-
// 如果mDatabase不为空则加锁 阻止其他的操作
-
if (mDatabase != null)
-
mDatabase.lock();
-
try {
-
mIsInitializing = true;
-
if (mName == null) {
-
db = SQLiteDatabase.create(null);
-
} else {
-
// 打开或创建数据库
-
db = mContext.openOrCreateDatabase(mName, 0, mFactory);
-
}
-
// 获取数据库版本(如果刚创建的数据库,版本为0)
-
int version = db.getVersion();
-
// 比较版本(我们代码中的版本mNewVersion为1)
-
if (version != mNewVersion) {
-
db.beginTransaction();// 开始事务
-
try {
-
if (version == 0) {
-
// 执行我们的onCreate方法
-
onCreate(db);
-
} else {
-
// 如果我们应用升级了mNewVersion为2,而原版本为1则执行onUpgrade方法
-
onUpgrade(db, version, mNewVersion);
-
}
-
db.setVersion(mNewVersion);// 设置最新版本
-
db.setTransactionSuccessful();// 设置事务成功
-
} finally {
-
db.endTransaction();// 结束事务
-
}
-
}
-
onOpen(db);
-
success = true;
-
return db;// 返回可读写模式的数据库实例
-
} finally {
-
mIsInitializing = false;
-
if (success) {
-
// 打开成功
-
if (mDatabase != null) {
-
// 如果mDatabase有值则先关闭
-
try {
-
mDatabase.close();
-
} catch (Exception e) {
-
}
-
mDatabase.unlock();// 解锁
-
}
-
mDatabase = db;// 赋值给mDatabase
-
} else {
-
// 打开失败的情况:解锁、关闭
-
if (mDatabase != null)
-
mDatabase.unlock();
-
if (db != null)
-
db.close();
-
}
-
}
-
}
public synchronized SQLiteDatabase getWritableDatabase() {
if (mDatabase != null && mDatabase.isOpen() && !mDatabase.isReadOnly()) {
// 如果mDatabase不为空已打开并且不是只读模式 则返回该实例
return mDatabase;
}
if (mIsInitializing) {
throw new IllegalStateException(“getWritableDatabase called recursively”);
}
// If we have a read-only database open, someone could be using it
// (though they shouldn’t), which would cause a lock to be held on
// the file, and our attempts to open the database read-write would
// fail waiting for the file lock. To prevent that, we acquire the
// lock on the read-only database, which shuts out other users.
boolean success = false;
SQLiteDatabase db = null;
// 如果mDatabase不为空则加锁 阻止其他的操作
if (mDatabase != null)
mDatabase.lock();
try {
mIsInitializing = true;
if (mName == null) {
db = SQLiteDatabase.create(null);
} else {
// 打开或创建数据库
db = mContext.openOrCreateDatabase(mName, 0, mFactory);
}
// 获取数据库版本(如果刚创建的数据库,版本为0)
int version = db.getVersion();
// 比较版本(我们代码中的版本mNewVersion为1)
if (version != mNewVersion) {
db.beginTransaction();// 开始事务
try {
if (version == 0) {
// 执行我们的onCreate方法
onCreate(db);
} else {
// 如果我们应用升级了mNewVersion为2,而原版本为1则执行onUpgrade方法
onUpgrade(db, version, mNewVersion);
}
db.setVersion(mNewVersion);// 设置最新版本
db.setTransactionSuccessful();// 设置事务成功
} finally {
db.endTransaction();// 结束事务
}
}
onOpen(db);
success = true;
return db;// 返回可读写模式的数据库实例
} finally {
mIsInitializing = false;
if (success) {
// 打开成功
if (mDatabase != null) {
// 如果mDatabase有值则先关闭
try {
mDatabase.close();
} catch (Exception e) {
}
mDatabase.unlock();// 解锁
}
mDatabase = db;// 赋值给mDatabase
} else {
// 打开失败的情况:解锁、关闭
if (mDatabase != null)
mDatabase.unlock();
if (db != null)
db.close();
}
}
}
大家可以看到,几个关键步骤是,首先判断mDatabase如果不为空已打开并不是只读模式则直接返回,否则如果mDatabase不为空则加锁,然后开始打开或创建数据库,比较版本,根据版本号来调用相应的方法,为数据库设置新版本号,最后释放旧的不为空的mDatabase并解锁,把新打开的数据库实例赋予mDatabase,并返回最新实例。
看完上面的过程之后,大家或许就清楚了许多,如果不是在遇到磁盘空间已满等情况,getReadableDatabase()一般都会返回和getWritableDatabase()一样的数据库实例,所以我们在DBManager构造方法中使用getWritableDatabase()获取整个应用所使用的数据库实例是可行的。当然如果你真的担心这种情况会发生,那么你可以先用getWritableDatabase()获取数据实例,如果遇到异常,再试图用getReadableDatabase()获取实例,当然这个时候你获取的实例只能读不能写了。
最后,让我们看一下如何使用这些数据操作方法来显示数据,下面是MainActivity.java的布局文件和代码:
[html] view plain copy print ?
- <?xml version\="1.0" encoding\="utf-8"?>
-
<LinearLayout xmlns:android=“http://schemas.android.com/apk/res/android”
-
android:orientation=“vertical”
-
android:layout_width=“fill_parent”
-
android:layout_height=“fill_parent”>
-
<Button
-
android:layout_width=“fill_parent”
-
android:layout_height=“wrap_content”
-
android:text=“add”
-
android:onClick=“add”/>
-
<Button
-
android:layout_width=“fill_parent”
-
android:layout_height=“wrap_content”
-
android:text=“update”
-
android:onClick=“update”/>
-
<Button
-
android:layout_width=“fill_parent”
-
android:layout_height=“wrap_content”
-
android:text=“delete”
-
android:onClick=“delete”/>
-
<Button
-
android:layout_width=“fill_parent”
-
android:layout_height=“wrap_content”
-
android:text=“query”
-
android:onClick=“query”/>
-
<Button
-
android:layout_width=“fill_parent”
-
android:layout_height=“wrap_content”
-
android:text=“queryTheCursor”
-
android:onClick=“queryTheCursor”/>
-
<ListView
-
android:id=“@+id/listView”
-
android:layout_width=“fill_parent”
-
android:layout_height=“wrap_content”/>
-
</LinearLayout>
<LinearLayout xmlns:android=“http://schemas.android.com/apk/res/android”
android:orientation=“vertical”
android:layout_width=“fill_parent”
android:layout_height=“fill_parent”>
<Button
android:layout_width=“fill_parent”
android:layout_height=“wrap_content”
android:text=“add”
android:onClick=“add”/>
<Button
android:layout_width=“fill_parent”
android:layout_height=“wrap_content”
android:text=“update”
android:onClick=“update”/>
<Button
android:layout_width=“fill_parent”
android:layout_height=“wrap_content”
android:text=“delete”
android:onClick=“delete”/>
<Button
android:layout_width=“fill_parent”
android:layout_height=“wrap_content”
android:text=“query”
android:onClick=“query”/>
<Button
android:layout_width=“fill_parent”
android:layout_height=“wrap_content”
android:text=“queryTheCursor”
android:onClick=“queryTheCursor”/>
<ListView
android:id=“@+id/listView”
android:layout_width=“fill_parent”
android:layout_height=“wrap_content”/>
[java] view plain copy print ?
-
package com.scott.db;
-
import java.util.ArrayList;
-
import java.util.HashMap;
-
import java.util.List;
-
import java.util.Map;
-
import android.app.Activity;
-
import android.database.Cursor;
-
import android.database.CursorWrapper;
-
import android.os.Bundle;
-
import android.view.View;
-
import android.widget.ListView;
-
import android.widget.SimpleAdapter;
-
import android.widget.SimpleCursorAdapter;
-
public class MainActivity extends Activity {
-
private DBManager mgr;
-
private ListView listView;
-
@Override
-
public void onCreate(Bundle savedInstanceState) {
-
super.onCreate(savedInstanceState);
-
setContentView(R.layout.main);
-
listView = (ListView) findViewById(R.id.listView);
-
//初始化DBManager
-
mgr = new DBManager(this);
-
}
-
@Override
-
protected void onDestroy() {
-
super.onDestroy();
-
//应用的最后一个Activity关闭时应释放DB
-
mgr.closeDB();
-
}
-
public void add(View view) {
-
ArrayList persons = new ArrayList();
-
Person person1 = new Person(“Ella”, 22, “lively girl”);
-
Person person2 = new Person(“Jenny”, 22, “beautiful girl”);
-
Person person3 = new Person(“Jessica”, 23, “sexy girl”);
-
Person person4 = new Person(“Kelly”, 23, “hot baby”);
-
Person person5 = new Person(“Jane”, 25, “a pretty woman”);
-
persons.add(person1);
-
persons.add(person2);
-
persons.add(person3);
-
persons.add(person4);
-
persons.add(person5);
-
mgr.add(persons);
-
}
-
public void update(View view) {
-
Person person = new Person();
-
person.name = “Jane”;
-
person.age = 30;
-
mgr.updateAge(person);
-
}
-
public void delete(View view) {
-
Person person = new Person();
-
person.age = 30;
-
mgr.deleteOldPerson(person);
-
}
-
public void query(View view) {
-
List persons = mgr.query();
-
ArrayList<Map<String, String>> list = new ArrayList<Map<String, String>>();
-
for (Person person : persons) {
-
HashMap<String, String> map = new HashMap<String, String>();
-
map.put(“name”, person.name);
-
map.put(“info”, person.age + " years old, " + person.info);
-
list.add(map);
-
}
-
SimpleAdapter adapter = new SimpleAdapter(this, list, android.R.layout.simple_list_item_2,
-
new String[]{“name”, “info”}, new int[]{android.R.id.text1, android.R.id.text2});
-
listView.setAdapter(adapter);
-
}
-
public void queryTheCursor(View view) {
-
Cursor c = mgr.queryTheCursor();
-
startManagingCursor©; //托付给activity根据自己的生命周期去管理Cursor的生命周期
-
CursorWrapper cursorWrapper = new CursorWrapper© {
-
@Override
-
public String getString(int columnIndex) {
-
//将简介前加上年龄
-
if (getColumnName(columnIndex).equals(“info”)) {
-
int age = getInt(getColumnIndex(“age”));
-
return age + " years old, " + super.getString(columnIndex);
-
}
-
return super.getString(columnIndex);
-
}
-
};
-
//确保查询结果中有"_id"列
-
SimpleCursorAdapter adapter = new SimpleCursorAdapter(this, android.R.layout.simple_list_item_2,
-
cursorWrapper, new String[]{“name”, “info”}, new int[]{android.R.id.text1, android.R.id.text2});
-
ListView listView = (ListView) findViewById(R.id.listView);
-
listView.setAdapter(adapter);
-
}
-
}
package com.scott.db;
import java.util.ArrayList;
import java.util.HashMap;
import java.util.List;
import java.util.Map;
import android.app.Activity;
import android.database.Cursor;
import android.database.CursorWrapper;
import android.os.Bundle;
import android.view.View;
import android.widget.ListView;
import android.widget.SimpleAdapter;
import android.widget.SimpleCursorAdapter;
public class MainActivity extends Activity {
private DBManager mgr;
private ListView listView;
@Override
public void onCreate(Bundle savedInstanceState) {
super.onCreate(savedInstanceState);
setContentView(R.layout.main);
listView = (ListView) findViewById(R.id.listView);
//初始化DBManager
mgr = new DBManager(this);
}
@Override
protected void onDestroy() {
super.onDestroy();
//应用的最后一个Activity关闭时应释放DB
mgr.closeDB();
}
public void add(View view) {
ArrayList persons = new ArrayList();
Person person1 = new Person(“Ella”, 22, “lively girl”);
Person person2 = new Person(“Jenny”, 22, “beautiful girl”);
Person person3 = new Person(“Jessica”, 23, “sexy girl”);
Person person4 = new Person(“Kelly”, 23, “hot baby”);
Person person5 = new Person(“Jane”, 25, “a pretty woman”);
persons.add(person1);
persons.add(person2);
persons.add(person3);
persons.add(person4);
persons.add(person5);
mgr.add(persons);
}
public void update(View view) {
Person person = new Person();
person.name = “Jane”;
person.age = 30;
mgr.updateAge(person);
}
public void delete(View view) {
Person person = new Person();
person.age = 30;
mgr.deleteOldPerson(person);
}
public void query(View view) {
List persons = mgr.query();
ArrayList<Map<String, String>> list = new ArrayList<Map<String, String>>();
for (Person person : persons) {
HashMap<String, String> map = new HashMap<String, String>();
map.put(“name”, person.name);
map.put(“info”, person.age + " years old, " + person.info);
list.add(map);
}
SimpleAdapter adapter = new SimpleAdapter(this, list, android.R.layout.simple_list_item_2,
new String[]{“name”, “info”}, new int[]{android.R.id.text1, android.R.id.text2});
listView.setAdapter(adapter);
}
public void queryTheCursor(View view) {
Cursor c = mgr.queryTheCursor();
startManagingCursor©; //托付给activity根据自己的生命周期去管理Cursor的生命周期
CursorWrapper cursorWrapper = new CursorWrapper© {
@Override
public String getString(int columnIndex) {
//将简介前加上年龄
if (getColumnName(columnIndex).equals(“info”)) {
int age = getInt(getColumnIndex(“age”));
return age + " years old, " + super.getString(columnIndex);
}
return super.getString(columnIndex);
}
};
//确保查询结果中有"_id"列
SimpleCursorAdapter adapter = new SimpleCursorAdapter(this, android.R.layout.simple_list_item_2,
cursorWrapper, new String[]{“name”, “info”}, new int[]{android.R.id.text1, android.R.id.text2});
ListView listView = (ListView) findViewById(R.id.listView);
listView.setAdapter(adapter);
}
}
这里需要注意的是SimpleCursorAdapter的应用,当我们使用这个适配器时,我们必须先得到一个Cursor对象,这里面有几个问题:如何管理Cursor的生命周期,如果包装Cursor,Cursor结果集都需要注意什么。
如果手动去管理Cursor的话会非常的麻烦,还有一定的风险,处理不当的话运行期间就会出现异常,幸好Activity为我们提供了startManagingCursor(Cursor cursor)方法,它会根据Activity的生命周期去管理当前的Cursor对象,下面是该方法的说明:
[java] view plain copy print ?
-
/**
-
* This method allows the activity to take care of managing the given
-
* {@link Cursor}'s lifecycle for you based on the activity’s lifecycle.
-
* That is, when the activity is stopped it will automatically call
-
* {@link Cursor#deactivate} on the given Cursor, and when it is later restarted
-
* it will call {@link Cursor#requery} for you. When the activity is
-
* destroyed, all managed Cursors will be closed automatically.
-
*
-
* @param c The Cursor to be managed.
-
*
-
* @see #managedQuery(android.net.Uri , String[], String, String[], String)
-
* @see #stopManagingCursor
-
*/
/**
-
This method allows the activity to take care of managing the given
-
{@link Cursor}'s lifecycle for you based on the activity’s lifecycle.
-
That is, when the activity is stopped it will automatically call
-
{@link Cursor#deactivate} on the given Cursor, and when it is later restarted
-
it will call {@link Cursor#requery} for you. When the activity is
自我介绍一下,小编13年上海交大毕业,曾经在小公司待过,也去过华为、OPPO等大厂,18年进入阿里一直到现在。
深知大多数初中级Android工程师,想要提升技能,往往是自己摸索成长或者是报班学习,但对于培训机构动则近万的学费,着实压力不小。自己不成体系的自学效果低效又漫长,而且极易碰到天花板技术停滞不前!
因此收集整理了一份《2024年Android移动开发全套学习资料》,初衷也很简单,就是希望能够帮助到想自学提升又不知道该从何学起的朋友,同时减轻大家的负担。

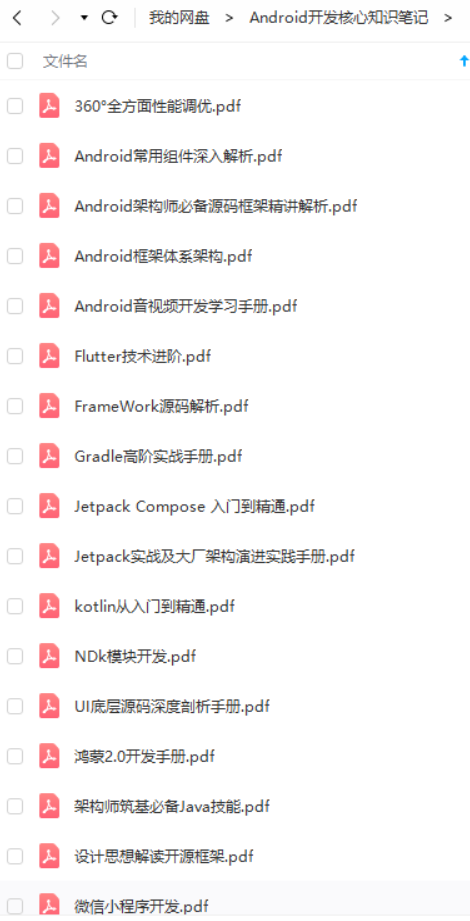

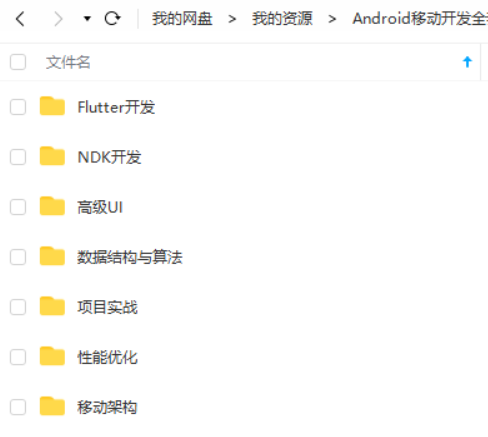

既有适合小白学习的零基础资料,也有适合3年以上经验的小伙伴深入学习提升的进阶课程,基本涵盖了95%以上Android开发知识点,真正体系化!
由于文件比较大,这里只是将部分目录截图出来,每个节点里面都包含大厂面经、学习笔记、源码讲义、实战项目、讲解视频,并且会持续更新!
如果你觉得这些内容对你有帮助,可以扫码获取!!(备注:Android)

最后
最后这里放上我这段时间复习的资料,这个资料也是偶然一位朋友分享给我的,里面包含了腾讯、字节跳动、阿里、百度2020-2021面试真题解析,并且把每个技术点整理成了视频和PDF(知识脉络 + 诸多细节)。
还有 高级架构技术进阶脑图、高级进阶架构资料 帮助大家学习提升进阶,这里我也免费分享给大家也节省大家在网上搜索资料的时间来学习,也可以分享给身边好友一起学习。


一起互勉~
《互联网大厂面试真题解析、进阶开发核心学习笔记、全套讲解视频、实战项目源码讲义》点击传送门即可获取!
opManagingCursor
- */
/**
-
This method allows the activity to take care of managing the given
-
{@link Cursor}'s lifecycle for you based on the activity’s lifecycle.
-
That is, when the activity is stopped it will automatically call
-
{@link Cursor#deactivate} on the given Cursor, and when it is later restarted
-
it will call {@link Cursor#requery} for you. When the activity is
自我介绍一下,小编13年上海交大毕业,曾经在小公司待过,也去过华为、OPPO等大厂,18年进入阿里一直到现在。
深知大多数初中级Android工程师,想要提升技能,往往是自己摸索成长或者是报班学习,但对于培训机构动则近万的学费,着实压力不小。自己不成体系的自学效果低效又漫长,而且极易碰到天花板技术停滞不前!
因此收集整理了一份《2024年Android移动开发全套学习资料》,初衷也很简单,就是希望能够帮助到想自学提升又不知道该从何学起的朋友,同时减轻大家的负担。
[外链图片转存中…(img-deIEaQmr-1713785651385)]
[外链图片转存中…(img-VrJQBnwa-1713785651387)]
[外链图片转存中…(img-e97jZSVh-1713785651388)]
[外链图片转存中…(img-rM8Pic2n-1713785651389)]
[外链图片转存中…(img-nY9iyqKT-1713785651390)]
既有适合小白学习的零基础资料,也有适合3年以上经验的小伙伴深入学习提升的进阶课程,基本涵盖了95%以上Android开发知识点,真正体系化!
由于文件比较大,这里只是将部分目录截图出来,每个节点里面都包含大厂面经、学习笔记、源码讲义、实战项目、讲解视频,并且会持续更新!
如果你觉得这些内容对你有帮助,可以扫码获取!!(备注:Android)
[外链图片转存中…(img-v0XtjAN6-1713785651392)]
最后
最后这里放上我这段时间复习的资料,这个资料也是偶然一位朋友分享给我的,里面包含了腾讯、字节跳动、阿里、百度2020-2021面试真题解析,并且把每个技术点整理成了视频和PDF(知识脉络 + 诸多细节)。
还有 高级架构技术进阶脑图、高级进阶架构资料 帮助大家学习提升进阶,这里我也免费分享给大家也节省大家在网上搜索资料的时间来学习,也可以分享给身边好友一起学习。
[外链图片转存中…(img-skcyXB5J-1713785651393)]
[外链图片转存中…(img-gFXMLFct-1713785651394)]
一起互勉~
《互联网大厂面试真题解析、进阶开发核心学习笔记、全套讲解视频、实战项目源码讲义》点击传送门即可获取!


 879
879


 被折叠的 条评论
为什么被折叠?
被折叠的 条评论
为什么被折叠?
 到【灌水乐园】发言


