


counter: store.getState().counter
})
})
}
render() {
const { counter } = this.state;
return (
Test
<button onClick={() => { this.increment() }}>+1
<button onClick={() => { this.addCounter() }}>+5
)
}
increment = () => {
store.dispatch(addAction(1))
}
addCounter = () => {
store.dispatch(addAction(5))
}
}
//函数组件
import React, { memo } from ‘react’;
import { useState } from ‘react’
import store from ‘…/store’
import { addAction } from ‘…/store/actionCreators’
export default memo(function Demo1() {
const initCounter = store.getState().counter;
const [a, setA] = useState(initCounter);
const add = () => {
store.dispatch(addAction(1));
setA(store.getState().counter)
}
return (
点我用reducer派发action
)
})
2.手写connect
解决监听store数据改变的代码,都需要在 componentDidMount中完成;
解决派发事件,我们都需要去先拿到 store, 在调用其 dispatch 等;
接受两个参数:
-
参数一:里面存放
component希望使用到的State属性; -
参数二:里面存放
component希望使用到的dispatch动作;
有一个返回值、是一个高阶组件:
-
在
constructor中的state中保存一下我们需要获取的状态; -
在
componentDidMount中订阅store中数据的变化,并且执行setState操作; -
在
componentWillUnmount中需要取消订阅; -
在
render函数中返回传入的WrappedComponent,并且将所有的状态映射到其props中; -
这个高阶组件接受一个组件作为参数,返回一个class组件:
import React, { PureComponent } from “react”;
import store from ‘…/store’;
export default function connect(mapStateToProps, mapDispatchToProps) {
return function handleMapCpn(WrappedComponent) {
return class extends PureComponent {
constructor(props) {
super(props);
this.state = {
storeState: mapStateToProps(store.getState())
}
}
componentDidMount() {
this.unsubscribe = store.subscribe(() => {
this.setState({
storeState: mapStateToProps(store.getState())
})
})
}
componentWillUnmount() {
this.unsubscribe();
}
render() {
return <WrappedComponent {…this.props}
{…mapStateToProps(store.getState())}
{…mapDispatchToProps(store.dispatch)}/>
}
}
}
}
在home和props文件中,我们按照自己需要的state、dispatch来进行映射、比如home.js中进行如下修改:
-
mapStateToProps:用于将state映射到一个对象中,对象中包含我们需要的属性; -
mapDispatchToProps:用于将dispatch映射到对象中,对象中包含在组件中可能操作的函数; -
当调用该函数时,本质上其实是调用dispatch(对应的Action);
const mapStateToProps = state => {
return {
counter: state.counter
}
}
const mapDispatchToProps = dispatch => {
return {
addNumber: function(number) {
dispatch(addAction(number));
}
}
}
export default connect(mapStateToProps, mapDispatchToProps)(Home);
有了connect函数,我们之后只需要关心从state和dispatch中映射自己需要的状态和行为即可;
3.store的context处理
但是上面的connect函数有一个很大的缺陷:依赖导入的store
正确的做法是我们提供一个Provider,Provider来自于我们创建的Context,让用户将store传入到value中即可;
创建一个context.js文件:
import { createContext } from ‘react’;
export const StoreContext = createContext();
修改connect函数中class组件部分的代码:
-
注意下面我们将class组件的名称明确的定义出来,并且给它的
contextType进行了赋值; -
在组件内部用到store的地方,统一使用
this.context代替(注意:constructor中直接使用第二个参数即可)
import React, { PureComponent } from “react”;
import { StoreContext } from ‘./context’;
export default function connect(mapStateToProps, mapDispatchToProps) {
return function handleMapCpn(WrappedComponent) {
class ConnectCpn extends PureComponent {
constructor(props, context) {
super(props);
this.state = {
storeState: mapStateToProps(context.getState())
}
}
componentDidMount() {
this.unsubscribe = this.context.subscribe(() => {
this.setState({
storeState: mapStateToProps(this.context.getState())
})
})
}
componentWillUnmount() {
this.unsubscribe();
}
render() {
return <WrappedComponent {…this.props}
{…mapStateToProps(this.context.getState())}
{…mapDispatchToProps(this.context.dispatch)} />
}
}
ConnectCpn.contextType = StoreContext;
return ConnectCpn;
}
}
在入口的index.js中,使用Provider并且提供store即可:
import { StoreContext } from ‘./utils/context’;
import store from ‘./store’;
ReactDOM.render(
<StoreContext.Provider value={store}>
</StoreContext.Provider>,
document.getElementById(‘root’)
);
4.react-redux使用
使用connect函数:
import React, { PureComponent } from ‘react’;
import { connect } from “react-redux”;
// import connect from ‘…/utils/connect2’;
export default connect(mapStateToProps, mapDispatchToProps)(Home);
使用Provider:
-
将之前自己创建的
Context的Provider,换成react-redux的Provider组件: -
注意:这里传入的是
store属性,而不是value属性;
import { Provider } from ‘react-redux’;
import store from ‘./store’;
ReactDOM.render(
,
document.getElementById(‘root’)
);
在之前简单的案例中,redux中保存的counter是一个本地定义的数据,我们可以直接通过同步的操作来dispatch action,state就会被立即更新。
但是真实开发中,redux中保存的很多数据可能来自服务器,我们需要进行异步的请求,再将数据保存到redux中。
1.redux中异步请求
[外链图片转存失败,源站可能有防盗链机制,建议将图片保存下来直接上传(img-ivTyBDg6-1634980687237)(./images/14.webp)]
redux也引入了中间件(Middleware)的概念:
-
这个中间件的目的是在
dispatch的action和最终达到的reducer之间,扩展一些自己的代码; -
比如日志记录、调用异步接口、添加代码调试功能等等;
redux-thunk是如何做到让我们可以发送异步的请求呢?
-
我们知道,默认情况下的dispatch(action),action需要是一个JavaScript的对象;
-
redux-thunk可以让dispatch(action函数),action可以是一个函数; -
该函数会被调用,并且会传给这个函数一个
dispatch函数和getState函数; -
dispatch函数用于我们之后再次派发action; -
getState函数考虑到我们之后的一些操作需要依赖原来的状态,用于让我们可以获取之前的一些状态;
2.redux-thunk使用
//redux引入applyMiddleware
import {
createStore,
applyMiddleware,
} from ‘redux’;
// 通过applyMiddleware来结合多个Middleware, 返回一个enhancer
const enhancer = applyMiddleware(thunkMiddleware);
// 将enhancer作为第二个参数传入到createStore中
const store = createStore(reducer, enhancer);
定义返回一个函数的action:
-
注意:这里不是返回一个对象了,而是一个函数;
-
该函数在
dispatch之后会被执行;
const getHomeMultidataAction = () => {
return (dispatch) => {
axios.get(“http://123.207.32.32:8000/home/multidata”).then(res => {
const data = res.data.data;
dispatch(changeBannersAction(data.banner.list));
dispatch(changeRecommendsAction(data.recommend.list));
})
}
}
修改home.js中的代码:
import React, { PureComponent } from ‘react’;
import { connect } from “react-redux”;
import {
addAction,
getHomeMultidataAction
} from ‘…/store/actionCreators’;
class Home extends PureComponent {
componentDidMount() {
this.props.getHomeMultidata();
}
…其他逻辑代码
}
…mapStatetoProps
const mapDispatchToProps = dispatch => {
return {
addNumber: function(number) {
dispatch(addAction(number));
},
getHomeMultidata() {
dispatch(getHomeMultidataAction());
}
}
}
export default connect(mapStateToProps, mapDispatchToProps)(Home);
3.redux-devtools
import { createStore, applyMiddleware, compose } from ‘redux’;
import thunkMiddleware from ‘redux-thunk’;
import reducer from ‘./reducer.js’;
const composeEnhancers = window.REDUX_DEVTOOLS_EXTENSION_COMPOSE || compose;
// 通过applyMiddleware来结合多个Middleware, 返回一个enhancer
const enhancer = composeEnhancers(applyMiddleware(thunkMiddleware));
// 将enhancer作为第二个参数传入到createStore中
const store = createStore(reducer, enhancer);
export default store;
trace打开:
const composeEnhancers = window.REDUX_DEVTOOLS_EXTENSION_COMPOSE({trace: true}) || compose;
4.redux-saga
saga中间件使用了ES6的generator语法
数编一个生成器函数:
function *foo() {//生成器generator函数
yield “Hello”;
yield “World”;
}
const iterator = foo();//迭代器iterator
console.log(iterator, typeof iterator); // 一个object类型的iterator对象
调用iterator的next函数,会销毁一次迭代器,并且返回一个yield的结果:
// 调用一次next()是消耗一次迭代器
iterator.next(); // {value: “Hello”, done: false}
iterator.next(); // {value: “World”, done: false}
iterator.next(); // {value: undefined, done: true}
研究一下foo生成器函数代码的执行顺序:
function *foo() {
console.log(“111111”);
yield “Hello”;
console.log(“222222”);
yield “World”;
console.log(“333333”);
}
// 调用一次next()是消耗一次迭代器
iterator.next(); // {value: “Hello”, done: false}
// 打印111111
iterator.next(); // {value: “World”, done: false}
// 打印222222
iterator.next(); // {value: undefined, done: true}
// 打印333333
generator和promise一起使用:
function *bar() {
const result = yield new Promise((resolve, reject) => {
setTimeout(() => {
resolve(“Hello Generator”);
return “Hello”;
}, 2000);
});
console.log(result);
}
const bIterator = bar();
bIterator.next().value.then(res => {
bIterator.next(res);
});
集成redux-saga中间件
import { createStore, applyMiddleware, compose } from ‘redux’;
import thunkMiddleware from ‘redux-thunk’;
import createSagaMiddleware from ‘redux-saga’;
import reducer from ‘./reducer.js’;
import mySaga from ‘./saga’;
// 通过createSagaMiddleware函数来创建saga中间件
const sagaMiddleware = createSagaMiddleware();
const composeEnhancers = window.REDUX_DEVTOOLS_EXTENSION_COMPOSE({trace: true}) || compose;
// 通过applyMiddleware来结合多个Middleware, 返回一个enhancer
const enhancer = composeEnhancers(applyMiddleware(thunkMiddleware, sagaMiddleware));
// 将enhancer作为第二个参数传入到createStore中
const store = createStore(reducer, enhancer);
// 必须启动saga中间件,并且传入其要监听的generator
sagaMiddleware.run(mySaga);
export default store;
saga.js文件的编写:
-
takeEvery:可以传入多个监听的actionType,每一个都可以被执行(对应有一个takeLastest,会取消前面的) -
put:在saga中派发action不再是通过dispatch,而是通过put; -
all:可以在yield的时候put多个action;
import { takeEvery, put, all } from ‘redux-saga/effects’;
import axios from ‘axios’;
import {
FETCH_HOME_MULTIDATA
} from “./constants”;
import {
changeBannersAction,
changeRecommendsAction,
} from ‘./actionCreators’;
function* fetchHomeMultidata(action) {
const res = yield axios.get(“http://123.207.32.32:8000/home/multidata”);
console.log(res);
const data = res.data.data;
yield all([
put(changeBannersAction(data.banner.list)),
put(changeRecommendsAction(data.recommend.list))
])
}
function* mySaga() {
yield takeEvery(FETCH_HOME_MULTIDATA, fetchHomeMultidata)
}
export default mySaga;
5.中间件的原理
打印日志需求
事实上,我们可以利用一个hack一点的技术:Monkey Patching,利用它可以修改原有的程序逻辑;
-
已经直接修改了
dispatch的调用过程; -
在调用
dispatch的过程中,真正调用的函数其实是dispatchAndLog;
let next = store.dispatch;
function dispatchAndLog(action) {
console.log(“dispatching:”, addAction(10));
next(addAction(5));
console.log(“新的state:”, store.getState());
}
store.dispatch = dispatchAndLog;
可以将它封装到一个模块中,只要调用这个模块中的函数,就可以对store进行这样的处理:
function patchLogging(store) {
let next = store.dispatch;
function dispatchAndLog(action) {
console.log(“dispatching:”, action);
next(addAction(5));
console.log(“新的state:”, store.getState());
}
store.dispatch = dispatchAndLog;
}
thunk需求
redux中利用一个中间件redux-thunk可以让我们的dispatch不再只是处理对象,并且可以处理函数;
对dispatch进行转换,这个dispatch会判断传入的
function patchThunk(store) {
let next = store.dispatch;
function dispatchAndThunk(action) {
if (typeof action === “function”) {
action(store.dispatch, store.getState);
} else {
next(action);
}
}
store.dispatch = dispatchAndThunk;
}
将两个patch应用起来,进行测试:
patchLogging(store);
patchThunk(store);
store.dispatch(addAction(10));
function getData(dispatch) {
setTimeout(() => {
dispatch(subAction(10));
}, 1000)
}
// 传入函数
store.dispatch(getData);
合并中间件
单个调用某个函数来合并中间件并不是特别的方便,我们可以封装一个函数来实现所有的中间件合并:
function applyMiddleware(store, middlewares) {
middlewares = middlewares.slice();
middlewares.forEach(middleware => {
store.dispatch = middleware(store);
})
}
applyMiddleware(store, [patchLogging, patchThunk]);
理解一下上面操作之后,代码的流程:
[外链图片转存失败,源站可能有防盗链机制,建议将图片保存下来直接上传(img-zcgX941B-1634980687242)(./images/16.webp)]
1.拆分reducer
先抽取一个对counter处理的reducer:
// counter相关的状态
const initialCounter = {
counter: 0
}
function counterReducer(state = initialCounter, action) {
switch (action.type) {
case ADD_NUMBER:
return { …state, counter: state.counter + action.num };
case SUB_NUMBER:
return { …state, counter: state.counter - action.num };
default:
return state;
}
}
再抽取一个对home处理的reducer:
// home相关的状态
const initialHome = {
banners: [],
recommends: []
}
function homeReducer(state = initialHome, action) {
switch (action.type) {
case CHANGE_BANNER:
return { …state, banners: action.banners };
case CHANGE_RECOMMEND:
return { …state, recommends: action.recommends };
default:
return state;
}
}
如果将它们合并起来呢?
const initialState = {
}
function reducer(state = initialState, action) {
return {
counterInfo: counterReducer(state.counterInfo, action),
homeInfo: homeReducer(state.homeInfo, action),
}
}
reducer文件拆分
已经将不同的状态处理拆分到不同的reducer中
对文件结构再次进行拆分:
./store
├── counter
│ ├── actioncreators.js
│ ├── constants.js
│ ├── index.js
│ └── reducer.js
├── home
│ ├── actioncreators.js
│ ├── constants.js
│ ├── index.js
│ └── reducer.js
├── index.js
├── reducer.js
└── saga.js
-
home/actioncreators.js:存放home相关的action;
-
home/constants.js:存放home相关的常量;
-
home/reducer.js:存放分离的reducer代码;
-
index.js:统一对外暴露的内容;
2.combineReducers合并
目前合并的方式是通过每次调用reducer函数自己来返回一个新的对象:
import { reducer as counterReducer } from ‘./counter’;
import { reducer as homeReducer } from ‘./home’;
const initialState = {
}
function reducer(state = initialState, action) {
return {
counterInfo: counterReducer(state.counterInfo, action),
homeInfo: homeReducer(state.homeInfo, action),
}
}
redux提供了一个combineReducers函数可以方便的对多个reducer进行合并:
import { combineReducers } from ‘redux’;
import { reducer as counterReducer } from ‘./counter’;
import { reducer as homeReducer } from ‘./home’;
const reducer = combineReducers({
counterInfo: counterReducer,
homeInfo: homeReducer
})
export default reducer;
combineReducers是如何实现的?
-
事实上,它也是讲我们传入的reducers合并到一个对象中,最终返回一个combination的函数(相当于我们之前的reducer函数了);
-
在执行combination函数的过程中,它会通过判断前后返回的数据是否相同来决定返回之前的state还是新的state;
-
新的state会触发订阅者发生对应的刷新,而旧的state可以有效的组织订阅者发生刷新;
export default function combineReducers(reducers) {
const reducerKeys = Object.keys(reducers)
const finalReducers = {}
for (let i = 0; i < reducerKeys.length; i++) {
const key = reducerKeys[i]
if (process.env.NODE_ENV !== ‘production’) {
if (typeof reducers[key] === ‘undefined’) {
warning(No reducer provided for key "${key}")
}
}
if (typeof reducers[key] === ‘function’) {
finalReducers[key] = reducers[key]
}
}
const finalReducerKeys = Object.keys(finalReducers)
// This is used to make sure we don’t warn about the same
// keys multiple times.
let unexpectedKeyCache
if (process.env.NODE_ENV !== ‘production’) {
unexpectedKeyCache = {}
}
let shapeAssertionError
try {
assertReducerShape(finalReducers)
} catch (e) {
shapeAssertionError = e
}
return function combination(state = {}, action) {
if (shapeAssertionError) {
throw shapeAssertionError
}
if (process.env.NODE_ENV !== ‘production’) {
const warningMessage = getUnexpectedStateShapeWarningMessage(
state,
finalReducers,
action,
unexpectedKeyCache
)
if (warningMessage) {
warning(warningMessage)
}
}
let hasChanged = false
const nextState = {}
for (let i = 0; i < finalReducerKeys.length; i++) {
const key = finalReducerKeys[i]
const reducer = finalReducers[key]
const previousStateForKey = state[key]
const nextStateForKey = reducer(previousStateForKey, action)
if (typeof nextStateForKey === ‘undefined’) {
const errorMessage = getUndefinedStateErrorMessage(key, action)
throw new Error(errorMessage)
}
nextState[key] = nextStateForKey
hasChanged = hasChanged || nextStateForKey !== previousStateForKey
}
hasChanged =
hasChanged || finalReducerKeys.length !== Object.keys(state).length
return hasChanged ? nextState : state
}
}
数据可变性的问题
自我介绍一下,小编13年上海交大毕业,曾经在小公司待过,也去过华为、OPPO等大厂,18年进入阿里一直到现在。
深知大多数前端工程师,想要提升技能,往往是自己摸索成长或者是报班学习,但对于培训机构动则几千的学费,着实压力不小。自己不成体系的自学效果低效又漫长,而且极易碰到天花板技术停滞不前!
因此收集整理了一份《2024年Web前端开发全套学习资料》,初衷也很简单,就是希望能够帮助到想自学提升又不知道该从何学起的朋友,同时减轻大家的负担。


既有适合小白学习的零基础资料,也有适合3年以上经验的小伙伴深入学习提升的进阶课程,基本涵盖了95%以上前端开发知识点,真正体系化!
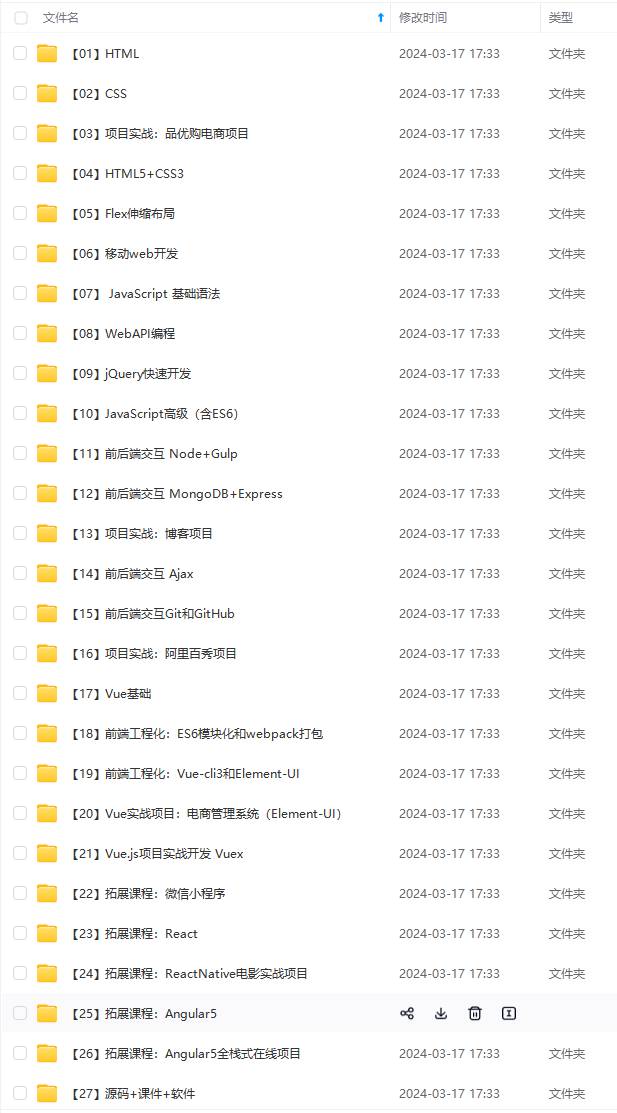
由于文件比较大,这里只是将部分目录截图出来,每个节点里面都包含大厂面经、学习笔记、源码讲义、实战项目、讲解视频,并且会持续更新!
如果你觉得这些内容对你有帮助,可以扫码获取!!(备注:前端)

最后
给大家分享一些关于HTML的面试题,有需要的朋友可以戳这里免费领取,先到先得哦。


ssage)
}
}
let hasChanged = false
const nextState = {}
for (let i = 0; i < finalReducerKeys.length; i++) {
const key = finalReducerKeys[i]
const reducer = finalReducers[key]
const previousStateForKey = state[key]
const nextStateForKey = reducer(previousStateForKey, action)
if (typeof nextStateForKey === ‘undefined’) {
const errorMessage = getUndefinedStateErrorMessage(key, action)
throw new Error(errorMessage)
}
nextState[key] = nextStateForKey
hasChanged = hasChanged || nextStateForKey !== previousStateForKey
}
hasChanged =
hasChanged || finalReducerKeys.length !== Object.keys(state).length
return hasChanged ? nextState : state
}
}
数据可变性的问题
自我介绍一下,小编13年上海交大毕业,曾经在小公司待过,也去过华为、OPPO等大厂,18年进入阿里一直到现在。
深知大多数前端工程师,想要提升技能,往往是自己摸索成长或者是报班学习,但对于培训机构动则几千的学费,着实压力不小。自己不成体系的自学效果低效又漫长,而且极易碰到天花板技术停滞不前!
因此收集整理了一份《2024年Web前端开发全套学习资料》,初衷也很简单,就是希望能够帮助到想自学提升又不知道该从何学起的朋友,同时减轻大家的负担。
[外链图片转存中…(img-Q9LiM0Lq-1713555102073)]
[外链图片转存中…(img-9kzhqQzz-1713555102074)]
既有适合小白学习的零基础资料,也有适合3年以上经验的小伙伴深入学习提升的进阶课程,基本涵盖了95%以上前端开发知识点,真正体系化!
[外链图片转存中…(img-oqtUpRlZ-1713555102074)]
由于文件比较大,这里只是将部分目录截图出来,每个节点里面都包含大厂面经、学习笔记、源码讲义、实战项目、讲解视频,并且会持续更新!
如果你觉得这些内容对你有帮助,可以扫码获取!!(备注:前端)
[外链图片转存中…(img-NzszeH3V-1713555102075)]
最后
给大家分享一些关于HTML的面试题,有需要的朋友可以戳这里免费领取,先到先得哦。
[外链图片转存中…(img-EHvmwxW9-1713555102075)]
[外链图片转存中…(img-zRcSbUhq-1713555102075)]


 1270
1270

 被折叠的 条评论
为什么被折叠?
被折叠的 条评论
为什么被折叠?
 到【灌水乐园】发言


