


先自我介绍一下,小编浙江大学毕业,去过华为、字节跳动等大厂,目前阿里P7
深知大多数程序员,想要提升技能,往往是自己摸索成长,但自己不成体系的自学效果低效又漫长,而且极易碰到天花板技术停滞不前!
因此收集整理了一份《2024年最新大数据全套学习资料》,初衷也很简单,就是希望能够帮助到想自学提升又不知道该从何学起的朋友。


既有适合小白学习的零基础资料,也有适合3年以上经验的小伙伴深入学习提升的进阶课程,涵盖了95%以上大数据知识点,真正体系化!
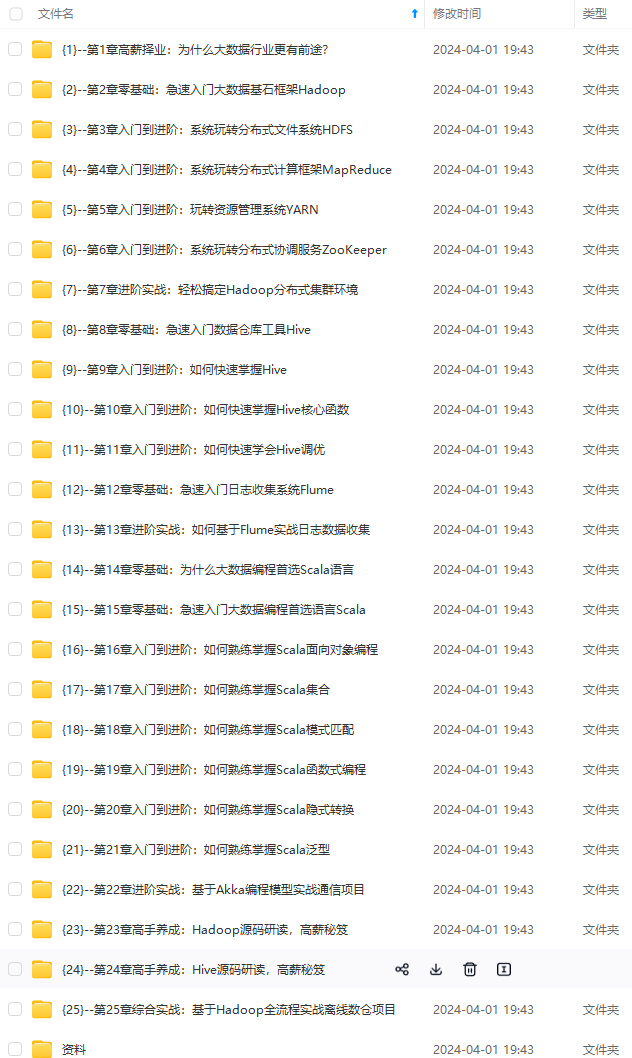
由于文件比较多,这里只是将部分目录截图出来,全套包含大厂面经、学习笔记、源码讲义、实战项目、大纲路线、讲解视频,并且后续会持续更新
如果你需要这些资料,可以添加V获取:vip204888 (备注大数据)

正文
属性:value 简单类型属性值
位置:1.在属性定义的上面 ,无需set方法,推荐使用。2.在set方法的上面。**
在属性定义的上面定义
package com.bjpowernode.ba02;

import org.springframework.beans.factory.annotation.Value;
import org.springframework.stereotype.Component;


@Component("myStudent")
public class Student {
    @Value(value = "李四")
    private String name ;
    //括号里面的value也可以省略
    @Value("20")
    private int age;

    public Student() {
        System.out.println("Student无参数构造方法");
    }

    @Override
    public String toString() {
        return "Student{" +
                "name='" + name + '\'' +
                ", age=" + age +
                '}';
    }
}
第二种方式:在set方法的上面
package com.bjpowernode.ba02;

import org.springframework.beans.factory.annotation.Value;
import org.springframework.stereotype.Component;


@Component("myStudent")
public class Student {
    private String name ;
    private int age;
    public Student() {
        System.out.println("Student无参数构造方法");
    }

    @Value("22")
    public void setAge(int age) {
        System.out.println("setAge===="+age);
        this.age = age;
    }

    @Override
    public String toString() {
        return "Student{" +
                "name='" + name + '\'' +
                ", age=" + age +
                '}';
    }
}
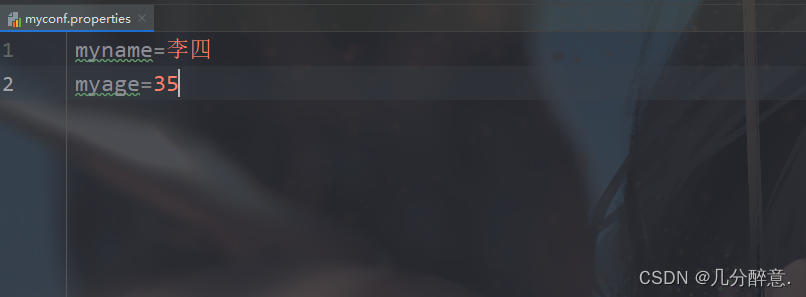
✨@Value使用外部属性配置文件
这里我创建了一个名为myconf.properties的配置文件

然后在配置文件输入相应的内容。
然后我们打开spring配置文件,在spring文件中读取使用它
<?xml version="1.0" encoding="UTF-8"?>
<beans xmlns="http://www.springframework.org/schema/beans"
       xmlns:xsi="http://www.w3.org/2001/XMLSchema-instance"
       xmlns:context="http://www.springframework.org/schema/context"
       xsi:schemaLocation="http://www.springframework.org/schema/beans
       http://www.springframework.org/schema/beans/spring-beans.xsd
       http://www.springframework.org/schema/context
       https://www.springframework.org/schema/context/spring-context.xsd">

    <!--声明组件扫描器:使用注解必须加入这个语句
        component-scan:翻译过来是组件扫描器,组件是java对象。
            属性: base-package 注解在你的项目中的包名。
                  框架会扫描这个包和子包中的所有类,找类中的所有注解。
                  遇到注解后,按照注解表示的功能,去创建对象, 给属性赋值。
    -->
    <context:component-scan base-package="com.b01"/>


    <!--读取外部的属性配置文件
        property-placeholder:读取properties这样的文件
    -->
    <context:property-placeholder location="classpath:/myconf.properties" />
</beans>
注意:location=“classpath:/类路径”
下一步我们开始还有外部文配置件。
语法 :@Value(${"key"})
@Component("myStudent")
public class Student {
    //使用外部属性文件中的数据,语法 @Value(${"key"})
    @Value("${myname}")
    private String name ;

    private int age;

    public Student() {
        System.out.println("Student无参数构造方法");
    }


    public void setName(String name) {
        this.name = name;
    }
    //使用外部属性文件中的数据
    @Value("${myage}")
    public void setAge(int age) {
        System.out.println("setAge===="+age);
        this.age = age;
    }

    @Override
    public String toString() {
        return "Student{" +
                "name='" + name + '\'' +
                ", age=" + age +
                '}';
    }
}
✨@Autowired引用类型属性赋值
 * @Autowired: spring框架提供的,给引用类型赋值的,使用自动注入原理。
 *             支持byName,byType。默认是byType.
💫byType自动注入
-
位置:1)在属性定义的上面,无需set方法,推荐使用
* ```
      2)在set方法的上面
创建一个School类
@Component("mySchool")
public class School {
    @Value("安徽大学")
    private String name;

    @Value("安徽的合肥市")
    private String address;

    public void setName(String name) {
        this.name = name;
    }

    public void setAddress(String address) {
        this.address = address;
    }

    @Override
    public String toString() {
        return "School{" +
                "name='" + name + '\'' +
                ", address='" + address + '\'' +
                '}';
    }
}
在Student类中使用School
@Component("myStudent")
public class Student {

    //默认使用byType
    @Autowired
    private School school;

    public Student() {
        System.out.println("Student无参数构造方法");
    }


    @Override
    public String toString() {
        return "Student{" +
                "name='" + name + '\'' +
                ", age=" + age +
                ", school=" + school +
                '}';
    }
}
Spring配置文件
<?xml version="1.0" encoding="UTF-8"?>
<beans xmlns="http://www.springframework.org/schema/beans"
       xmlns:xsi="http://www.w3.org/2001/XMLSchema-instance"
       xmlns:context="http://www.springframework.org/schema/context"
       xsi:schemaLocation="http://www.springframework.org/schema/beans
       http://www.springframework.org/schema/beans/spring-beans.xsd
       http://www.springframework.org/schema/context
       https://www.springframework.org/schema/context/spring-context.xsd">

    <context:component-scan base-package="com.bjpowernode.ba07"/>

    <!--读取外部的属性配置文件
        property-placeholder:读取properties这样的文件
    -->
    <context:property-placeholder location="classpath:/myconf.properties" />
</beans>
测试
public class MyTest3 {
    @Test
    public void test01(){
        String config="applicationContext.xml";
        ApplicationContext ctx = new ClassPathXmlApplicationContext(config);

        Student student = (Student) ctx.getBean("myStudent");

        System.out.println("student=="+student);
    }
}
💫byName自动注入
byName自动注入
1.@Autowired:给引用类型赋值。
2.@Qualifer(value=“bean的id”):从容器中找到指定名称的对象,把这个对象赋值给引用类型。
@Component("myStudent")
public class Student {

    //byName
    @Autowired
    @Qualifier("mySchool")
    private School school;

    public Student() {
        System.out.println("Student无参数构造方法");
    }


    @Override
    public String toString() {
        return "Student{" +
                "name='" + name + '\'' +
                ", age=" + age +
                ", school=" + school +
                '}';
    }
}
测试
public class MyTest3 {
    @Test
    public void test01(){
        String config="applicationContext.xml";
        ApplicationContext ctx = new ClassPathXmlApplicationContext(config);
        Student student = (Student) ctx.getBean("myStudent");
        System.out.println("student=="+student);
    }
}
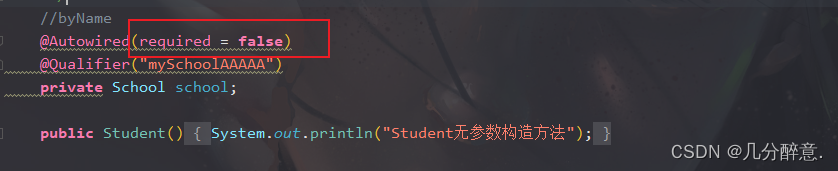
💫required属性
 *        属性:required :boolean类型的属性, 默认true
 *             true:spring在启动的时候,创建容器对象时候,会检查引用类型是否赋值成功。
 *                   如果赋值失败, 终止程序执行,并报错。
 *             false:引用类型赋值失败,程序正常执行,不报错。引用类型的值是null
示例:
✨@Resource引用类型属性赋值
* 引用类型
* @Resource: 来自jdk中,给引用类型赋值的,支持byName,byType.默认是byName
* spring支持这个注解的使用。
* 位置:1)在属性定义的上面,无需set方法, 推荐使用
* 2)在set方法的上面
*
* 说明,使用jdk1.8带有@Resource注解, 高于jdk1.8没有这个@Resource,
* 需要加入一个依赖。
**网上学习资料一大堆,但如果学到的知识不成体系,遇到问题时只是浅尝辄止,不再深入研究,那么很难做到真正的技术提升。**
**需要这份系统化的资料的朋友,可以添加V获取:vip204888 (备注大数据)**

**一个人可以走的很快,但一群人才能走的更远!不论你是正从事IT行业的老鸟或是对IT行业感兴趣的新人,都欢迎加入我们的的圈子(技术交流、学习资源、职场吐槽、大厂内推、面试辅导),让我们一起学习成长!**
这个注解的使用。
* 位置:1)在属性定义的上面,无需set方法, 推荐使用
* 2)在set方法的上面
*
* 说明,使用jdk1.8带有@Resource注解, 高于jdk1.8没有这个@Resource,
* 需要加入一个依赖。
**网上学习资料一大堆,但如果学到的知识不成体系,遇到问题时只是浅尝辄止,不再深入研究,那么很难做到真正的技术提升。**
**需要这份系统化的资料的朋友,可以添加V获取:vip204888 (备注大数据)**
[外链图片转存中...(img-IWTZAIqU-1713351944598)]
**一个人可以走的很快,但一群人才能走的更远!不论你是正从事IT行业的老鸟或是对IT行业感兴趣的新人,都欢迎加入我们的的圈子(技术交流、学习资源、职场吐槽、大厂内推、面试辅导),让我们一起学习成长!**


 2425
2425


 被折叠的 条评论
为什么被折叠?
被折叠的 条评论
为什么被折叠?
 到【灌水乐园】发言


