


先自我介绍一下,小编浙江大学毕业,去过华为、字节跳动等大厂,目前阿里P7
深知大多数程序员,想要提升技能,往往是自己摸索成长,但自己不成体系的自学效果低效又漫长,而且极易碰到天花板技术停滞不前!
因此收集整理了一份《2024年最新大数据全套学习资料》,初衷也很简单,就是希望能够帮助到想自学提升又不知道该从何学起的朋友。


既有适合小白学习的零基础资料,也有适合3年以上经验的小伙伴深入学习提升的进阶课程,涵盖了95%以上大数据知识点,真正体系化!
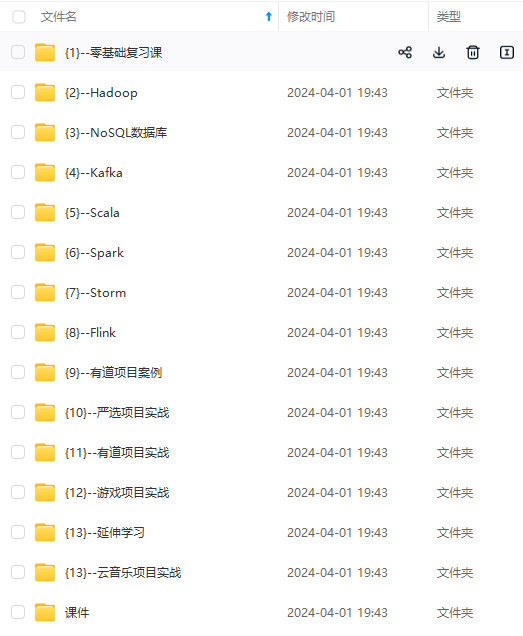
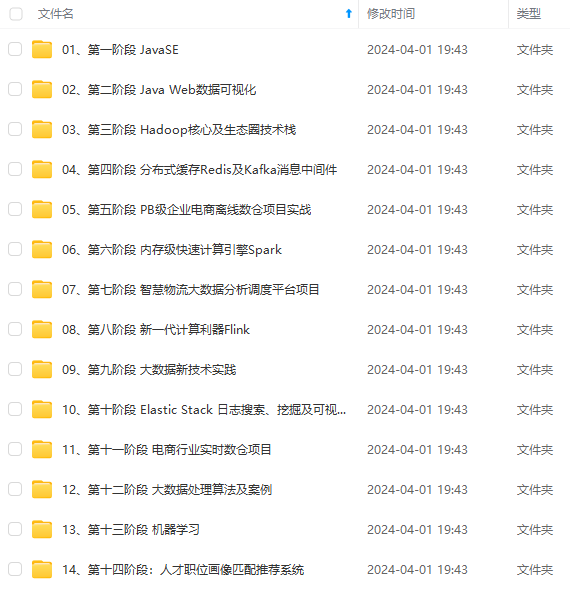
由于文件比较多,这里只是将部分目录截图出来,全套包含大厂面经、学习笔记、源码讲义、实战项目、大纲路线、讲解视频,并且后续会持续更新
如果你需要这些资料,可以添加V获取:vip204888 (备注大数据)

正文
自己参照上面的网络规划表修改地址和主机名,一定要记得修改完地址和主机名以后记得重启网络服务和bash刷新一下系统信息。
只能耐心点慢慢在虚拟机上改。这边就贴一个改db1的过程,剩下就不贴了。自己认真改好,全改好以后不要忘记把mycat也刷新一下网络服务和系统信息以防止地址冲突和主机名重复。


全部配置完以后,我们就进入了正式的实验环境了,接着其他就是把前面文章讲到的几个集群重新搭建一遍。我们首先来实现主从读写分离数据库集群。
先将所有虚拟机都挂载一下本地源,然后在mycat节点上安装java环境。

[root@mycat ~]# yum install -y java java-devel
然后去db1和2节点安装数据库服务,并且都将其启动后设置为自启动。
yum install -y mariadb mariadb-server
[root@db1 ~]# systemctl start mariadb
[root@db1 ~]# systemctl enable mariadb
都进行数据库初始化,这边数据库密码一定要是123456不能改,因为后端jar包中mysql驱动配置的密码就为123456。
这边只贴db1的图,db2也是一样的流程。
[root@db1 ~]#  mysql_secure_installation

NOTE: RUNNING ALL PARTS OF THIS SCRIPT IS RECOMMENDED FOR ALL MariaDB
      SERVERS IN PRODUCTION USE!  PLEASE READ EACH STEP CAREFULLY!

In order to log into MariaDB to secure it, we'll need the current
password for the root user.  If you've just installed MariaDB, and
you haven't set the root password yet, the password will be blank,
so you should just press enter here.

Enter current password for root (enter for none):
OK, successfully used password, moving on...

Setting the root password ensures that nobody can log into the MariaDB
root user without the proper authorisation.

Set root password? [Y/n] y
New password:
Re-enter new password:
Password updated successfully!
Reloading privilege tables..
 ... Success!


By default, a MariaDB installation has an anonymous user, allowing anyone
to log into MariaDB without having to have a user account created for
them.  This is intended only for testing, and to make the installation
go a bit smoother.  You should remove them before moving into a
production environment.

Remove anonymous users? [Y/n] y
 ... Success!

Normally, root should only be allowed to connect from 'localhost'.  This
ensures that someone cannot guess at the root password from the network.

Disallow root login remotely? [Y/n] n
 ... skipping.

By default, MariaDB comes with a database named 'test' that anyone can
access.  This is also intended only for testing, and should be removed
before moving into a production environment.

Remove test database and access to it? [Y/n] y
 - Dropping test database...
 ... Success!
 - Removing privileges on test database...
 ... Success!

Reloading the privilege tables will ensure that all changes made so far
will take effect immediately.

Reload privilege tables now? [Y/n] y
 ... Success!

Cleaning up...

All done!  If you've completed all of the above steps, your MariaDB
installation should now be secure.

Thanks for using MariaDB!
[root@db1 ~]#
配置db1为数据库主节点。
[root@db1 ~]# vi /etc/my.cnf
#
# This group is read both both by the client and the server
# use it for options that affect everything
#
[client-server]

#
# include all files from the config directory
#
!includedir /etc/my.cnf.d
[mysqld]
log_bin = mysql-bin                       #记录操作日志
binlog_ignore_db = mysql                  #不同步MySQL系统数据库
server_id = 22                            #数据库集群中的每个节点id都要不同,一般使用IP地址
的最后段的数字,例如172.16.51.18,server_id就写18

datadir=/var/lib/mysql
socket=/var/lib/mysql/mysql.sock
# Disabling symbolic-links is recommended to prevent assorted security risks
symbolic-links=0

[mysqld_safe]
log-error=/var/log/mariadb/mariadb.log
pid-file=/var/run/mariadb/mariadb.pid
然后重启服务。

开放db1主节点的数据库权限。在主节点db1虚拟机上使用mysql命令登录MariaDB数据库,授权在任何客户端机器上可以以root用户登录到数据库。在主节点db1数据库上创建一个user用户让从节点db2连接,并赋予从节点同步主节点数据库的权限
[root@db1 ~]# mysql -uroot -p123456
Welcome to the MariaDB monitor.  Commands end with ; or \g.
Your MariaDB connection id is 9
Server version: 10.3.18-MariaDB-log MariaDB Server

Copyright (c) 2000, 2018, Oracle, MariaDB Corporation Ab and others.

Type 'help;' or '\h' for help. Type '\c' to clear the current input statement.

MariaDB [(none)]> grant all privileges  on *.* to root@'%' identified by "123456";
Query OK, 0 rows affected (0.000 sec)

MariaDB [(none)]> grant replication slave on *.* to 'user'@'db2' identified by '123456';
Query OK, 0 rows affected (0.000 sec)

MariaDB [(none)]>
让db2从节点同步db1主节点。在从节点db2虚拟机上使用mysql命令登录MariaDB数据库,配置从节点连接主节点的连接信息。master_host为主节点主机名db1,master_user为在db1中创建的用户user。
配置完毕主从数据库之间的连接信息之后,开启从节点服务。使用show slave status\G; 命令并查看从节点服务状态,如果Slave_IO_Running和Slave_SQL_Running的状态都为YES,则从节点服务开启成功。
[root@db2 ~]# mysql -uroot -p123456
Welcome to the MariaDB monitor.  Commands end with ; or \g.
Your MariaDB connection id is 21
Server version: 10.3.18-MariaDB MariaDB Server

Copyright (c) 2000, 2018, Oracle, MariaDB Corporation Ab and others.

Type 'help;' or '\h' for help. Type '\c' to clear the current input statement.

MariaDB [(none)]> change master to master_host='db1',master_user='user',master_password='12  3456';
Query OK, 0 rows affected (0.002 sec)

MariaDB [(none)]> start slave;
Query OK, 0 rows affected (0.001 sec)
MariaDB [(none)]> show slave status\G;
*************************** 1. row ***************************
                Slave_IO_State: Waiting for master to send event
                   Master_Host: db1
                   Master_User: user
                   Master_Port: 3306
                 Connect_Retry: 60
               Master_Log_File: mysql-bin.000001
           Read_Master_Log_Pos: 702
                Relay_Log_File: db2-relay-bin.000002
                 Relay_Log_Pos: 1001
         Relay_Master_Log_File: mysql-bin.000001
              Slave_IO_Running: Yes
             Slave_SQL_Running: Yes
回到主节点db1上验证一下同步功能。先在主节点db1的数据库中创建库test,并在库test中创建表company,插入表数据。创建完成后,查看表company数据。
[root@db1 ~]# mysql -uroot -p123456
Welcome to the MariaDB monitor.  Commands end with ; or \g.
Your MariaDB connection id is 11
Server version: 10.3.18-MariaDB-log MariaDB Server

Copyright (c) 2000, 2018, Oracle, MariaDB Corporation Ab and others.

Type 'help;' or '\h' for help. Type '\c' to clear the current input statement.

MariaDB [(none)]> create database test;
Query OK, 1 row affected (0.000 sec)
MariaDB [(none)]> use test
Database changed
MariaDB [test]> create table company(id int not null primary key,name varchar(50),addr varchar(255));
Query OK, 0 rows affected (0.034 sec)

MariaDB [test]>  insert into company values(1,"facebook","usa");
Query OK, 1 row affected (0.001 sec)

MariaDB [test]> select * from company;
+----+----------+------+
| id | name     | addr |
+----+----------+------+
|  1 | facebook | usa  |
+----+----------+------+
1 row in set (0.000 sec)

MariaDB [test]>
这时从节点db2的数据库就会同步主节点数据库创建的test库,可以在从节点查询test数据库与表company,如果可以查询到信息,就能验证主从数据库集群功能在正常运行。
[root@db2 ~]# mysql -uroot -p123456
Welcome to the MariaDB monitor.  Commands end with ; or \g.
Your MariaDB connection id is 25
Server version: 10.3.18-MariaDB MariaDB Server

Copyright (c) 2000, 2018, Oracle, MariaDB Corporation Ab and others.

Type 'help;' or '\h' for help. Type '\c' to clear the current input statement.

MariaDB [(none)]> show databases;
+--------------------+
| Database           |
+--------------------+
| information_schema |
| mysql              |
| performance_schema |
| test               |
+--------------------+
4 rows in set (0.000 sec)

MariaDB [(none)]> select * from test.company;
+----+----------+------+
| id | name     | addr |
+----+----------+------+
|  1 | facebook | usa  |
+----+----------+------+
1 row in set (0.000 sec)

MariaDB [(none)]>
我们要到db1上导入这次搭建应用商城的数据库表。
回到db1上构建数据库。
[root@db1 ~]# mysql -uroot -p123456
Welcome to the MariaDB monitor.  Commands end with ; or \g.
Your MariaDB connection id is 12
Server version: 10.3.18-MariaDB-log MariaDB Server

Copyright (c) 2000, 2018, Oracle, MariaDB Corporation Ab and others.

Type 'help;' or '\h' for help. Type '\c' to clear the current input statement.

MariaDB [(none)]> create database gpmall;
Query OK, 1 row affected (0.000 sec)

MariaDB [(none)]>  use gpmall
Database changed
MariaDB [gpmall]>  source /root/gpmall.sql
接着我们回到mycat节点上部署mycat。先解压该服务目录然后赋予权限添加系统变量。
[root@mycat ~]# tar -zxvf Mycat-server-1.6-RELEASE-20161028204710-linux.tar.gz -C /usr/local/
[root@mycat ~]# chown -R 777 /usr/local/mycat/
[root@mycat ~]# echo export MYCAT_HOME=/usr/local/mycat/ >> /etc/profile
[root@mycat ~]# source /etc/profile
然后编写mycat的逻辑库文件来实现读写分离。直接把里面的内容用dG键删光重写。
[root@mycat ~]# vi /usr/local/mycat/conf/schema.xml
<?xml version="1.0"?>
<!DOCTYPE mycat:schema SYSTEM "schema.dtd">
<mycat:schema xmlns:mycat="http://io.mycat/">
<schema name="gpmall" checkSQLschema="false" sqlMaxLimit="100" dataNode="dn1"></schema>
<dataNode name="dn1" dataHost="localhost1" database="gpmall" />
<dataHost name="localhost1" maxCon="1000" minCon="10" balance="3" dbType="mysql" dbDriver="native" writeType="0" switchType="1"  slaveThreshold="100">
    <heartbeat>select user()</heartbeat>
    <writeHost host="hostM1" url="172.16.51.22:3306" user="root" password="123456">
        <readHost host="hostS1" url="172.16.51.26:3306" user="root" password="123456" />
    </writeHost>
</dataHost>
</mycat:schema>
再去修改服务配置文件,要到文件末尾进行修改。在server.xml文件的最后部分,将USERDB改成gpmall,然后删除或者注释掉下面多余的参数配置。
就如我这边贴出的代码所示,多余的部分已经删除,数据库名也已经修改为gpmall。
[root@mycat ~]# vi /usr/local/mycat/conf/server.xml
        <user name="root">
                <property name="password">123456</property>
                <property name="schemas">gpmall</property>

                <!-- 表级 DML 权限设置 -->
                <!--
                <privileges check="false">
                        <schema name="TESTDB" dml="0110" >
                                <table name="tb01" dml="0000"></table>
                                <table name="tb02" dml="1111"></table>
                        </schema>
                </privileges>
                 -->
        </user>


</mycat:server>
再修改一下配置文件权限。
[root@mycat ~]# chown root:root /usr/local/mycat/conf/schema.xml
再次回到mycat节点上启动服务,安装网络工具包,使用命令查看端口验证服务是否启动。如果能看到8066端口,则说明Mycat服务启动成功。有的时候有延迟没出来的话可以把启动服务的start替换成restart重启服务再查看端口试试。
[root@mycat ~]# /bin/bash /usr/local/mycat/bin/mycat start
Starting Mycat-server...
[root@mycat ~]# yum install -y net-tools
[root@mycat ~]# netstat -ntpl
Active Internet connections (only servers)
Proto Recv-Q Send-Q Local Address           Foreign Address         State       PID/Program name
tcp        0      0 0.0.0.0:22              0.0.0.0:*               LISTEN      1129/sshd
tcp        0      0 127.0.0.1:25            0.0.0.0:*               LISTEN      1611/master
tcp        0      0 127.0.0.1:32000         0.0.0.0:*               LISTEN      3826/java
tcp6       0      0 :::9066                 :::*                    LISTEN      3826/java
tcp6       0      0 :::36682                :::*                    LISTEN      3826/java
tcp6       0      0 :::22                   :::*                    LISTEN      1129/sshd
tcp6       0      0 ::1:25                  :::*                    LISTEN      1611/master
tcp6       0      0 :::48605                :::*                    LISTEN      3826/java
tcp6       0      0 :::1984                 :::*                    LISTEN      3826/java
tcp6       0      0 :::8066                 :::*                    LISTEN      3826/java
[root@mycat ~]#
到这里我们数据库的机子已经配置完了,接着我们去配置redis服务,我们到redis节点上去。
安装服务先。
[root@redis ~]# yum install redis -y
和单节点类似的修改配置文件。将bind 127.0.0.1这一行注释掉,将protected-mode yes改为protected-mode no。
[root@redis ~]# vi /etc/redis.conf


然后启动redis服务并设置为自启动。如果检查到6379端口,即证明Redis服务运行成功。
[root@redis ~]# systemctl start redis
[root@redis ~]# systemctl enable redis
Created symlink from /etc/systemd/system/multi-user.target.wants/redis.service to /usr/lib/systemd/system/redis.service.
[root@redis ~]# yum  install -y net-tools
[root@redis ~]# netstat -ntpl
Active Internet connections (only servers)
Proto Recv-Q Send-Q Local Address           Foreign Address         State       PID/Program name
tcp        0      0 0.0.0.0:6379            0.0.0.0:*               LISTEN      2435/redis-server *
tcp        0      0 0.0.0.0:22              0.0.0.0:*               LISTEN      1129/sshd
tcp        0      0 127.0.0.1:25            0.0.0.0:*               LISTEN      1591/master
tcp6       0      0 :::6379                 :::*                    LISTEN      2435/redis-server *
tcp6       0      0 :::22                   :::*                    LISTEN      1129/sshd
tcp6       0      0 ::1:25                  :::*                    LISTEN      1591/master
[root@redis ~]#
接下来我们配置zookeeper集群和Kafka集群服务。
我们这边主机名直接设置为zk1,2,3。
步骤和前面文章搭建集群的方法一模一样,先在3个节点上安装java环境。我这边只贴一个节点的图。
[root@zk1 ~]# yum install -y java java-devel
同样三个节点都解压服务文件。
[root@zk1 ~]# tar -zxvf zookeeper-3.4.14.tar.gz
接着修改节点配置文件,然后scp传递给另外两个节点。一般来说其他都是默认对的上的,就直接文件末尾添加3个节点参数条目即可。
[root@zk1 ~]# cd zookeeper-3.4.14/conf/
[root@zk1 conf]# mv zoo_sample.cfg zoo.cfg
[root@zk1 conf]# vi zoo.cfg
2:tickTime=2000
5:initLimit=10
8:syncLimit=5
12:dataDir=/tmp/zookeeper
14:clientPort=2181
29:server.1=172.16.51.23:2888:3888
30:server.2=172.16.51.32:2888:3888
31:server.3=172.16.51.41:2888:3888
[root@zk1 conf]# scp zoo.cfg root@172.16.51.32:/root/zookeeper-3.4.14/conf/zoo.cfg
The authenticity of host '172.16.51.32 (172.16.51.32)' can't be established.
ECDSA key fingerprint is a2:06:6f:65:a3:1f:9c:53:91:6d:0a:81:d0:6f:da:6a.
Are you sure you want to continue connecting (yes/no)? yes
Warning: Permanently added '172.16.51.32' (ECDSA) to the list of known hosts.
root@172.16.51.32's password:
zoo.cfg                                                      100% 1019     1.0KB/s   00:00
[root@zk1 conf]# scp zoo.cfg root@172.16.51.41:/root/zookeeper-3.4.14/conf/zoo.cfg
The authenticity of host '172.16.51.41 (172.16.51.41)' can't be established.
ECDSA key fingerprint is a2:06:6f:65:a3:1f:9c:53:91:6d:0a:81:d0:6f:da:6a.
Are you sure you want to continue connecting (yes/no)? yes
Warning: Permanently added '172.16.51.41' (ECDSA) to the list of known hosts.
root@172.16.51.41's password:
zoo.cfg                                                      100% 1019     1.0KB/s   00:00
[root@zk1 conf]#
然后各自创建myid文件编辑id。自己对应的1,2,3节点都编辑填上对应1,2,3标号即可。这里只给出zk1节点,2和3节点则是把数字改成2和3。
[root@zk1 ~]# cd
[root@zk1 ~]# mkdir /tmp/zookeeper
[root@zk1 ~]# vi /tmp/zookeeper/myid
[root@zk1 ~]# cat /tmp/zookeeper/myid
1
[root@zk1 ~]#
到启动目录下,启动zookeeper服务。将3个节点都这样启动以后再逐步查看它们的状态。
[root@zk1 ~]# cd zookeeper-3.4.14/bin/
[root@zk1 bin]# ./zkServer.sh start
ZooKeeper JMX enabled by default
Using config: /root/zookeeper-3.4.14/bin/../conf/zoo.cfg
Starting zookeeper ... STARTED
可以看到,3个节点,zookeeper2为leader,其他的都是follower。
[root@zk1 bin]#  ./zkServer.sh status
ZooKeeper JMX enabled by default
Using config: /root/zookeeper-3.4.14/bin/../conf/zoo.cfg
Mode: follower
[root@zk2 bin]#  ./zkServer.sh status
ZooKeeper JMX enabled by default
Using config: /root/zookeeper-3.4.14/bin/../conf/zoo.cfg
Mode: leader
[root@zk3 bin]#  ./zkServer.sh status
ZooKeeper JMX enabled by default
Using config: /root/zookeeper-3.4.14/bin/../conf/zoo.cfg
Mode: follower
那zookeeper集群弄完了,我们马上开始弄Kafka。
依旧是3节点都解压安装包。记得切换到root目录下。
[root@zk1 bin]# cd
[root@zk1 ~]# tar -zxvf kafka_2.11-1.1.1.tgz
然后改配置文件。在zookeeper1节点,进入kafka_2.11-1.1.1/config目录下,编辑server.properties文件。在配置文件中找到以下两行并注释掉。
因为这是每个节点都一样的注释区,所以我们在zk1节点上改完以后scp传给另外2个节点即可。
[root@zk1 ~]# cd kafka_2.11-1.1.1/config/
[root@zk1 config]# vi server.properties


[root@zk1 config]# scp server.properties root@172.16.51.32:/root/kafka_2.11-1.1.1/config/server.properties
The authenticity of host '172.16.51.32 (172.16.51.32)' can't be established.
ECDSA key fingerprint is a2:06:6f:65:a3:1f:9c:53:91:6d:0a:81:d0:6f:da:6a.
Are you sure you want to continue connecting (yes/no)? yes
Warning: Permanently added '172.16.51.32' (ECDSA) to the list of known hosts.
root@172.16.51.32's password:
server.properties                                            100% 6855     6.7KB/s   00:00
[root@zk1 config]# scp server.properties root@172.16.51.41:/root/kafka_2.11-1.1.1/config/server.properties
The authenticity of host '172.16.51.41 (172.16.51.41)' can't be established.
ECDSA key fingerprint is a2:06:6f:65:a3:1f:9c:53:91:6d:0a:81:d0:6f:da:6a.
Are you sure you want to continue connecting (yes/no)? yes
Warning: Permanently added '172.16.51.41' (ECDSA) to the list of known hosts.
root@172.16.51.41's password:
server.properties                                            100% 6855     6.7KB/s   00:00
[root@zk1 config]#
然后我们在文件末尾逐个添加节点们不一样的内容。
zk1节点
broker.id=1
zookeeper.connect=172.16.51.23:2181,172.16.51.32:2181,172.16.51.41:2181
listeners = PLAINTEXT://172.16.51.23:9092
zk2
broker.id=2
zookeeper.connect=172.16.51.23:2181,172.16.51.32:2181,172.16.51.41:2181
listeners = PLAINTEXT://172.16.51.32:9092
zk3
broker.id=3
zookeeper.connect=172.16.51.23:2181,172.16.51.32:2181,172.16.51.41:2181
listeners = PLAINTEXT://172.16.51.41:9092
然后我们在逐个节点上启动服务并用jps命令查看是否开启。这边就只贴zk1节点的图,剩下两个一样的步骤。
[root@zk1 config]# cd
[root@zk1 ~]# cd kafka_2.11-1.1.1/bin/
[root@zk1 bin]# ./kafka-server-start.sh -daemon ../config/server.properties
[root@zk1 bin]# jps
2868 Jps
2459 QuorumPeerMain
2799 Kafka
**网上学习资料一大堆,但如果学到的知识不成体系,遇到问题时只是浅尝辄止,不再深入研究,那么很难做到真正的技术提升。**
**需要这份系统化的资料的朋友,可以添加V获取:vip204888 (备注大数据)**

**一个人可以走的很快,但一群人才能走的更远!不论你是正从事IT行业的老鸟或是对IT行业感兴趣的新人,都欢迎加入我们的的圈子(技术交流、学习资源、职场吐槽、大厂内推、面试辅导),让我们一起学习成长!**
2:9092
zk3
broker.id=3
zookeeper.connect=172.16.51.23:2181,172.16.51.32:2181,172.16.51.41:2181
listeners = PLAINTEXT://172.16.51.41:9092
然后我们在逐个节点上启动服务并用jps命令查看是否开启。这边就只贴zk1节点的图,剩下两个一样的步骤。
[root@zk1 config]# cd
[root@zk1 ~]# cd kafka_2.11-1.1.1/bin/
[root@zk1 bin]# ./kafka-server-start.sh -daemon ../config/server.properties
[root@zk1 bin]# jps
2868 Jps
2459 QuorumPeerMain
2799 Kafka


**网上学习资料一大堆,但如果学到的知识不成体系,遇到问题时只是浅尝辄止,不再深入研究,那么很难做到真正的技术提升。**

**需要这份系统化的资料的朋友,可以添加V获取:vip204888 (备注大数据)**
[外链图片转存中...(img-9cV0TlFw-1713276173940)]

**一个人可以走的很快,但一群人才能走的更远!不论你是正从事IT行业的老鸟或是对IT行业感兴趣的新人,都欢迎加入我们的的圈子(技术交流、学习资源、职场吐槽、大厂内推、面试辅导),让我们一起学习成长!**


 163
163


 被折叠的 条评论
为什么被折叠?
被折叠的 条评论
为什么被折叠?
 到【灌水乐园】发言


