


打包成功后,可以创建一个 SpringBoot 项目,在 pom 中加入下面依赖:
<dependency>
     <artifactId>leaf-boot-starter</artifactId>
     <groupId>com.sankuai.inf.leaf</groupId>
     <version>1.0.1-RELEASE</version>
     <exclusions>
         <exclusion>
             <groupId>com.alibaba</groupId>
             <artifactId>druid</artifactId>
         </exclusion>
         <exclusion>
             <groupId>mysql</groupId>
             <artifactId>mysql-connector-java</artifactId>
         </exclusion>
     </exclusions>
 </dependency>

 <dependency>
     <groupId>com.alibaba</groupId>
     <artifactId>druid</artifactId>
     <version>1.1.6</version>
 </dependency>

 <dependency>
     <groupId>mysql</groupId>
     <artifactId>mysql-connector-java</artifactId>
 </dependency>
二、Leaf-segment 方式使用
首先创建leaf使用的数据库:
CREATE DATABASE leaf
创建ID规则表:
CREATE TABLE `leaf\_alloc` (
  `biz\_tag` varchar(128)  NOT NULL DEFAULT '',
  `max\_id` bigint(20) NOT NULL DEFAULT '1',
  `step` int(11) NOT NULL,
  `description` varchar(256)  DEFAULT NULL,
  `update\_time` timestamp NOT NULL DEFAULT CURRENT\_TIMESTAMP ON UPDATE CURRENT\_TIMESTAMP,
  PRIMARY KEY (`biz\_tag`)
) ENGINE=InnoDB;
写入两个 biz_tag:
insert into leaf_alloc(biz_tag, max_id, step, description) values('test1', 1, 2000, '测试1');
insert into leaf_alloc(biz_tag, max_id, step, description) values('test2', 1, 2000, '测试2');
项目中加入leaf 和数据库配置:
leaf:
  name: test1
  segment:
    enable: true
    url: jdbc:mysql://localhost:3306/leaf?useUnicode=true&characterEncoding=utf8&serverTimezone=GMT
    username: root
    password: root
生成ID测试:
@Slf4j
@SpringBootTest
class LeafIdApplicationTests {

    @Resource
    private SegmentService segmentService;

    @Test
    void contextLoads() {
        // 生成 1000 个ID
        StopWatch sw = new StopWatch();
        sw.start();
        for (int i = 0; i < 1000; i++) {
            long id1 = segmentService.getId("test1").getId();
            long id2 = segmentService.getId("test2").getId();
            log.info("id1: {}, id2: {}", id1, id2);
        }
        sw.stop();
        log.info(sw.prettyPrint());
    }

}
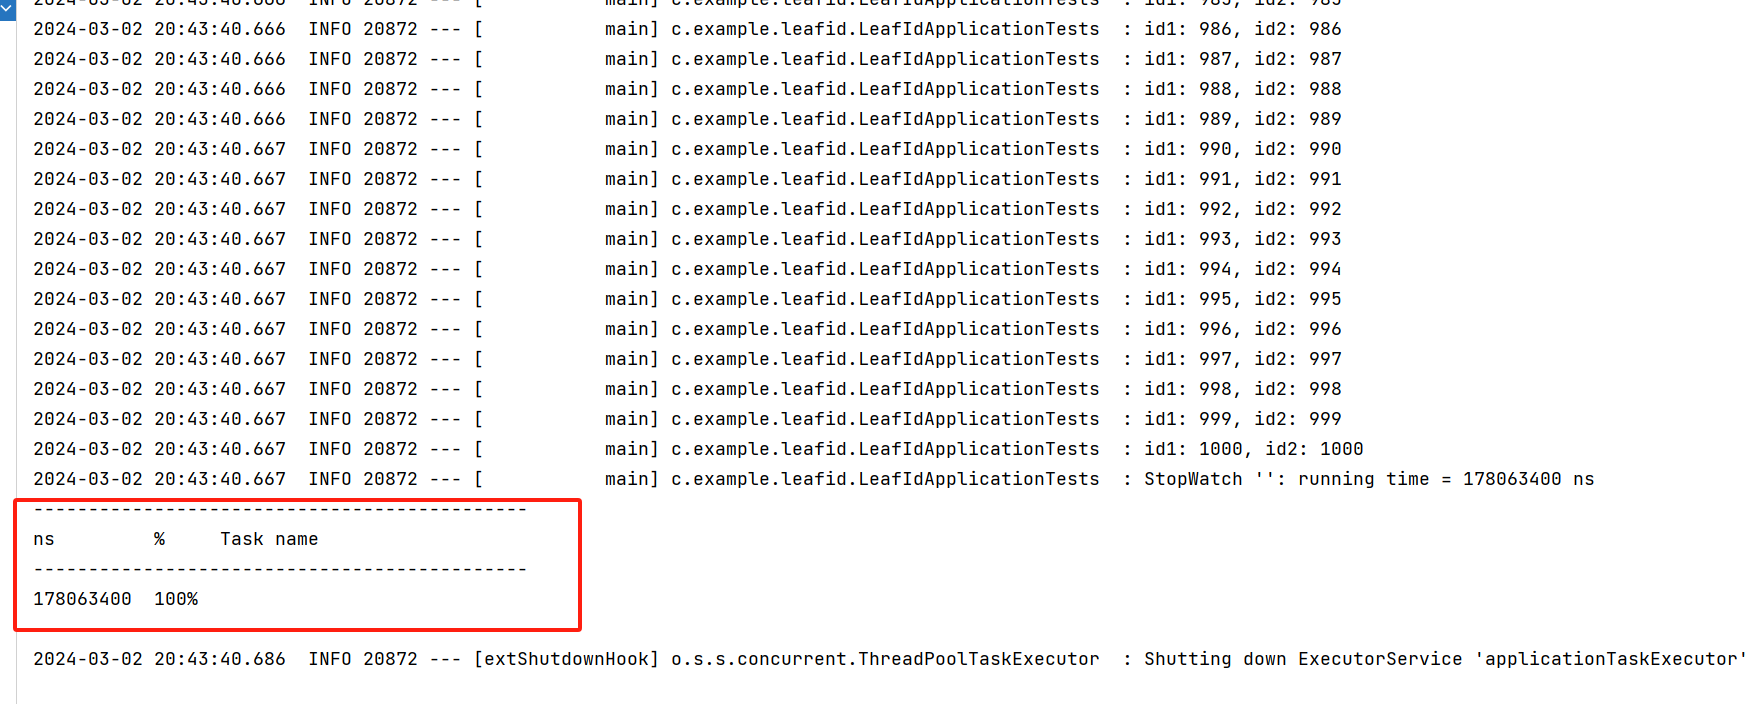
可以看到在约 0.178 秒的时间,为两个业务场景生成了 1000个ID。
三、Leaf-snowflake 方式使用
这种模式依赖于 Zookeeper ,所以在实验前你需要有一个运行中的 Zookeeper 服务。
这种模式操作ZK使用 curator,因此需要引入 curator 的依赖:
<dependency>
    <groupId>org.apache.curator</groupId>
    <artifactId>curator-recipes</artifactId>
    <version>2.12.0</version>
</dependency>
在配置文件中开启Leaf-snowflake 模式:
leaf:
  name: test1
  segment:
    enable: true
    url: jdbc:mysql://localhost:3306/leaf?useUnicode=true&characterEncoding=utf8&serverTimezone=GMT
    username: root
    password: root
  snowflake:
    enable: true
    address: 127.0.0.1
    port: 2181
生成ID测试:
@Slf4j
@SpringBootTest
class LeafIdApplicationTests {
@Resource
private SegmentService segmentService;
@Resource
private SnowflakeService snowflakeService;


**网上学习资料一大堆,但如果学到的知识不成体系,遇到问题时只是浅尝辄止,不再深入研究,那么很难做到真正的技术提升。**
**[需要这份系统化资料的朋友,可以戳这里获取](https://bbs.csdn.net/topics/618545628)**
**一个人可以走的很快,但一群人才能走的更远!不论你是正从事IT行业的老鸟或是对IT行业感兴趣的新人,都欢迎加入我们的的圈子(技术交流、学习资源、职场吐槽、大厂内推、面试辅导),让我们一起学习成长!**
技术提升。**
**[需要这份系统化资料的朋友,可以戳这里获取](https://bbs.csdn.net/topics/618545628)**
**一个人可以走的很快,但一群人才能走的更远!不论你是正从事IT行业的老鸟或是对IT行业感兴趣的新人,都欢迎加入我们的的圈子(技术交流、学习资源、职场吐槽、大厂内推、面试辅导),让我们一起学习成长!**


 2373
2373


 被折叠的 条评论
为什么被折叠?
被折叠的 条评论
为什么被折叠?
 到【灌水乐园】发言


