


}
// 子类继承了父类,但是没有任何实现
public class Child extends Parent {
}
然后我们通过子类获取注解信息,测试代码如下:
private void test() {
Annotation[] annotations = Child.class.getAnnotations();
System.out.println(“-----start-----”);
for (Annotation annotation : annotations) {
System.out.println(annotation.toString());
}
System.out.println(“------end------”);
}
运行以上代码,最终会打印


>
> System.out: -----start----- System.out: @com.payne.annotation.demo.ExAnn() System.out: ------end------
>
>
>


通过以上打印可以发现:父类里面的注解如果有被@Inherited注解,其子类才可以获取到父类的注解。


## 3. 自定义注解


### 3.1 运行时注解


以前在Android开发过程中,我们经常会使用到`findViewById`去获取`View`,大量的视图控件意味着我们会去重复多次使用`findViewById`,以至于后面出现了第三方框架`ButterKnife`,下面以`findViewById`做示例。


1. 首先创建一个注解类,创建的注解类和接口有点像,只不过在`interface`前面多了一个@符号,如下:
@Retention(RetentionPolicy.RUNTIME)
@Target({ElementType.FIELD, ElementType.METHOD})
public @interface BindView {
int value();
}
2. 其次在测试类中使用,代码如下:
public class MainActivity extends AppCompatActivity {
@BindView(R.id.tv_show)
TextView tvShow;

@Override
protected void onCreate(Bundle savedInstanceState) {
    super.onCreate(savedInstanceState);
    setContentView(R.layout.activity_main);
    processView(this);
    tvShow.setText("赋值成功");
}

/**
 * 反射处理findViewById
 */
public static void processView(Activity activity) {
    // 获取Activity中所有的字段
    Field[] fields = activity.getClass().getDeclaredFields();
    if (fields == null) {
        return;
    }
    // 遍历字段数组,找到带有BindView注解的字段
    for (Field field : fields) {
        BindView bindView = field.getAnnotation(BindView.class);
        if (bindView == null) {
            continue;
        }
        // 获取注解值——即ViewID
        int value = bindView.value();
        // 通过ViewID找到View
        View viewById = activity.findViewById(value);
        try {
            // 给字段View赋值
            field.set(activity, viewById);
        } catch (IllegalAccessException e) {
            e.printStackTrace();
        }
    }
}
}
下面是运行效果:

可以看到并没有直接给`tvShow`设置`findViewById`,但是运行之后`TextView`依然被成功设置为"赋值成功"。这是因为运行时在processView方法中通过反射获取并设值。
### 3.2 编译时注解
反射使用多了比较影响性能,翻看`ButterKnife`、`Retrofit`等第三方框架源码我们也能发现其并不是通过运行时反射赋值,而是通过编译工具在编译期间就对注解进行了处理,而处理注解需要使用到注解处理器,那什么是注解处理器呢? 注解处理器:英文为Annotation Processor,顾名思义,是用来处理注解的工具,其基本原理是将自定义注解处理器注册到编译器,编译器在编译阶段会去执行注册了的自定义注解处理器,完成对应的代码注入。 实现自定义注解处理器主要分为三步:
1. 编写注解。
2. 编写继承自`javax.annotation.processing`包下的`AbstractProcessor`类的自定义注解处理器。
3. 将自定义注解处理器注册到编译器。
下面是自定义注解处理器的实现示例:
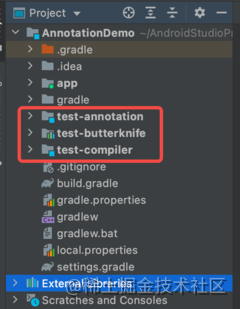
如上图,示例主要包括两个Java module和一个Android module。
1. test-annotation:Java module,主要用来存放自定义注解。
2. test-compiler:Java module,主要存放继承自`AbstractProcessor`类的自定义注解处理器类。
3. test-butterknife:Android module,主要存放工具类,用来反射获取编译器根据注解处理器生成的类。
#### 3.2.1 定义注解
test-annotation模块下定义一个需要处理的注解类`BindView`
@Retention(RetentionPolicy.CLASS)
@Target({ElementType.FIELD})
public @interface BindView {
int value();
}
#### 3.2.2 实现注解处理器
public class AnnotationCompiler extends AbstractProcessor {
/**
 * 设置支持的源版本,默认为RELEASE_6
 * 两种方式设置版本:
 * 1. 此处返回指定版本
 * 2. 类上面设置SupportedSourceVersion注解,并传入版本号
 */
@Override
public SourceVersion getSupportedSourceVersion() {
    return SourceVersion.latestSupported();
}

/**
 * 设置支持的注解类型,默认为空集合(都不支持)
 * 两种方式设置注解集合:
 * 1. 此处返回支持的注解集合
 * 2. 类上面设置SupportedAnnotationTypes注解,并传入需要支持的注解
 */
@Override
public Set<String> getSupportedAnnotationTypes() {
    Set<String> types = new HashSet<>();
    types.add(BindView.class.getCanonicalName());
    return types;
}

/**
 * 初始化操作
 *
 * @param processingEnv 环境
 */
@Override
public synchronized void init(ProcessingEnvironment processingEnv) {
    super.init(processingEnv);
}

/**
 * 处理注解
 *
 * @param set              待处理的注解集合
 * @param roundEnvironment RoundEnvironment
 * @return 返回true表示后续处理器不再处理
 */
@Override
public boolean process(Set<? extends TypeElement> set, RoundEnvironment roundEnvironment) {
    Set<? extends Element> elements = roundEnvironment.getElementsAnnotatedWith(BindView.class);
    //TypeElement->类    ExecutableElement->方法   VariableElement->属性
    Map<String, List<VariableElement>> map = new HashMap<>(16);
    for (Element element : elements) {
        //属性元素
        VariableElement variableElement = (VariableElement) element;
        //获取类名
        String activityName = variableElement.getEnclosingElement().getSimpleName().toString();
        //根据类名将属性元素保存在集合中
        List<VariableElement> variableElements = map.get(activityName);
        if (variableElements == null) {
            variableElements = new ArrayList<>();
            map.put(activityName, variableElements);
        }
        variableElements.add(variableElement);
    }

    if (map.size() > 0) {
        for (String activityName : map.keySet()) {
            //根据类名获取属性元素集合
            List<VariableElement> variableElements = map.get(activityName);
            //获取类元素
            TypeElement enclosingElement = (TypeElement) variableElements.get(0).getEnclosingElement();
            //获取类的包名
            String packageName = processingEnv.getElementUtils().getPackageOf(enclosingElement).toString();
            //生成对应的类
            generateClass(variableElements, packageName, activityName);
        }
    }
    return false;
}

/**
 * 根据注解信息生成对应的类,本方法中手动生成类文件内容
 * 我们还可以使用第三方工具JavaPoet优雅的生成,具体参考地址:https://github.com/square/javapoet
 *
 * @param variableElements 设置了对应注解的属性元素的集合
 * @param packageName      包名
 * @param activityName     类名
 */
private void generateClass(List<VariableElement> variableElements, String packageName, String activityName) {
    Writer writer = null;
    try {
        JavaFileObject sourceFile = processingEnv.getFiler().createSourceFile(packageName + "." + activityName + "_ViewBinding");
        writer = sourceFile.openWriter();
        //包名
        writer.write("package " + packageName + ";\n");
        //导入包
        writer.write("import com.payne.buf.IBinder;\n");
        //类名以及实现的接口名
        writer.write("public class " + activityName + "_ViewBinding implements IBinder<"
                + packageName + "." + activityName + "> {\n");
        //实现接口中的方法
        writer.write("  @Override\n");
        writer.write("  public void bind(" + packageName + "." + activityName + " target) {\n");
        //遍历属性元素集合,根据信息生成findViewById操作
        for (VariableElement variableElement : variableElements) {
            String variableName = variableElement.getSimpleName().toString();
            int id = variableElement.getAnnotation(BindView.class).value();
            TypeMirror typeMirror = variableElement.asType();
            writer.write("      target." + variableName + " = (" + typeMirror + ") target.findViewById(" + id + ");\n");
        }
        writer.write("  }\n");
        writer.write("}\n");
    } catch (IOException e) {
        e.printStackTrace();
    } finally {
        if (writer != null) {
            try {
                writer.close();
            } catch (IOException e) {
                e.printStackTrace();
            }
        }
    }
}
}
#### 3.2.3 注册注解处理器
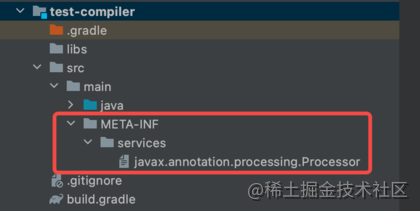
有两种方法将自定义注解处理器注册到编辑器。
1. 手动注册:在test-compiler模块下的`src/main/`目录下创建`META-INF/services/`子目录,并创建文件名为`javax.annotation.processing.Processor`的文件,文件名是Processor类的全路径名,如下图:
 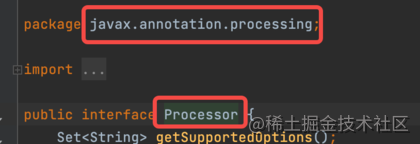
文件中加入自定义注解处理器的全路径名`com.payne.annotation.test_compiler.AnnotationCompiler`,如下图:

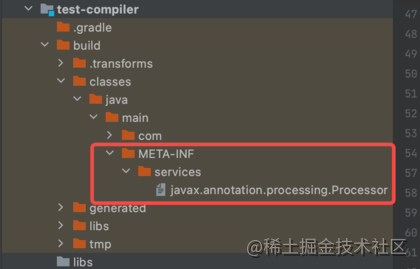
2. 自动注册:依赖于Google的工具框架。
首先在test-compiler模块下的`build.gradle`中加入依赖框架,然后在自定义注解处理器类上面添加`@AutoService(Processor.class)`注解即可。
implementation ‘com.google.auto.service:auto-service:1.0’
annotationProcessor ‘com.google.auto.service:auto-service:1.0’

编译之后可以发现test-compiler模块下的`build`文件夹中自动生成了和我们手动注册一样的文件。
最后在test-butterknife模块下提供`IBinder`接口以及`findViewById`的绑定类供App调用。
public interface IBinder {
void bind(T target);
}
public class PayneButterKnife {
@SuppressWarnings(“unchecked”)
public static void bind(Activity activity) {
String name = activity.getClass().getName() + “_ViewBinding”;
try {
Class<?> aClass = Class.forName(name);
IBinder iBinder = (IBinder) aClass.newInstance();
iBinder.bind(activity);
} catch (Exception e) {
e.printStackTrace();
}
}
}
## 4. 小结
1. 注释面向开发者,注解面向程序。
2. 可以通过`Target`元注解设置注解的作用范围,`Retention`元注解设置注解的作用时机。
3. 源码时注解主要作用源码阶段,编译则被舍弃,主要面向编辑器等开发工具,用来在开发阶段提示开发者或者限制开发者使用范围。
4. 编译时注解主要作用于编译阶段,编译之后则被舍弃,主要面向编译器,可以根据注解信息生成对应的类。
5. 运行时注解主要作用于运行阶段,注解信息运行时依然存在,可以通过反射获取使用。
### 文末
要想成为架构师,那就不要局限在编码,业务,要会选型、扩展,提升编程思维。此外,良好的职业规划也很重要,学习的习惯很重要,但是最重要的还是要能持之以恒,任何不能坚持落实的计划都是空谈。
如果你没有方向,这里给大家分享一套由阿里高级架构师编写的《Android八大模块进阶笔记》,帮大家将杂乱、零散、碎片化的知识进行体系化的整理,让大家系统而高效地掌握Android开发的各个知识点。
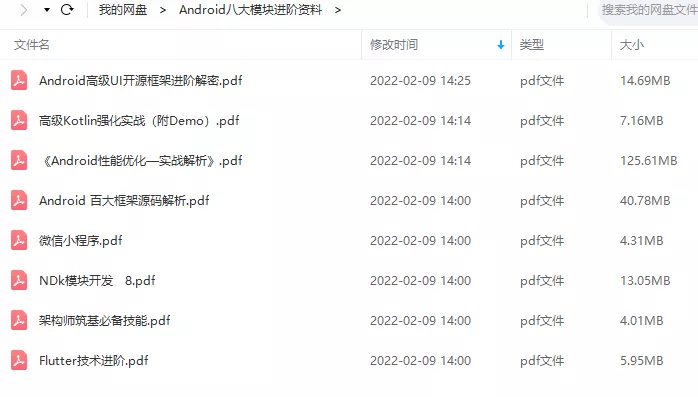
相对于我们平时看的碎片化内容,这份笔记的知识点更系统化,更容易理解和记忆,是严格按照知识体系编排的。
## 总结
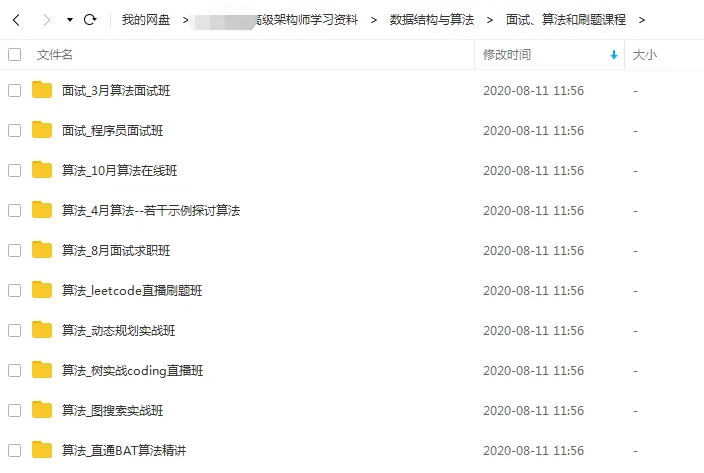
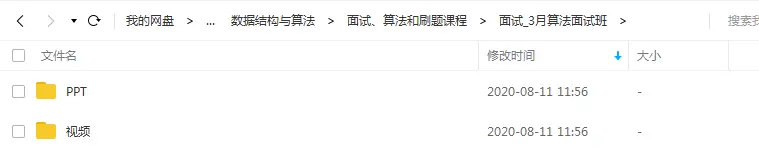
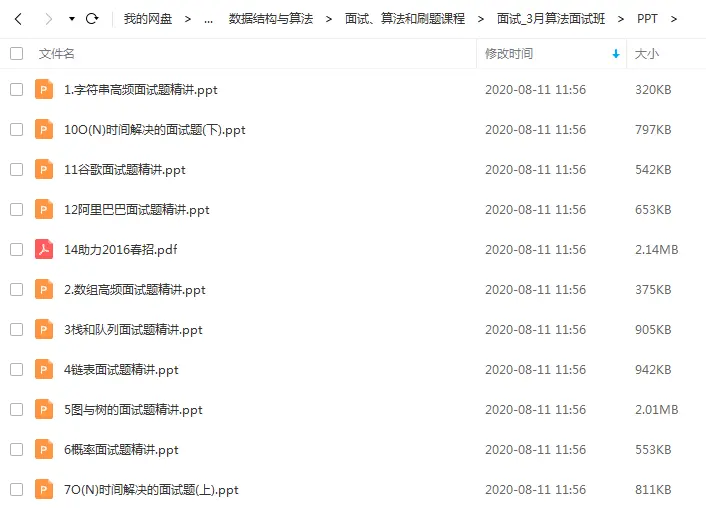
算法知识点繁多,企业考察的题目千变万化,面对越来越近的“金九银十”,我给大家准备好了一套比较完善的学习方法,希望能帮助大家在有限的时间里尽可能系统快速的恶补算法,通过高效的学习来提高大家面试中算法模块的通过率。
这一套学习资料既有文字档也有视频,里面不仅仅有关键知识点的整理,还有案例的算法相关部分的讲解,可以帮助大家更好更全面的进行学习,二者搭配起来学习效果会更好。
**部分资料展示:**
**有了这套学习资料,坚持刷题一周,你就会发现自己的算法知识体系有明显的完善,离大厂Offer的距离更加近。**
**网上学习资料一大堆,但如果学到的知识不成体系,遇到问题时只是浅尝辄止,不再深入研究,那么很难做到真正的技术提升。**
**[需要这份系统化学习资料的朋友,可以戳这里获取](https://bbs.csdn.net/topics/618156601)**
**一个人可以走的很快,但一群人才能走的更远!不论你是正从事IT行业的老鸟或是对IT行业感兴趣的新人,都欢迎加入我们的的圈子(技术交流、学习资源、职场吐槽、大厂内推、面试辅导),让我们一起学习成长!**
14414655522)]
[外链图片转存中...(img-6m80TMjy-1714414655523)]
[外链图片转存中...(img-lt8ZJMc5-1714414655523)]
**有了这套学习资料,坚持刷题一周,你就会发现自己的算法知识体系有明显的完善,离大厂Offer的距离更加近。**
**网上学习资料一大堆,但如果学到的知识不成体系,遇到问题时只是浅尝辄止,不再深入研究,那么很难做到真正的技术提升。**
**[需要这份系统化学习资料的朋友,可以戳这里获取](https://bbs.csdn.net/topics/618156601)**
**一个人可以走的很快,但一群人才能走的更远!不论你是正从事IT行业的老鸟或是对IT行业感兴趣的新人,都欢迎加入我们的的圈子(技术交流、学习资源、职场吐槽、大厂内推、面试辅导),让我们一起学习成长!**


 1万+
1万+


 被折叠的 条评论
为什么被折叠?
被折叠的 条评论
为什么被折叠?
 到【灌水乐园】发言


