


紧跟潮流
大前端和全栈是以后前端的一个趋势,懂后端的前端,懂各端的前端更加具有竞争力,以后可以往这个方向靠拢。
这边整理了一个对标“阿里 50W”年薪企业高级前端工程师成长路线,由于图片太大仅展示一小部分
开源分享:【大厂前端面试题解析+核心总结学习笔记+真实项目实战+最新讲解视频】
直接用线段连接LineA的终点和LineB的起点,会导致物体移动朝向异常,镜头转动也比较突兀,因此当两个端点距离大于某个阈值时,需要提供一个方法可以自动“焊接”两条线段。平滑焊接路线的目的是为了让物体移动更加平滑,我们可以选择预先处理,或者实时处理,视情况而定。
这里会遇到几种情况,我们分别处理:
LineA和LineB延长线必定相交,需要生成一条平滑的贝塞尔曲线连接这两个端点;
LineA和LineB处于同一条直线,只需要将两个端点连接起来即可;
LineA和LineB平行,则需要生成半个圆角矩形的边线将端点连接起来。
代码实现
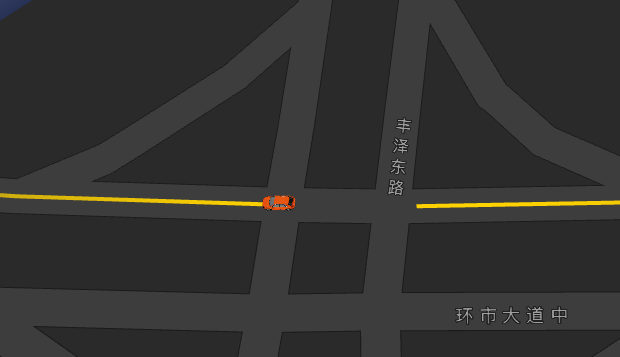
1.获取数据,生成移动路径,并绘制巡航轨迹;
//最终路径数据
const PATH_DATA = {features: []}
var path = [];
path.push([113.532592,22.788502]); //起点
path.push([113.532592,22.788502]); //经过
path.push([113.532553, 22.788321]); //终点
map.plugin("AMap.DragRoute", function() {
//构造拖拽导航类
route = new AMap.DragRoute(map, path, AMap.DrivingPolicy.LEAST_FEE);
//查询导航路径并开启拖拽导航
route.search();
route.on('complete',function({type,target, data}){
// 获得路径数据后,处理成GeoJSON
const res = data.routes[0].steps.map(v=>{
var arr = v.path.map(o=>{
return [o.lng, o.lat]
})
return {
"type": "Feature",
"geometry": {
"type": "MultiLineString",
"coordinates": [arr]
},
"properties": {
"instruction": v.instruction,
"distance": v.distance,
"duration": v.duration,
"road": v.road
}
}
})
PATH_DATA.features = res
})
});
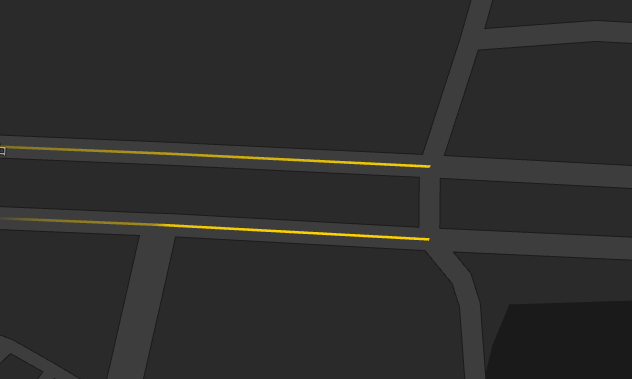
// 使用数据绘制流光的轨迹线
// 这个图层的作用是便于调试运动轨迹是否吻合
const layer = new FlowlineLayer({
map: getMap(),
zooms: [4, 22],
data: PATH_DATA,
speed: 0.4,
lineWidth: 2,
altitude: 0.5
})
2.将GeoJSON数据合并成一整条路线数据,并预处理好数据;
// 合并后的路径数据(空间坐标)
var _PATH_COORDS = []
// 合并后的路径数据(地理坐标)
var _PATH_LNG_LAT = []


//处理转换图层基础数据的地理坐标为空间坐标,保留z轴数据
initData (geoJSON) {
    const { features } = geoJSON
    this._data = JSON.parse(JSON.stringify(features))


    this._data.forEach((feature, index) => {
      const { geometry } = feature
      const { type, coordinates } = geometry


      if (type === 'MultiLineString') {
        feature.geometry.coordinates = coordinates.map(sub => {
          return this.handleOnePath(sub)
        })
      }
      if (type === 'LineString') {
        feature.geometry.coordinates = this.handleOnePath(coordinates)
      }
    })
}
/**
   * 处理单条路径数据
   * @param {Array} path 地理坐标数据 [[x,y,z]...]
   * @returns {Array} 空间坐标数据 [[x',y',z']...]
   */
  handleOnePath (path) {
    const { _PATH_LNG_LAT, _PATH_COORDS, _NPC_ALTITUDE } = this
    const len = _PATH_COORDS.length
    const arr = path.map(v => {
      return [v[0], v[1], v[2] || this._NPC_ALTITUDE]
    })


    // 如果与前线段有重复点,则去除重复坐标点
    if (len > 0) {
      const { x, y, z } = _PATH_LNG_LAT[len - 1]
      if (JSON.stringify([x, y, z]) === JSON.stringify(arr[0])) {
        arr.shift()
      }
    }


    // 合并地理坐标
    _PATH_LNG_LAT.push(...arr.map(v => new THREE.Vector3().fromArray(v)))


    // 转换空间坐标
    // customCoords.lngLatsToCoords会丢失z轴数据,需要重新赋值
    const xyArr = this.customCoords.lngLatsToCoords(arr).map((v, i) => {
      return [v[0], v[1], arr[i][2] || _NPC_ALTITUDE]
    })
    // 合并空间坐标
    _PATH_COORDS.push(...xyArr.map(v => new THREE.Vector3().fromArray(v)))
    // 返回空间坐标
    return arr
  }
3.加载、放置、调整模型;
// 加载主体NPC
function getModel (scene) {
  return new Promise((resolve) => {
    const loader = new GLTFLoader()
    loader.load('./static/gltf/car/car1.gltf', function (gltf) {
      const model = gltf.scene.children[0]


      // 调试代码
      // const axesHelper = new THREE.AxesHelper(50)
      // model.add(axesHelper)


      // 调整模型大小
      const size = 1.0
      model.scale.set(size, size, size)


      resolve(model)
    })
  })
}


// 初始化主体NPC的状态
initNPC () {
  const { _PATH_COORDS, scene } = this
  const { NPC } = this._conf


  // z轴朝上
  NPC.up.set(0, 0, 1)


  // 初始位置和朝向
  if (_PATH_COORDS.length > 1) {
    NPC.position.copy(_PATH_COORDS[0])
    NPC.lookAt(_PATH_COORDS[1])
  }


  // 添加到场景中
  scene.add(NPC)
}
4.重点来了!移动模型,并更新NPC的位置和朝向、更新镜头的位置和朝向,这里使用了TWEEN做移动状态的控制器,它控制的是一整条路线(A-B-C-D…)里两个关键点(A和B)连线的移动状态,当连线AB的移动结束后,立即开启下一个连线BC,以此类推。我们简单过一下实现逻辑。
initController () {
  // 状态记录器
  const target = { t: 0 }
  // 获取第一段线段的移动时长,具体实现就是两个坐标点的距离除以速度参数speed
  const duration = this.getMoveDuration()
  // 路线数据 这里用了两组空间坐标和地理坐标两组数据
  // 目的是为了省掉中间坐标转换花费的时间
  const { _PATH_COORDS, _PATH_LNG_LAT, map } = this


  this._rayController = new TWEEN.Tween(target)
    .to({ t: 1 }, duration)
    .easing(TWEEN.Easing.Linear.None)
    .onUpdate(() => {
        //todo: 处理当前连线当前时刻,NPC的位置


        //通过状态值t, 计算NPC应该在的位置
        const position = new THREE.Vector3().copy(point).lerp(nextPoint, target.t)


        //todo: 处理地图中心位置,地图镜头朝向
     })
    .onStart(()=>{
       // todo: 处理NPC的朝向,每次开启路线都会执行
    })
    .onComplete(()=>{
      // todo: 停止当前路线、开启下一段路线
      this._rayController
          .stop()
          .to({ t: 1 }, duration)
          .start()
    })
}
5.随着模型移动,更新镜头的位置、以及镜头朝向的位置;
(1)更新镜头位置与更新NPC位置思路一样,不同的就是使用了地理坐标去计算中间插值,以方便直接调用高德的map.panTo(), 用map.setCenter()也是一样的。
// 计算两个lngLat端点的中间值
const pointLngLat = new THREE.Vector3().copy(_PATH_LNG_LAT[this.npc_step])
const nextPointLngLat = new THREE.Vector3().copy(_PATH_LNG_LAT[nextIndex])
const positionLngLat = new THREE.Vector3().copy(pointLngLat).lerp(nextPointLngLat, target.t)
// 更新地图镜头位置
this.updateMapCenter(positionLngLat)


// 更新地图中心到指定位置
updateMapCenter (positionLngLat) {
   // duration = 0 防止画面抖动
   this.map.panTo([positionLngLat.x, positionLngLat.y], 0)
}
(2)更新镜头朝向,朝向其实就是矢量方向,两个点确定矢量,在这里取NPC当前坐标和后面第四个关键点的坐标确定朝向,也可以根据实际情况而定。
//计算偏转角度
const angle = this.getAngle(position, _PATH_COORDS[(this.npc_step + 3) % _PATH_COORDS.length]
this.updateMapRotation(angle)


//更新地图旋转角度,正北为0度
updateMapRotation (angle) {
  if (Math.abs(angle) >= 1.0) {
    this.map.setRotation(angle, true, 0)
  }
}
这是步骤4和5的完整代码。
// 是否镜头跟随NPC移动
const cameraFollow = true
initController () {
// 状态记录器
const target = { t: 0 }
// 获取第一段线段的移动时长,具体实现就是两个坐标点的距离除以速度参数speed
const duration = this.getMoveDuration()
// 路线数据
const { _PATH_COORDS, _PATH_LNG_LAT, map } = this
this._rayController = new TWEEN.Tween(target)
.to({ t: 1 }, duration)
.easing(TWEEN.Easing.Linear.None)
.onUpdate(() => {
const { NPC, cameraFollow } = this._conf
// 终点坐标索引
const nextIndex = this.getNextStepIndex()
// 获取当前位置在路径上的位置
const point = new THREE.Vector3().copy(_PATH_COORDS[this.npc_step])
// 计算下一个路径点的位置
const nextPoint = new THREE.Vector3().copy(_PATH_COORDS[nextIndex])
// 计算物体应该移动到的位置,并移动物体
const position = new THREE.Vector3().copy(point).lerp(nextPoint, target.t)
if (NPC) {
// 更新NPC的位置
NPC.position.copy(position)
}
// 需要镜头跟随
if (cameraFollow) {
// 计算两个lngLat端点的中间值
const pointLngLat = new THREE.Vector3().copy(_PATH_LNG_LAT[this.npc_step])
const nextPointLngLat = new THREE.Vector3().copy(_PATH_LNG_LAT[nextIndex])
const positionLngLat = new THREE.Vector3().copy(pointLngLat).lerp(nextPointLngLat, target.t)
// 更新地图镜头位置
this.updateMapCenter(positionLngLat)
}
// 更新地图朝向
if (cameraFollow) {
const angle = this.getAngle(position, _PATH_COORDS[(this.npc_step + 3) % _PATH_COORDS.length])
this.updateMapRotation(angle)
}
})
.onStart(() => {
const { NPC } = this._conf
const nextPoint = _PATH_COORDS[(this.npc_step + 3) % _PATH_COORDS.length]
# 学习分享,共勉
题外话,毕竟我工作多年,深知技术改革和创新的方向,Flutter作为跨平台开发技术、Flutter以其美观、快速、高效、开放等优势迅速俘获人心
**[开源分享:【大厂前端面试题解析+核心总结学习笔记+真实项目实战+最新讲解视频】](https://bbs.csdn.net/forums/4304bb5a486d4c3ab8389e65ecb71ac0)**

> {
const { NPC } = this._conf
const nextPoint = _PATH_COORDS[(this.npc_step + 3) % _PATH_COORDS.length]
# 学习分享,共勉
题外话,毕竟我工作多年,深知技术改革和创新的方向,Flutter作为跨平台开发技术、Flutter以其美观、快速、高效、开放等优势迅速俘获人心
**[开源分享:【大厂前端面试题解析+核心总结学习笔记+真实项目实战+最新讲解视频】](https://bbs.csdn.net/forums/4304bb5a486d4c3ab8389e65ecb71ac0)**
[外链图片转存中...(img-yvKoep6i-1715533583278)]


 被折叠的 条评论
为什么被折叠?
被折叠的 条评论
为什么被折叠?
 到【灌水乐园】发言


