


总结
总的来说,面试是有套路的,一面基础,二面架构,三面个人。
最后,小编这里收集整理了一些资料,其中包括面试题(含答案)、书籍、视频等。希望也能帮助想进大厂的朋友


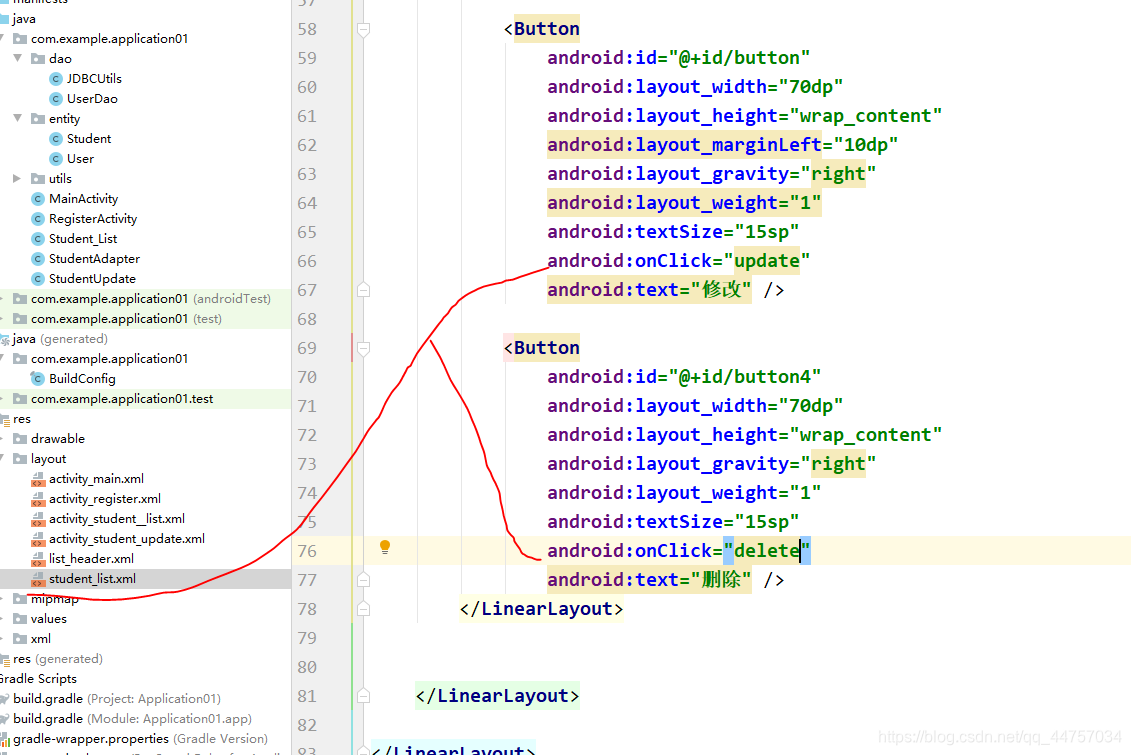
android:layout_height=“wrap_content”
android:layout_gravity=“right”
android:layout_weight=“1”
android:textSize=“15sp”
android:text=“删除” />
3、在adapter当中动态加载表头
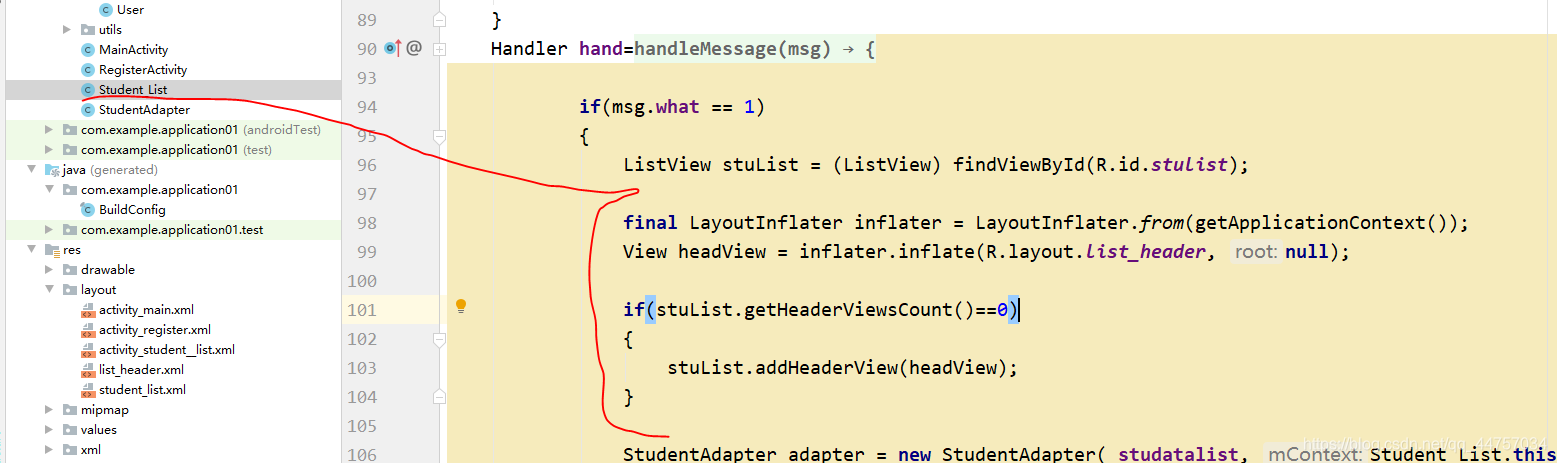
final LayoutInflater inflater = LayoutInflater.from(getApplicationContext());
View headView = inflater.inflate(R.layout.list_header, null);
if(stuList.getHeaderViewsCount()==0)
{
stuList.addHeaderView(headView);
}

(一)安卓端
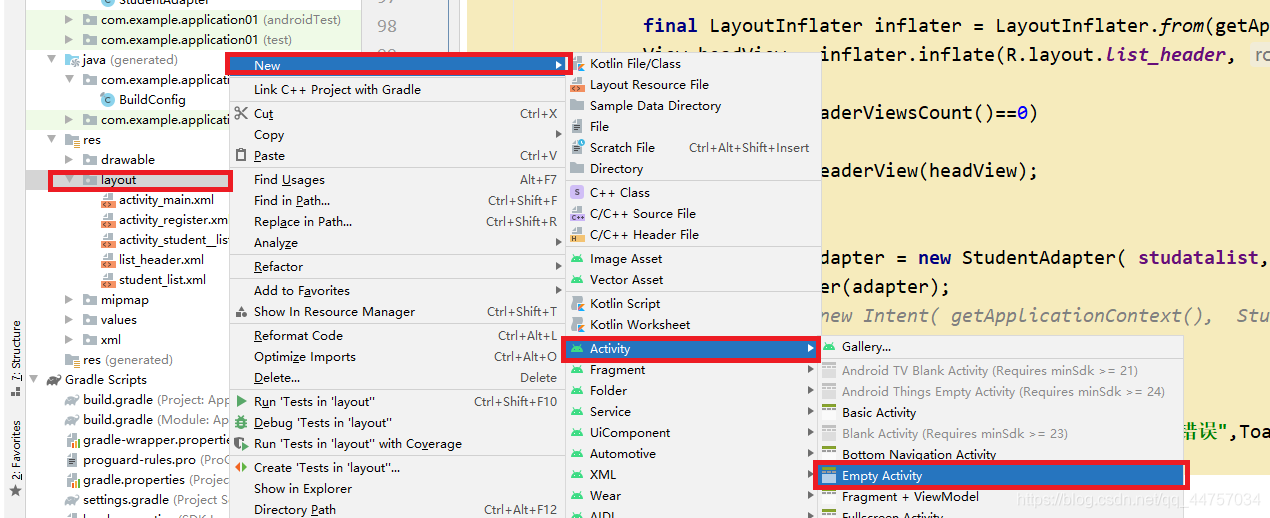
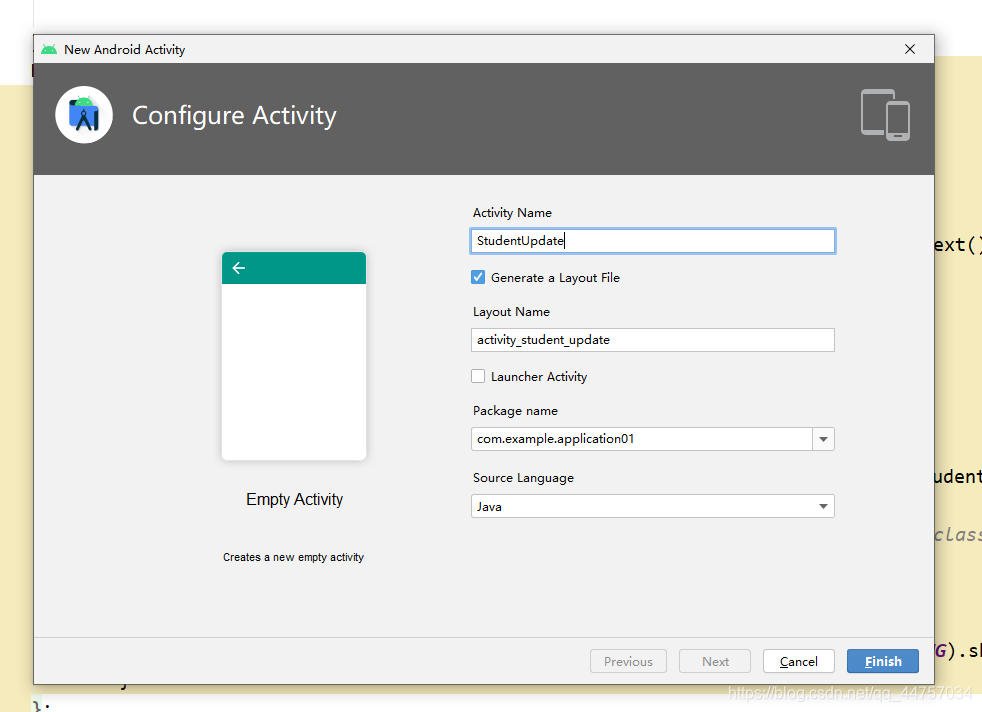
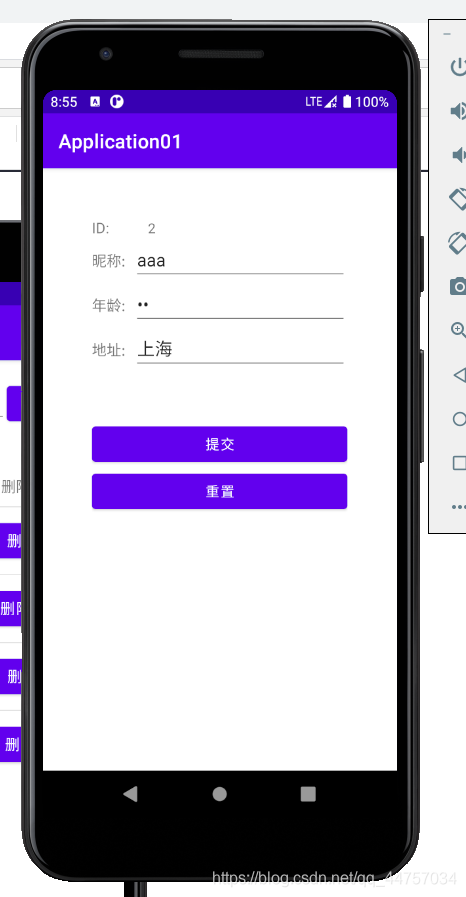
1、创建显示学生信息的页面
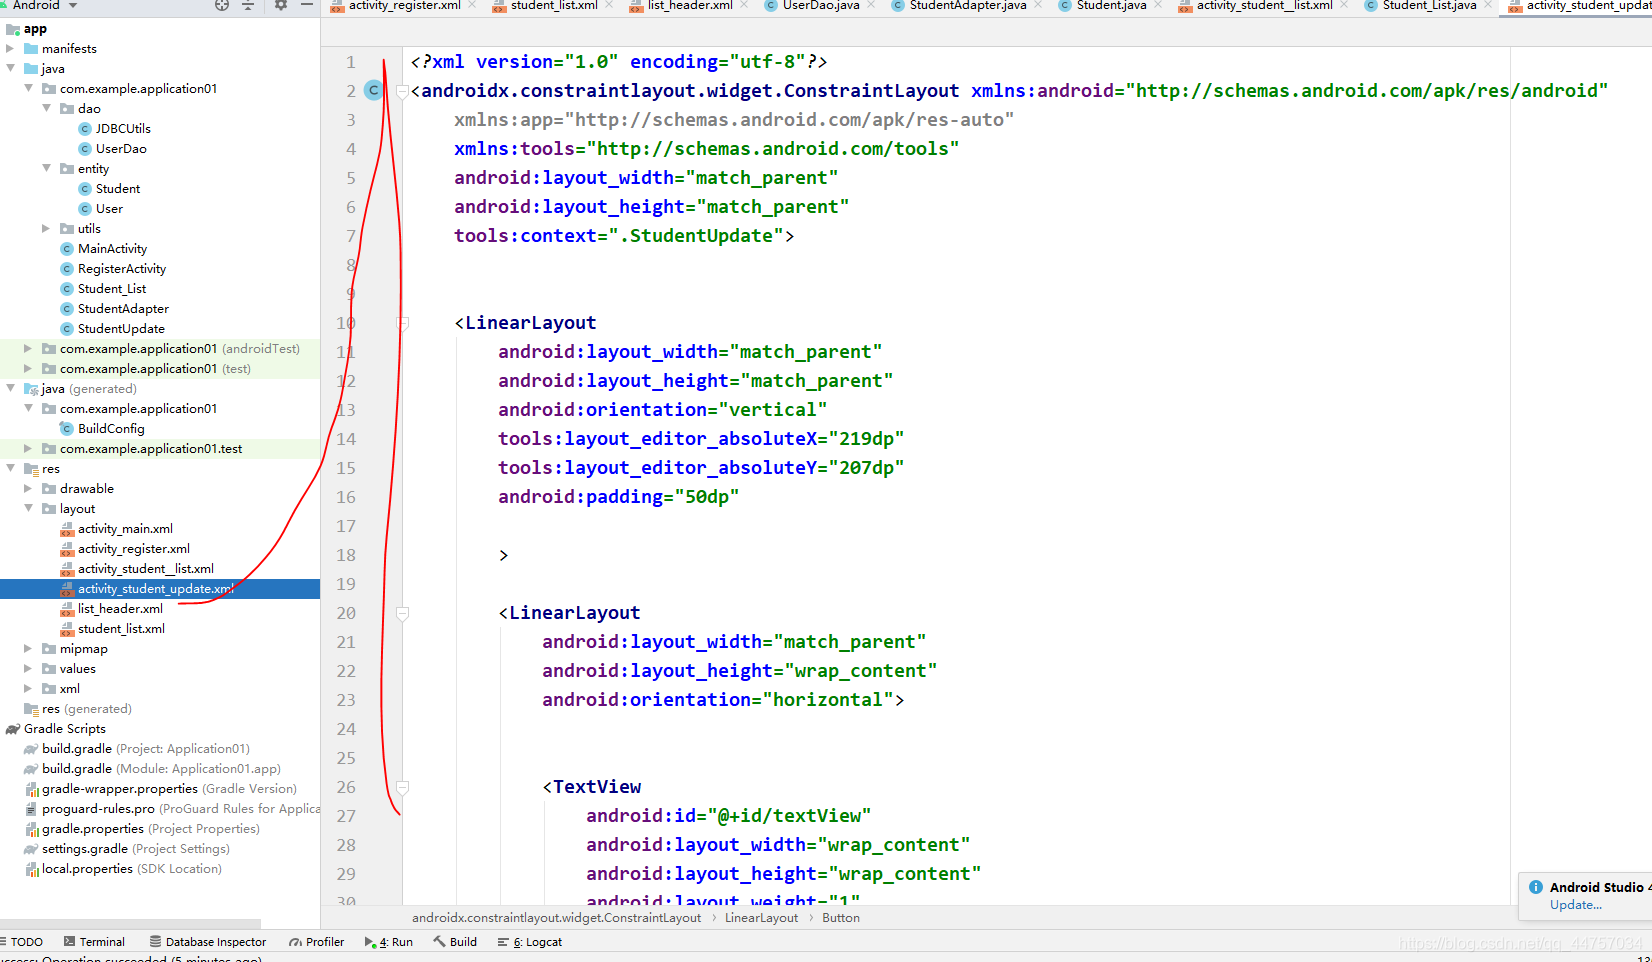
<androidx.constraintlayout.widget.ConstraintLayout xmlns:android=“http://schemas.android.com/apk/res/android”
xmlns:app=“http://schemas.android.com/apk/res-auto”
xmlns:tools=“http://schemas.android.com/tools”
android:layout_width=“match_parent”
android:layout_height=“match_parent”
tools:context=“.StudentUpdate”>
<LinearLayout
android:layout_width=“match_parent”
android:layout_height=“match_parent”
android:orientation=“vertical”
tools:layout_editor_absoluteX=“219dp”
tools:layout_editor_absoluteY=“207dp”
android:padding=“50dp”
<LinearLayout
android:layout_width=“match_parent”
android:layout_height=“wrap_content”
android:orientation=“horizontal”>
<TextView
android:id=“@+id/textView”
android:layout_width=“wrap_content”
android:layout_height=“wrap_content”
android:layout_weight=“1”
android:textSize=“15sp”
android:text=“ID:” />
<TextView
android:id=“@+id/id”
android:layout_width=“wrap_content”
android:layout_height=“wrap_content”
android:layout_weight=“1”
android:ems=“10”
/>
<LinearLayout
android:layout_width=“match_parent”
android:layout_height=“wrap_content”
android:orientation=“horizontal”>
<TextView
android:layout_width=“wrap_content”
android:layout_height=“wrap_content”
android:layout_weight=“1”
android:textSize=“15sp”
android:text=“昵称:” />
<EditText
android:id=“@+id/name”
android:layout_width=“wrap_content”
android:layout_height=“wrap_content”
android:layout_weight=“1”
android:ems=“10”
android:inputType=“textPersonName”
/>
<LinearLayout
android:layout_width=“match_parent”
android:layout_height=“wrap_content”
android:orientation=“horizontal”>
<TextView
android:id=“@+id/textView2”
android:layout_width=“wrap_content”
android:layout_height=“wrap_content”
android:layout_weight=“1”
android:textSize=“15sp”
android:text=“年龄:”
/>
<EditText
android:id=“@+id/age”
android:layout_width=“wrap_content”
android:layout_height=“wrap_content”
android:layout_weight=“1”
android:ems=“10”
/>
<LinearLayout
android:layout_width=“match_parent”
android:layout_height=“wrap_content”
android:orientation=“horizontal”>
<TextView
android:layout_width=“wrap_content”
android:layout_height=“wrap_content”
android:layout_weight=“1”
android:textSize=“15sp”
android:text=“地址:”
/>
<EditText
android:id=“@+id/address”
android:layout_width=“wrap_content”
android:layout_height=“wrap_content”
android:layout_weight=“1”
android:ems=“10”
android:inputType=“phone”
/>
<LinearLayout
android:layout_width=“match_parent”
android:layout_height=“wrap_content”
android:orientation=“horizontal”>
<Button
android:layout_marginTop=“50dp”
android:id=“@+id/button2”
android:layout_width=“match_parent”
android:layout_height=“wrap_content”
android:text=“提交”
android:onClick=“updatestudent”
/>
<Button
android:id=“@+id/button3”
android:layout_width=“match_parent”
android:layout_height=“wrap_content”
android:text=“重置” />
</androidx.constraintlayout.widget.ConstraintLayout>
2、在student_list.xml页面上的按钮上添加onClick
3、完善Student_List当中的update方法
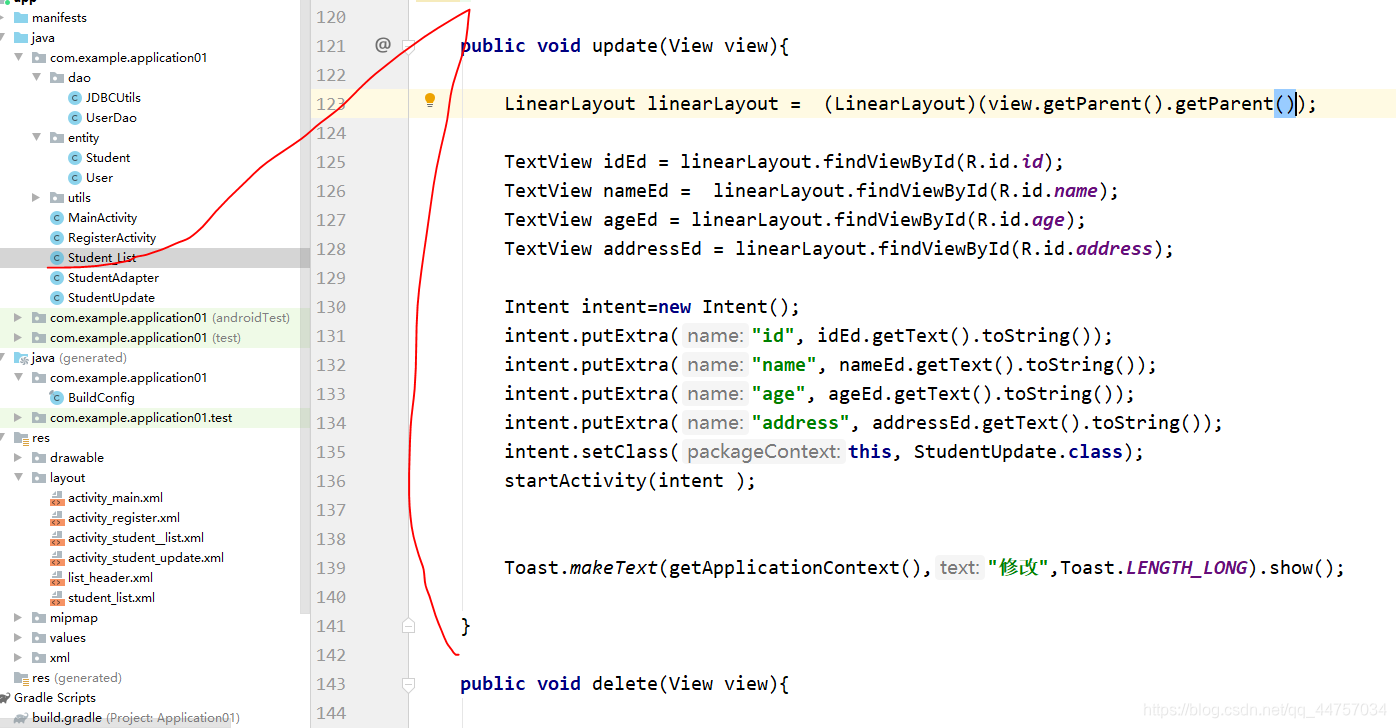
public void update(View view){
LinearLayout linearLayout = (LinearLayout)(view.getParent().getParent());
TextView idEd = linearLayout.findViewById(R.id.id);
TextView nameEd = linearLayout.findViewById(R.id.name);
TextView ageEd = linearLayout.findViewById(R.id.age);
TextView addressEd = linearLayout.findViewById(R.id.address);
Intent intent=new Intent();
intent.putExtra(“id”, idEd.getText().toString());
intent.putExtra(“name”, nameEd.getText().toString());
intent.putExtra(“age”, ageEd.getText().toString());
intent.putExtra(“address”, addressEd.getText().toString());
intent.setClass(this, StudentUpdate.class);
startActivity(intent );
Toast.makeText(getApplicationContext(),“修改”,Toast.LENGTH_LONG).show();
}
4、StudentUpdate当中获取对应Intent 对象当中的值并放入到页面当中的修改框当中
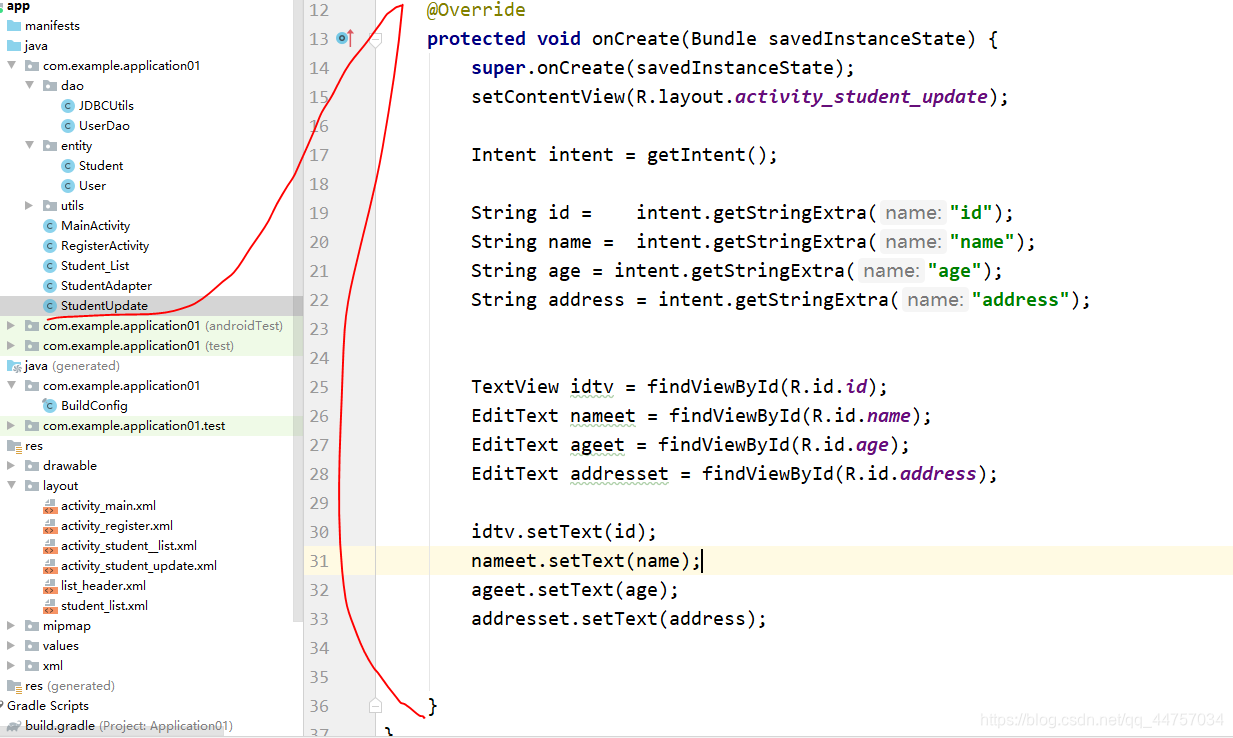
@Override
protected void onCreate(Bundle savedInstanceState) {
super.onCreate(savedInstanceState);
setContentView(R.layout.activity_student_update);
Intent intent = getIntent();
String id = intent.getStringExtra(“id”);
String name = intent.getStringExtra(“name”);
String age = intent.getStringExtra(“age”);
String address = intent.getStringExtra(“address”);
TextView idtv = findViewById(R.id.id);
EditText nameet = findViewById(R.id.name);
EditText ageet = findViewById(R.id.age);
EditText addresset = findViewById(R.id.address);
idtv.setText(id);
nameet.setText(name);
ageet.setText(age);
addresset.setText(address);
}
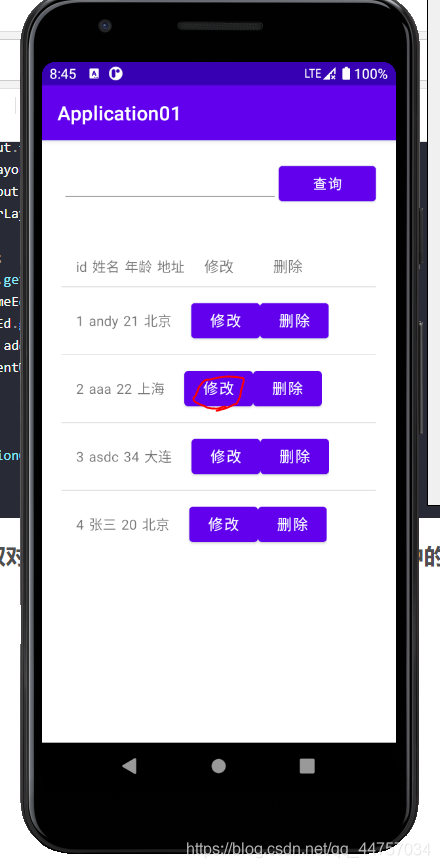
运行测试
(二)web端
1、创建更新学生信息的dao

public boolean update(Student stu){
String sql=“update student set name=?,age=?,address=? where id=?”;
Connection con = JDBCUtils.getConn();
try {
PreparedStatement pst=con.prepareStatement(sql);
pst.setString(1,stu.getName());
pst.setInt(2,stu.getAge());
pst.setString(3,stu.getAddress() );
pst.setInt(4,stu.getId() );
int value = pst.executeUpdate();
if(value>0){
return true;
}
} catch (SQLException throwables) {
throwables.printStackTrace();
}finally {
JDBCUtils.close(con);
}
return false;
}
2、创建对应更新学生信息的Servlet

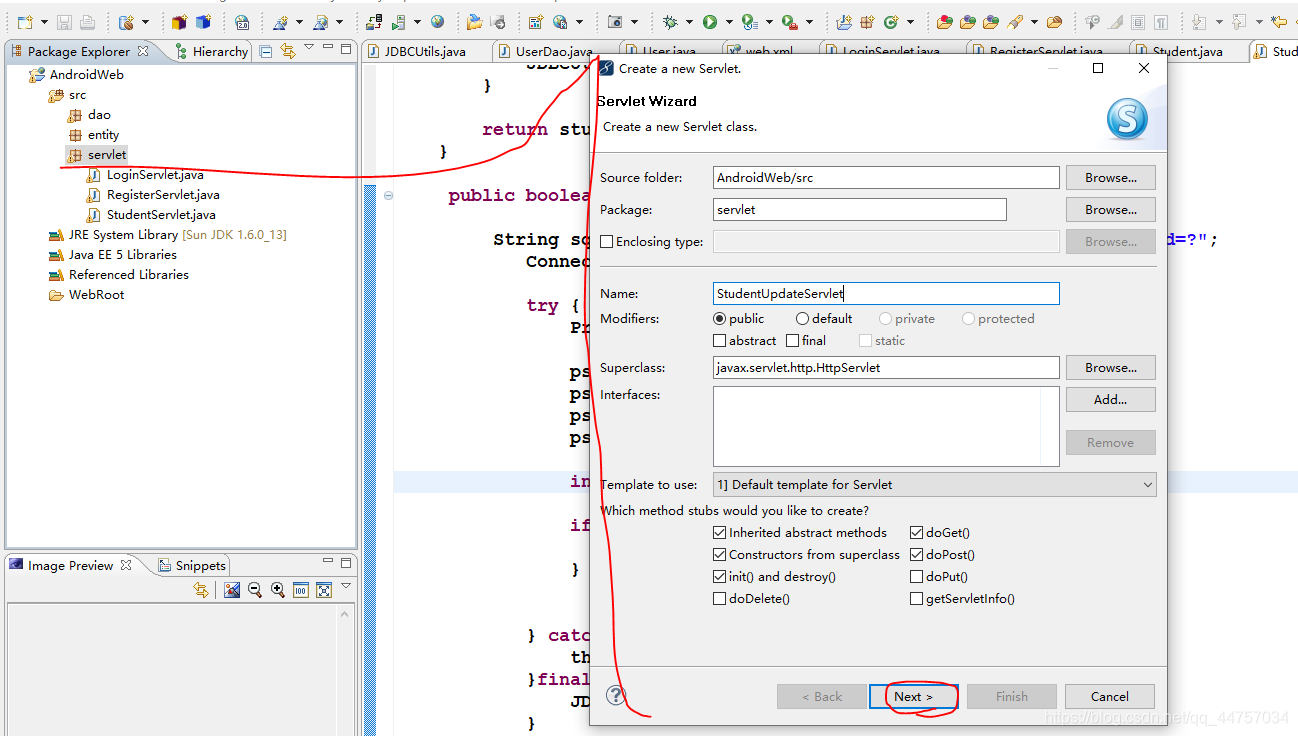
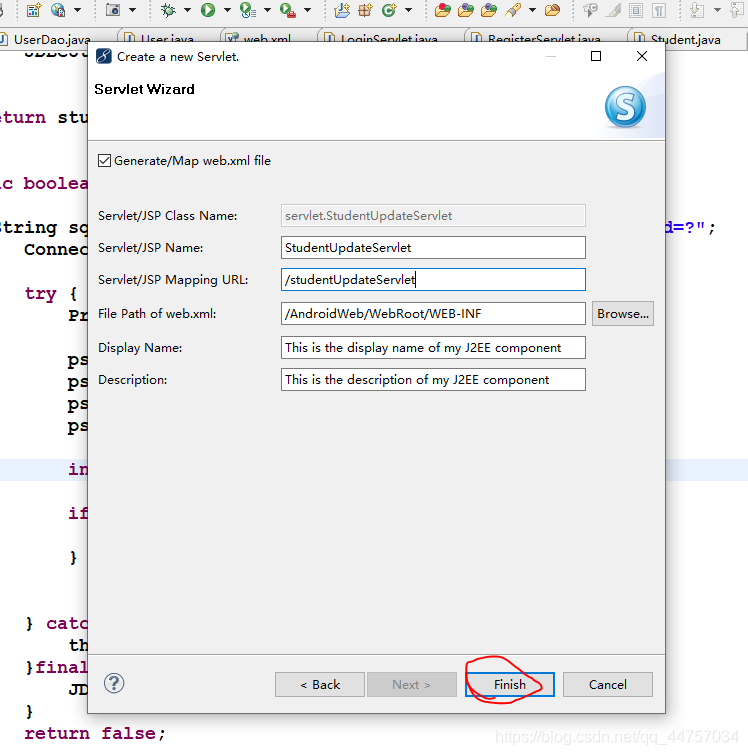
完善StudentUpdateServlet
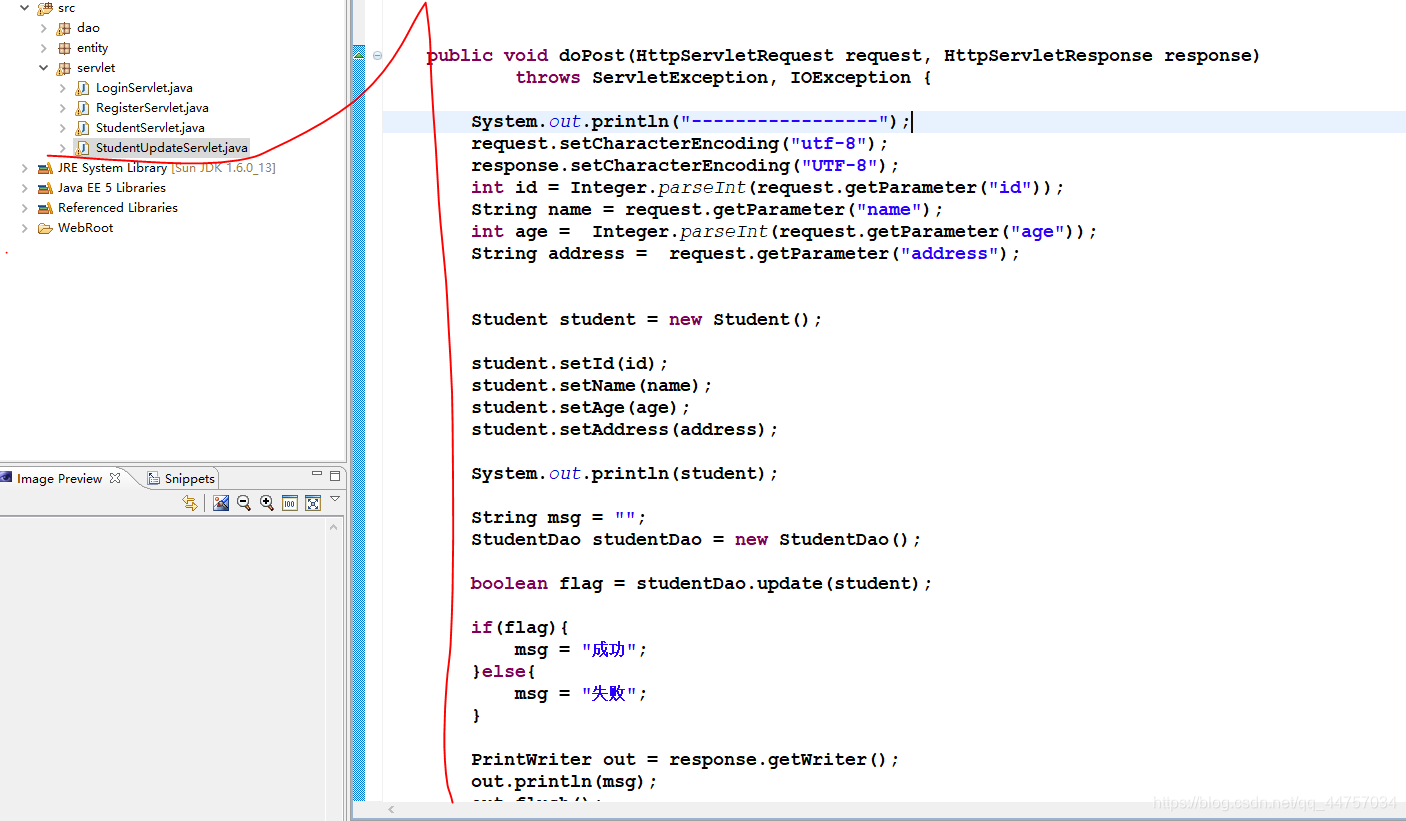
public void doPost(HttpServletRequest request, HttpServletResponse response)
throws ServletException, IOException {
System.out.println(“-----------------”);
request.setCharacterEncoding(“utf-8”);
response.setCharacterEncoding(“UTF-8”);
int id = Integer.parseInt(request.getParameter(“id”));
String name = request.getParameter(“name”);
int age = Integer.parseInt(request.getParameter(“age”));
String address = request.getParameter(“address”);
Student student = new Student();
student.setId(id);
student.setName(name);
student.setAge(age);
student.setAddress(address);
String msg = “”;
StudentDao studentDao = new StudentDao();
boolean flag = studentDao.update(student);
if(flag){
msg = “成功”;
}else{
msg = “失败”;
}
PrintWriter out = response.getWriter();
out.println(msg);
out.flush();
out.close();
}
(三)安卓端
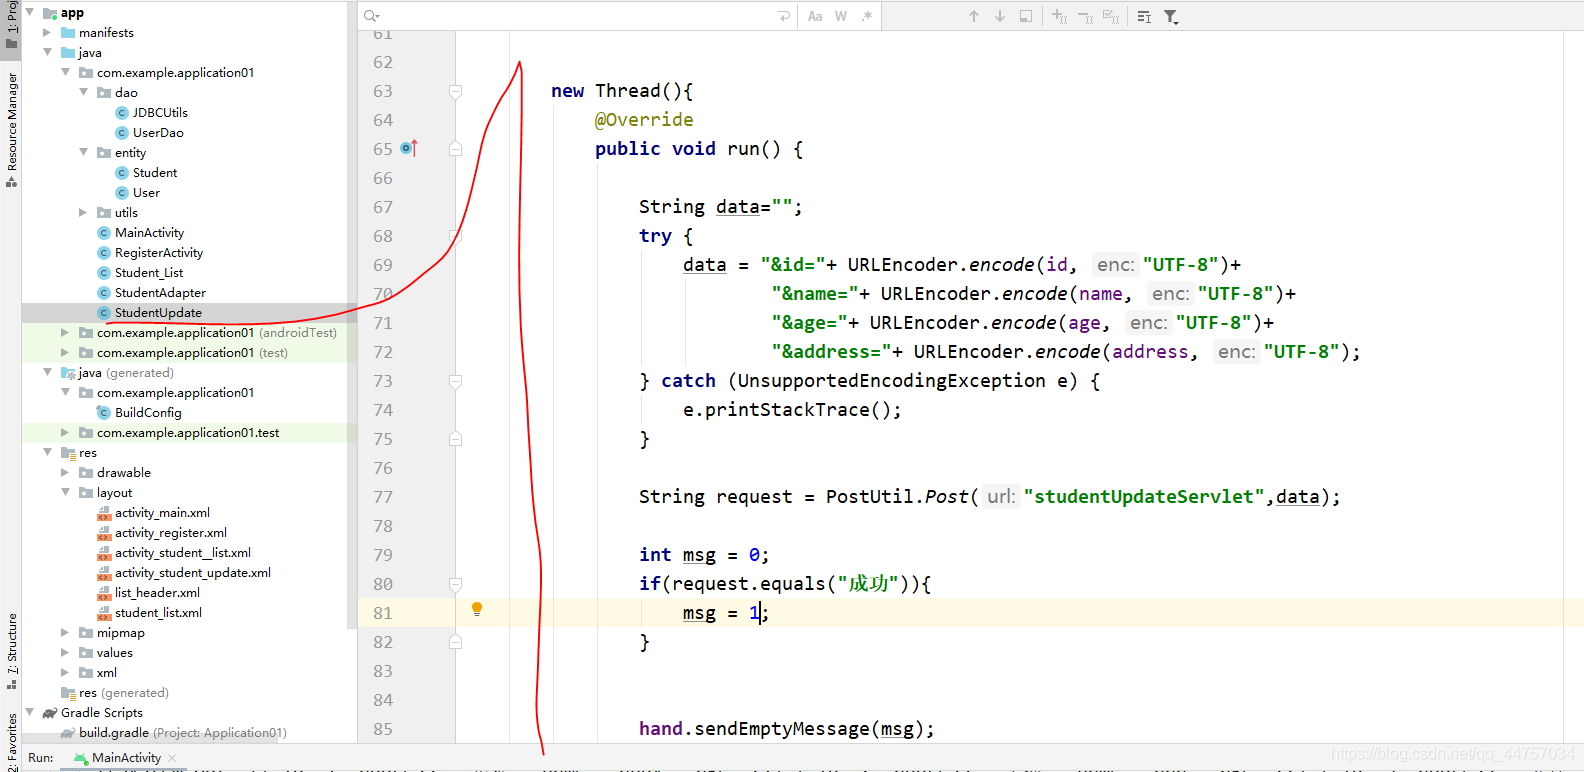
1、在StudentUpdate当中创建updatestudent实现向studentUpdateServlet发送更新信息的请求
package com.example.application01;
import androidx.appcompat.app.AppCompatActivity;
import android.content.Intent;
import android.os.Bundle;
import android.os.Handler;
import android.os.Message;
import android.view.LayoutInflater;
import android.view.View;
import android.widget.EditText;
import android.widget.ListView;
import android.widget.TextView;
import android.widget.Toast;
import com.example.application01.utils.PostUtil;
import java.io.UnsupportedEncodingException;
import java.net.URLEncoder;
public class StudentUpdate extends AppCompatActivity {
@Override
protected void onCreate(Bundle savedInstanceState) {
super.onCreate(savedInstanceState);
setContentView(R.layout.activity_student_update);
Intent intent = getIntent();
String id = intent.getStringExtra(“id”);
String name = intent.getStringExtra(“name”);
String age = intent.getStringExtra(“age”);
String address = intent.getStringExtra(“address”);
TextView idtv = findViewById(R.id.id);
EditText nameet = findViewById(R.id.name);
总结:绘上一张Kakfa架构思维大纲脑图(xmind)

其实关于Kafka,能问的问题实在是太多了,扒了几天,最终筛选出44问:基础篇17问、进阶篇15问、高级篇12问,个个直戳痛点,不知道如果你不着急看答案,又能答出几个呢?
若是对Kafka的知识还回忆不起来,不妨先看我手绘的知识总结脑图(xmind不能上传,文章里用的是图片版)进行整体架构的梳理
梳理了知识,刷完了面试,如若你还想进一步的深入学习解读kafka以及源码,那么接下来的这份《手写“kafka”》将会是个不错的选择。
-
Kafka入门
-
为什么选择Kafka
-
Kafka的安装、管理和配置
-
Kafka的集群
-
第一个Kafka程序
-
Kafka的生产者
-
Kafka的消费者
-
深入理解Kafka
-
可靠的数据传递
-
Spring和Kafka的整合
-
SpringBoot和Kafka的整合
-
Kafka实战之削峰填谷
-
数据管道和流式处理(了解即可)


片转存中…(img-pWTlNgHQ-1715281147506)]
其实关于Kafka,能问的问题实在是太多了,扒了几天,最终筛选出44问:基础篇17问、进阶篇15问、高级篇12问,个个直戳痛点,不知道如果你不着急看答案,又能答出几个呢?
若是对Kafka的知识还回忆不起来,不妨先看我手绘的知识总结脑图(xmind不能上传,文章里用的是图片版)进行整体架构的梳理
梳理了知识,刷完了面试,如若你还想进一步的深入学习解读kafka以及源码,那么接下来的这份《手写“kafka”》将会是个不错的选择。
-
Kafka入门
-
为什么选择Kafka
-
Kafka的安装、管理和配置
-
Kafka的集群
-
第一个Kafka程序
-
Kafka的生产者
-
Kafka的消费者
-
深入理解Kafka
-
可靠的数据传递
-
Spring和Kafka的整合
-
SpringBoot和Kafka的整合
-
Kafka实战之削峰填谷
-
数据管道和流式处理(了解即可)
[外链图片转存中…(img-zXwnrbGN-1715281147506)]
[外链图片转存中…(img-kZI5YKMk-1715281147506)]


 176
176


 被折叠的 条评论
为什么被折叠?
被折叠的 条评论
为什么被折叠?
 到【灌水乐园】发言


