


深知大多数程序员,想要提升技能,往往是自己摸索成长,但自己不成体系的自学效果低效又漫长,而且极易碰到天花板技术停滞不前!
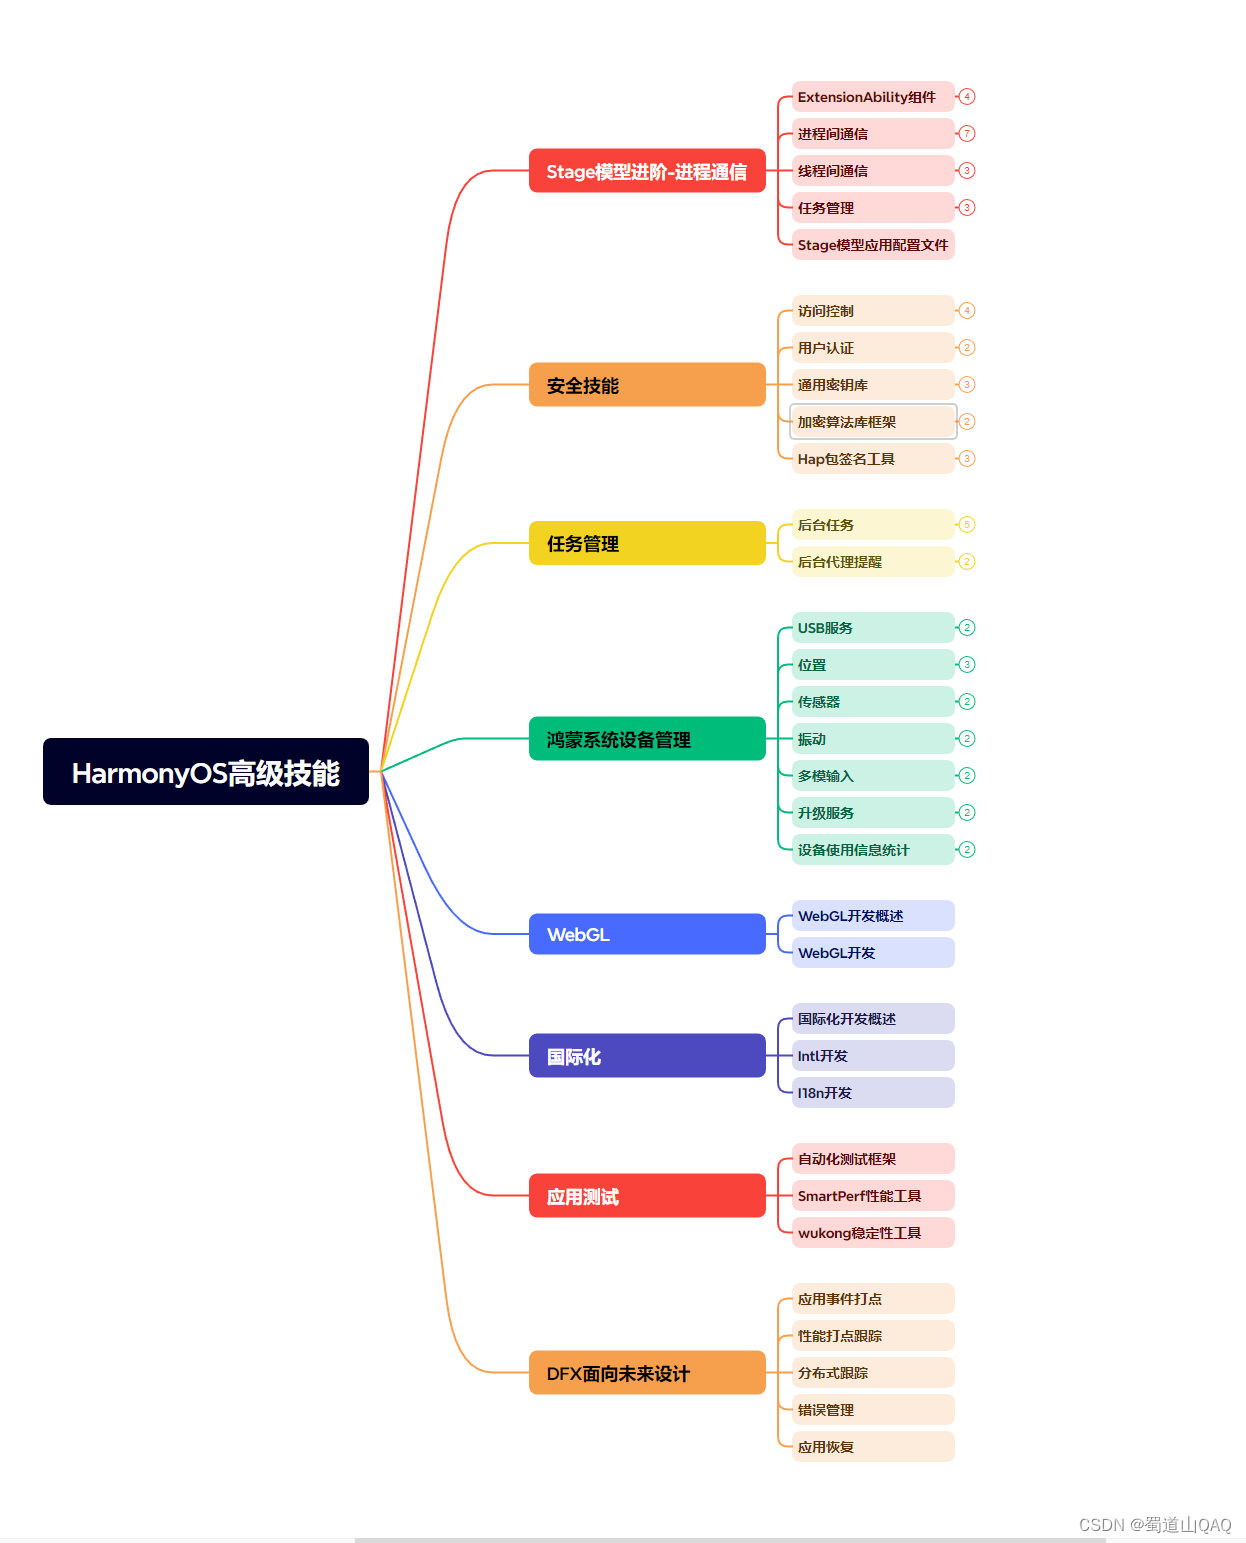

既有适合小白学习的零基础资料,也有适合3年以上经验的小伙伴深入学习提升的进阶课程,涵盖了95%以上鸿蒙开发知识点,真正体系化!
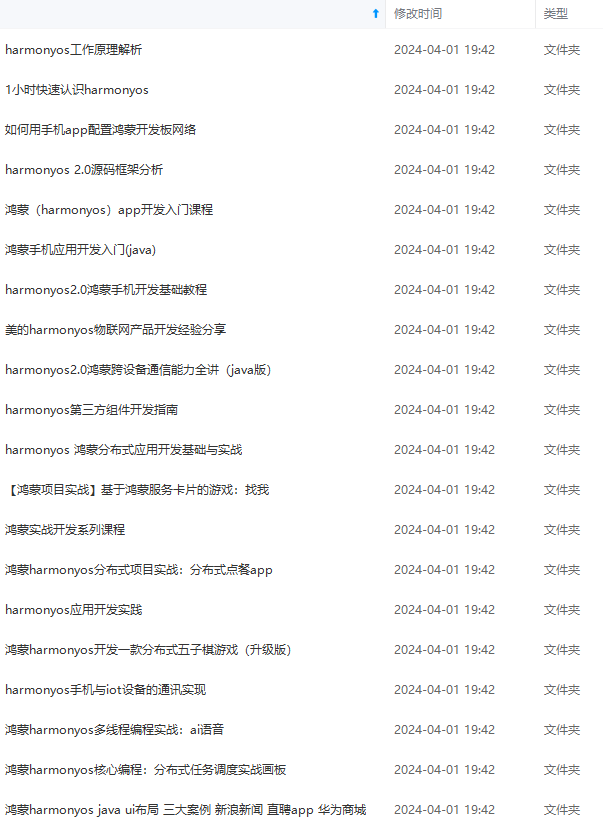
由于文件比较多,这里只是将部分目录截图出来,全套包含大厂面经、学习笔记、源码讲义、实战项目、大纲路线、讲解视频,并且后续会持续更新
该接口通过图片数据源获取图片,支持本地图片和网络图片的渲染展示。其中,src是图片的数据源
1.加载图片资源
🦋1.1 存档图类型数据源
☀️1.1.1 本地资源
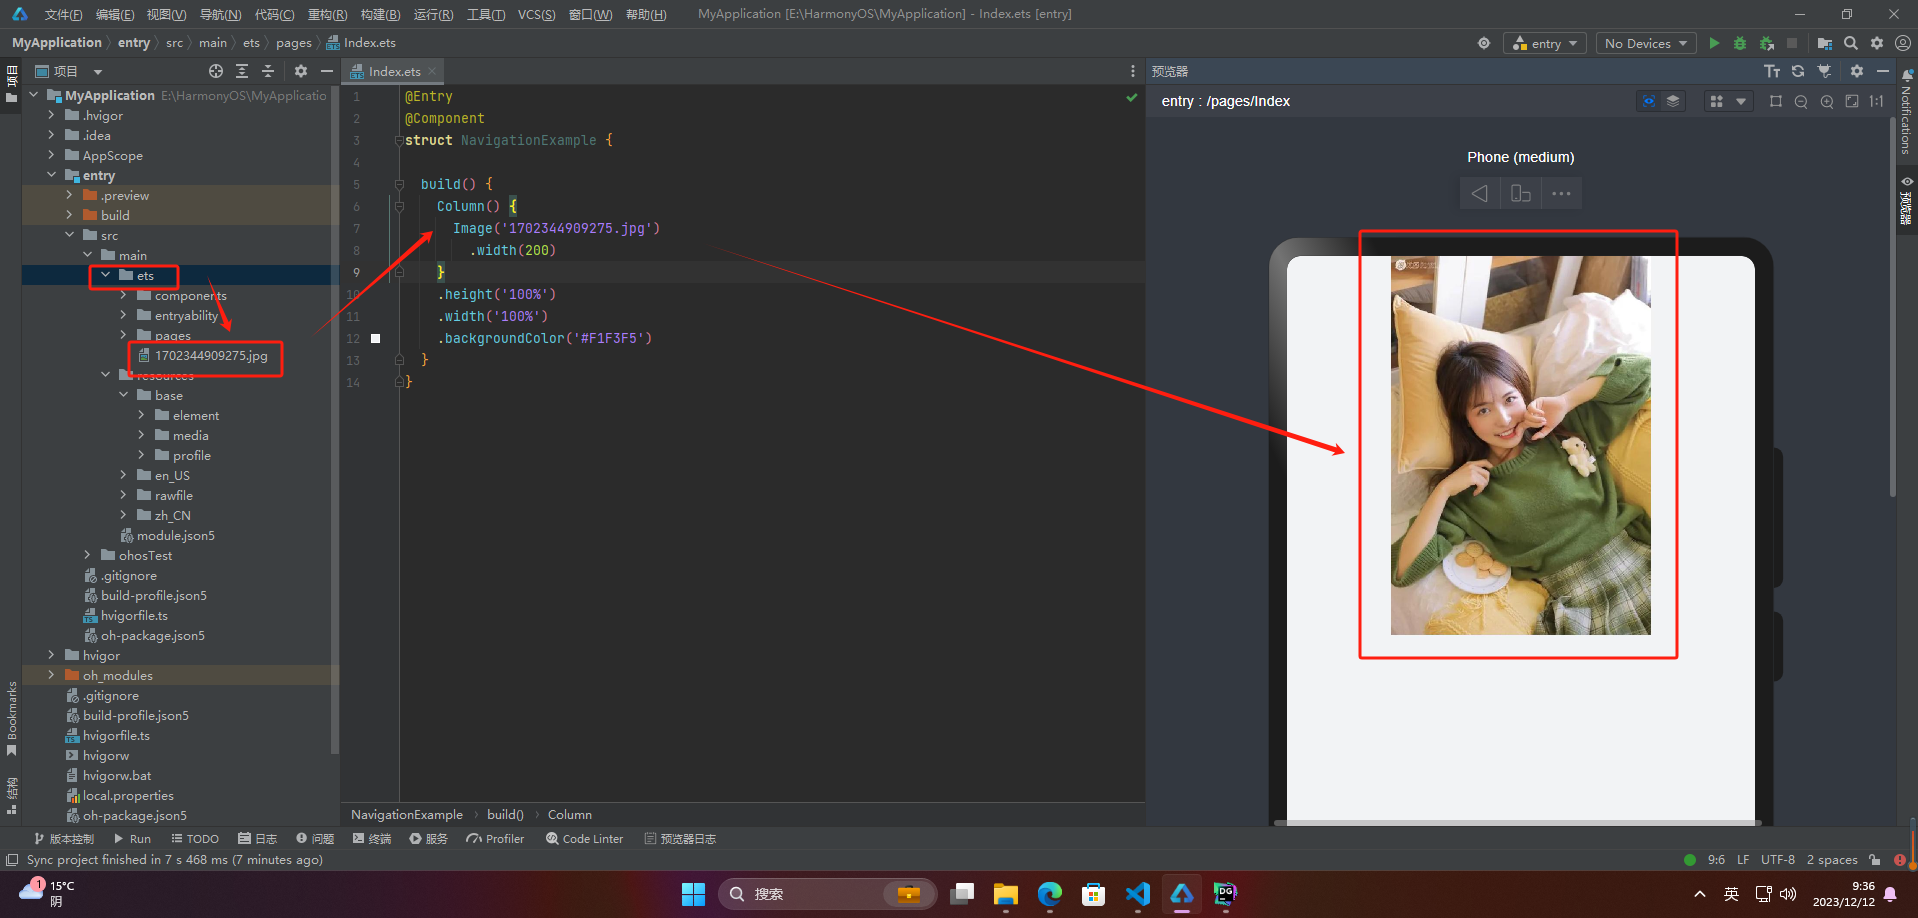
Image组件引入本地图片路径,即可显示图片(根目录为ets文件夹)
@Entry
@Component
struct NavigationExample {
build() {
Column() {
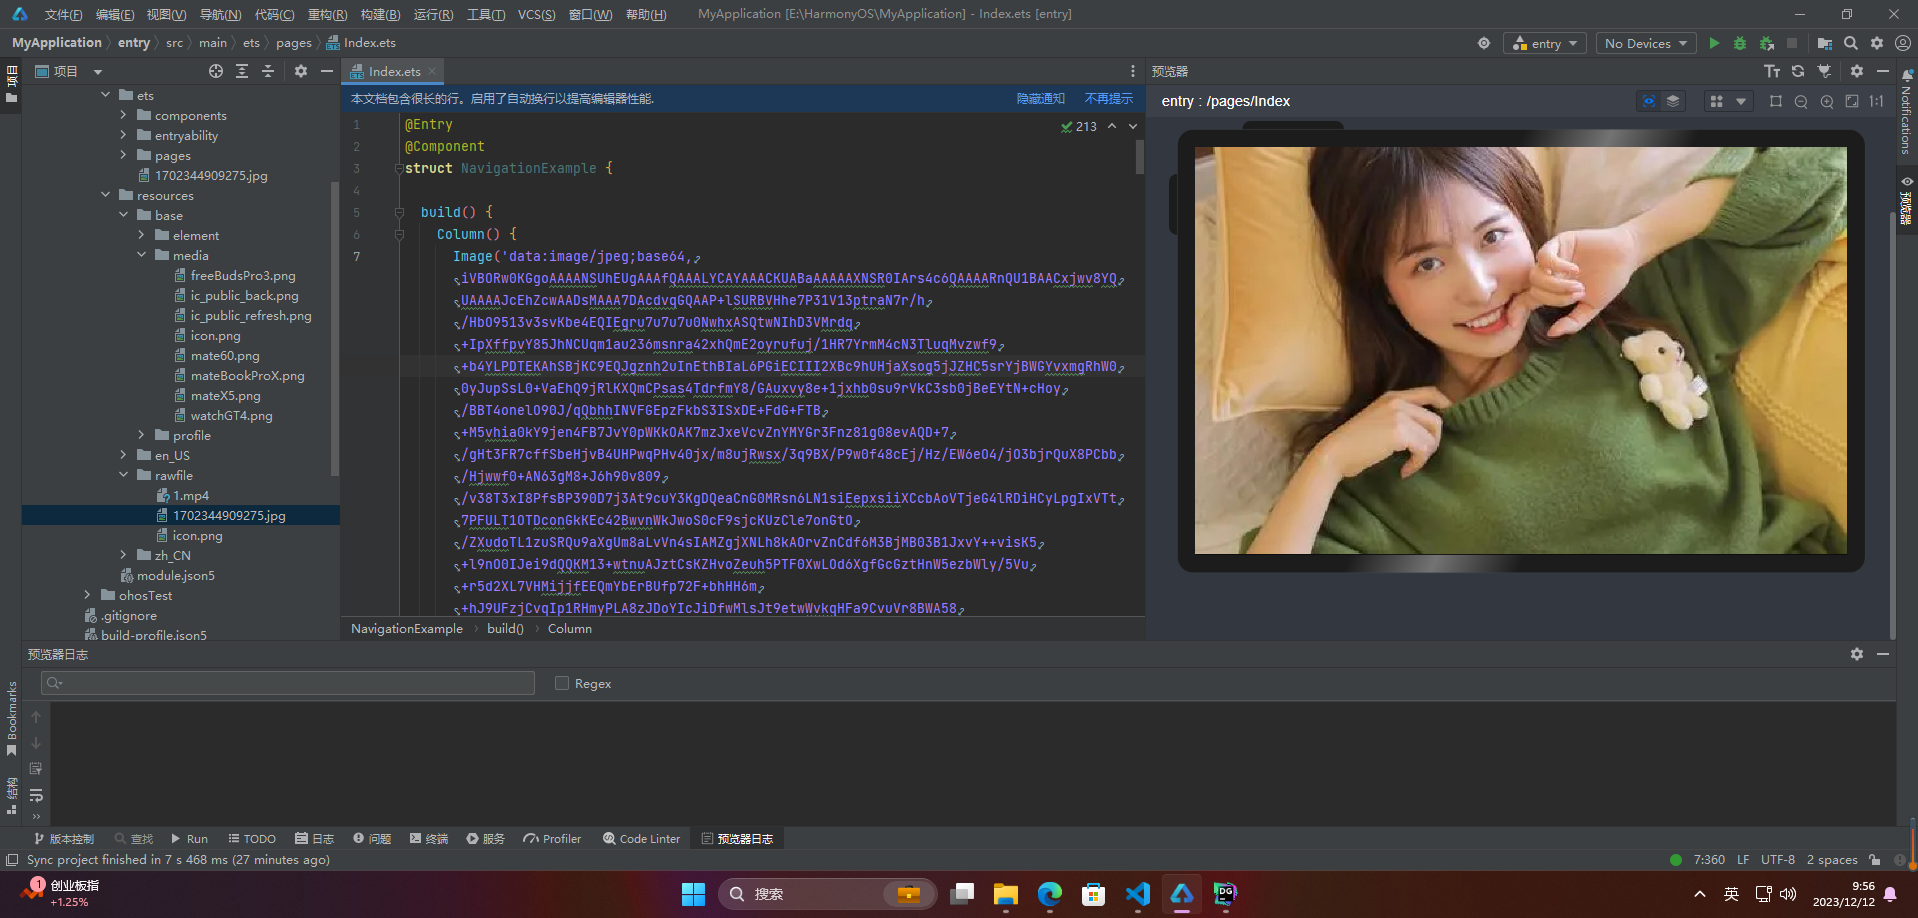
Image(‘1702344909275.jpg’)
.width(200)
}
.height(‘100%’)
.width(‘100%’)
.backgroundColor(‘#F1F3F5’)
}
}
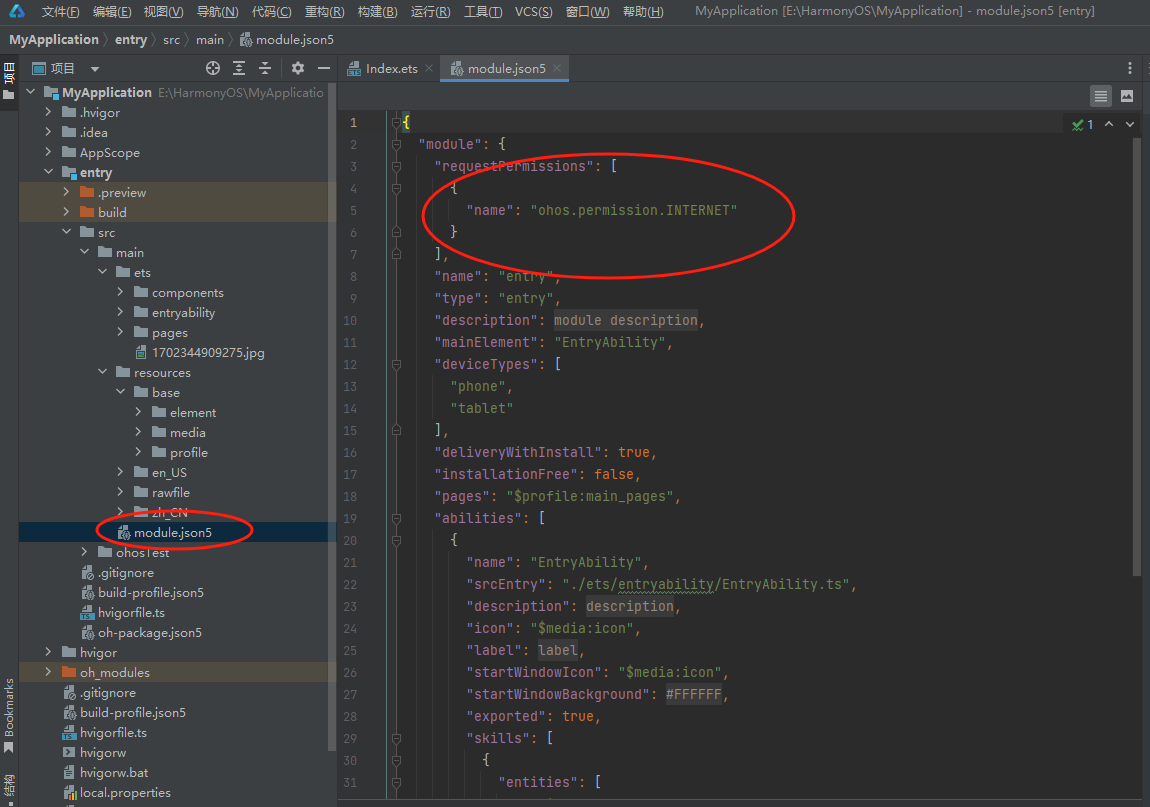
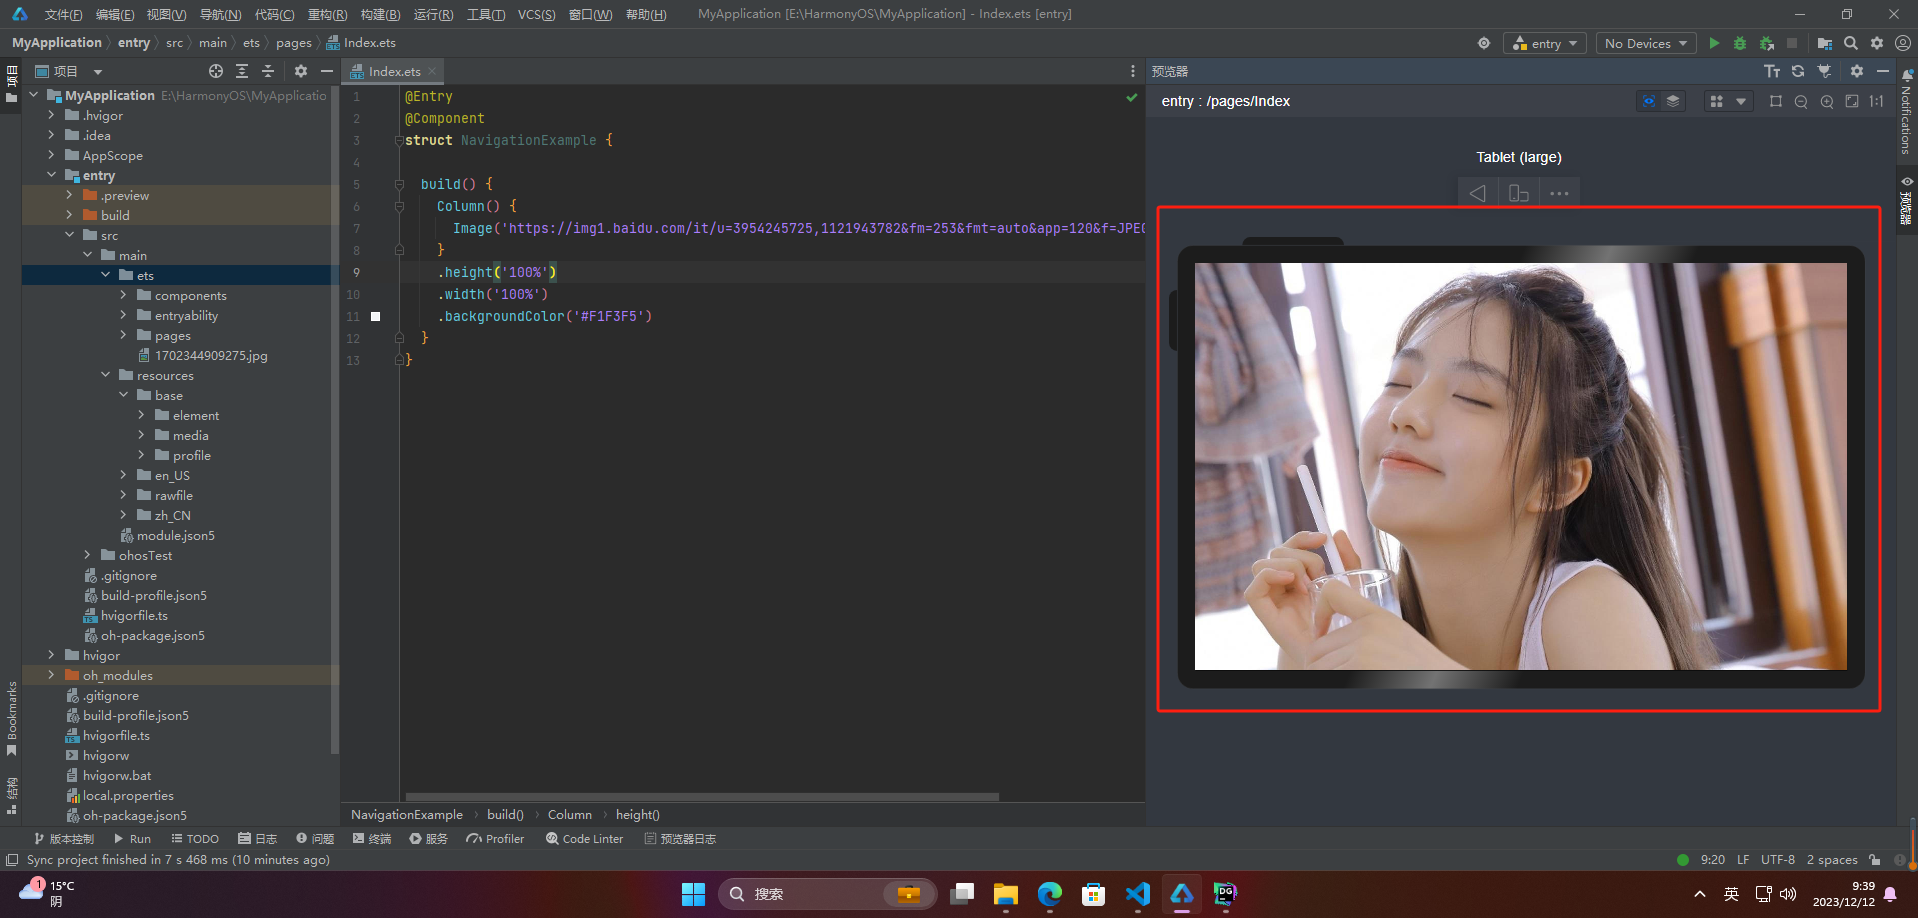
☀️1.1.2 网络资源
引入网络图片需申请权限ohos.permission.INTERNET,
@Entry
@Component
struct NavigationExample {
build() {
Column() {
Image(‘https://img1.baidu.com/it/u=3954245725,1121943782&fm=253&fmt=auto&app=120&f=JPEG?w=640&h=400’)
}
.height(‘100%’)
.width(‘100%’)
.backgroundColor(‘#F1F3F5’)
}
}
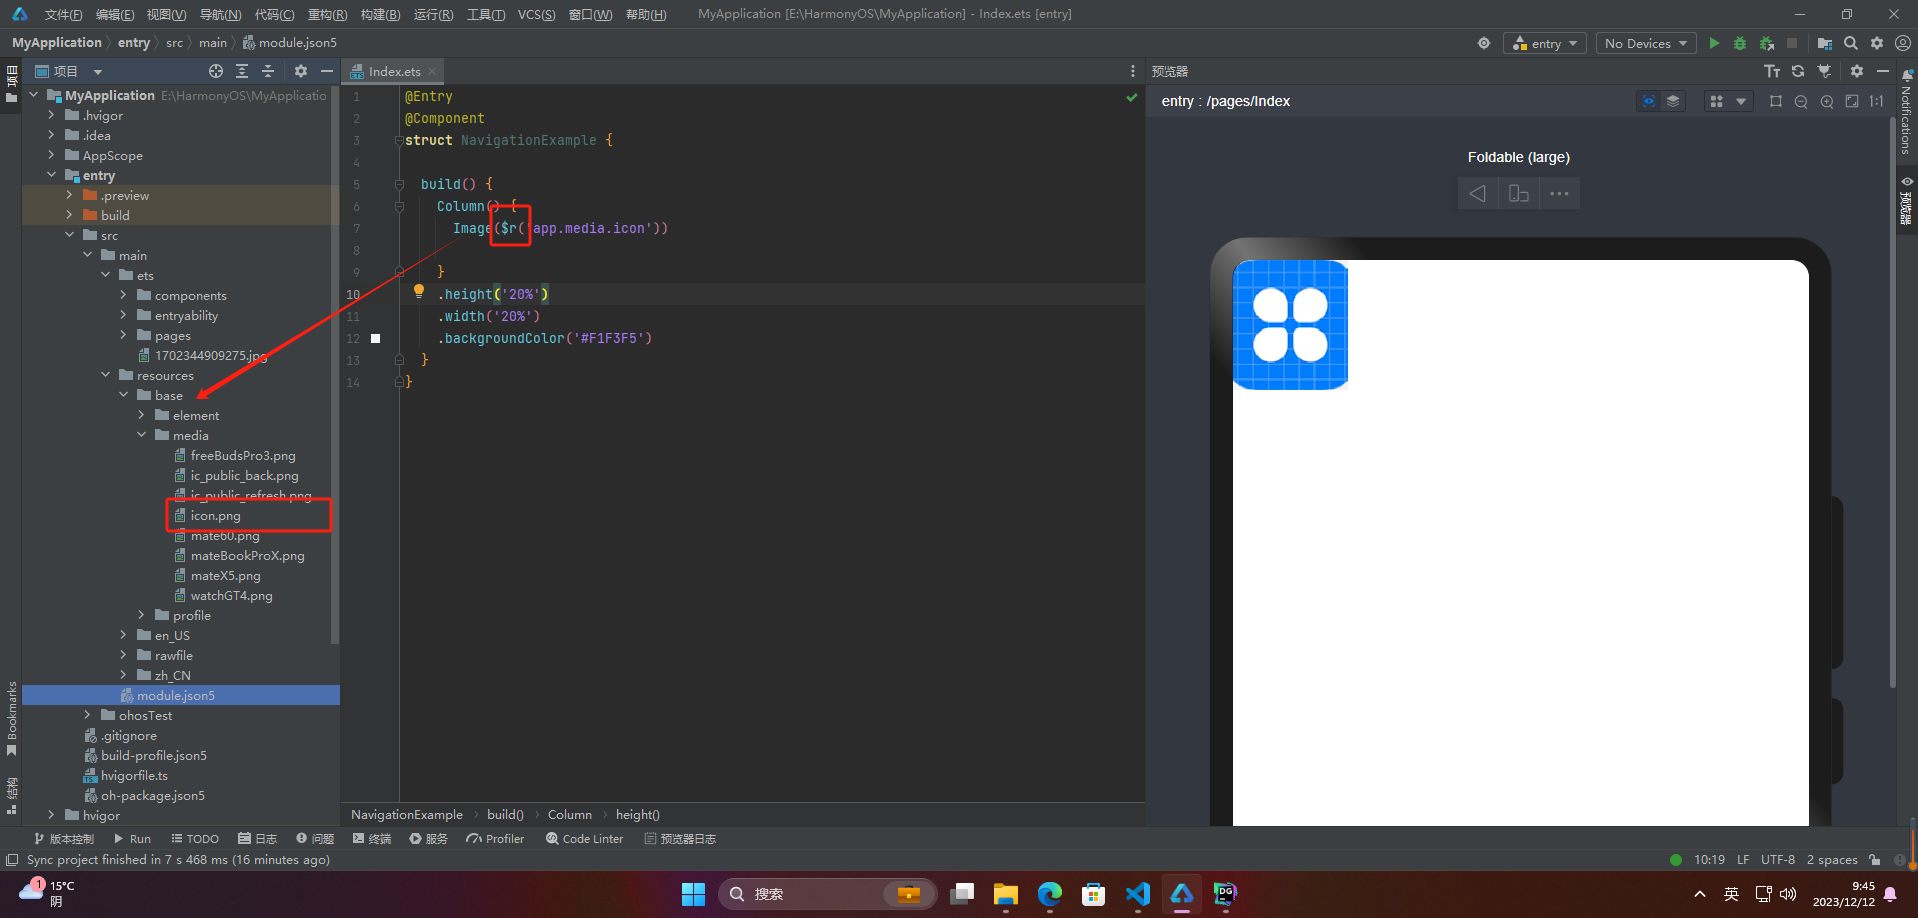
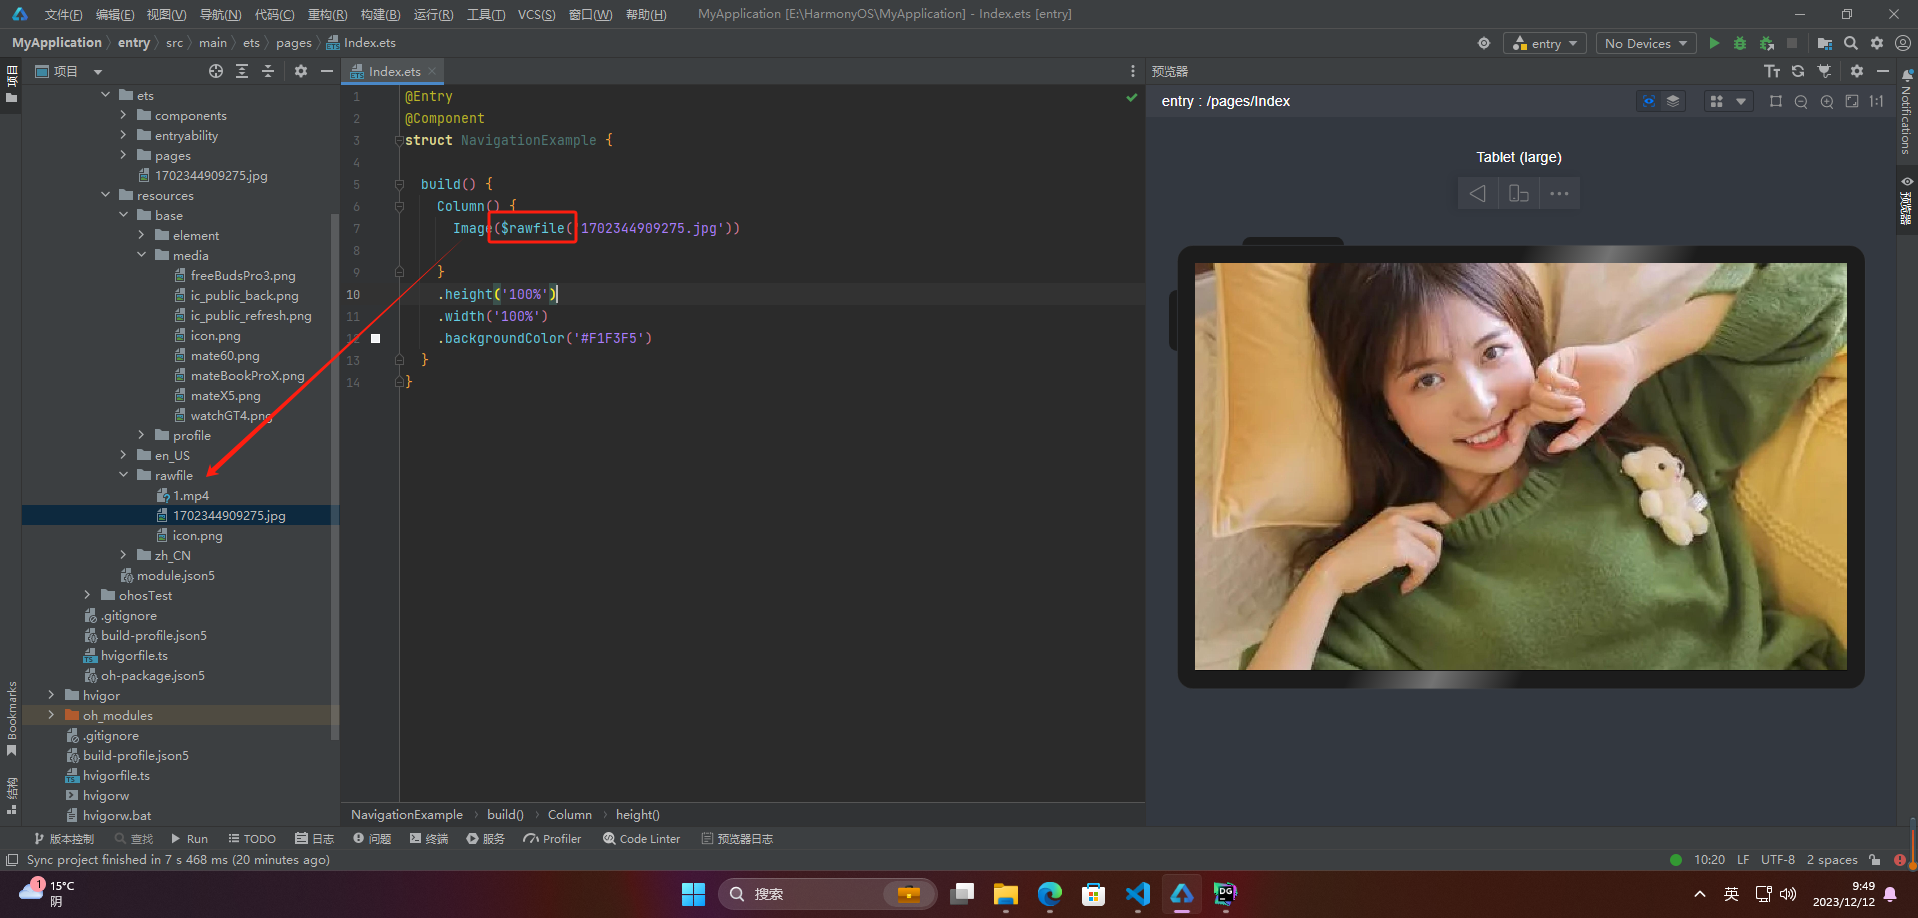
☀️1.1.3 Resource资源
使用资源格式可以跨包/跨模块引入图片,resources文件夹下的图片都可以通过$r或$rawfile资源接口读取到并转换到Resource格式
@Entry
@Component
struct NavigationExample {
build() {
Column() {
Image($r(‘app.media.icon’))
}
.height(‘20%’)
.width(‘20%’)
.backgroundColor(‘#F1F3F5’)
}
}
@Entry
@Component
struct NavigationExample {
build() {
Column() {
Image($rawfile(‘1702344909275.jpg’))
}
.height(‘100%’)
.width(‘100%’)
.backgroundColor(‘#F1F3F5’)
}
}
☀️1.1.4 媒体库
支持file://路径前缀的字符串,用于访问通过媒体库提供的图片路径。
1、调用接口获取图库的照片url
import picker from ‘@ohos.file.picker’;
@Entry
@Component
struct Index {
@State imgDatas: string[] = [];
// 获取照片url集
getAllImg() {
let result = new Array();
try {
let PhotoSelectOptions = new picker.PhotoSelectOptions();
PhotoSelectOptions.MIMEType = picker.PhotoViewMIMETypes.IMAGE_TYPE;
PhotoSelectOptions.maxSelectNumber = 5;
let photoPicker = new picker.PhotoViewPicker();
photoPicker.select(PhotoSelectOptions).then((PhotoSelectResult) => {
this.imgDatas = PhotoSelectResult.photoUris;
console.info('PhotoViewPicker.select successfully, PhotoSelectResult uri: ’ + JSON.stringify(PhotoSelectResult));
}).catch((err) => {
console.error(PhotoViewPicker.select failed with. Code: ${err.code}, message: ${err.message});
});
} catch (err) {
console.error(PhotoViewPicker failed with. Code: ${err.code}, message: ${err.message}); }
}
// aboutToAppear中调用上述函数,获取图库的所有图片url,存在imgDatas中
async aboutToAppear() {
this.getAllImg();
}
// 使用imgDatas的url加载图片。
build() {
Column() {
Grid() {
ForEach(this.imgDatas, item => {
GridItem() {
Image(item)
.width(200)
}
}, item => JSON.stringify(item))
}
}.width(‘100%’).height(‘100%’)
}
}
2、从媒体库获取的url格式通常如下
Image(‘file://media/Photos/5’)
.width(200)
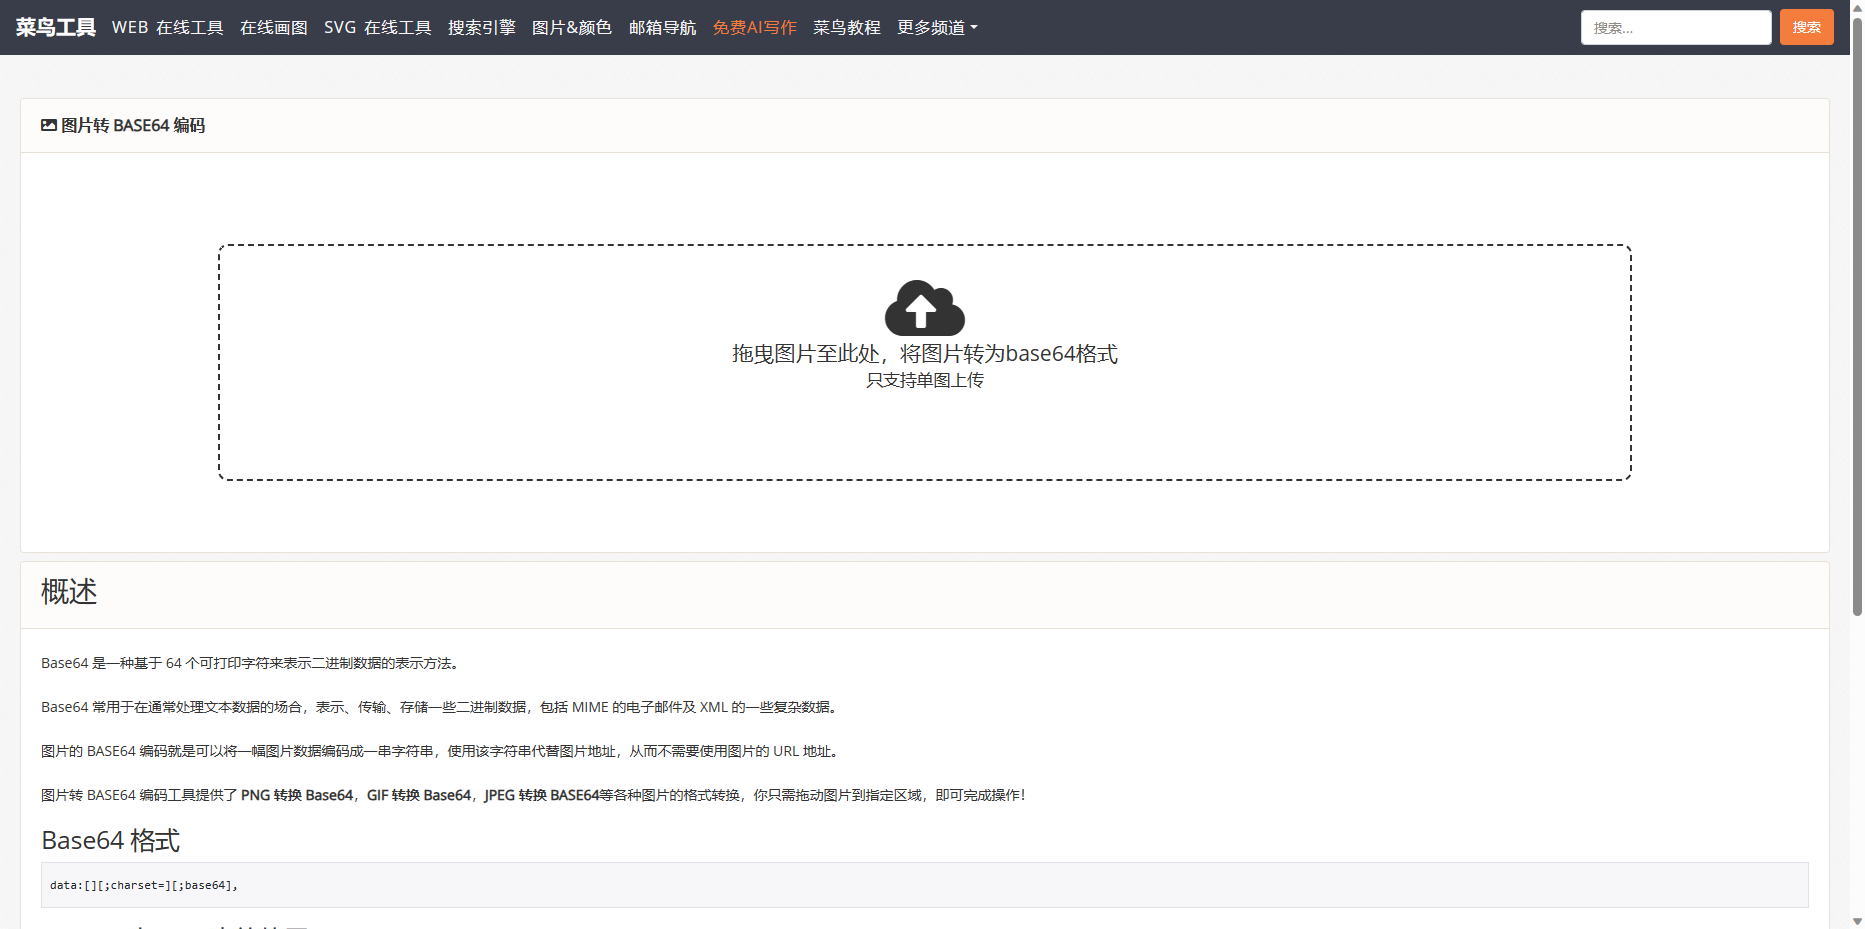
☀️1.1.5 base64
路径格式为data:image/[png|jpeg|bmp|webp];base64,[base64 data],其中[base64 data]为Base64字符串数据。
图片转换地址:https://c.runoob.com/front-end/59/
代码太长就不展示了,图片如下:
🦋1.2 多媒体像素图
import http from ‘@ohos.net.http’;
import ResponseCode from ‘@ohos.net.http’;
import image from ‘@ohos.multimedia.image’;
@Entry
@Component
struct NavigationExample {
@State image: PixelMap = undefined;
build() {
Column() {
Button(“获取网络图片”)
.onClick(() => {
http.createHttp().request(“https://img1.baidu.com/it/u=3954245725,1121943782&fm=253&fmt=auto&app=120&f=JPEG?w=640&h=400”,
(error, data) => {
if (error){
console.error(http reqeust failed with. Code: ${error.code}, message: ${error.message});
} else {
let code = data.responseCode;
if (ResponseCode.ResponseCode.OK === code) {
let res: any = data.result
let imageSource = image.createImageSource(res);
let options = {
alphaType: 0, // 透明度
editable: false, // 是否可编辑
pixelFormat: 3, // 像素格式
scaleMode: 1, // 缩略值
size: { height: 100, width: 100}
} // 创建图片大小
imageSource.createPixelMap(options).then((pixelMap) => {
console.log(‘进不来’)
this.image = pixelMap
})
}
}
}
)
})
Image(this.image)
}
.height(‘100%’)
.width(‘100%’)
.backgroundColor(‘#F1F3F5’)
}
}
2.显示矢量图
Image组件支持显示矢量图(svg格式的图片),并且支持以下标签:svg、rect、circle、ellipse、path、line、polyline、polygon和animate。如果你想改变图片的绘制颜色,可以使用fillColor属性。
Image($r(‘app.media.cloud’)).width(50)
.fillColor(Color.Blue)
3.添加属性
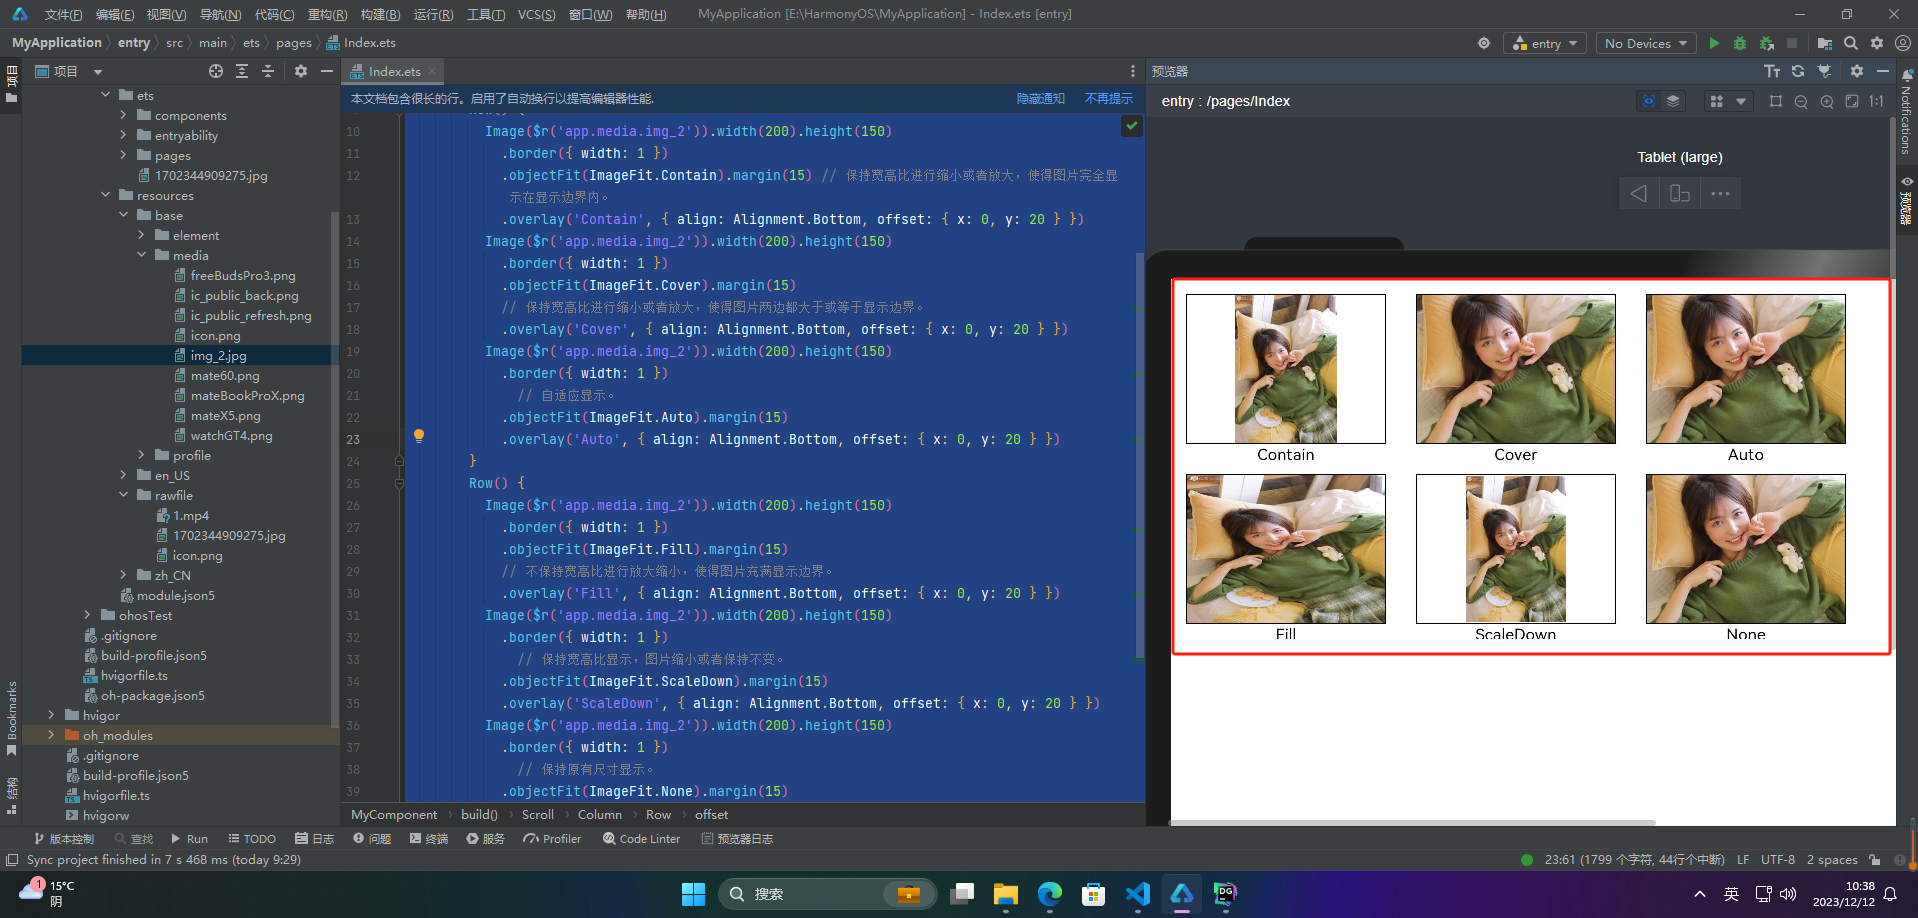
🦋3.1 设置图片缩放类型
| 缩放类型 | 描述 |
|---|---|
| Contain | 图片按比例缩放以适应容器边界,可能会出现空白区域 |
| Cover | 图片按比例缩放以填充容器,可能会被裁剪 |
| Auto | 默认值,图片大小保持原始大小 |
| Fill | 图片拉伸以填充容器,可能会出现失真 |
| ScaleDown | 图片按比例缩小以适应容器边界,但是不会放大图片 |
| None | 不进行任何缩放操作,即使图片溢出容器也不会被裁剪或缩放 |
@Entry
@Component
struct MyComponent {
scroller: Scroller = new Scroller()
build() {
Scroll(this.scroller) {
Column(){
Row() {
Image(
r
(
′
a
p
p
.
m
e
d
i
a
.
i
m
g
2
′
)
)
.
w
i
d
t
h
(
200
)
.
h
e
i
g
h
t
(
150
)
.
b
o
r
d
e
r
(
w
i
d
t
h
:
1
)
.
o
b
j
e
c
t
F
i
t
(
I
m
a
g
e
F
i
t
.
C
o
n
t
a
i
n
)
.
m
a
r
g
i
n
(
15
)
/
/
保持宽高比进行缩小或者放大,使得图片完全显示在显示边界内。
.
o
v
e
r
l
a
y
(
′
C
o
n
t
a
i
n
′
,
a
l
i
g
n
:
A
l
i
g
n
m
e
n
t
.
B
o
t
t
o
m
,
o
f
f
s
e
t
:
x
:
0
,
y
:
20
)
I
m
a
g
e
(
r('app.media.img_2')).width(200).height(150) .border({ width: 1 }) .objectFit(ImageFit.Contain).margin(15) // 保持宽高比进行缩小或者放大,使得图片完全显示在显示边界内。 .overlay('Contain', { align: Alignment.Bottom, offset: { x: 0, y: 20 } }) Image(
r(′app.media.img2′)).width(200).height(150).border(width:1).objectFit(ImageFit.Contain).margin(15)//保持宽高比进行缩小或者放大,使得图片完全显示在显示边界内。.overlay(′Contain′,align:Alignment.Bottom,offset:x:0,y:20)Image(r(‘app.media.img_2’)).width(200).height(150)
.border({ width: 1 })
.objectFit(ImageFit.Cover).margin(15)
// 保持宽高比进行缩小或者放大,使得图片两边都大于或等于显示边界。
.overlay(‘Cover’, { align: Alignment.Bottom, offset: { x: 0, y: 20 } })
Image(KaTeX parse error: Expected 'EOF', got '}' at position 186: … 0, y: 20 } }) }̲ Row() { Image(r(‘app.media.img_2’)).width(200).height(150)
.border({ width: 1 })
.objectFit(ImageFit.Fill).margin(15)
// 不保持宽高比进行放大缩小,使得图片充满显示边界。
.overlay(‘Fill’, { align: Alignment.Bottom, offset: { x: 0, y: 20 } })
Image(
r
(
′
a
p
p
.
m
e
d
i
a
.
i
m
g
2
′
)
)
.
w
i
d
t
h
(
200
)
.
h
e
i
g
h
t
(
150
)
.
b
o
r
d
e
r
(
w
i
d
t
h
:
1
)
/
/
保持宽高比显示,图片缩小或者保持不变。
.
o
b
j
e
c
t
F
i
t
(
I
m
a
g
e
F
i
t
.
S
c
a
l
e
D
o
w
n
)
.
m
a
r
g
i
n
(
15
)
.
o
v
e
r
l
a
y
(
′
S
c
a
l
e
D
o
w
n
′
,
a
l
i
g
n
:
A
l
i
g
n
m
e
n
t
.
B
o
t
t
o
m
,
o
f
f
s
e
t
:
x
:
0
,
y
:
20
)
I
m
a
g
e
(
r('app.media.img_2')).width(200).height(150) .border({ width: 1 }) // 保持宽高比显示,图片缩小或者保持不变。 .objectFit(ImageFit.ScaleDown).margin(15) .overlay('ScaleDown', { align: Alignment.Bottom, offset: { x: 0, y: 20 } }) Image(
r(′app.media.img2′)).width(200).height(150).border(width:1)//保持宽高比显示,图片缩小或者保持不变。.objectFit(ImageFit.ScaleDown).margin(15).overlay(′ScaleDown′,align:Alignment.Bottom,offset:x:0,y:20)Image(r(‘app.media.img_2’)).width(200).height(150)
.border({ width: 1 })
// 保持原有尺寸显示。
.objectFit(ImageFit.None).margin(15)
.overlay(‘None’, { align: Alignment.Bottom, offset: { x: 0, y: 20 } })
}
}
}
}
}
🦋3.2 图片插值
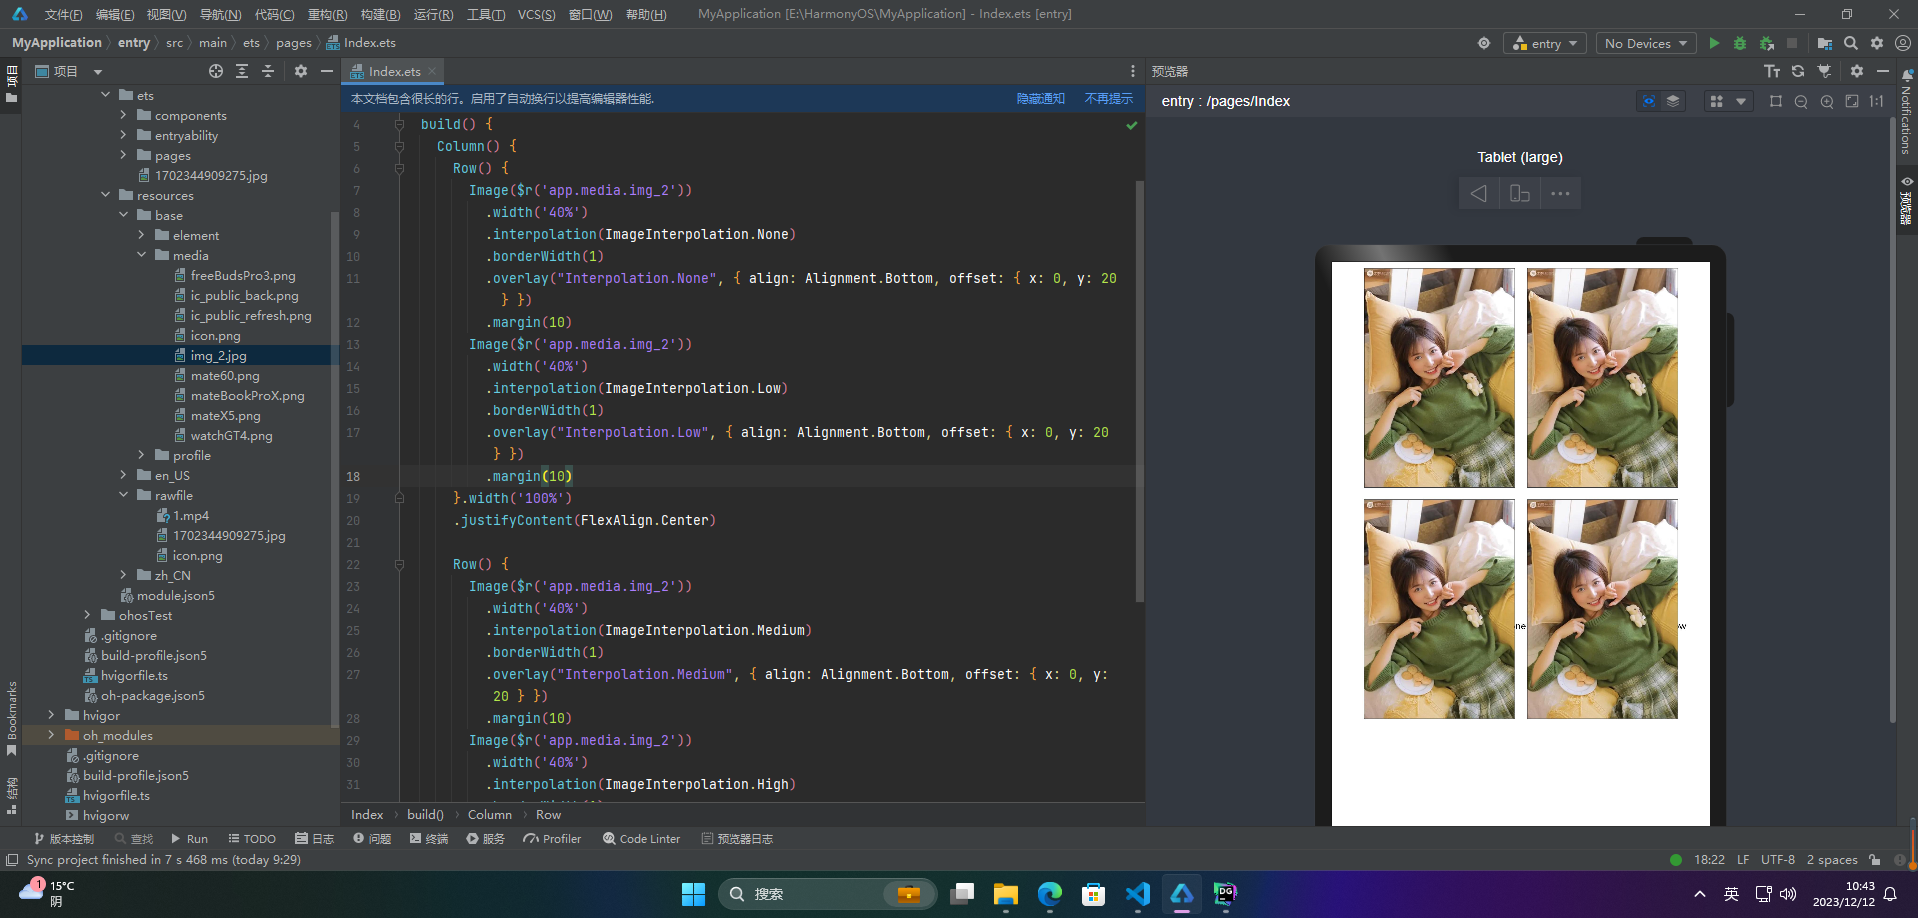
图片插值(Image interpolation)是指通过计算和处理像素点之间的值,生成一个新的像素值并插入到图像中的过程。插值通常用于调整图像的大小,例如将图像从低分辨率放大到高分辨率或从高分辨率缩小到低分辨率。通过插值算法,可以在不失真或失真最小的情况下调整图像大小。常用的插值算法包括双线性插值、双三次插值等。
HarmonyOS可以使用interpolation属性对图片进行插值,使图片显示得更清晰。
@Entry
@Component
struct Index {
build() {
Column() {
Row() {
Image(
r
(
′
a
p
p
.
m
e
d
i
a
.
i
m
g
2
′
)
)
.
w
i
d
t
h
(
′
40.
i
n
t
e
r
p
o
l
a
t
i
o
n
(
I
m
a
g
e
I
n
t
e
r
p
o
l
a
t
i
o
n
.
N
o
n
e
)
.
b
o
r
d
e
r
W
i
d
t
h
(
1
)
.
o
v
e
r
l
a
y
(
"
I
n
t
e
r
p
o
l
a
t
i
o
n
.
N
o
n
e
"
,
a
l
i
g
n
:
A
l
i
g
n
m
e
n
t
.
B
o
t
t
o
m
,
o
f
f
s
e
t
:
x
:
0
,
y
:
20
)
.
m
a
r
g
i
n
(
10
)
I
m
a
g
e
(
r('app.media.img_2')) .width('40%') .interpolation(ImageInterpolation.None) .borderWidth(1) .overlay("Interpolation.None", { align: Alignment.Bottom, offset: { x: 0, y: 20 } }) .margin(10) Image(
r(′app.media.img2′)).width(′40.interpolation(ImageInterpolation.None).borderWidth(1).overlay("Interpolation.None",align:Alignment.Bottom,offset:x:0,y:20).margin(10)Image(r(‘app.media.img_2’))
.width(‘40%’)
.interpolation(ImageInterpolation.Low)
.borderWidth(1)
.overlay(“Interpolation.Low”, { align: Alignment.Bottom, offset: { x: 0, y: 20 } })
.margin(10)
}.width(‘100%’)
.justifyContent(FlexAlign.Center)
Row() {
Image(
r
(
′
a
p
p
.
m
e
d
i
a
.
i
m
g
2
′
)
)
.
w
i
d
t
h
(
′
40.
i
n
t
e
r
p
o
l
a
t
i
o
n
(
I
m
a
g
e
I
n
t
e
r
p
o
l
a
t
i
o
n
.
M
e
d
i
u
m
)
.
b
o
r
d
e
r
W
i
d
t
h
(
1
)
.
o
v
e
r
l
a
y
(
"
I
n
t
e
r
p
o
l
a
t
i
o
n
.
M
e
d
i
u
m
"
,
a
l
i
g
n
:
A
l
i
g
n
m
e
n
t
.
B
o
t
t
o
m
,
o
f
f
s
e
t
:
x
:
0
,
y
:
20
)
.
m
a
r
g
i
n
(
10
)
I
m
a
g
e
(
r('app.media.img_2')) .width('40%') .interpolation(ImageInterpolation.Medium) .borderWidth(1) .overlay("Interpolation.Medium", { align: Alignment.Bottom, offset: { x: 0, y: 20 } }) .margin(10) Image(
r(′app.media.img2′)).width(′40.interpolation(ImageInterpolation.Medium).borderWidth(1).overlay("Interpolation.Medium",align:Alignment.Bottom,offset:x:0,y:20).margin(10)Image(r(‘app.media.img_2’))
.width(‘40%’)
.interpolation(ImageInterpolation.High)
.borderWidth(1)
.overlay(“Interpolation.High”, { align: Alignment.Bottom, offset: { x: 0, y: 20 } })
.margin(10)
}.width(‘100%’)
.justifyContent(FlexAlign.Center)
}
.height(‘100%’)
}
}
🦋3.3 设置图片重复样式
@Entry
@Component
struct MyComponent {
build() {
Column({ space: 10 }) {
Row({ space: 5 }) {
Image($r(‘app.media.icon’))
.width(110)
深知大多数程序员,想要提升技能,往往是自己摸索成长,但自己不成体系的自学效果低效又漫长,而且极易碰到天花板技术停滞不前!

既有适合小白学习的零基础资料,也有适合3年以上经验的小伙伴深入学习提升的进阶课程,涵盖了95%以上鸿蒙开发知识点,真正体系化!
由于文件比较多,这里只是将部分目录截图出来,全套包含大厂面经、学习笔记、源码讲义、实战项目、大纲路线、讲解视频,并且后续会持续更新
体系的自学效果低效又漫长,而且极易碰到天花板技术停滞不前!**
[外链图片转存中…(img-o00ftVEd-1715381999943)]
[外链图片转存中…(img-aoO3SDnw-1715381999944)]
既有适合小白学习的零基础资料,也有适合3年以上经验的小伙伴深入学习提升的进阶课程,涵盖了95%以上鸿蒙开发知识点,真正体系化!
由于文件比较多,这里只是将部分目录截图出来,全套包含大厂面经、学习笔记、源码讲义、实战项目、大纲路线、讲解视频,并且后续会持续更新


 被折叠的 条评论
为什么被折叠?
被折叠的 条评论
为什么被折叠?
 到【灌水乐园】发言


