


更新完毕:
policycoreutils.x86_64 0:2.5-34.el7
完毕!
依赖下载完,
开始rpm安装
执行口令 rpm -ivh gitlab-ce-10.8.4-ce.0.el7.x86_64.rpm
[root@localhost ~]# rpm -ivh gitlab-ce-10.8.4-ce.0.el7.x86_64.rpm
警告:gitlab-ce-10.8.4-ce.0.el7.x86_64.rpm: 头V4 RSA/SHA1 Signature, 密钥 ID f27eab47: NOKEY
准备中… ################################# [100%]
正在升级/安装…
1:gitlab-ce-10.8.4-ce.0.el7 ################################# [100%]
It looks like GitLab has not been configured yet; skipping the upgrade script.
*. *.
.****** *******
,***********,
,*********,
.,*******,
,*****,.
,****,
.,***,
,*,.
/ __() // / ____ / /
/ / __/ / __/ / / __ `/ __ \
/ // / / // /_/ // / // /
_//_/__/_,/./
Thank you for installing GitLab!
GitLab was unable to detect a valid hostname for your instance.
Please configure a URL for your GitLab instance by setting external_url
configuration in /etc/gitlab/gitlab.rb file.
Then, you can start your GitLab instance by running the following command:
sudo gitlab-ctl reconfigure
For a comprehensive list of configuration options please see the Omnibus GitLab readme
https://gitlab.com/gitlab-org/omnibus-gitlab/blob/master/README.md
修改gitlab配置文件信息,指定服务ip和端口号
[root@localhost ~]# vim /etc/gitlab/gitlab.rb
GitLab URL
##! URL on which GitLab will be reachable.
##! For more details on configuring external_url see:
##! https://docs.gitlab.com/omnibus/settings/configuration.html#configuring-the-external-url-for-gitlab
#external_url ‘http://gitlab.example.com’
#找到这行将url修改为自己的服务器ip和端口号
external_url ‘http://ip:端口号’
将external_url后面的url替换为自己的ip+端口号,(查看端口是否被占用,防火墙是否放开),
修改完wp保存退出。
添加配置信息
第一次配置信息,需要一定的时间,请耐心等待,直到最后看到gitlab Reconfigured! 表示配置完成。
[root@localhost ~]# gitlab-ctl reconfigure
…
…
…
Running handlers:
Running handlers complete
Chef Client finished, 426/609 resources updated in 02 minutes 55 seconds
gitlab Reconfigured!
注:如果发现ip或者端口等配置信息需要更改,每次更改完之后,一定要重新加载配置 gitlab-ctl reconfigure
重启gitlab服务
看到如下的信息,“ok,run ”表示各个模块启动成功。gitlab-ctl start | stop | restart
[root@localhost ~]# gitlab-ctl restart
ok: run: alertmanager: (pid 224124) 0s
ok: run: gitaly: (pid 224146) 0s
ok: run: gitlab-monitor: (pid 224167) 1s
ok: run: gitlab-workhorse: (pid 224192) 0s
ok: run: logrotate: (pid 224211) 1s
ok: run: nginx: (pid 224218) 0s
ok: run: node-exporter: (pid 224294) 1s
ok: run: postgres-exporter: (pid 224307) 0s
ok: run: postgresql: (pid 224318) 0s
ok: run: prometheus: (pid 224327) 0s
ok: run: redis: (pid 224371) 0s
ok: run: redis-exporter: (pid 224376) 1s
ok: run: sidekiq: (pid 224393) 0s
ok: run: unicorn: (pid 224409) 0s
ok,到这里基本上已经完成了对gitlab的安装,
浏览器登陆
浏览器访问,http://ip:端口号
第一次访问,直接进入更改root账号密码的页面,只需要填写密码即可,修改完,直接跳入到登陆页面。
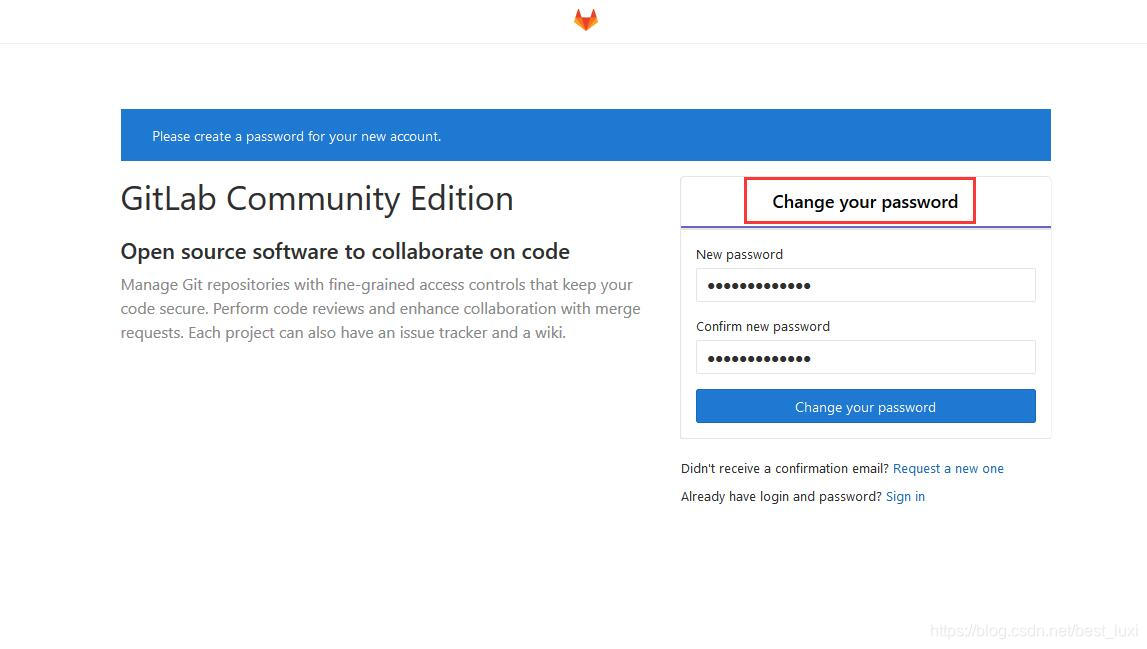
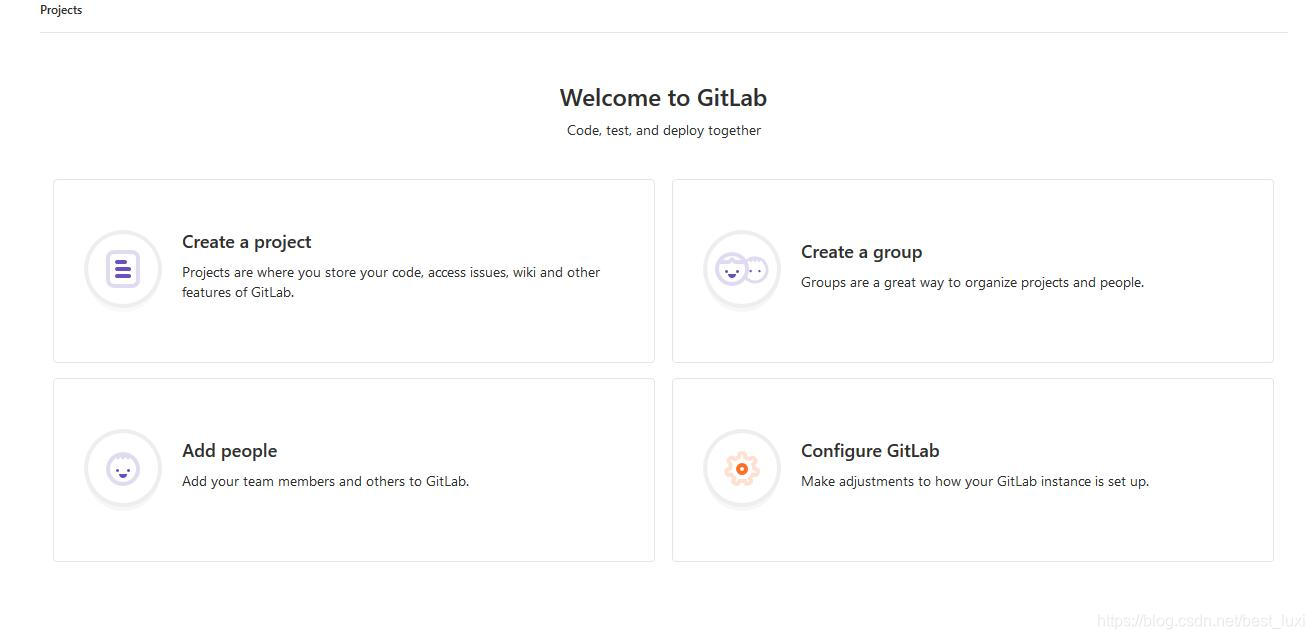
进入到gitlab页面后,即可开始创建自己项目。
其他
–
邮件配置
gitlab_rails[‘smtp_enable’] = true
gitlab_rails[‘smtp_address’] = “your.smtp.server”
gitlab_rails[‘smtp_port’] = 465
gitlab_rails[‘smtp_user_name’] = “your.smtp user”
gitlab_rails[‘smtp_password’] = “your.smtp password”
gitlab_rails[‘smtp_domain’] = “your.demain.com”
gitlab_rails[‘smtp_authentication’] = “login”
gitlab_rails[‘smtp_enable_starttls_auto’] = true
gitlab_rails[‘smtp_openssl_verify_mode’] = ‘peer’
gitlab_rails[‘gitlab_email_from’] = ‘gitlab@mail.domain.com’
gitlab_rails[‘gitlab_email_reply_to’] = ‘noreply@mail.domain.com’
查看服务
查看服务状态
[root@localhost ~]# gitlab-ctl status
run: alertmanager: (pid 224124) 81166s; run: log: (pid 223418) 81323s
run: gitaly: (pid 224146) 81166s; run: log: (pid 223304) 81324s
run: gitlab-monitor: (pid 224167) 81166s; run: log: (pid 223352) 81324s
run: gitlab-workhorse: (pid 224192) 81165s; run: log: (pid 223250) 81325s
run: logrotate: (pid 236092) 1964s; run: log: (pid 223251) 81325s
run: nginx: (pid 227942) 80560s; run: log: (pid 223181) 81326s
run: node-exporter: (pid 224294) 81164s; run: log: (pid 223308) 81324s
run: postgres-exporter: (pid 224307) 81163s; run: log: (pid 223428) 81323s
run: postgresql: (pid 224318) 81163s; run: log: (pid 223216) 81325s
run: prometheus: (pid 224327) 81162s; run: log: (pid 223417) 81323s
run: redis: (pid 224371) 81162s; run: log: (pid 223215) 81325s
run: redis-exporter: (pid 224376) 81162s; run: log: (pid 223354) 81324s
run: sidekiq: (pid 227863) 80573s; run: log: (pid 223158) 81326s
run: unicorn: (pid 228149) 80549s; run: log: (pid 223157) 81326s
格式:
进程名称:(进程ID编号)进程运行时间(秒);进程的日志服务进程Id 日志运行时间
run 表示进程运行正常
down 表示进程没有启动或者挂掉,我们可以查看服务的日志信息,来定位问题。
查看服务日志
检查redis的日志
gitlab-ctl tail redis
检查postgresql的日志
gitlab-ctl tail postgresql
检查gitlab-workhorse的日志
gitlab-ctl tail gitlab-workhorse
检查logrotate的日志
gitlab-ctl tail logrotate
检查nginx的日志
gitlab-ctl tail nginx
检查sidekiq的日志
gitlab-ctl tail sidekiq
检查unicorn的日志
gitlab-ctl tail unicorn
注:每次修改完配置,记得启动配置更新。
到这里gitlab已经安装完成,下面会介绍项目的创建,用户的添加和项目管理。
深知大多数程序员,想要提升技能,往往是自己摸索成长,但自己不成体系的自学效果低效又漫长,而且极易碰到天花板技术停滞不前!


由于文件比较多,这里只是将部分目录截图出来,全套包含大厂面经、学习笔记、源码讲义、实战项目、大纲路线、讲解视频,并且后续会持续更新
加入社区》https://bbs.csdn.net/forums/4304bb5a486d4c3ab8389e65ecb71ac0
icorn的日志
gitlab-ctl tail unicorn
注:每次修改完配置,记得启动配置更新。
到这里gitlab已经安装完成,下面会介绍项目的创建,用户的添加和项目管理。
深知大多数程序员,想要提升技能,往往是自己摸索成长,但自己不成体系的自学效果低效又漫长,而且极易碰到天花板技术停滞不前!
[外链图片转存中…(img-ip8lsIx8-1725671674323)]
[外链图片转存中…(img-1aOsUx7v-1725671674324)]
由于文件比较多,这里只是将部分目录截图出来,全套包含大厂面经、学习笔记、源码讲义、实战项目、大纲路线、讲解视频,并且后续会持续更新
加入社区》https://bbs.csdn.net/forums/4304bb5a486d4c3ab8389e65ecb71ac0


 1174
1174

 被折叠的 条评论
为什么被折叠?
被折叠的 条评论
为什么被折叠?
 到【灌水乐园】发言


