


主工程:
AndroidMainfest.xml按照正常写法即可,无需配置什么东东,当时在设置皮肤的需要这样写上:
Activity.java
package com.tal.skinmain; import com.tal.skin.R; import android.app.Activity; |
注解:②③④获取皮肤工程的数据,当中有指定皮肤的包名
main.xml
| <?xml version="1.0" encoding="utf-8"?> <LinearLayout xmlns:android="http://schemas.android.com/apk/res/android" android:orientation="vertical" android:layout_width="fill_parent" android:layout_height="fill_parent" android:id="@+id/id_skin_linearlayout" > <TextView android:id="@+id/id_skin_textview" android:layout_width="fill_parent" android:layout_height="wrap_content" android:text="@string/hello" /> <Button android:id="@+id/id_skin_bt1" android:layout_width="fill_parent" android:layout_height="wrap_content" android:text="默认" /> <Button android:id="@+id/id_skin_bt2" android:layout_width="fill_parent" android:layout_height="wrap_content" android:text="皮肤一" /> <Button android:id="@+id/id_skin_bt3" android:layout_width="fill_parent" android:layout_height="wrap_content" android:text="皮肤二" /> </LinearLayout> |
android 动态换肤,Android系统已经完美解决换肤问题,看到网上好多的朋友还在询问如何换肤。我示例一下Android换肤
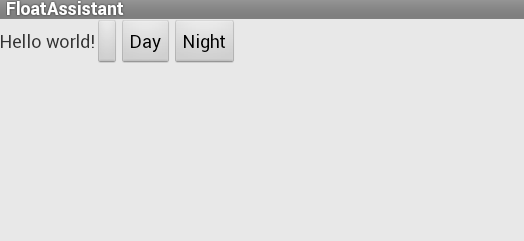
看效果
点击 Day 后的主题皮肤
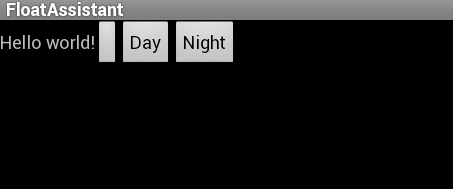
点击 Night后,主题皮肤
[java] view plain copy
-
package cn.hpc.assistant;
-
import android.app.Activity;
-
import android.content.Context;
-
import android.graphics.PixelFormat;
-
import android.graphics.Point;
-
import android.os.Bundle;
-
import android.os.Handler;
-
import android.os.Message;
-
import android.view.Gravity;
-
import android.view.View;
-
import android.view.WindowManager;
-
import android.view.WindowManager.LayoutParams;
-
public class MainActivity extends Activity {
-
private int mThemeId = -1; // 皮肤主题ID,默认-1 不处理
-
@Override
-
protected void onCreate(Bundle savedInstanceState) {
-
super.onCreate(savedInstanceState);
-
if (savedInstanceState != null) {
-
if (savedInstanceState.getInt(“theme”, -1) != -1) {// 读取皮肤主题ID,-1 不处理
-
mThemeId = savedInstanceState.getInt(“theme”);
-
this.setTheme(mThemeId); //设置主题皮肤
-
}
-
}
-
setContentView(R.layout.activity_main);
-
this.findViewById(R.id.id_btn_day).setOnClickListener(mOnClickListener); // day 明亮主题
-
this.findViewById(R.id.id_btn_night).setOnClickListener(mOnClickListener); //night 黑暗主题
-
}
-
View.OnClickListener mOnClickListener = new View.OnClickListener() {
-
@Override
-
public void onClick(View v) {
-
// TODO Auto-generated method stub
-
switch (v.getId()) {
-
case R.id.id_btn_day:
-
onTheme(android.R.style.Theme_Light);
-
break;
-
case R.id.id_btn_night:
-
onTheme(android.R.style.Theme_Black);
-
break;
-
default:
-
}
-
}
-
};
-
// 设置主题,并重建
-
private void onTheme(int iThemeId){
-
mThemeId = iThemeId;
-
this.recreate();
-
}
-
// 保存主题ID,onCreate 时读取主题
-
@Override
-
public void onSaveInstanceState(Bundle outState) {
-
super.onSaveInstanceState(outState);
-
outState.putInt(“theme”, mThemeId);
-
}
-
}
布局文件:
activity_main.xml
自学编程路线、面试题集合/面经、及系列技术文章等,资源持续更新中…

State);
-
outState.putInt(“theme”, mThemeId);
-
}
-
}
布局文件:
activity_main.xml
自学编程路线、面试题集合/面经、及系列技术文章等,资源持续更新中…
[外链图片转存中…(img-cOkSSWPp-1723782440174)]


 258
258

 被折叠的 条评论
为什么被折叠?
被折叠的 条评论
为什么被折叠?
 到【灌水乐园】发言


