gitlab页面的出现的问题; 检测端口号80和8080是否被占用;
 访问主页502的时候,看一下端口号8080是否被占用
gitlab相关命令
gitlab-ctl start //启动gitlab服务
gitlab-ctl stop //停止gitlab服务
gitlab-ctl start unicorn(添加组件名称) //单独开启某个组件
gitlab-ctl status //查看gitlab的运行状态
gitlab-ctl reconfigure //修改完配置文件重新编译
gitlab-ctl tail //查看gitlab的日志
## 配置 GitLab 邮件服务


sendmail /postfix /smtp
 古老邮箱 邮件服务服务器 在线邮箱


* 配置smtp邮箱步骤
###修改配置文件
[root@localhost ~]# vim /etc/gitlab/gitlab.rb
gitlab_rails[‘gitlab_email_from’] = ‘bm73333@163.com’ //说明邮箱从哪里发,设置自己的邮箱地址
#ctrl+v 进入可视块 +x
gitlab_rails[‘smtp_enable’] = true
gitlab_rails[‘smtp_address’] = “smtp.163.com” //在线邮件服务器地址
gitlab_rails[‘smtp_port’] = 25 //端口号,开启本地发邮件的端口
gitlab_rails[‘smtp_user_name’] = “bm73333@163.com” //邮箱地址
gitlab_rails[‘smtp_password’] = “qwerty567890” //邮箱授权码,调用邮箱
###邮箱授权码的获取
设置
POP3/SMTP/IMAP
客户端授权密码,在里面就可以设置授权码
gitlab_rails[‘smtp_domain’] = “163.com”
gitlab_rails[‘smtp_authentication’] = “login” //在登录时,查看是否有授权码
gitlab_rails[‘smtp_enable_starttls_auto’] = true //加密方式
gitlab_rails[‘smtp_tls’] = false //加密方式
user[‘git_user_email’] = “bm73333@163.com”
###修改完成
重新编译配置文件
[root@localhost ~]# gitlab-ctl reconfigure
重启gitlab服务
[root@localhost ~]# gitlab-ctl restart
进入控制台
[root@localhost ~]# gitlab-rails console
GitLab: 11.7.5 (c5b5b18)
GitLab Shell: 8.4.4
postgresql: 9.6.11
Loading production environment (Rails 5.0.7.1)
irb(main):001:0> Notify.test_email(‘18256001006@163.com’,‘yangxiaofeiNB’,‘hello,world!’).deliver_now //发送邮件,deliver_now代表立刻发送
(格式:收件人的邮箱地址,邮件标题,邮件内容)
irb(main):003:0> exit //退出控制台
## GitLab 的日常操作
gitlab的备份
[root@localhost ~]# gitlab-rake gitlab:backup:create //gitlab的备份
备份的数据的目录
[root@localhost ~]# ls /var/opt/gitlab/backups/
1550541218_2019_02_19_11.7.5_gitlab_backup.tar //备份完成后会形成tar包,文件名格式:时间戳,当前日期,当前gitlab版本,backup备份包
恢复数据的步骤
首先停止一下两个组件
[root@localhost ~]# gitlab-ctl stop sidekiq
ok: down: sidekiq: 0s, normally up
[root@localhost ~]# gitlab-ctl stop unicorn
ok: down: unicorn: 0s, normally up
切换到备份目录
[root@localhost ~]# cd /var/opt/gitlab/backups/
[root@localhost backups]# ls
1550541218_2019_02_19_11.7.5_gitlab_backup.tar
[root@localhost backups]# gitlab-rake gitlab:backup:restore BACKUP=1550541218_2019_02_19_11.7.5 //进行数据的恢复,名字为上面的时间戳,日期,版本号组成
出现以下提示
Do you want to continue (yes/no)? yes
Do you want to continue (yes/no)? yes
[root@localhost backups]# gitlab-ctl start sidekiq //启动组件服务
ok: run: sidekiq: (pid 19474) 0s
[root@localhost backups]# gitlab-ctl start unicorn //启动组件服务
ok: run: unicorn: (pid 19536) 1s
数据恢复完成
访问gitlab的web页面
 http://gitlab.bdqn.com 或者 http://localhost 的 ip 地址


## 进入控制台的两种方法
1、[root@localhost ~]# gitlab-rails console //进入控制台
GitLab: 11.7.5 (c5b5b18)
GitLab Shell: 8.4.4
postgresql: 9.6.11
Loading production environment (Rails 5.0.7.1) //加载生产环境
irb(main):001:0>
#2、[root@localhost ~]# gitlab-rails console production
GitLab: 11.7.5 (c5b5b18)
GitLab Shell: 8.4.4
postgresql: 9.6.11
Loading production environment (Rails 5.0.7.1)
irb(main):001:0>
## 忘记 root 密码,进行修改
[root@localhost ~]# gitlab-rails console production
GitLab: 11.7.5 (c5b5b18)
GitLab Shell: 8.4.4
postgresql: 9.6.11
Loading production environment (Rails 5.0.7.1)
irb(main):001:0> user = User.where(id:1).first //切换到root用户
=> #<User id:1 @root>
irb(main):002:0> user.password=‘1234.com’ //''里面修改密码,密码为8位
=> “1234.com”
irb(main):003:0> user.save!
Enqueued ActionMailer::DeliveryJob (Job ID: 7661b452-fcb4-48a0-b9f0-35995ba21258) to Sidekiq(mailers) with arguments: “DeviseMailer”, “password_change”, “deliver_now”, #<GlobalID:0x00007f4360748a10 @uri=#<URI::GID gid://gitlab/User/1>>
=> true
irb(main):004:0> exit
验证是都修改成功,使用web进行登录测试
##至此修改完成
## 查看 GitLab 的日志
[root@localhost ~]# gitlab-ctl tail //查看整体的日志
查看组件的相关日志
[root@localhost ~]# gitlab-ctl tail redis //查看redis的日志
[root@localhost ~]# gitlab-ctl tail logrotate
## 通过 ssh 远程连接方式往 GitLab 上传文件
查看密钥
[root@localhost ~]# ssh-keygen -t rsa -C “zhangsan@bdqn.cn” //为创建用户时输入的邮箱地址
[root@localhost .ssh]# pwd
/root/.ssh
[root@localhost .ssh]# ls
id_rsa id_rsa.pub
[root@localhost .ssh]# cat id_rsa.pub
ssh-rsa AAAAB3NzaC1yc2EAAAADAQABAAABAQDG+woCe7UsBcXhU/I5hRZ0B7fzOOzzGsYzm1+qSvxn1SRaWQ53TNfWJJKpmamodHDI0IWHld6MI+2IB5bSXobNjrV1W147m34fE3KZZ4Kx9wwQ89UnUzqREIPDHnTLozHOE36AxGh6pREFawMjxJJjzd6d3xC9PM9bQ3KaY80agGY44N1vO6c+Turfkpyre3fyITudEqPlrCibJF9eikXgFhHNtrrWVAII6LUKU89LNfXKKYfOmXvB+T+ZYODkXqPR5GPCz4IIuGd5fxpfAmnTvm+Sz3Dp5APVSmveEx9ivtRVsb5lqlYoXJT1vL+D9dQKFY7HI8/FttOSduQNLfrv 45354066@qq.com
复制密钥,到web页面进行添加密钥
验证远程登录是否成功
[root@localhost .ssh]# ssh -T git@gitlab.bdqn.cn
The authenticity of host ‘gitlab.bdqn.cn (192.168.1.21)’ can’t be established.
ECDSA key fingerprint is SHA256:88Ixrb6xHdt9SVsQ3n78nQbfzPplW8kZNKQLuldud6w.
ECDSA key fingerprint is MD5:3e:34:68:db:3a:f6:5c:a5🇩🇪18:9b:1c:cc:ef:f9:ff.
Are you sure you want to continue connecting (yes/no)? yes
Warning: Permanently added ‘gitlab.bdqn.cn,192.168.1.21’ (ECDSA) to the list of known hosts.
Welcome to GitLab, @root!
## 克隆项目,进行上传
[root@localhost ~]# yum install -y git //下载git
声明谁操作,全局配置,为用户和用户邮箱(用户必须有才行)
[root@localhost ~]# git config --global user.name “zhangsan”
[root@localhost ~]# git config --global user.email “zahngsan@bdqn.cn”
[root@localhost ~]# git clone git@gitlab.bdqn.cn:ios/ios.git //克隆项目库
正克隆到 ‘ios’…
warning: 您似乎克隆了一个空版本库。
[root@localhost ~]# ls //生成一个目录,就是克隆的代码
anaconda-ks.cfg ios 模板 图片 下载 桌面
initial-setup-ks.cfg 公共 视频 文档 音乐
[root@localhost ~]# cd ios/ //首先进入到克隆的库中
[root@localhost ~]# touch README.md //创建一个文件
[root@localhost ~]# echo 111 > README.md //输入内容
[root@localhost ios]# git add README.md //git中添加内容
[root@localhost ios]# git commit -m “test111” //进行提交,打一个标签
[master(根提交) ad3c913] test111
1 file changed, 1 insertion(+)
create mode 100644 README.md
[root@localhost ios]# git push origin master //上传,原来的,向主干添加
Counting objects: 3, done.
Writing objects: 100% (3/3), 209 bytes | 0 bytes/s, done.
Total 3 (delta 0), reused 0 (delta 0)
To git@gitlab.bdqn.cn:ios/ios.git
* [new branch] master -> master
进入web页面就可以看到项目了
克隆项目
[root@localhost ~]# mkdir test
[root@localhost ~]# cd test/
[root@localhost test]# git clone git@gitlab.bdqn.cn:ios/ios.git
正克隆到 ‘ios’…
remote: Enumerating objects: 3, done.
remote: Counting objects: 100% (3/3), done.
remote: Total 3 (delta 0), reused 0 (delta 0)
接收对象中: 100% (3/3), done.
[root@localhost test]# ls
ios
[root@localhost test]# cd ios/
[root@localhost ios]# ls
README.md
参考链接 :
gitlab-ci的简易入门—基于python项目的CI演示 : https://mp.weixin.qq.com/s/aQmdusndVdxHo1rrj7eg1w
**深知大多数程序员,想要提升技能,往往是自己摸索成长,但自己不成体系的自学效果低效又漫长,而且极易碰到天花板技术停滞不前!**


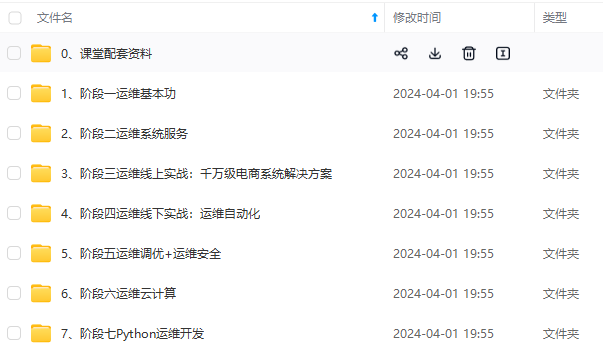
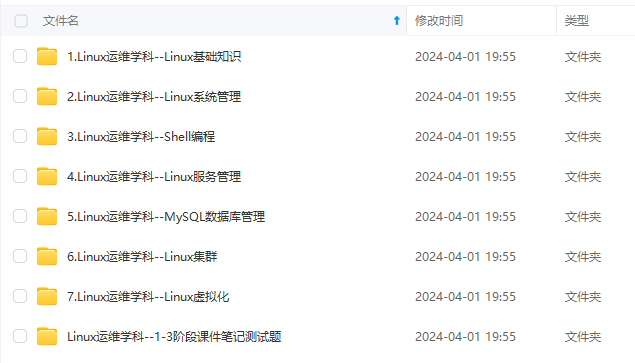
**由于文件比较多,这里只是将部分目录截图出来,全套包含大厂面经、学习笔记、源码讲义、实战项目、大纲路线、讲解视频,并且后续会持续更新**
详情docs.qq.com/doc/DSmdCdUNwcEJDTXFK
**深知大多数程序员,想要提升技能,往往是自己摸索成长,但自己不成体系的自学效果低效又漫长,而且极易碰到天花板技术停滞不前!**
[外链图片转存中...(img-icjkj5PV-1724620914671)]
[外链图片转存中...(img-hMaAXcS1-1724620914672)]
**由于文件比较多,这里只是将部分目录截图出来,全套包含大厂面经、学习笔记、源码讲义、实战项目、大纲路线、讲解视频,并且后续会持续更新**
详情docs.qq.com/doc/DSmdCdUNwcEJDTXFK


 170
170

 被折叠的 条评论
为什么被折叠?


