


kickstart自动安装脚本制作
实验前的准备
1.rhel7主机
2.开启主机图形   #init 5 开图形
                #如果没有安装
                #yum group install GNOME -y
                #systemctl set-default  graphical.target
                #reboo
3.配置网络可用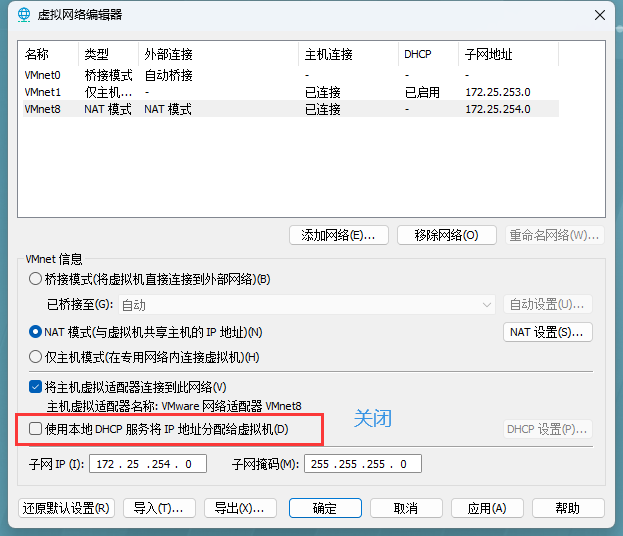
4.关闭vmware dhcp功能![]()
注意:关闭本地的DHCP服务
编辑
此文件是在系统安装好后自动生成的这个文件记录了系统在安装过程中的所有设定
[root@localhost ~]# cat /root/anaconda-ks.cfg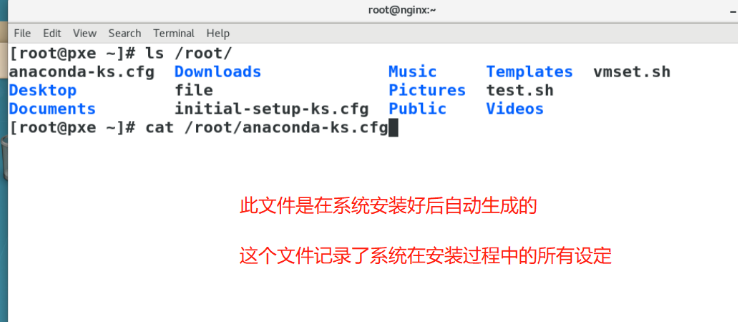
编辑
开始创建脚本
安装图形化生成kickstart自动安装脚本的工具
[root@localhost ~]# yum install system-config-kickstart -y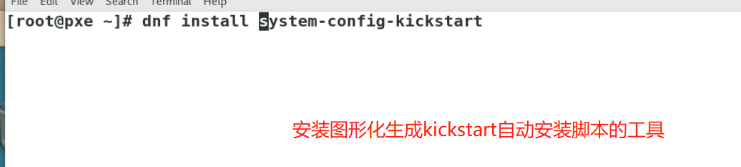
编辑
启动图形制作工具
注意:启动要在虚拟机里面启动,不可以在xshell中使用
[root@localhost ~]# system-config-kickstart
编辑
脚本安装设置
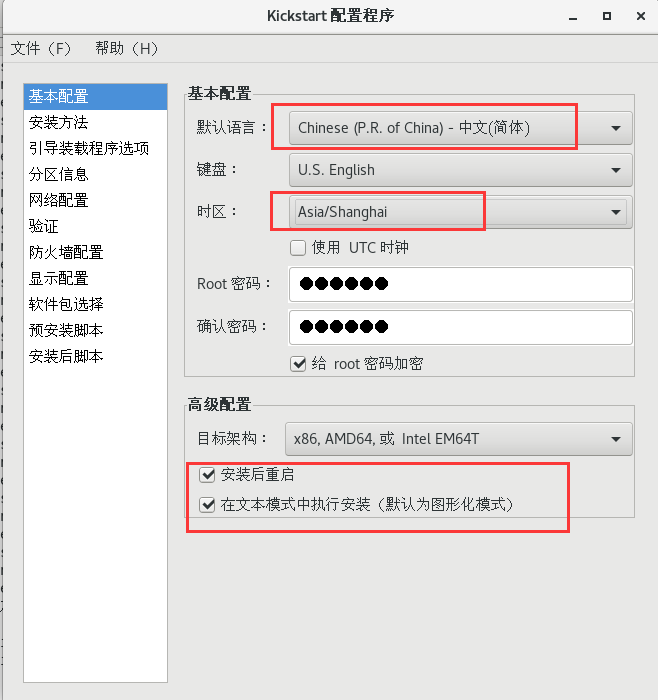
启动后的样子:
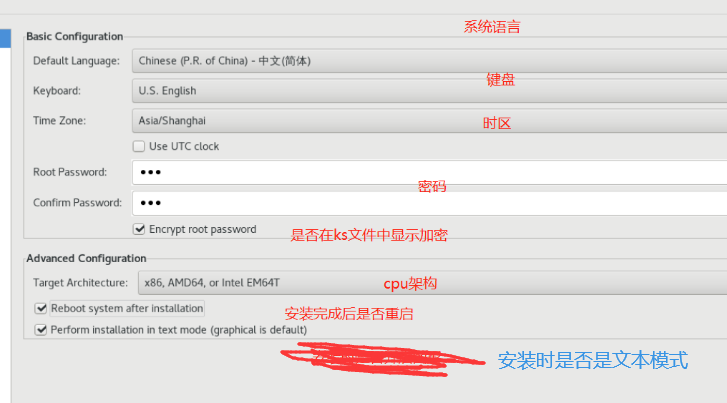
基本配置:
编辑
编辑
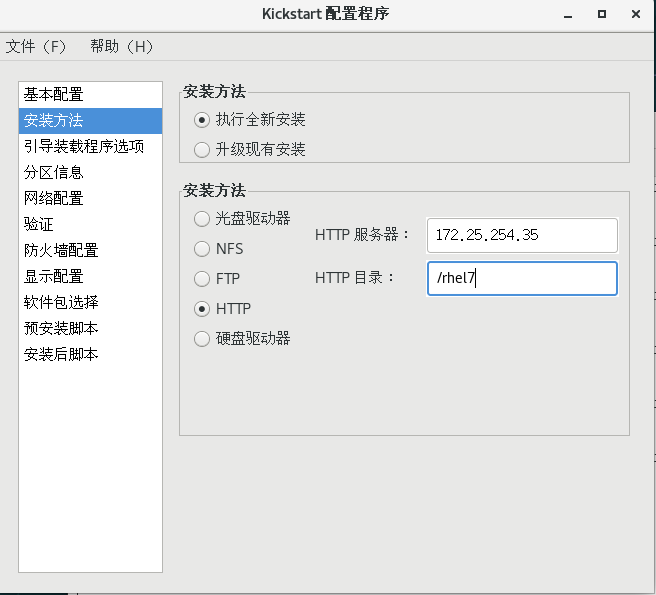
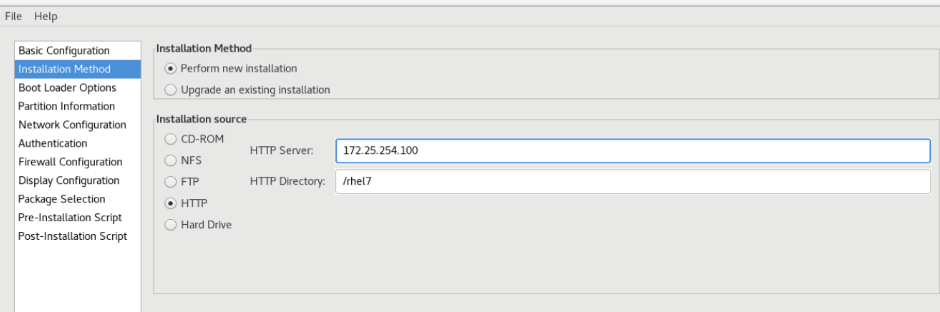
安装方法:
编辑
注意:在这里需要自己配置一个httpd
#下载httpd
[root@localhost ~]# yum install httpd -y
#启动httpd
[root@localhost ~]# systemctl start httpd
#软链接
[root@localhost ~]# ln -s /rhel7 /var/www/html
#关闭防火墙
[root@localhost ~]# systemctl stop firewalld
编辑
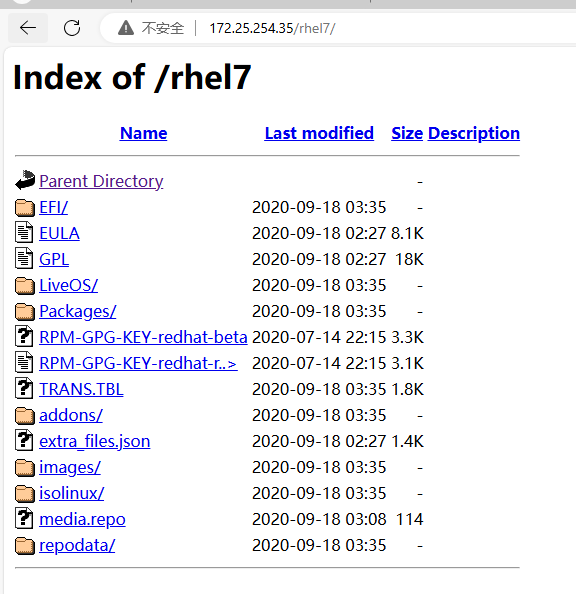
网站访问:172.25.254.35/rhel7查看
编辑
编辑
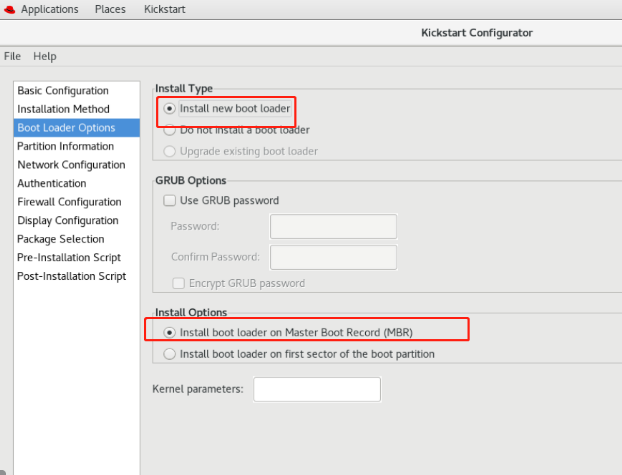
引导装载程序选项:
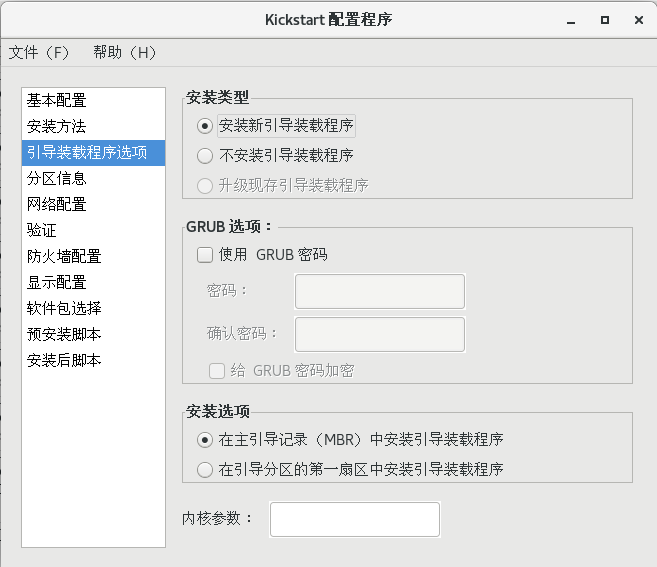
编辑
编辑
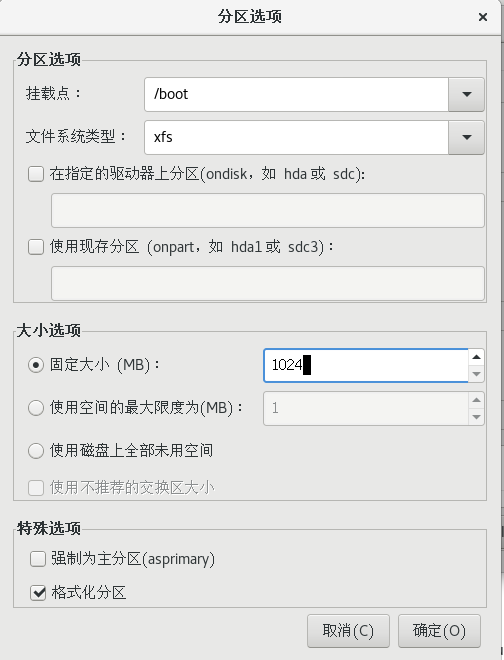
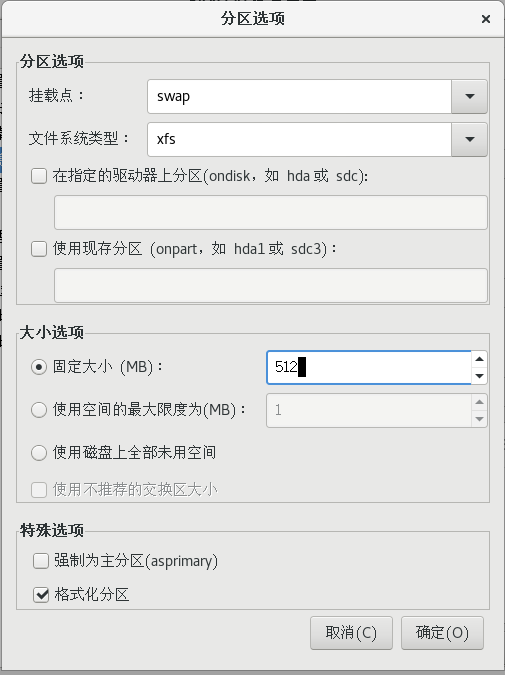
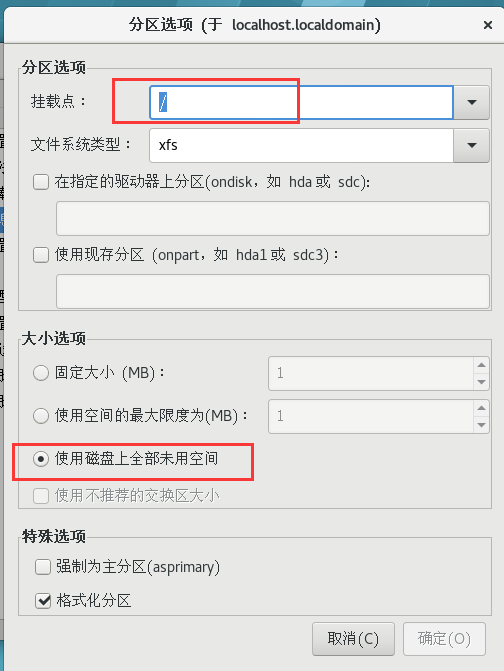
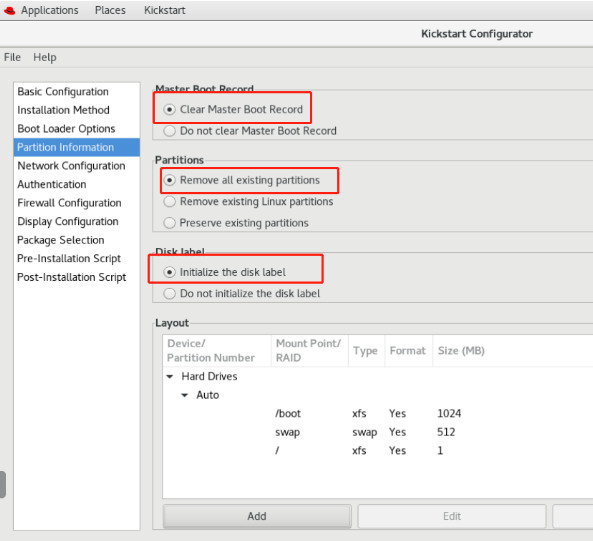
分区信息:
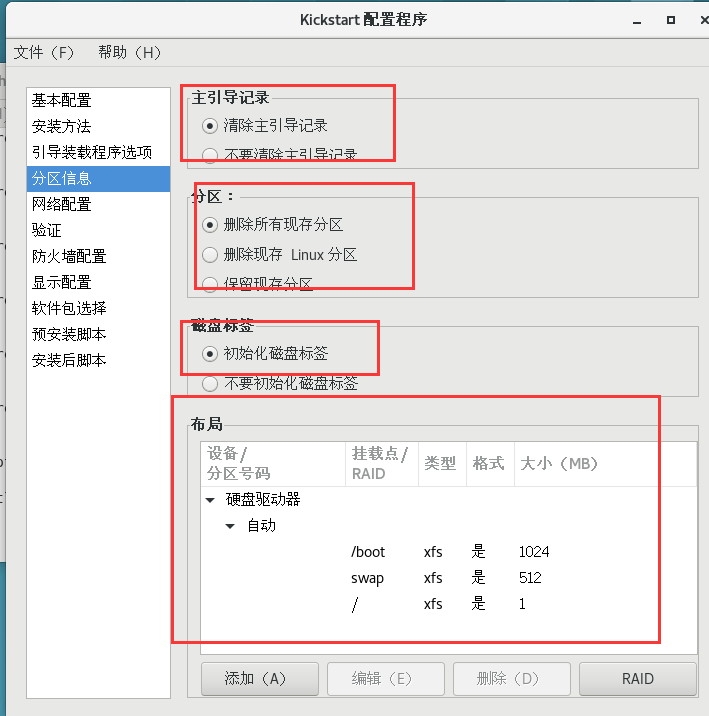
编辑
编辑
编辑
编辑
编辑
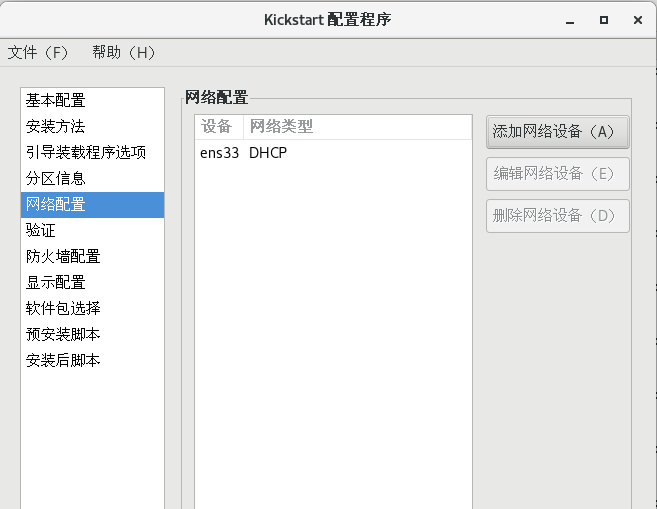
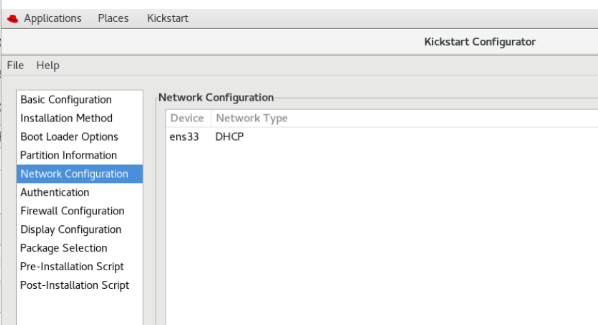
网络配置:(rhel7.9默认是ens33)

编辑
编辑
编辑
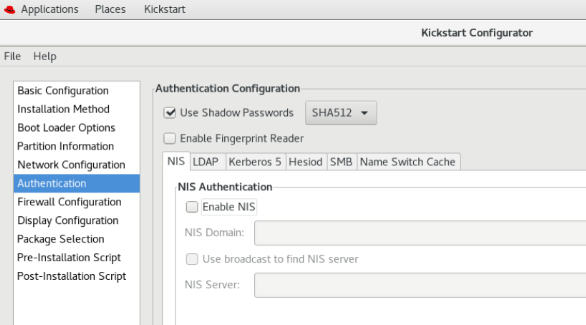
验证:
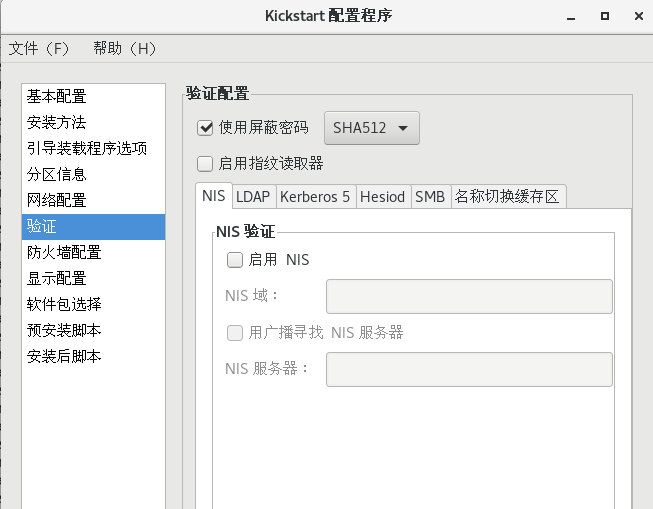
编辑
编辑
显示配置:
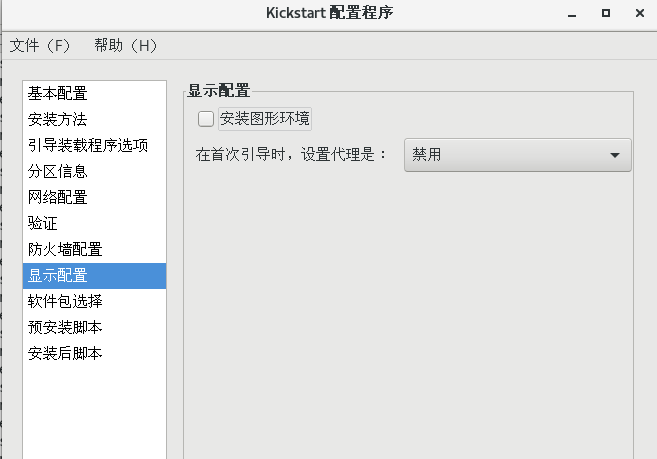
编辑
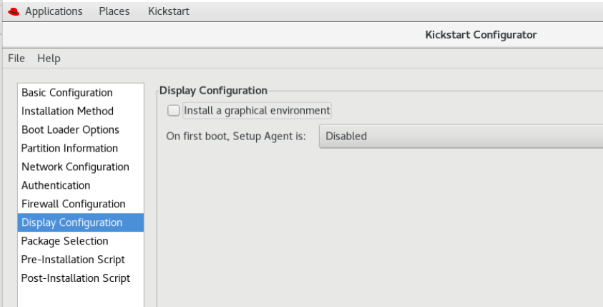
编辑
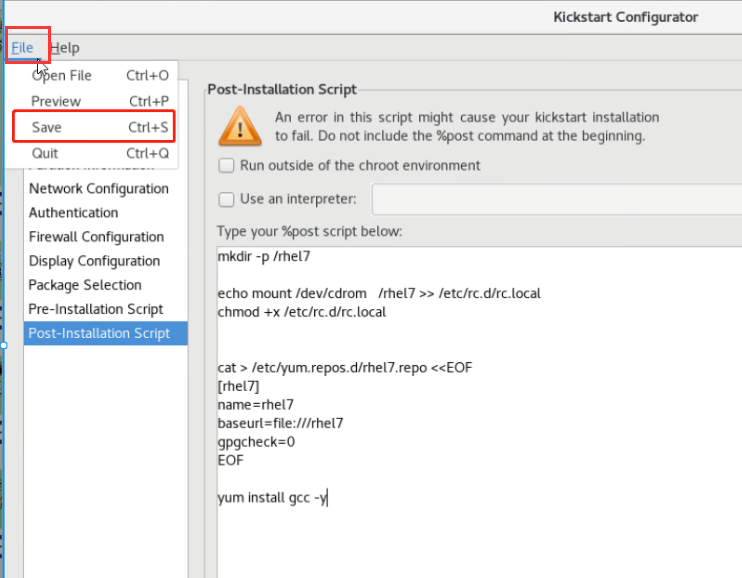
安装后脚本:
安装之后运行该脚本
mkdir -p /rhel7

echo mount /dev/cdrom /rhel7 >> /etc/rc.d/rc.local
chmod +x /etc/rc.d/rc.local

cat >/etc/yum.repos.d/rhel7.repo <<EOF
[rhel7]
name=rhel7
baseurl=file:///rhel7
gpgcheck=0
EOF

yum install gcc -y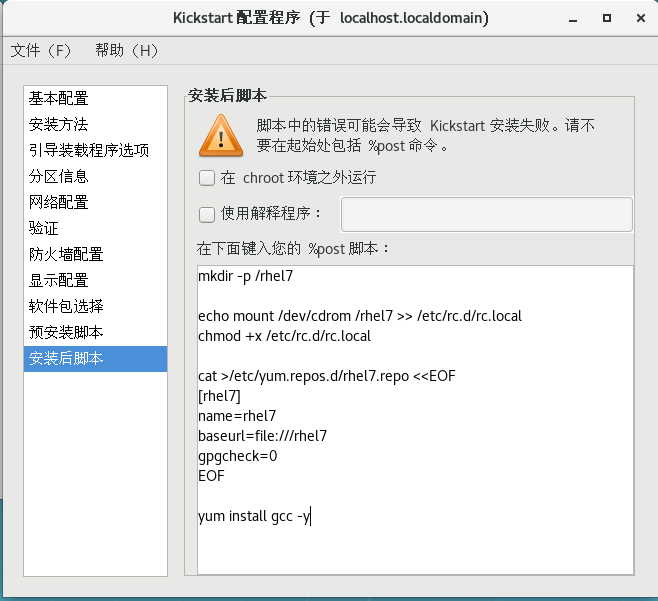
编辑
编辑
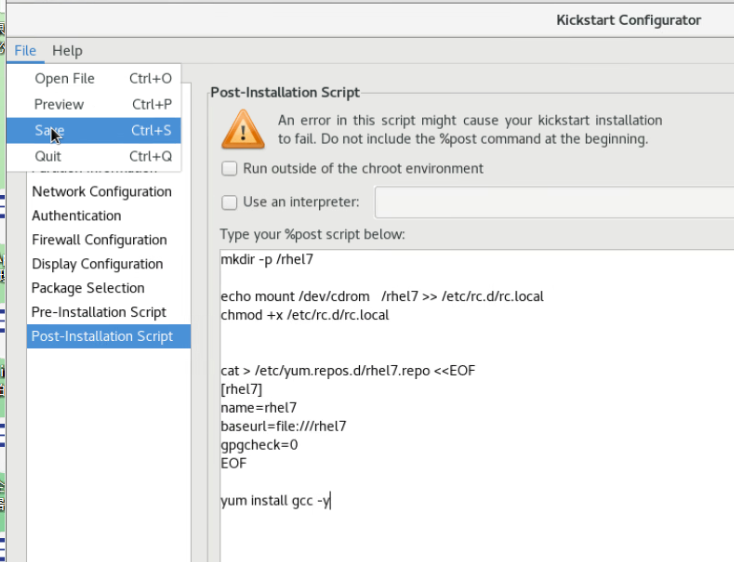
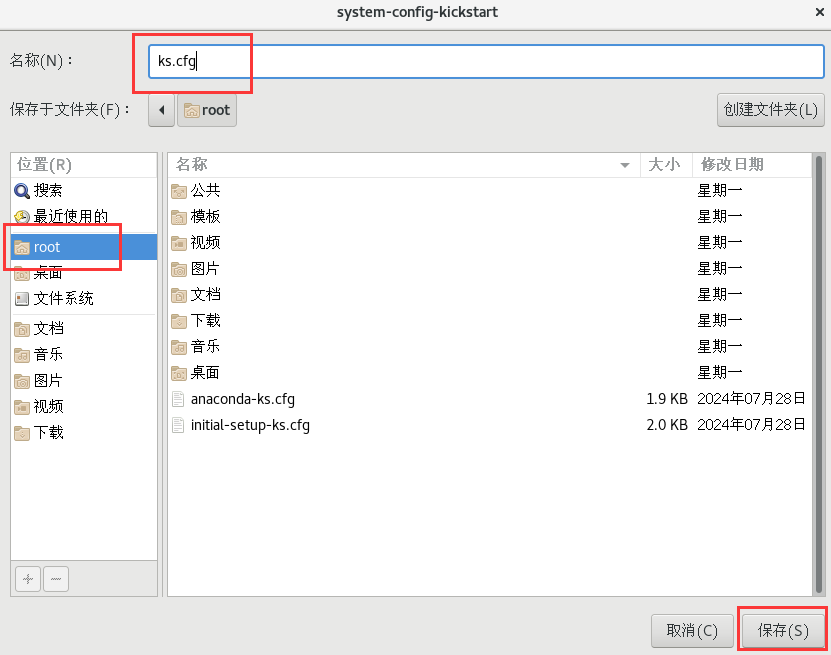
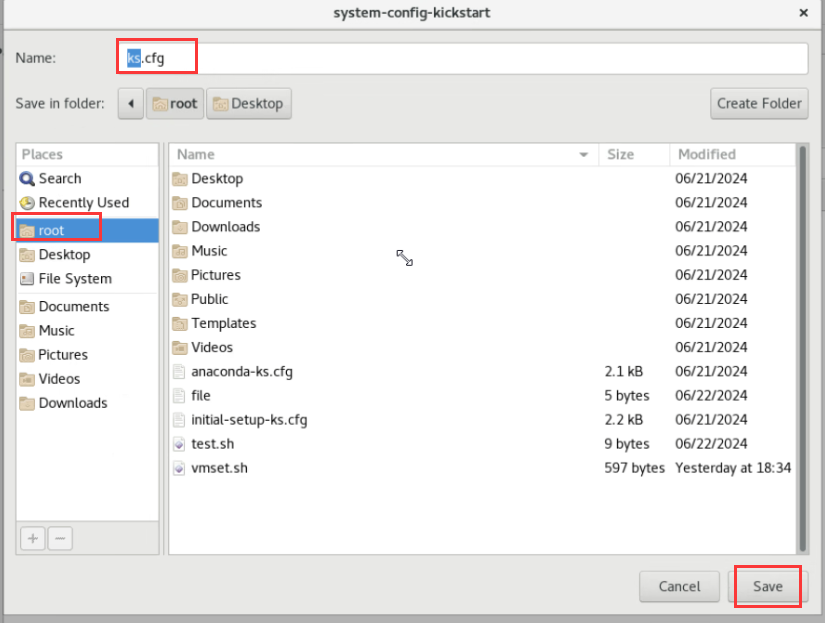
保存:
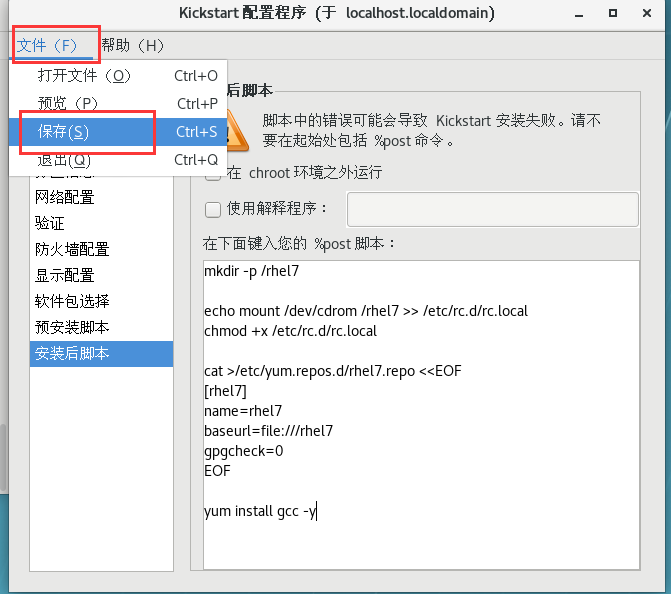
编辑
编辑
编辑
编辑

编辑
[root@localhost ~]# cd /root
[root@localhost ~]# vim ks.cfg
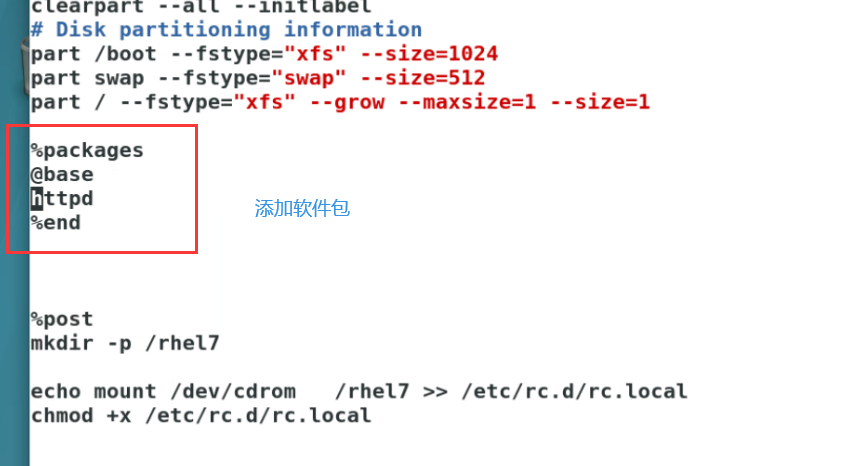
#添加软件包
%packages
@base
httpd
%end
#检查语法错误
[root@localhost ~]# ksvalidator ks.cfg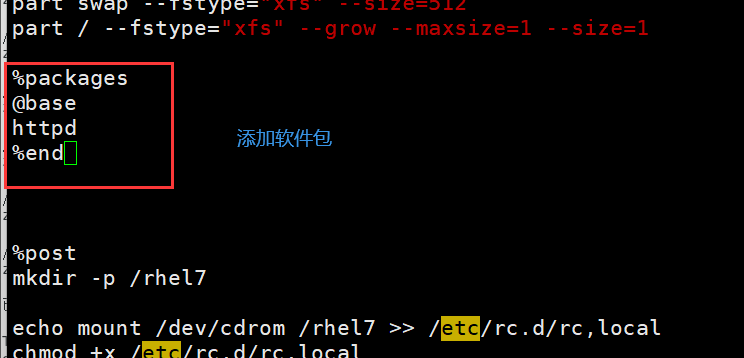
编辑
编辑
检测文件语法是否有错误

编辑
如果想要增加图形化界面
[root@localhost ~]# vim ks.cfg
#添加
@^graphical-server-environment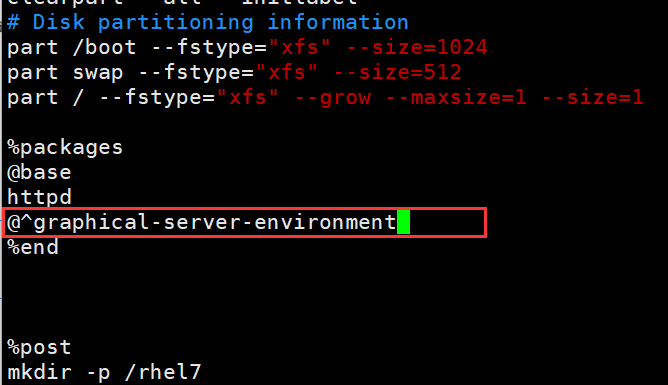
编辑
将创建的脚本共享出去
[root@localhost ~]# cp /root/ks.cfg /var/www/html
[root@localhost ~]# cd /rhel7/
[root@localhost rhel7]# ls
addons images repodata
EFI isolinux RPM-GPG-KEY-redhat-beta
EULA LiveOS RPM-GPG-KEY-redhat-release
extra_files.json media.repo TRANS.TBL
GPL Packages
[root@localhost rhel7]# cd /var/www/html/
[root@localhost html]# ls
ks.cfg rhel7
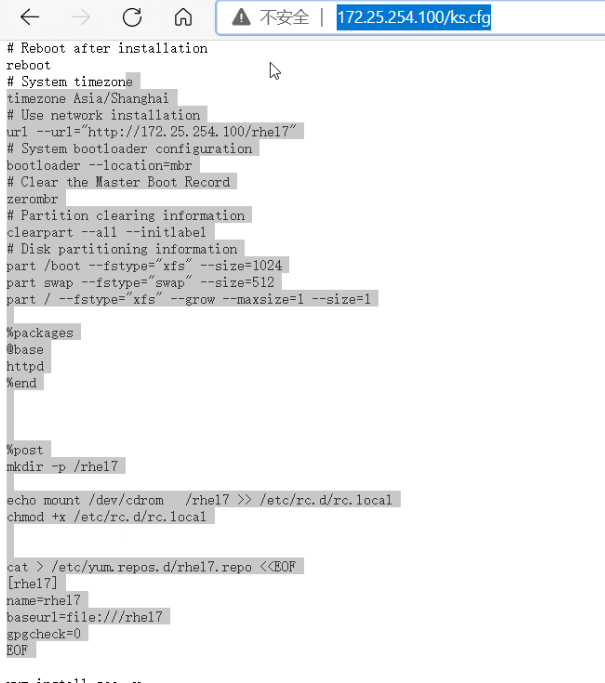
#访问网站:http://172.25.254.35/ks.cfg#访问网站:http://172.25.254.35/ks.cfg

编辑
编辑
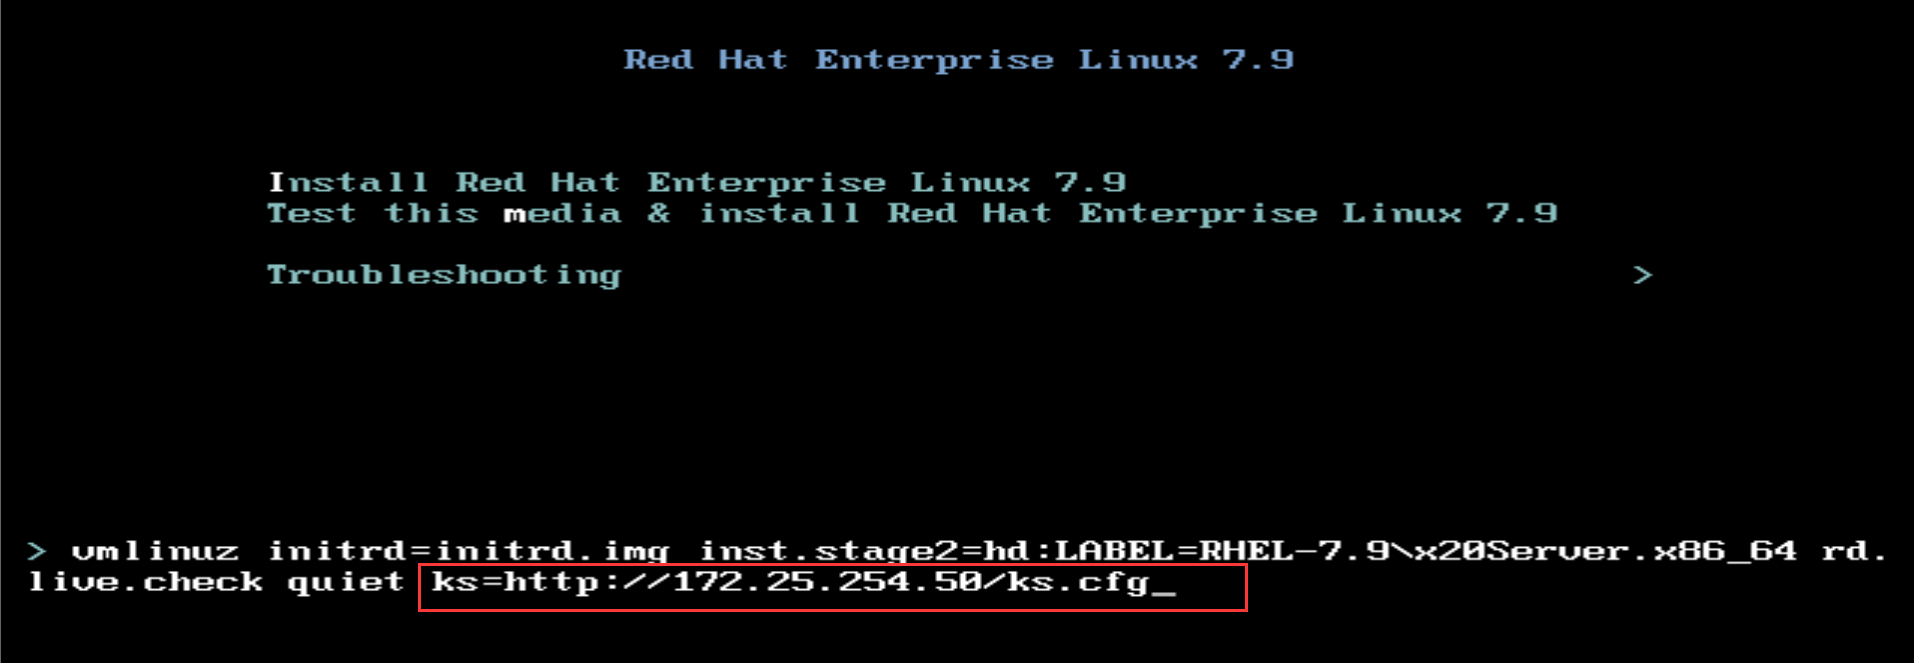
测试:
新建一个虚拟机(挂好镜像)
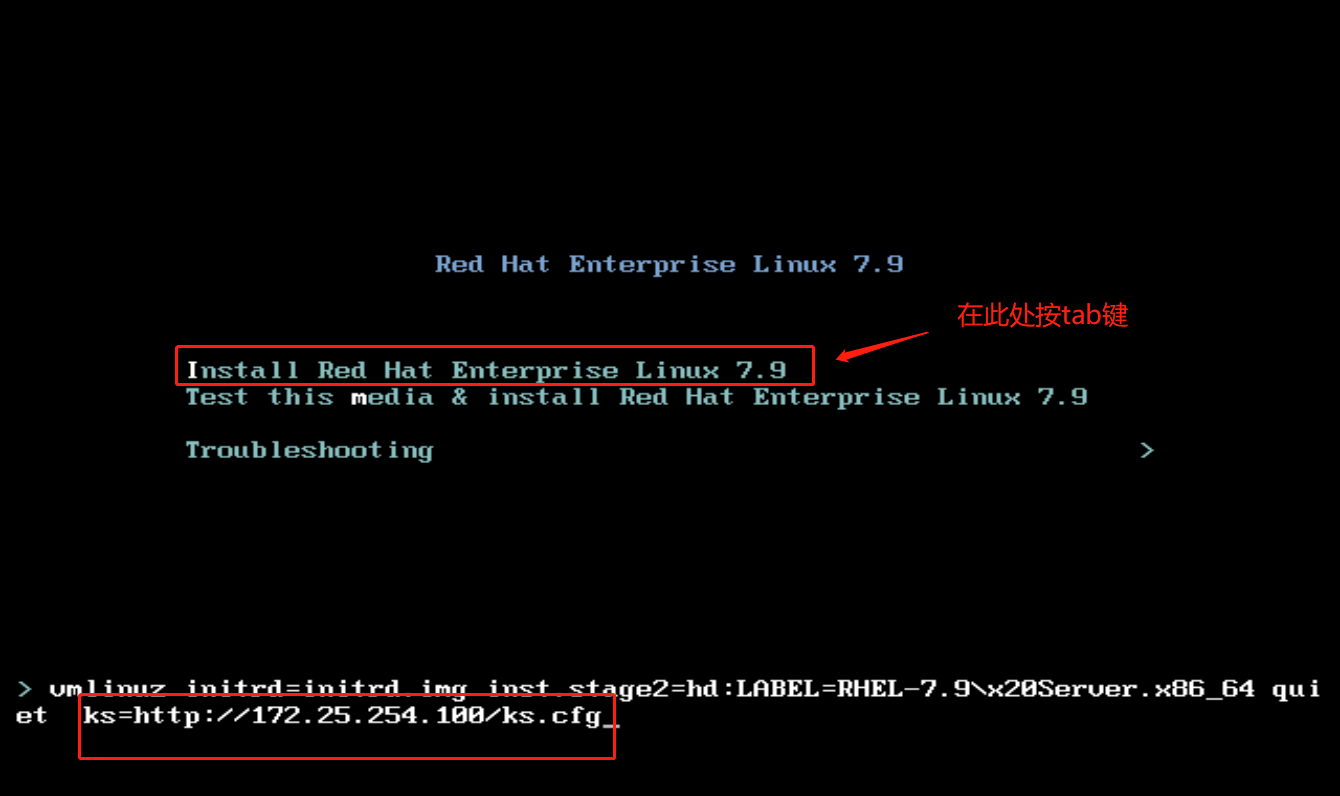
看见下面这个界面之后按tab
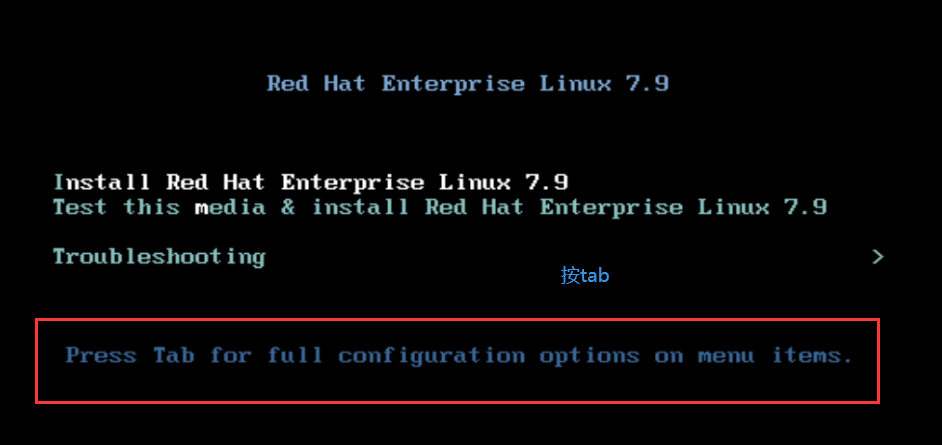
编辑
在后面添加ks=http://172.25.254.35/ks.cfg
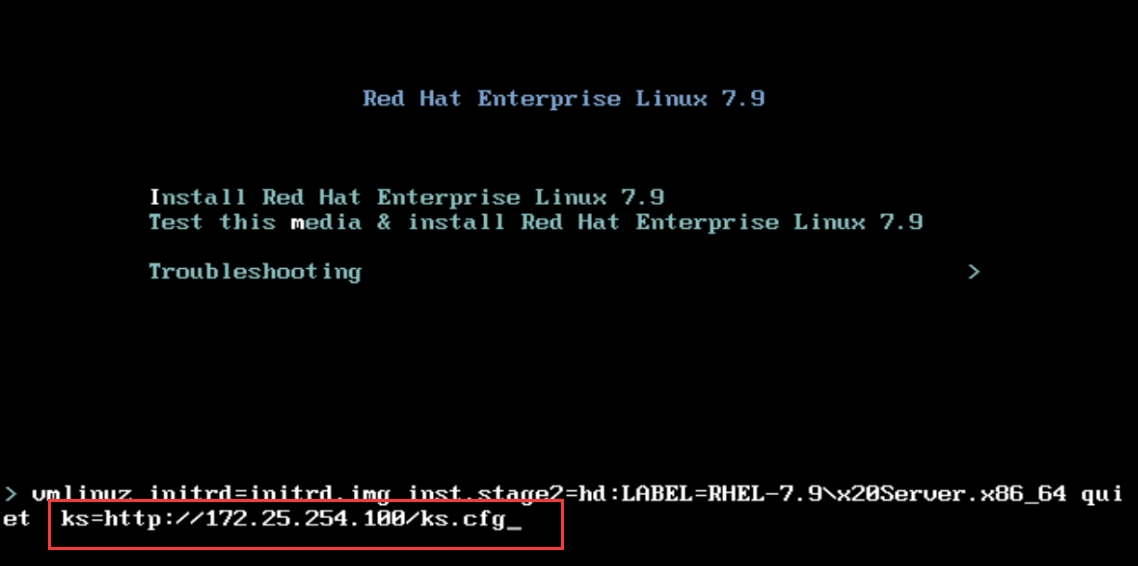
编辑
回车(发现无法安装:原因:dhcp关了没有网络)
解决方法:
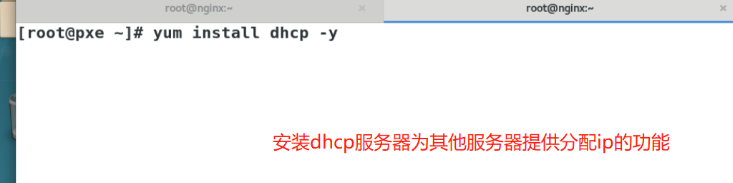
#安装dhcp为其他服务器提供分配IP的功能
[root@localhost ~]# yum install dhcp -y
#查看配置文件
[root@localhost ~]# rpm -qc dhcp
/etc/dhcp/dhcpd.conf
/etc/dhcp/dhcpd6.conf
/etc/openldap/schema/dhcp.schema
/etc/sysconfig/dhcpd
/var/lib/dhcpd/dhcpd.leases
/var/lib/dhcpd/dhcpd6.leases
[root@localhost ~]# cat /etc/dhcp/dhcpd.conf
#
# DHCP Server Configuration file.
# see /usr/share/doc/dhcp*/dhcpd.conf.example
# see dhcpd.conf(5) man page
#
[root@localhost ~]# cp /usr/share/doc/dhcp*/dhcpd.conf.example /etc/dhcp/dhcpd.conf
cp:是否覆盖"/etc/dhcp/dhcpd.conf"? y
#\可以取消询问是否覆盖,-f强制复制
[root@localhost ~]# \cp -f /usr/share/doc/dhcp*/dhcpd.conf.example /etc/dhcp/dhcpd.conf
#删除37行以后的,注释掉27,28行,并且将内容修改为一下结果
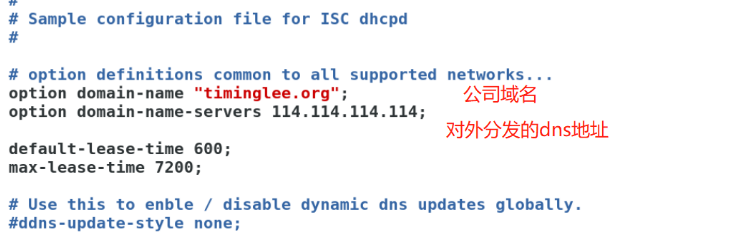
[root@localhost ~]# vim /etc/dhcp/dhcpd.conf
option domain-name "example.org";
option domain-name-servers 114.114.114.114;
default-lease-time 600;
max-lease-time 7200;
.........
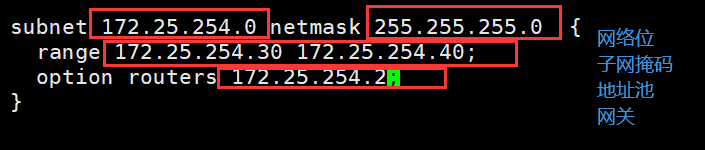
subnet 172.25.254.0 netmask 255.255.255.0 {
range 172.25.254.30 172.25.254.40;
option routers 172.25.254.2;
}
#重启dhcp服务
[root@localhost ~]# systemctl enable --now dhcpd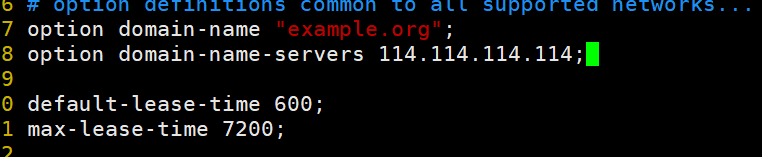
编辑
option domain-name "example.org"; #公司域名
option domain-name-servers 114.114.114.114; #
default-lease-time 600; 默认租约期
max-lease-time 7200; 最长租约期
编辑
编辑

编辑

编辑
编辑

编辑
然后重新安装:
记得先按tab
在后面添加ks=http://172.25.254.35/ks.cfg
编辑
编辑
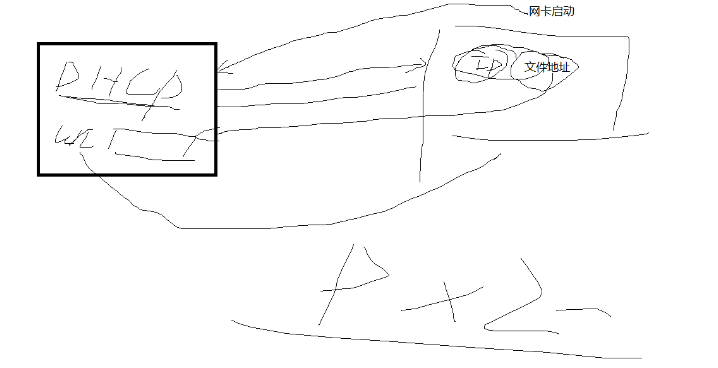
搭建pxe(实现多个服务器安装操作系统)
编辑
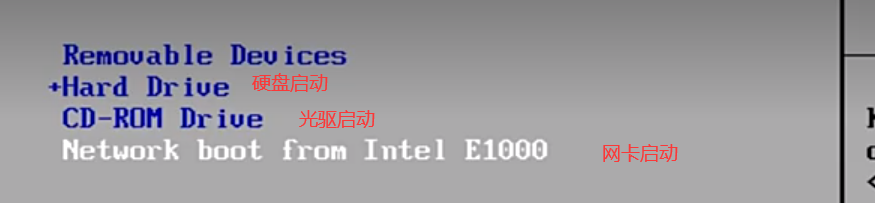
各个登录选项:
编辑
#安装软件pxelinux
[root@localhost ~]# yum install syslinux.x86_64 -y
#共享pxelinux.0数据文件的网络服务
[root@localhost ~]# yum install tftp-server.x86_64 -y
#查看软件包
[root@localhost ~]# rpm -ql tftp-server
/etc/xinetd.d/tftp
/usr/lib/systemd/system/tftp.service
/usr/lib/systemd/system/tftp.socket
/usr/sbin/in.tftpd
/usr/share/doc/tftp-server-5.2
/usr/share/doc/tftp-server-5.2/CHANGES
/usr/share/doc/tftp-server-5.2/README
/usr/share/doc/tftp-server-5.2/README.security
/usr/share/man/man8/in.tftpd.8.gz
/usr/share/man/man8/tftpd.8.gz
/var/lib/tftpboot #数据目录
#启动服务
[root@localhost ~]# systemctl enable --now tftp
Created symlink from /etc/systemd/system/sockets.target.wants/tftp.socket to /usr/lib/systemd/system/tftp.socket.
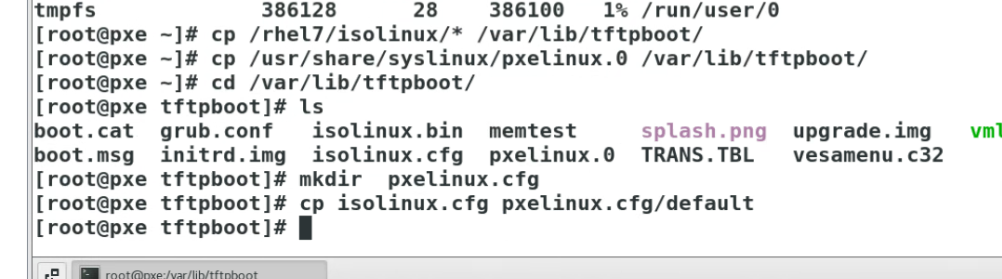
#/rhel里面挂在了光盘的,将光盘里面的isolinux/*复制过去
[root@localhost ~]# cp /rhel7/isolinux/* /var/lib/tftpboot/
[root@localhost ~]# cp /usr/share/syslinux/pxelinux.0 /var/lib/tftpboot/
[root@localhost ~]# cd /var/lib/tftpboot/
[root@localhost tftpboot]# ls
boot.cat initrd.img memtest TRANS.TBL vmlinuz
boot.msg isolinux.bin pxelinux.0 upgrade.img
grub.conf isolinux.cfg splash.png vesamenu.c32
[root@localhost tftpboot]# mkdir pxelinux.cfg
[root@localhost tftpboot]# cp isolinux.cfg pxelinux.cfg/default
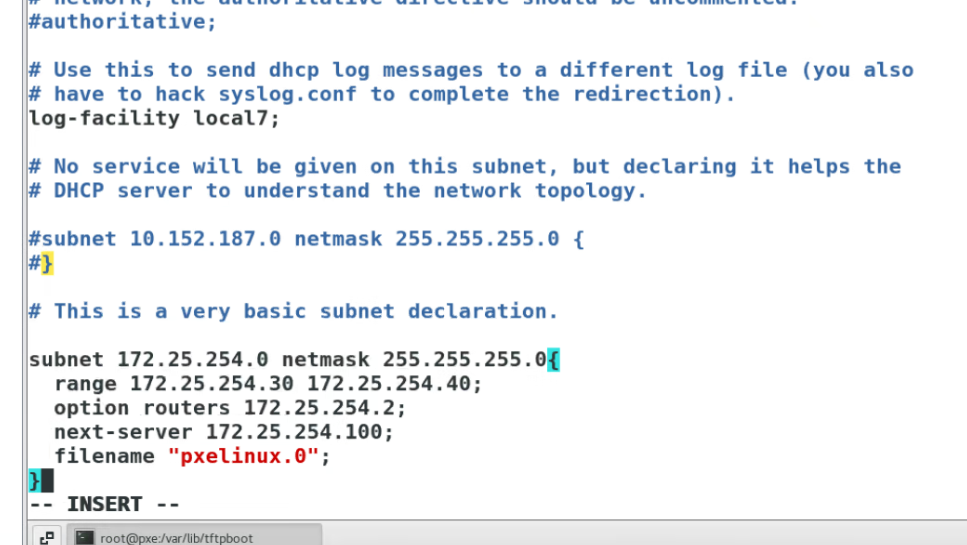
#更改dhcp,next-server会去找下一步的服务器,filename是指定找的下一步服务器的文件,pxelinux.0里面指定了下一步要访问的文件
[root@localhost tftpboot]# vim /etc/dhcp/dhcpd.conf
subnet 172.25.254.0 netmask 255.255.255.0 {
range 172.25.254.30 172.25.254.40;
option routers 172.25.254.2;
next-server 172.25.254.35; #下一步进入的服务器
filename "pxelinux.0";
}
#重启DHCP服务
[root@localhost tftpboot]# systemctl restart dhcpd
#设置pxelinux.0指定的文件
#设置前要确保http://172.25.254.35/rhel7和http://172.25.254.35/ks.cfg可以访问
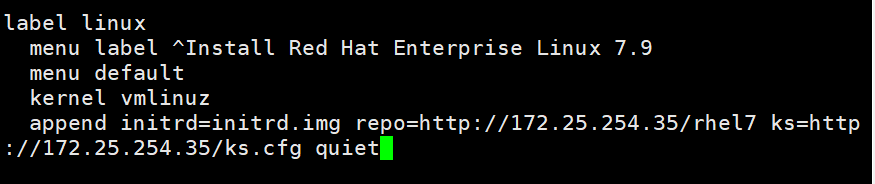
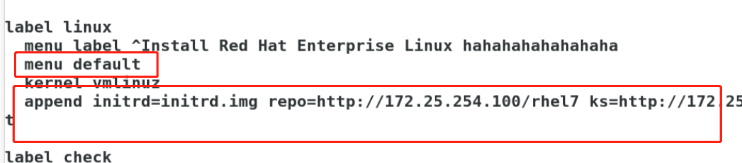
[root@localhost tftpboot]# vim /var/lib/tftpboot/pxelinux.cfg/default
timeout 30 #时间是3s
.........
label linux
menu label ^Install Red Hat Enterprise Linux 7.9
menu default #默认
kernel vmlinuz
append initrd=initrd.img repo=http://172.25.254.35/rhel7 ks=http://172.25.254.35/ks.cfg quiet
#退出要用wq!
#创建一个虚拟机用光盘模式进入,服务器安装好后可以不需要管了,但是vm里面第一次安装好之后需要再换成硬盘模式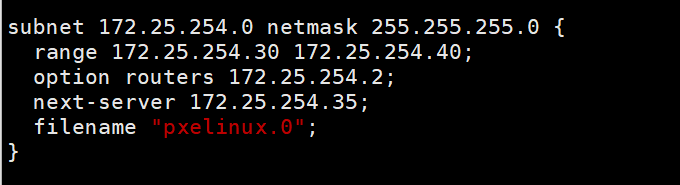
编辑
![]()
编辑

编辑
编辑
编辑

编辑

编辑
编辑
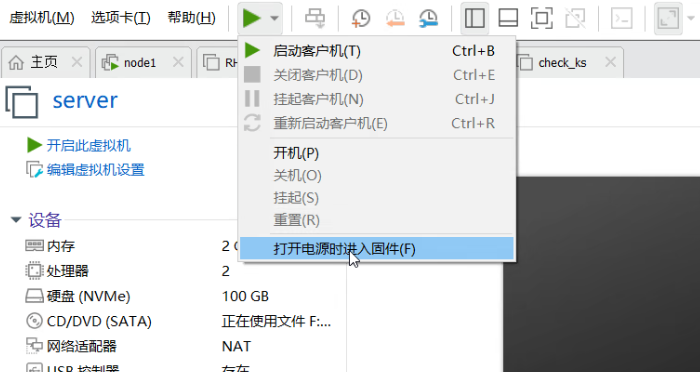
开一个虚拟机选择开机模式
编辑
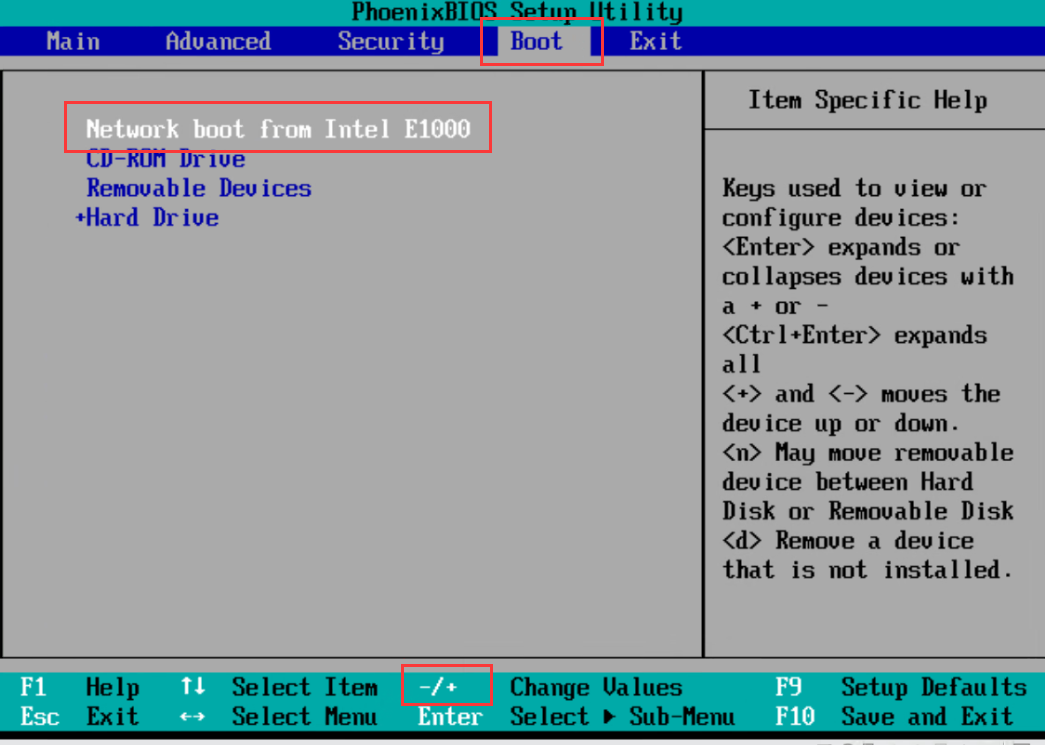
编辑
编辑
回车等待即可
注意:服务器安装好后可以不需要管了,但是vm里面第一次安装好之后需要再换成硬盘模式再次进入


 90
90

 被折叠的 条评论
为什么被折叠?
被折叠的 条评论
为什么被折叠?
 到【灌水乐园】发言


