


基于 YOLOv5 的手势手语识别数据集
文章目录
以下文字及代码仅供参考。
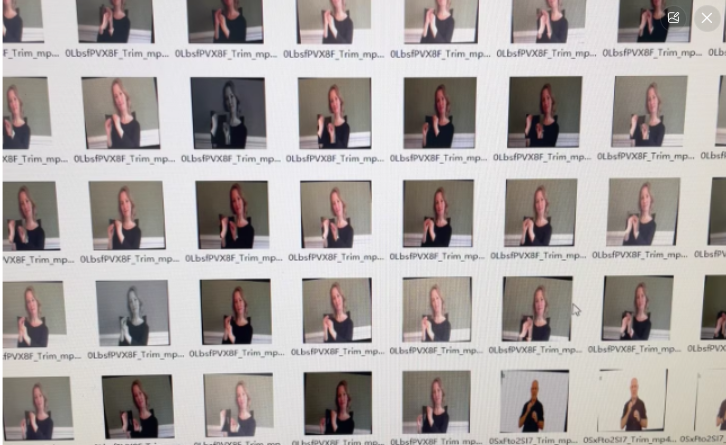
手势手语识别数据集
YOLOv5目标检测 nc: 106 names: [‘A’, ‘B’, ‘C’, ‘D’, ‘E’, ‘F’, ‘G’, ‘H’, ‘I’, ‘J’, ‘K’, ‘L’, ‘M’, ‘N’, ‘O’, ‘P’, ‘Q’, ‘R’, ‘S’, ‘T’, ‘U’, ‘V’, ‘W’, ‘X’, ‘Y’, ‘Z’, ‘additional’, ‘alcohol’, ‘allergy’, ‘bacon’, ‘bag’, ‘barbecue’, ‘bill’, ‘biscuit’, ‘bitter’, ‘bread’, ‘burger’, ‘bye’, ‘cake’, ‘cash’, ‘cheese’, ‘chicken’, ‘coke’, ‘cold’, ‘cost’, ‘coupon’, ‘credit card’, ‘cup’, ‘dessert’, ‘drink’, ‘drive’, ‘eat’, ‘eggs’, ‘enjoy’, ‘fork’, ‘french fries’, ‘fresh’, ‘hello’, ‘hot’, ‘icecream’, ‘ingredients’, ‘juicy’, ‘ketchup’, ‘lactose’, ‘lettuce’, ‘lid’, ‘manager’, ‘menu’, ‘milk’, ‘mustard’, ‘napkin’, ‘no’, ‘order’, ‘pepper’, ‘pickle’, ‘pizza’, ‘please’, ‘ready’, ‘receipt’, ‘refill’, ‘repeat’, ‘safe’, ‘salt’, ‘sandwich’, ‘sauce’, ‘small’, ‘soda’, ‘sorry’, ‘spicy’, ‘spoon’, ‘straw’, ‘sugar’, ‘sweet’, ‘thank-you’, ‘tissues’, ‘tomato’, ‘total’, ‘urgent’, ‘vegetables’, ‘wait’, ‘warm’, ‘water’, ‘what’, ‘would’, ‘yoghurt’, ‘your’]

1
基于 YOLOv5 的手势手语识别数据集的完整处理流程,包括数据准备、格式转换、数据划分、环境搭建、模型训练、推理和性能评估。我使用提供的 nc: 106 和类别名称进行配置。
1. 数据准备
1.1 数据目录结构
假设数据集目录结构如下:
dataset/
├── images/
│   ├── train/
│   │   ├── img1.jpg
│   │   ├── img2.jpg
│   │   └── ...
│   ├── val/
│   │   ├── img1.jpg
│   │   ├── img2.jpg
│   │   └── ...
├── labels/
│   ├── train/
│   │   ├── img1.txt
│   │   ├── img2.txt
│   │   └── ...
│   ├── val/
│   │   ├── img1.txt
│   │   ├── img2.txt
│   │   └── ...
- 图像文件存储在
images/train/和images/val/。 - 标注文件(YOLO格式)存储在
labels/train/和labels/val/。
1.2 YOLO 格式标注
每张图像对应的 .txt 文件包含以下内容:
<object-class> <x_center> <y_center> <width> <height>
<object-class>:类别索引(从 0 开始)。<x_center>, <y_center>, <width>, <height>:归一化到[0, 1]的边界框坐标。
2. 环境搭建
安装依赖并克隆 YOLOv5 仓库:
# 安装 Python 环境
pip install torch torchvision torchaudio --index-url https://download.pytorch.org/whl/cu117  # CUDA 版本
pip install -r requirements.txt

# 克隆 YOLOv5 仓库
git clone https://github.com/ultralytics/yolov5
cd yolov5
3. 数据配置
3.1 创建数据配置文件
创建 data.yaml 文件,定义数据集路径和类别信息:
train: ../dataset/images/train
val: ../dataset/images/val

nc: 106
names: ['A', 'B', 'C', 'D', 'E', 'F', 'G', 'H', 'I', 'J', 'K', 'L', 'M', 'N', 'O', 'P', 'Q', 'R', 'S', 'T', 'U', 'V', 'W', 'X', 'Y', 'Z', 'additional', 'alcohol', 'allergy', 'bacon', 'bag', 'barbecue', 'bill', 'biscuit', 'bitter', 'bread', 'burger', 'bye', 'cake', 'cash', 'cheese', 'chicken', 'coke', 'cold', 'cost', 'coupon', 'credit card', 'cup', 'dessert', 'drink', 'drive', 'eat', 'eggs', 'enjoy', 'fork', 'french fries', 'fresh', 'hello', 'hot', 'icecream', 'ingredients', 'juicy', 'ketchup', 'lactose', 'lettuce', 'lid', 'manager', 'menu', 'milk', 'mustard', 'napkin', 'no', 'order', 'pepper', 'pickle', 'pizza', 'please', 'ready', 'receipt', 'refill', 'repeat', 'safe', 'salt', 'sandwich', 'sauce', 'small', 'soda', 'sorry', 'spicy', 'spoon', 'straw', 'sugar', 'sweet', 'thank-you', 'tissues', 'tomato', 'total', 'urgent', 'vegetables', 'wait', 'warm', 'water', 'what', 'would', 'yoghurt', 'your']
4. 模型训练
4.1 配置超参数
创建或修改 hyp.scratch.yaml 文件,调整超参数(如学习率、权重衰减等)。
4.2 启动训练
运行以下命令启动训练:
python train.py --img 640 --batch 16 --epochs 50 --data data.yaml --cfg yolov5s.yaml --weights yolov5s.pt --name hand_gesture_detection
--img 640:输入图像大小为 640x640。--batch 16:批量大小为 16。--epochs 50:训练 50 个 epoch。--cfg yolov5s.yaml:使用 YOLOv5 小型模型。--weights yolov5s.pt:预训练权重。--name hand_gesture_detection:保存实验结果的名称。
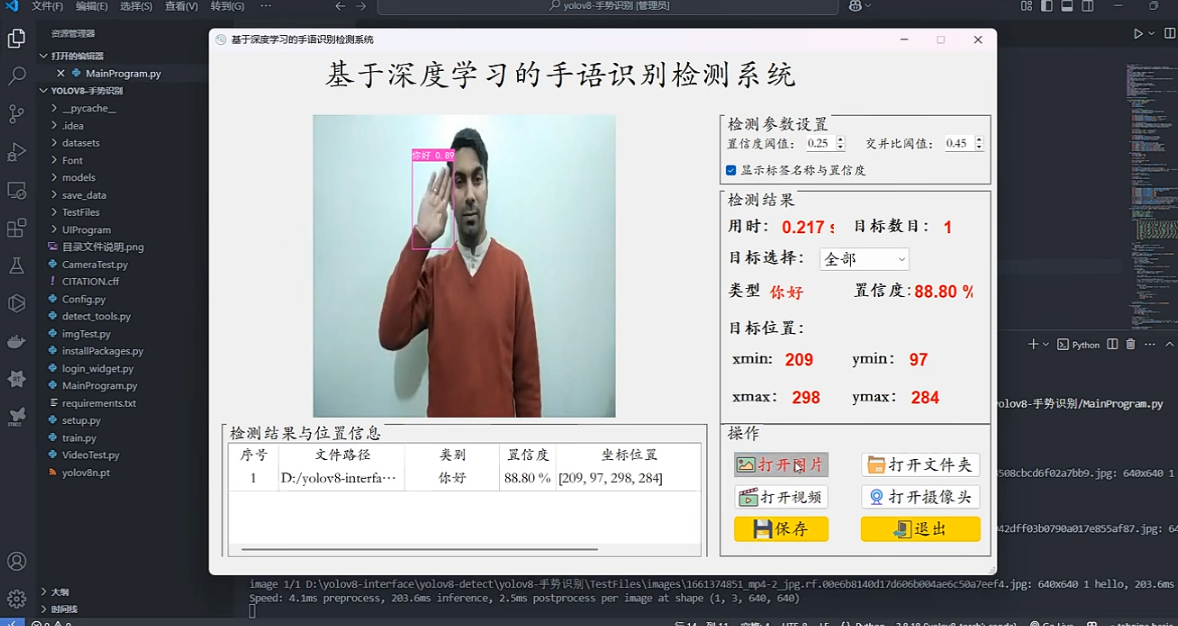
5. 模型推理
5.1 单张图像推理
使用训练好的模型对单张图像进行推理:
python detect.py --weights runs/train/hand_gesture_detection/weights/best.pt --img 640 --conf 0.25 --source path/to/image.jpg
5.2 批量推理
对整个文件夹的图像进行推理:
python detect.py --weights runs/train/hand_gesture_detection/weights/best.pt --img 640 --conf 0.25 --source path/to/test_images/
6. 性能评估
6.1 计算 mAP
运行以下命令评估模型性能:
python val.py --data data.yaml --weights runs/train/hand_gesture_detection/weights/best.pt --img 640 --task test
输出包括 mAP(平均精度均值)、Precision(精确率)、Recall(召回率)等指标。
7. 推理代码(Python API)
如果需要将 YOLOv5 集成到自定义代码中,可以使用以下代码:
from PIL import Image
import torch
from yolov5 import detect

# 加载模型
model = torch.hub.load('ultralytics/yolov5', 'custom', path='runs/train/hand_gesture_detection/weights/best.pt')

# 推理单张图像
img_path = 'path/to/image.jpg'
results = model(img_path)

# 显示结果
results.show()  # 可视化
print(results.pandas().xyxy[0])  # 打印检测结果
仅供参考,我的同学们。


 被折叠的 条评论
为什么被折叠?
被折叠的 条评论
为什么被折叠?
 到【灌水乐园】发言


