


Task
通过配置修复所有问题并重新启动受影响的组件以确保新的设置生效。
修复针对 api server 发现的所有以下违规行为:
1.2.7 Ensure that the --authorization-mode argument is not set to AlwaysAllow FAIL
1.2.8 Ensure that the --authorization-mode argument includes Node FAIL
1.2.9 Ensure that the --authorization-mode argument includes RBAC FAIL
1.2.18 Ensure that the --insecure-bind-address argument is not set FAIL (现在没有了,也可以手动检查下)
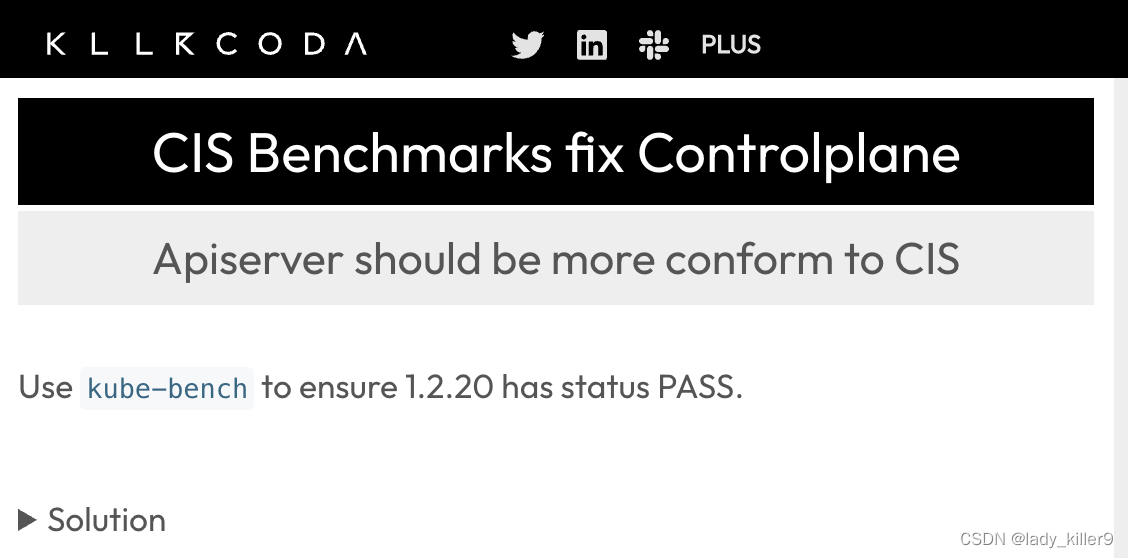
1.2.19 Ensure that the --insecure-port argument is set to 0 FAIL (现在没有了,也可以手动检查下)
修复针对 kubelet 发现的所有以下违规行为:
Fix all of the following violations that were found against the kubelet:
4.2.1 Ensure that the anonymous-auth argument is set to false FAIL
4.2.2 Ensure that the --authorization-mode argument is not set to AlwaysAllow FAIL
注意:尽可能使用 Webhook 身份验证/授权。
修复针对 etcd 发现的所有以下违规行为:
Fix all of the following violations that were found against etcd:
2.2 Ensure that the --client-cert-auth argument is set to true FAIL
-
- -authorization-mode strings 在安全端口上进行鉴权的插件的顺序列表。 逗号分隔的列表:AlwaysAllow、AlwaysDeny、ABAC、Webhook、RBAC、Node。 默认值:“AlwaysAllow”
-
- -authorization-mode stringkubelet 服务器的鉴权模式。可选值包括:AlwaysAllow、Webhook。Webhook 模式使用 SubjectAccessReview API 鉴权。 当 --config 参数未被设置时,默认值为 AlwaysAllow,当使用了 --config 时,默认值为 Webhook。
环境搭建
apiserver部分
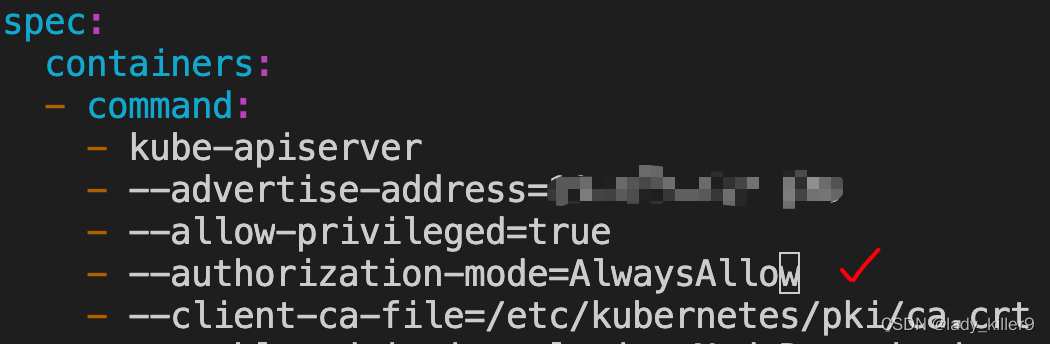
命令
vim /etc/kubernetes/manifests/kube-apiserver.yaml
截图
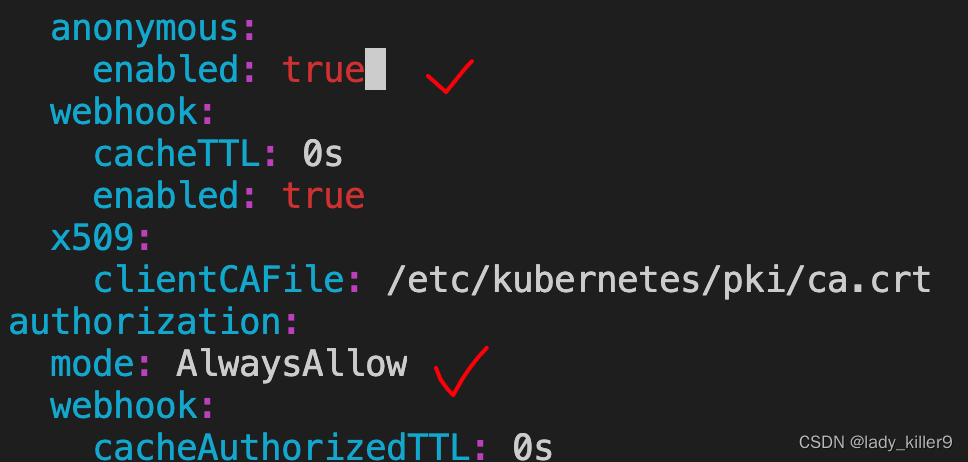
命令
vim /var/lib/kubelet/config.yaml
截图
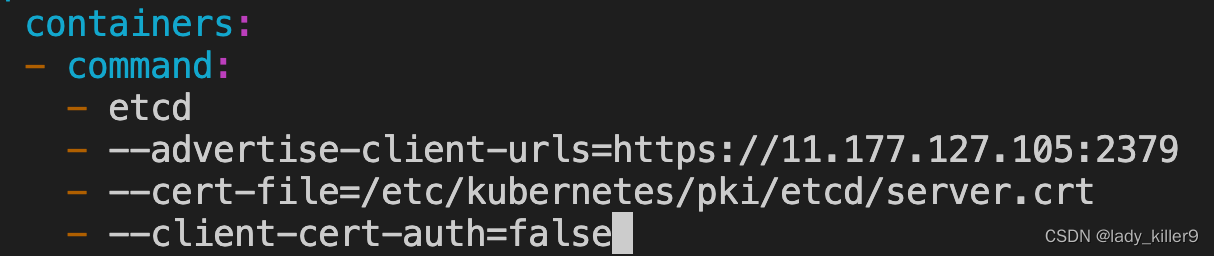
命令
vim /etc/kubernetes/manifests/etcd.yaml
截图
之后按照参考的链接,根据集群所在系统类型安装即可
kube-bench


解题
解题很简单,按照要求改就行。
命令
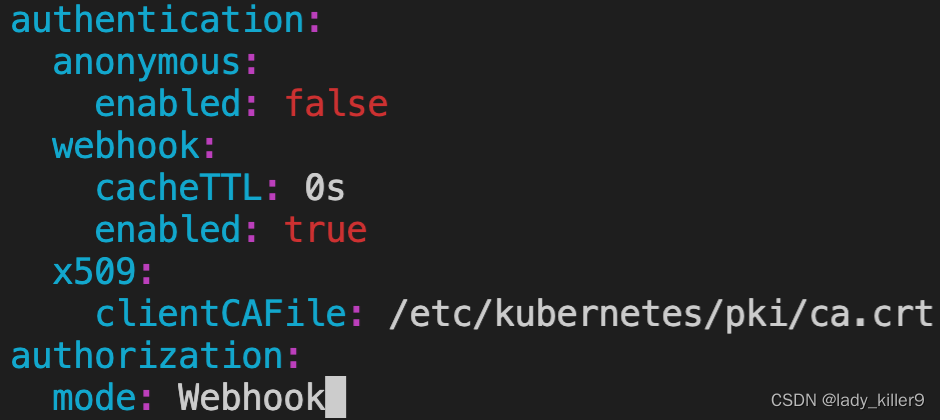
vim /var/lib/kubelet/config.yaml
anonymous的enabled改为true
authorization改为Webhook
截图
命令
vim /etc/kubernetes/manifests/etcd.yaml
–client-cert-auth改为true
截图

命令
vim /etc/kubernetes/manifests/kube-apiserver.yaml
–authorization-mode改为Node,RBAC
截图

最后,重启一下kubelet
systemctl daemon-reload
systemctl restart kubelet
模拟题


 961
961

 被折叠的 条评论
为什么被折叠?
被折叠的 条评论
为什么被折叠?
 到【灌水乐园】发言


