


2019-01-27 20:38:11 (61.9 MB/s) - 已保存 “docker-compose.yml” [1227/1227])
Creating network “003_esnet” with the default driver
Creating head … done
Creating elasticsearch2 … done
Creating elasticsearch … done
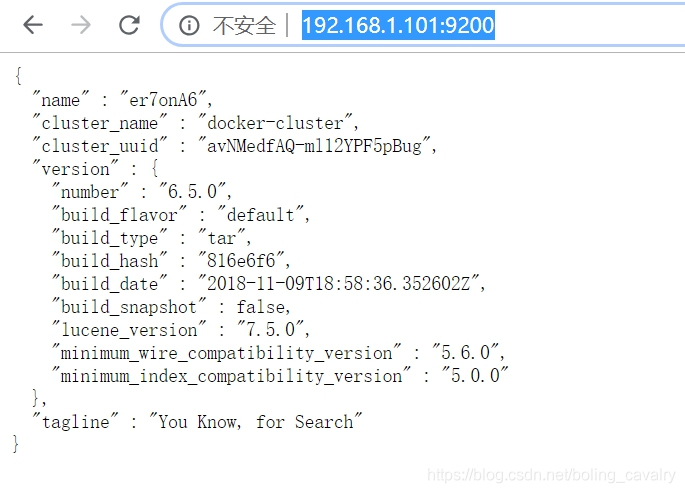
- 假设docker所在电脑的IP地址是192.168.1.101,如下图,浏览器访问此地址可以查看es信息:http://192.168.1.101:9200
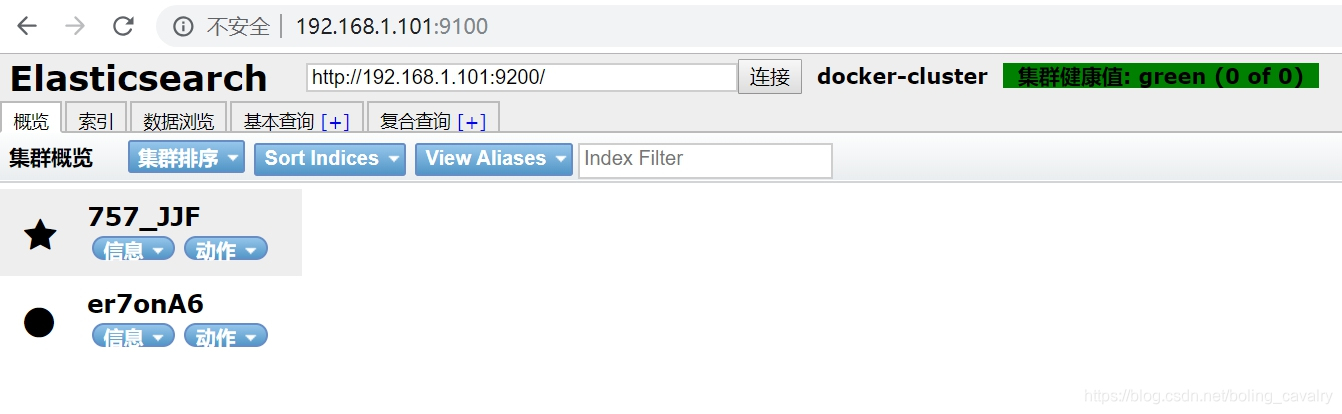
- 如下图,浏览器访问此地址可以使用head插件:http://192.168.1.101:9100
- 执行以下命令来创建一个索引:
curl -X PUT http://192.168.1.101:9200/test001
- 执行以下命令验证ik分词器效果:
curl -X POST \
‘http://192.168.1.101:9200/test001/_analyze?pretty=true’ \
-H ‘Content-Type: application/json’ \
-d ‘{“text”:“我们是软件工程师”,“tokenizer”:“ik_smart”}’
收到的响应如下,可见ik分词器已经生效:
{
“tokens” : [
{
“token” : “我们”,
“start_offset” : 0,
“end_offset” : 2,
“type” : “CN_WORD”,
“position” : 0
},
{
“token” : “是”,
“start_offset” : 2,
“end_offset” : 3,
“type” : “CN_CHAR”,
“position” : 1
},
{
“token” : “软件”,
“start_offset” : 3,
“end_offset” : 5,
“type” : “CN_WORD”,
“position” : 2
},
{
“token” : “工程师”,
“start_offset” : 5,
“end_offset” : 8,
“type” : “CN_WORD”,
“position” : 3
}
]
}
验证完毕,集群、head插件、ik分词器都是正常的;
一行命令如何能实现上述功能
- 首先来看看docker-compose.yml文件的内容,这里面决定了整个构成整个功能的容器:
version: ‘2.2’
services:
elasticsearch:
image: bolingcavalry/elasticsearch-with-ik:6.5.0
container_name: elasticsearch
environment:
-
cluster.name=docker-cluster
-
bootstrap.memory_lock=true
-
http.cors.enabled=true
-
http.cors.allow-origin=*
-
“ES_JAVA_OPTS=-Xms512m -Xmx512m”
ulimits:
memlock:
soft: -1
hard: -1
volumes:
- esdata1:/usr/share/elasticsearch/data
ports:
- 9200:9200
networks:
- esnet
elasticsearch2:
image: bolingcavalry/elasticsearch-with-ik:6.5.0
container_name: elasticsearch2
environment:
-
cluster.name=docker-cluster
-
bootstrap.memory_lock=true
-
http.cors.enabled=true
-
http.cors.allow-origin=*
-
“ES_JAVA_OPTS=-Xms512m -Xmx512m”
-
“discovery.zen.ping.unicast.hosts=elasticsearch”
ulimits:
memlock:
soft: -1
hard: -1
volumes:
- esdata2:/usr/share/elasticsearch/data
networks:
- esnet
head:
image: bolingcavalry/elasticsearch-head:6
container_name: head
ports:
- 9100:9100
networks:
- esnet


 480
480

 被折叠的 条评论
为什么被折叠?
被折叠的 条评论
为什么被折叠?
 到【灌水乐园】发言


