


如何使用yolo算法训练自己采集的智能手机屏幕玻璃缺陷检测数据集 建立基于yolov8手机智能手机屏幕玻璃缺陷检测 检测裂纹 破损斑点 划痕 漏光等进行检测
文章目录
以下文字及代码仅供参考。
智能手机屏幕玻璃缺陷检测数据集,用于目标检测
数据集数量和标注类别:
2500+张jpg图像,xml标注一对应。
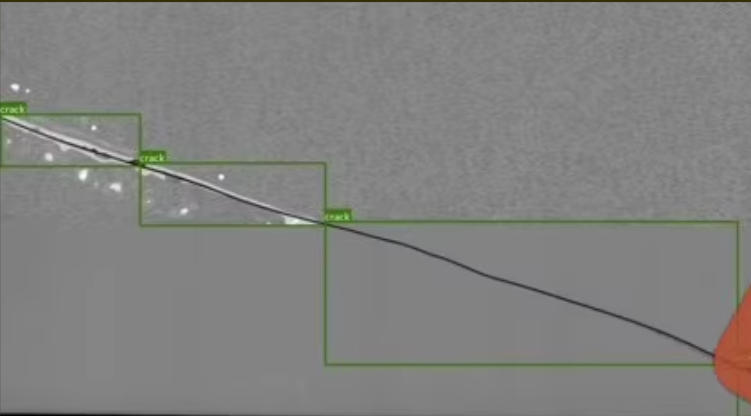
缺陷类型:共7种,包括裂纹(crack)、破损(broken)、斑点(spot)、划痕(scratch)、漏光(light-leakage)、污迹(blot)和破膜(broken-membrane)。
标注方式:使用labelme工具进行标注,以bounding box格式标记缺陷及其对应位置,并为每张图片生成XML文件。
数据集分布:
Part I和Part II:数据集被分为两部分,分别由两个工作站捕获。
Part I:1258张图片
Part II:1246张图片
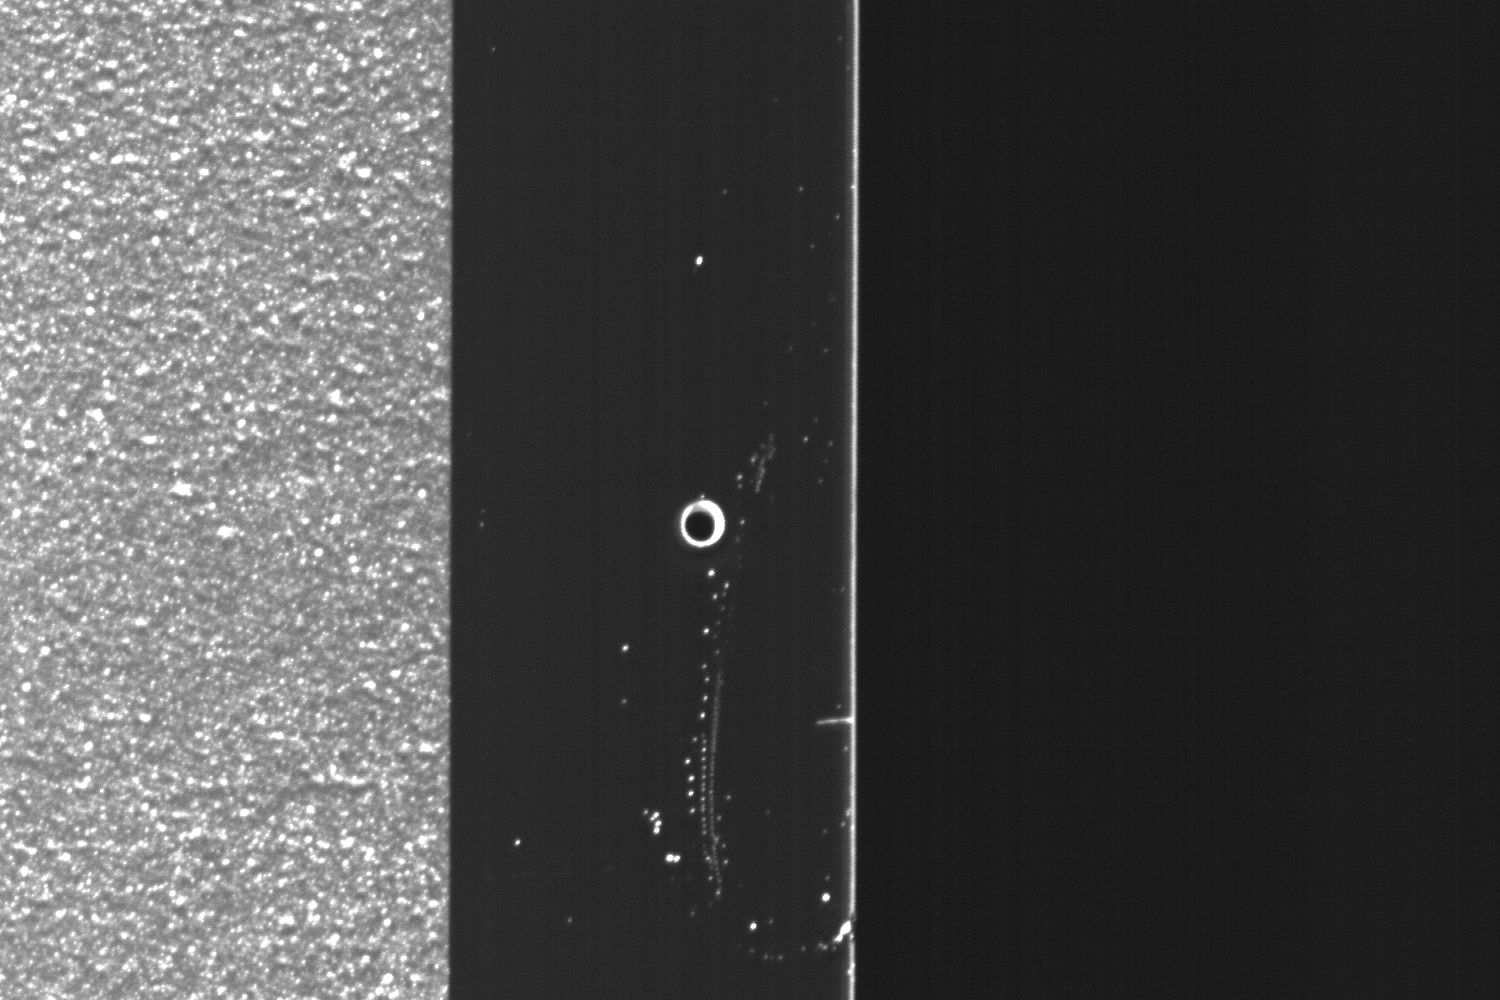
数据采集过程:使用专业采集设备在固定工作站上捕获图像,背景设置为黑色以减少环境光的影响。图像采集后,统一调整分辨率为1500×1000像素。
使用智能手机屏幕玻璃缺陷检测数据集进行目标检测,同学从数据准备、格式转换、数据划分、环境搭建、数据配置、模型训练、超参数配置、模型推理、批量推理和性能评估等方面详细说明。以下是具体步骤及代码示例。
1. 数据准备
假设数据集目录结构如下:
dataset/
├── Part_I/
│   ├── images/
│   │   ├── img1.jpg
│   │   └── ...
│   ├── annotations/
│   │   ├── img1.xml
│   │   └── ...
├── Part_II/
│   ├── images/
│   │   ├── img1.jpg
│   │   └── ...
│   ├── annotations/
│   │   ├── img1.xml
│   │   └── ...
2. 格式转换
将Labelme标注的XML文件转换为YOLO格式(txt 文件):
import os
import xml.etree.ElementTree as ET

def convert_voc_to_yolo(voc_dir, yolo_dir, classes):
    if not os.path.exists(yolo_dir):
        os.makedirs(yolo_dir)

    for xml_file in os.listdir(voc_dir):
        tree = ET.parse(os.path.join(voc_dir, xml_file))
        root = tree.getroot()

        size = root.find('size')
        w = int(size.find('width').text)
        h = int(size.find('height').text)

        with open(os.path.join(yolo_dir, os.path.splitext(xml_file)[0] + '.txt'), 'w') as f:
            for obj in root.findall('object'):
                cls = obj.find('name').text
                if cls not in classes:
                    continue
                cls_id = classes.index(cls)
                bbox = obj.find('bndbox')
                xmin = int(bbox.find('xmin').text)
                ymin = int(bbox.find('ymin').text)
                xmax = int(bbox.find('xmax').text)
                ymax = int(bbox.find('ymax').text)

                x_center = (xmin + xmax) / 2.0 / w
                y_center = (ymin + ymax) / 2.0 / h
                width = (xmax - xmin) / w
                height = (ymax - ymin) / h

                f.write(f"{cls_id} {x_center:.6f} {y_center:.6f} {width:.6f} {height:.6f}\n")

# 类别列表
classes = ['crack', 'broken', 'spot', 'scratch', 'light-leakage', 'blot', 'broken-membrane']
convert_voc_to_yolo('dataset/Part_I/annotations', 'dataset/Part_I/labels_yolo', classes)
convert_voc_to_yolo('dataset/Part_II/annotations', 'dataset/Part_II/labels_yolo', classes)
3. 数据合并与划分
将两部分数据合并,并划分为训练集、验证集和测试集(如7:2:1):
import glob
import random

def split_dataset(image_dirs, label_dirs, train_ratio=0.7, val_ratio=0.2):
    images = []
    for image_dir in image_dirs:
        images.extend(glob.glob(os.path.join(image_dir, '*.jpg')))
    random.shuffle(images)

    total_num = len(images)
    train_num = int(total_num * train_ratio)
    val_num = int(total_num * val_ratio)

    train_images = images[:train_num]
    val_images = images[train_num:train_num + val_num]
    test_images = images[train_num + val_num:]

    return train_images, val_images, test_images

image_dirs = ['dataset/Part_I/images', 'dataset/Part_II/images']
label_dirs = ['dataset/Part_I/labels_yolo', 'dataset/Part_II/labels_yolo']
train_images, val_images, test_images = split_dataset(image_dirs, label_dirs)

# 保存划分结果
with open('dataset/train.txt', 'w') as f:
    f.writelines([img + '\n' for img in train_images])

with open('dataset/val.txt', 'w') as f:
    f.writelines([img + '\n' for img in val_images])

with open('dataset/test.txt', 'w') as f:
    f.writelines([img + '\n' for img in test_images])
4. 环境搭建
安装 YOLOv5 所需依赖库:
pip install torch torchvision opencv-python matplotlib tqdm ultralytics
5. 数据配置
创建YOLO的数据配置文件 data.yaml:
train: dataset/train.txt
val: dataset/val.txt
test: dataset/test.txt

nc: 7  # 类别数量
names: ['crack', 'broken', 'spot', 'scratch', 'light-leakage', 'blot', 'broken-membrane']
6. 模型训练
使用YOLOv8进行训练:
from ultralytics import YOLO

# 加载预训练模型
model = YOLO('yolov8n.pt')  # 可选择 yolov8s, yolov8m, yolov8l, yolov8x

# 开始训练
model.train(data='data.yaml', epochs=50, imgsz=640, batch=16, name='glass_defect_detection')
7. 配置超参数
在 model.train() 中调整以下参数:
epochs: 训练轮数。imgsz: 输入图像尺寸。batch: 批次大小。name: 实验名称。
8. 模型推理
加载训练好的模型进行推理:
from PIL import Image
import torch

# 加载模型
model = YOLO('runs/detect/glass_defect_detection/weights/best.pt')

# 推理函数
def detect(image_path):
    results = model(image_path)
    for result in results:
        im_array = result.plot()  # 绘制检测结果
        im = Image.fromarray(im_array[..., ::-1])  # BGR to RGB
        im.show()

detect('dataset/Part_I/images/img1.jpg')
9. 批量推理
对测试集进行批量推理:
import glob

test_images = glob.glob('dataset/test/*.jpg')
for img_path in test_images:
    detect(img_path)
10. 性能评估
使用 mAP 和其他指标评估模型性能:
# 使用验证集评估模型
metrics = model.val()
print(metrics)
是基于 YOLOv8 的智能手机屏幕玻璃缺陷检测任务的完整实现流程
这样,可检测数据集的手机缺陷类型,特别是针对智能手机屏幕,方便手机维修中的检测。
大概也智能给打架做个参考。


 被折叠的 条评论
为什么被折叠?
被折叠的 条评论
为什么被折叠?
 到【灌水乐园】发言


