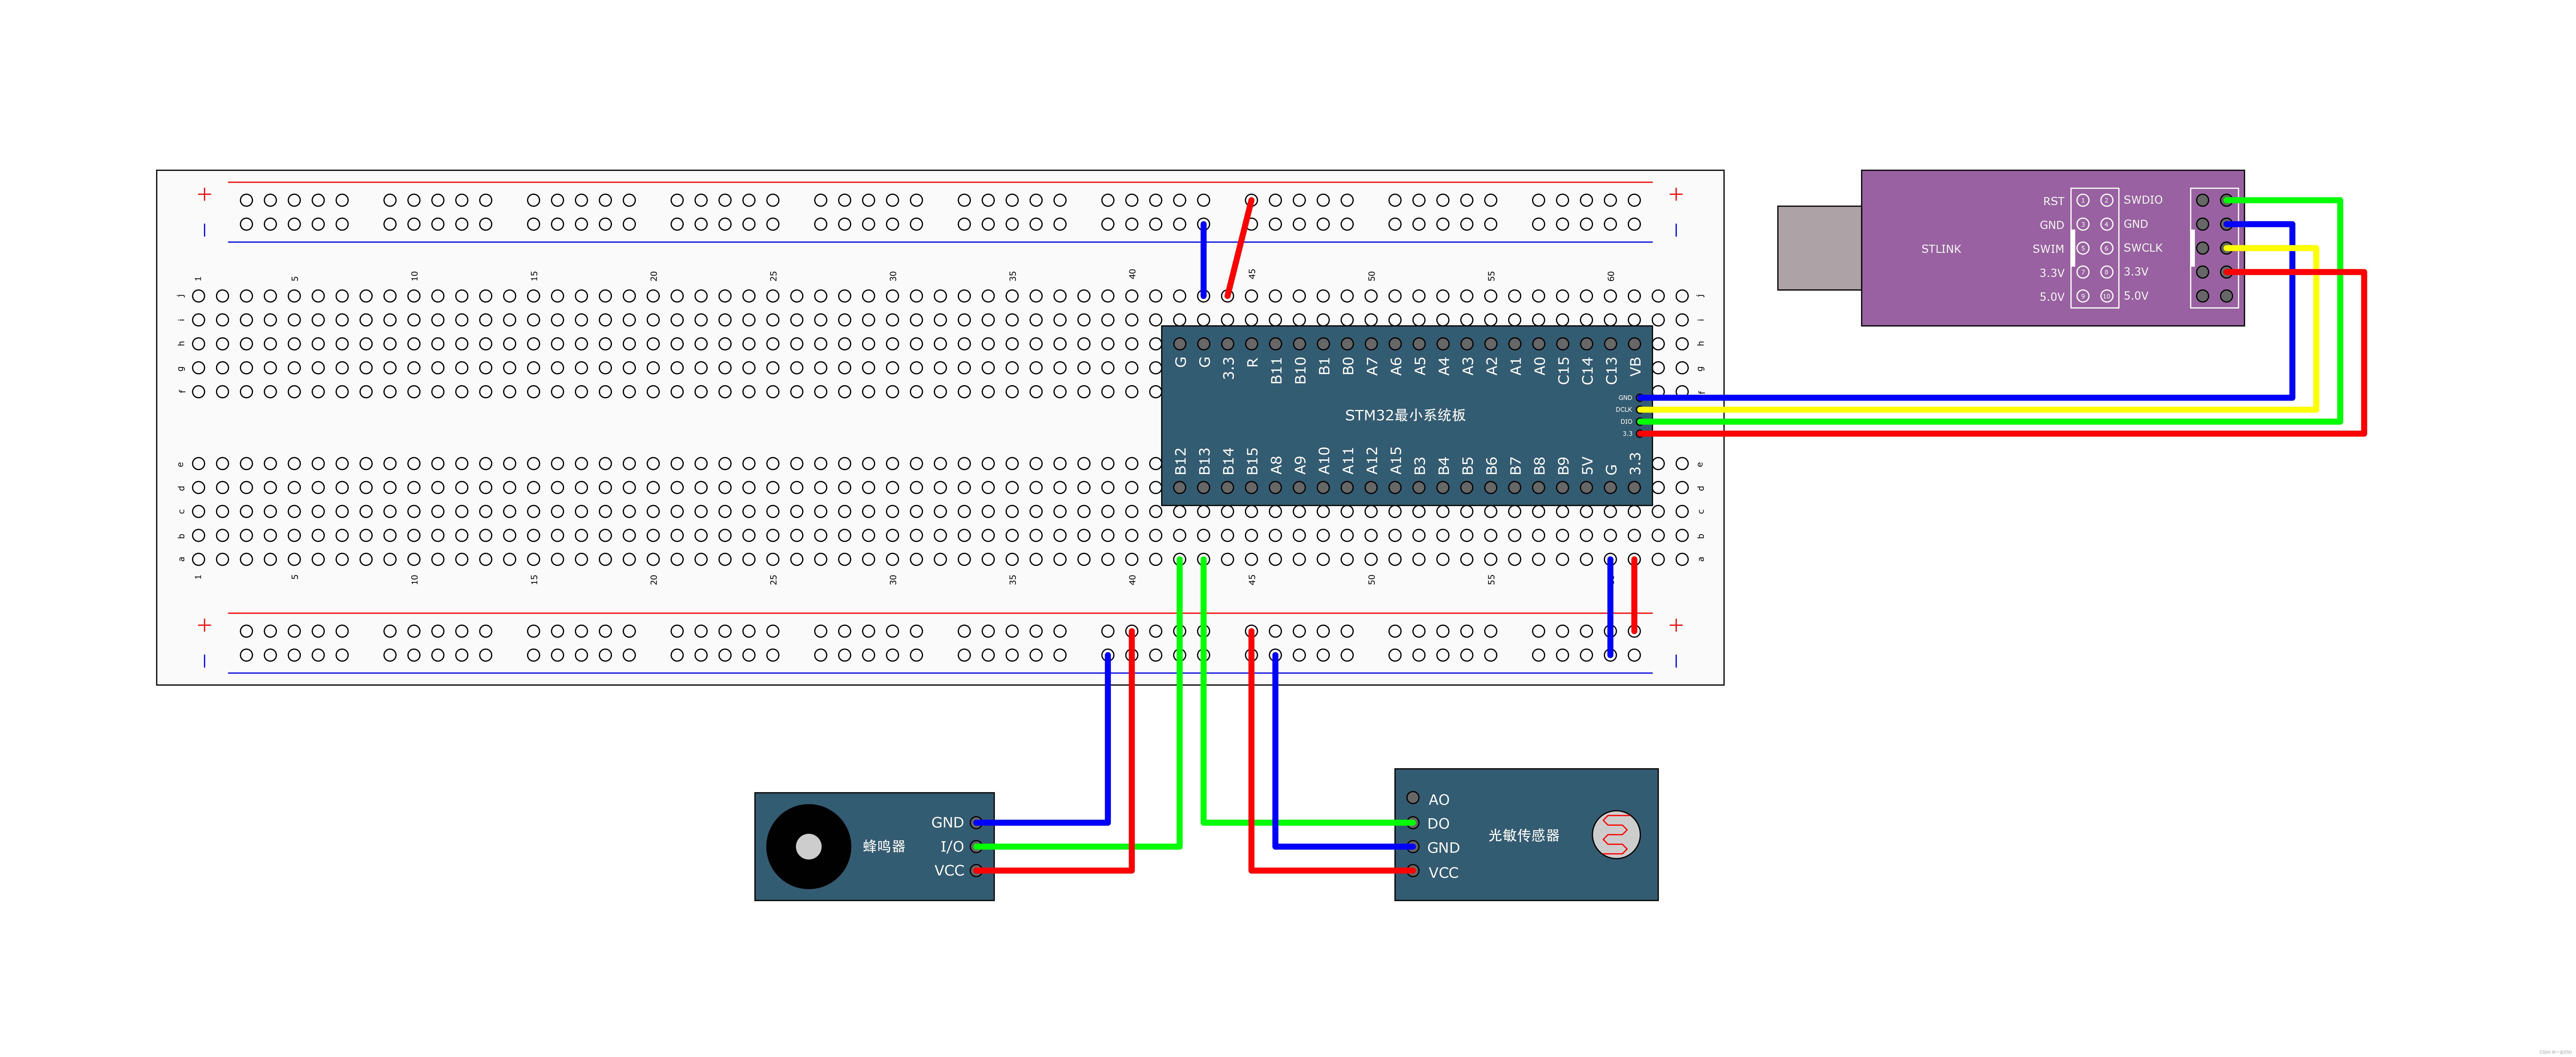
用的是面包板和最小系统板,线上接线图:

此实验需要让光敏电阻的信号灯熄灭时蜂鸣器响,当周围环境亮度低到一定值以下时,光敏电阻模块的输出信号,也就是PB13引脚的输入信号会由低电平变成高电平,当然光敏电阻模块检测的阈值是可调的,螺丝刀可调。我们只要让光敏电阻变成高电平时给蜂鸣器,也就是PB12高电平即可。既然要用到这些引脚,那就要初始化了。
光敏电阻初始化:
#include "stm32f10x.h"                  // Device header

void LightSensor_Init()
{
	RCC_APB2PeriphClockCmd(RCC_APB2Periph_GPIOB,ENABLE);
	GPIO_InitTypeDef GPIO_LightSensor_InitStructure;
	GPIO_LightSensor_InitStructure.GPIO_Mode=GPIO_Mode_IPU;
	GPIO_LightSensor_InitStructure.GPIO_Pin=GPIO_Pin_13;
	GPIO_LightSensor_InitStructure.GPIO_Speed=GPIO_Speed_50MHz;
	GPIO_Init(GPIOB,&GPIO_LightSensor_InitStructure);
}
uint8_t Get_LightInformation()
{
	return GPIO_ReadInputDataBit(GPIOB,GPIO_Pin_13);//将该引脚的输入信号返回(0/1)
}
蜂鸣器初始化:
#include "stm32f10x.h"                  // Device header

void Buzzer_Init()
{
	RCC_APB2PeriphClockCmd(RCC_APB2Periph_GPIOB,ENABLE);
	GPIO_InitTypeDef GPIO_Buzzer_InitStructure;
	GPIO_Buzzer_InitStructure.GPIO_Mode=GPIO_Mode_Out_PP;
	GPIO_Buzzer_InitStructure.GPIO_Pin=GPIO_Pin_12;
	GPIO_Buzzer_InitStructure.GPIO_Speed=GPIO_Speed_50MHz;
	GPIO_Init(GPIOB,&GPIO_Buzzer_InitStructure);
}
void Buzzer_Reply()
{
		GPIO_ResetBits(GPIOB,GPIO_Pin_12);//蜂鸣器响
}
void Buzzer_Close()
{
		GPIO_SetBits(GPIOB,GPIO_Pin_12);//蜂鸣器关
}
主函数部分,初始化蜂鸣器和光敏电阻后在while()循环部分用Get_LightInformation()函数检测光敏电阻的输入,根据不同的输入开关蜂鸣器。
#include "stm32f10x.h"                  // Device header
#include "Buzzer.H"
#include "LightSensor.h"
int main()
{
	Buzzer_Init();
	LightSensor_Init();
	while(1)
	{
		if(Get_LightInformation()==1)
			Buzzer_Reply();
		else
			Buzzer_Close();
	}
}
以上内容经供参考,谢谢!


 被折叠的 条评论
为什么被折叠?


