


实现用户退出接口
实现原理
前端直接清除掉 token 即可。
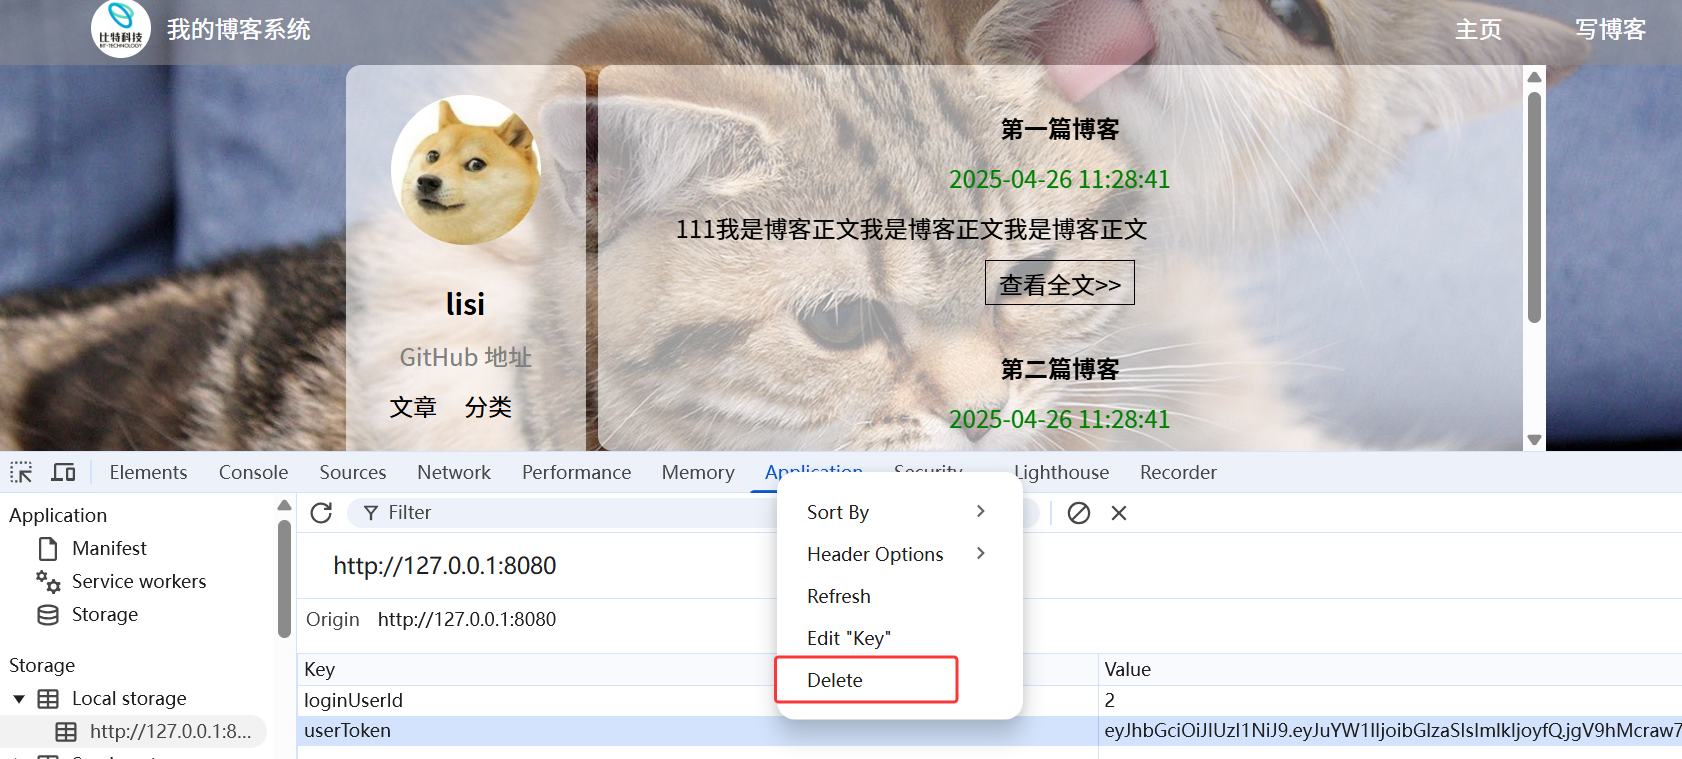
删除 userToken 后,刷新页面,会自动跳转到登录页面:
点击注销按钮,前端直接调用删除lovalStorage中的userToken方法,即可实现注销功能:
实现客户端代码
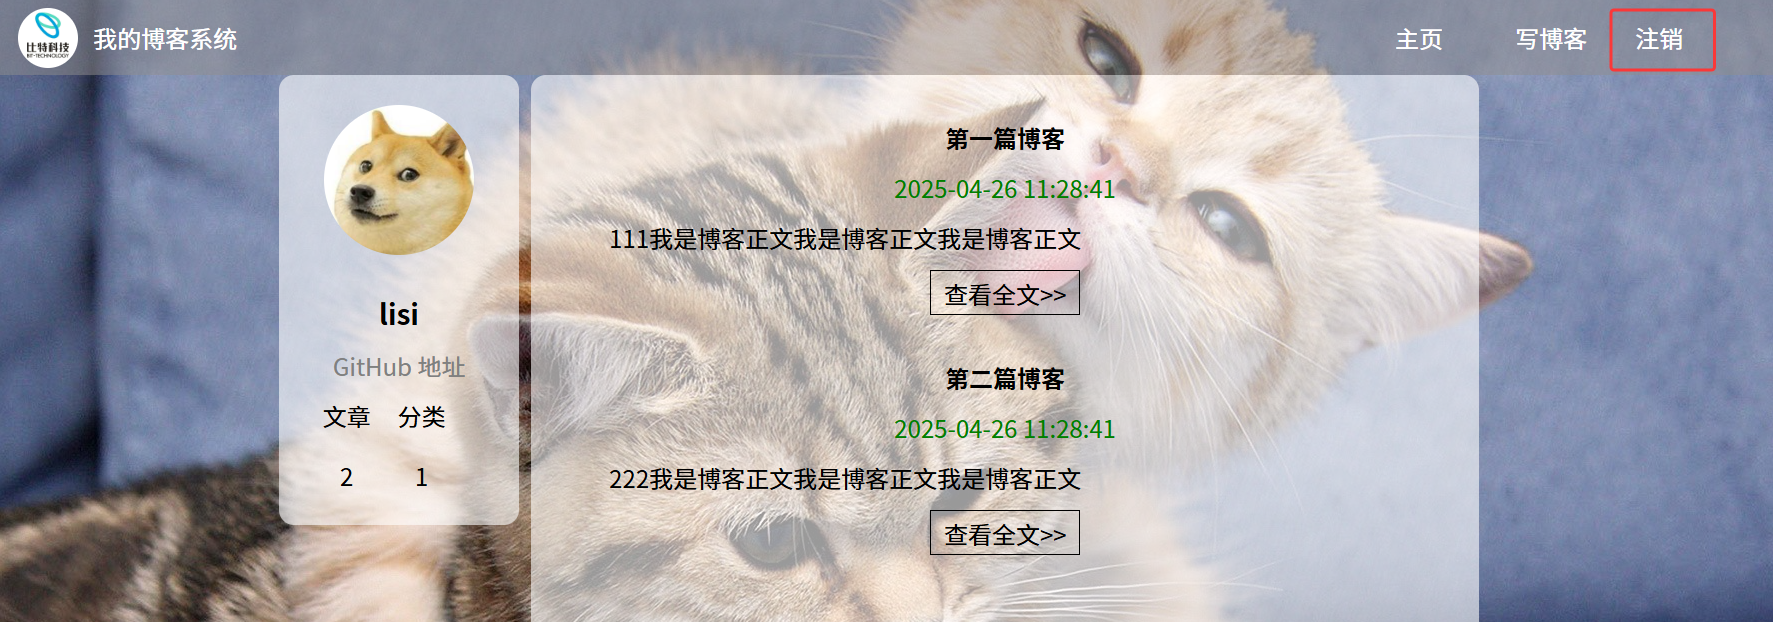
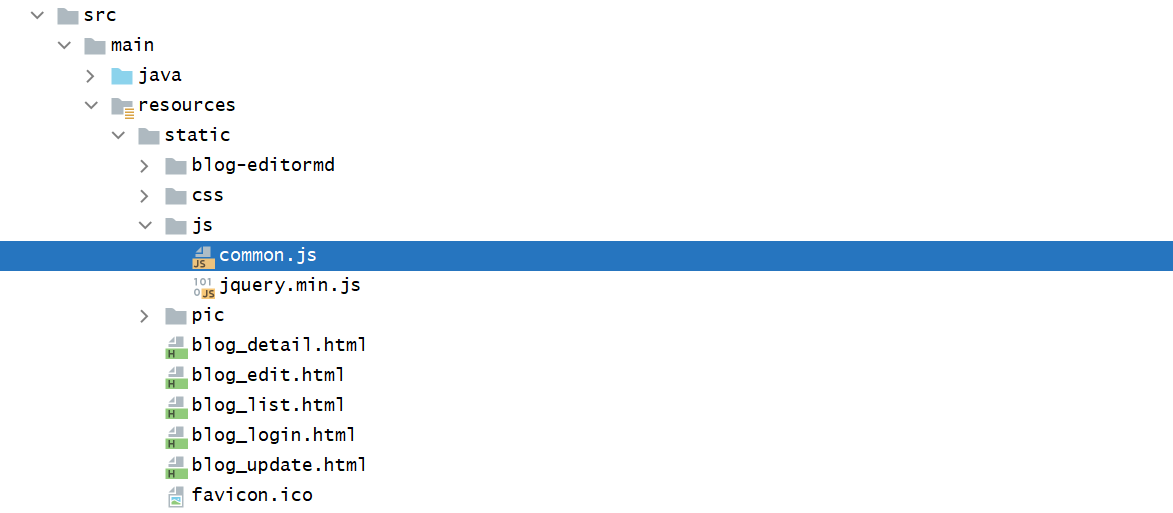
在 blog_list.html、blog_detail.html 中,都有注销按钮,点击注销按钮,对应的标签都会触发onclick = logout() 事件:
    <div class="nav">
        <img src="pic/logo2.jpg" alt="">
        <span class="blog-title">我的博客系统</span>
        <div class="space"></div>
        <a class="nav-span" href="blog_list.html">主页</a>
        <a class="nav-span" href="blog_edit.html">写博客</a>
        <a class="nav-span" href="#" onclick="logout()">注销</a>
    </div>
因为在 blog_list.html 和 blog_detail.html 中都有注销触发 onclick="logout()"的机制,所以将 logout() 提取到 common.js 中,并在common.js 中完善 logout 方法:
function logout() {
    // 删除 localStorage 中的登录用户 id
    localStorage.removeItem("loginUserId");

    // 删除 localStorage 中的 token
    localStorage.removeItem("userToken");

    // 跳转到登录页面
    location.href = "blog_login.html";
}
接口测试
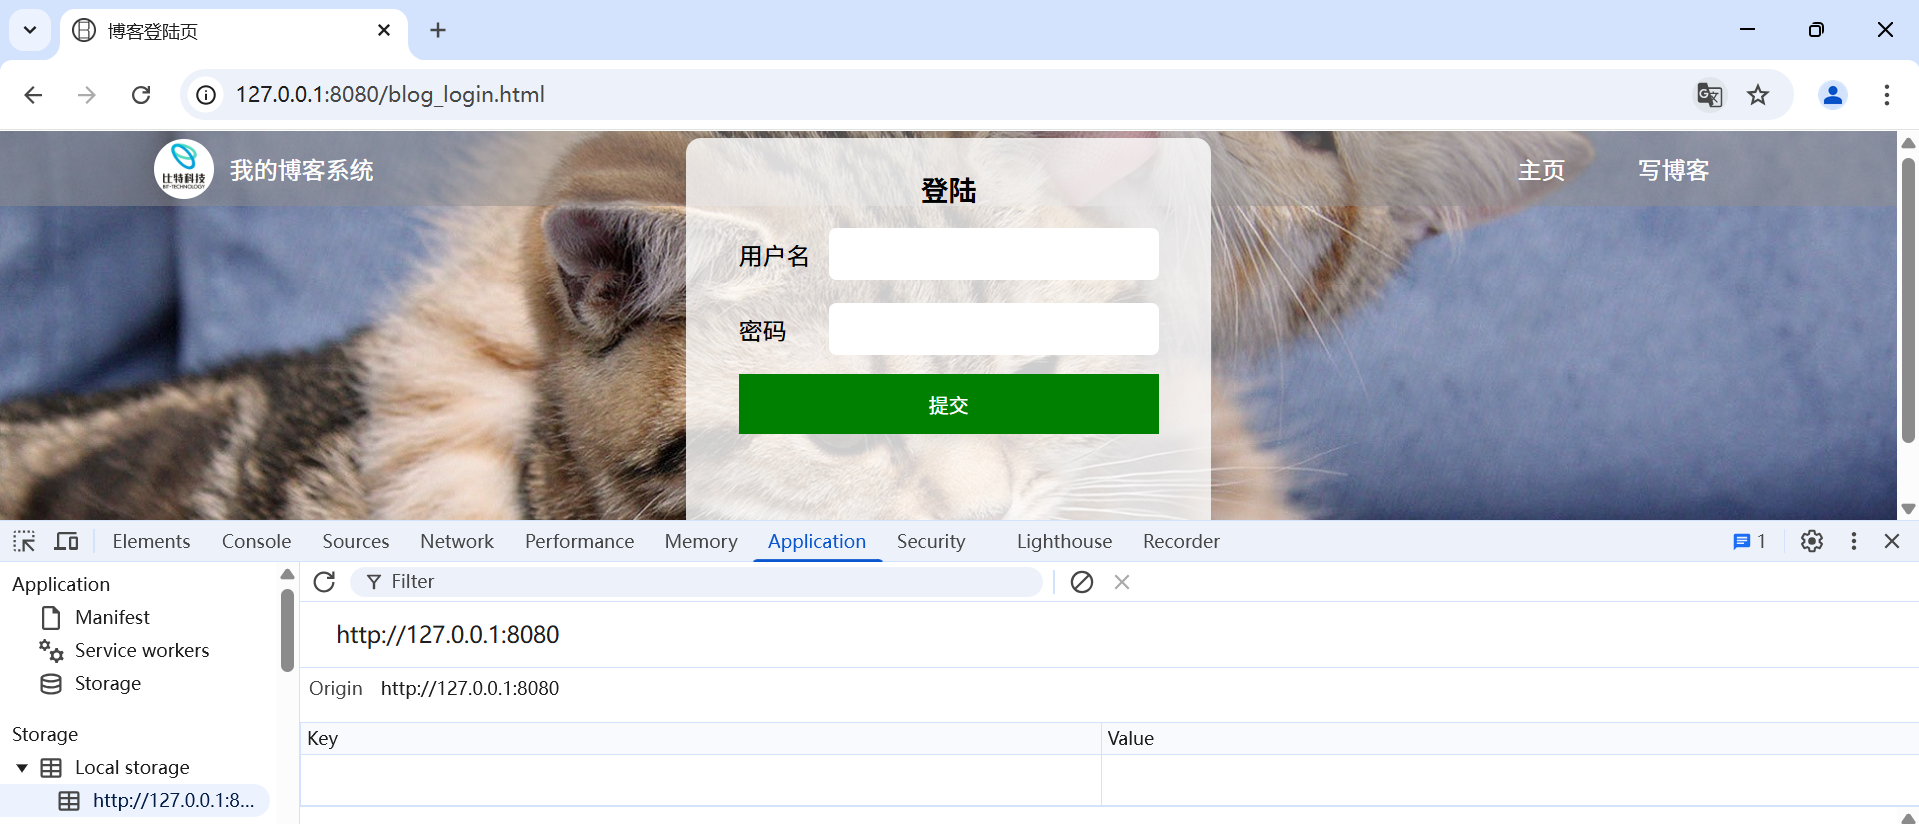
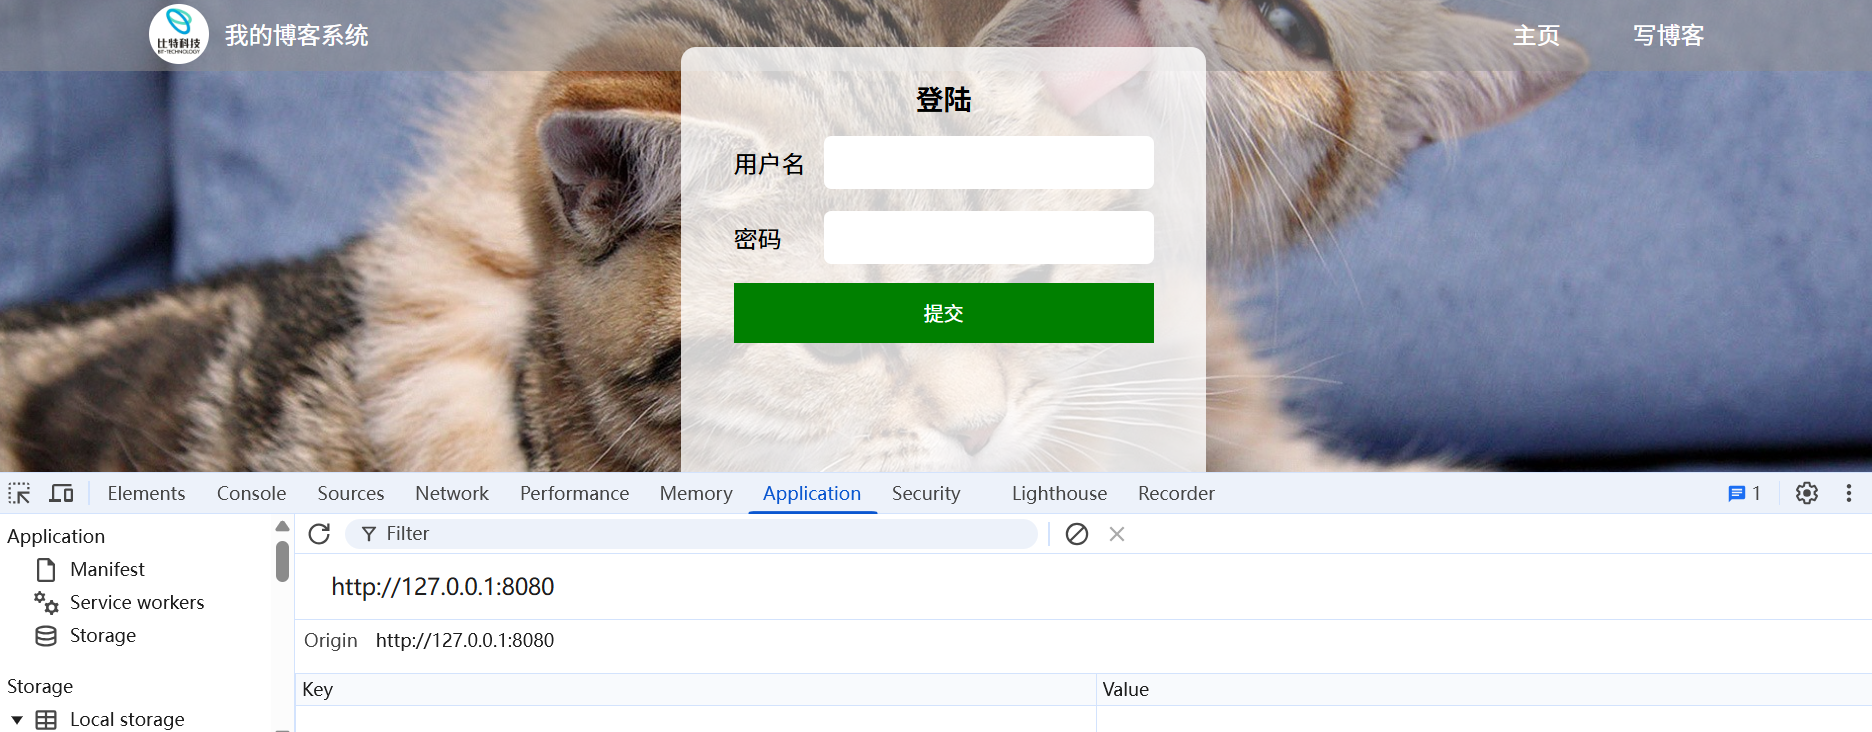
重新运行程序,打开 blog_list.html,点击注销:
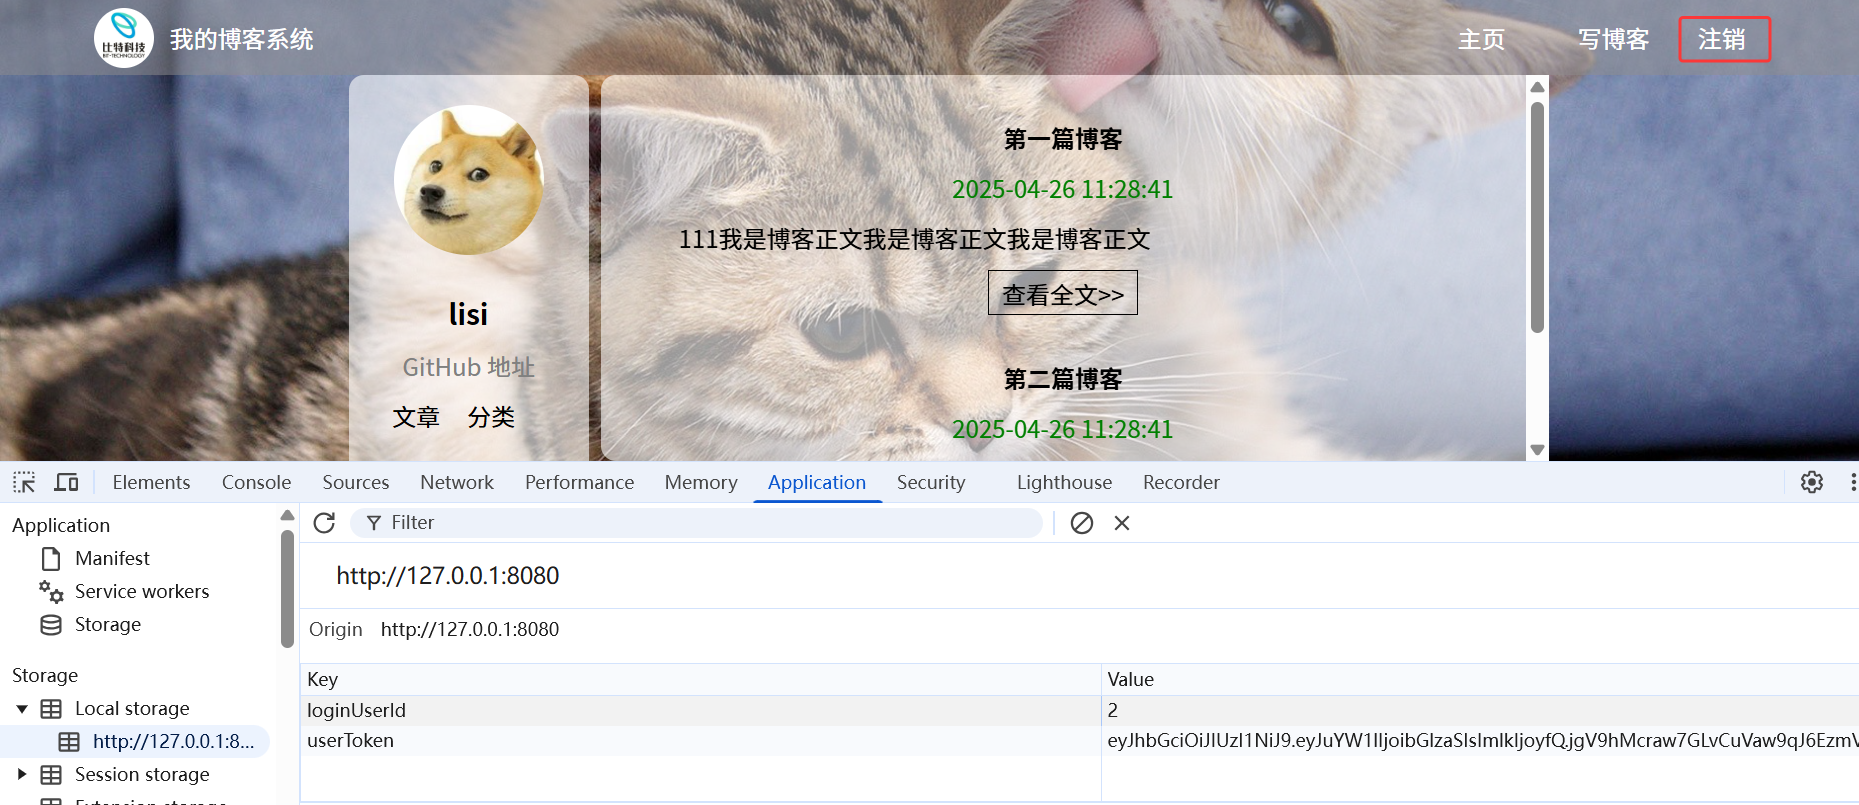
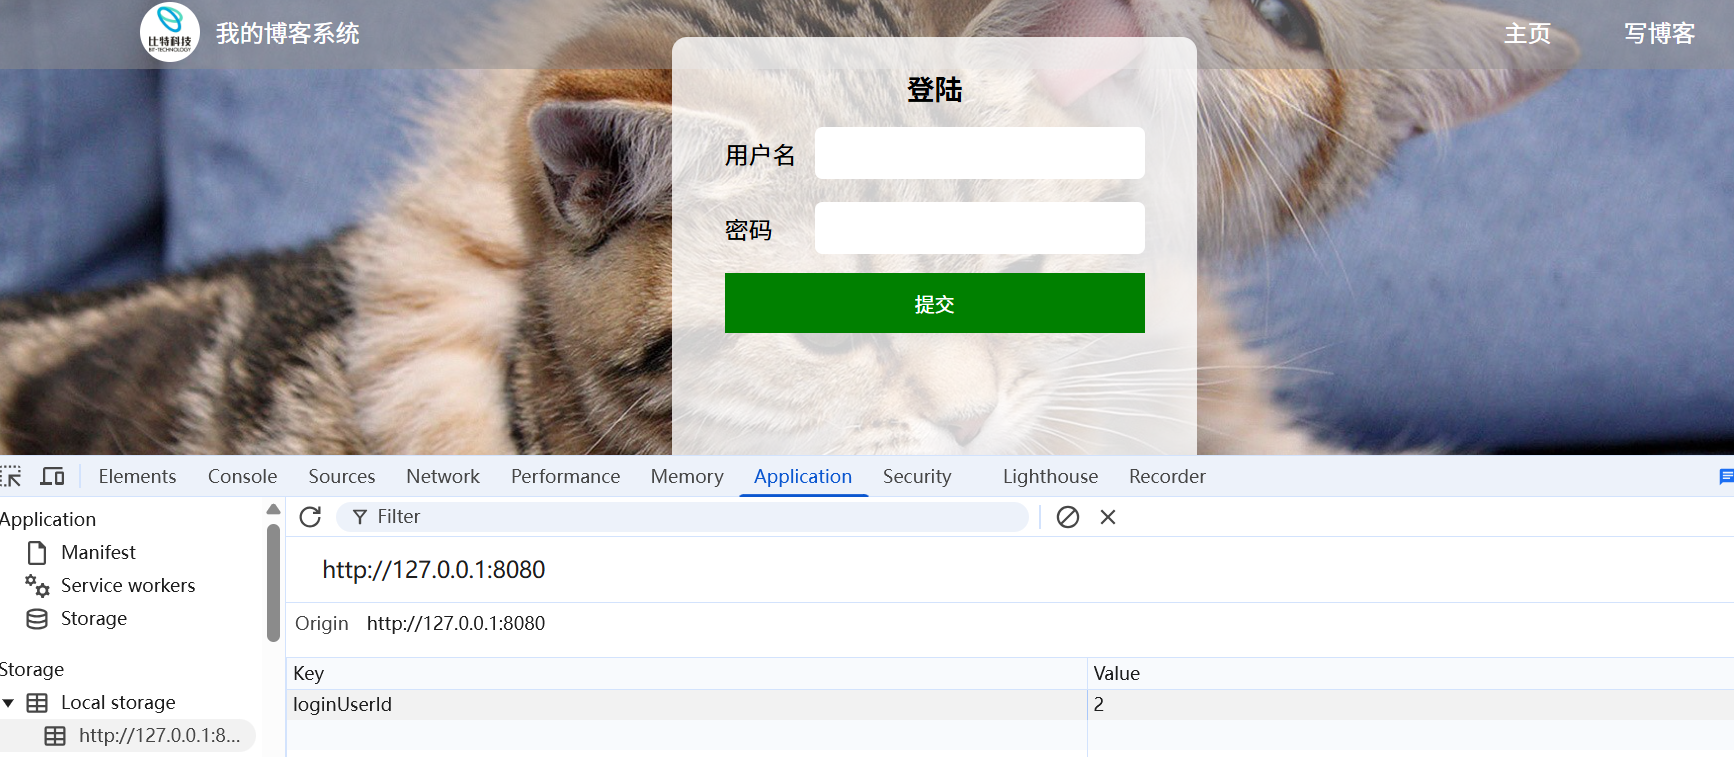
localStorage 被清除,跳转到登录页面:
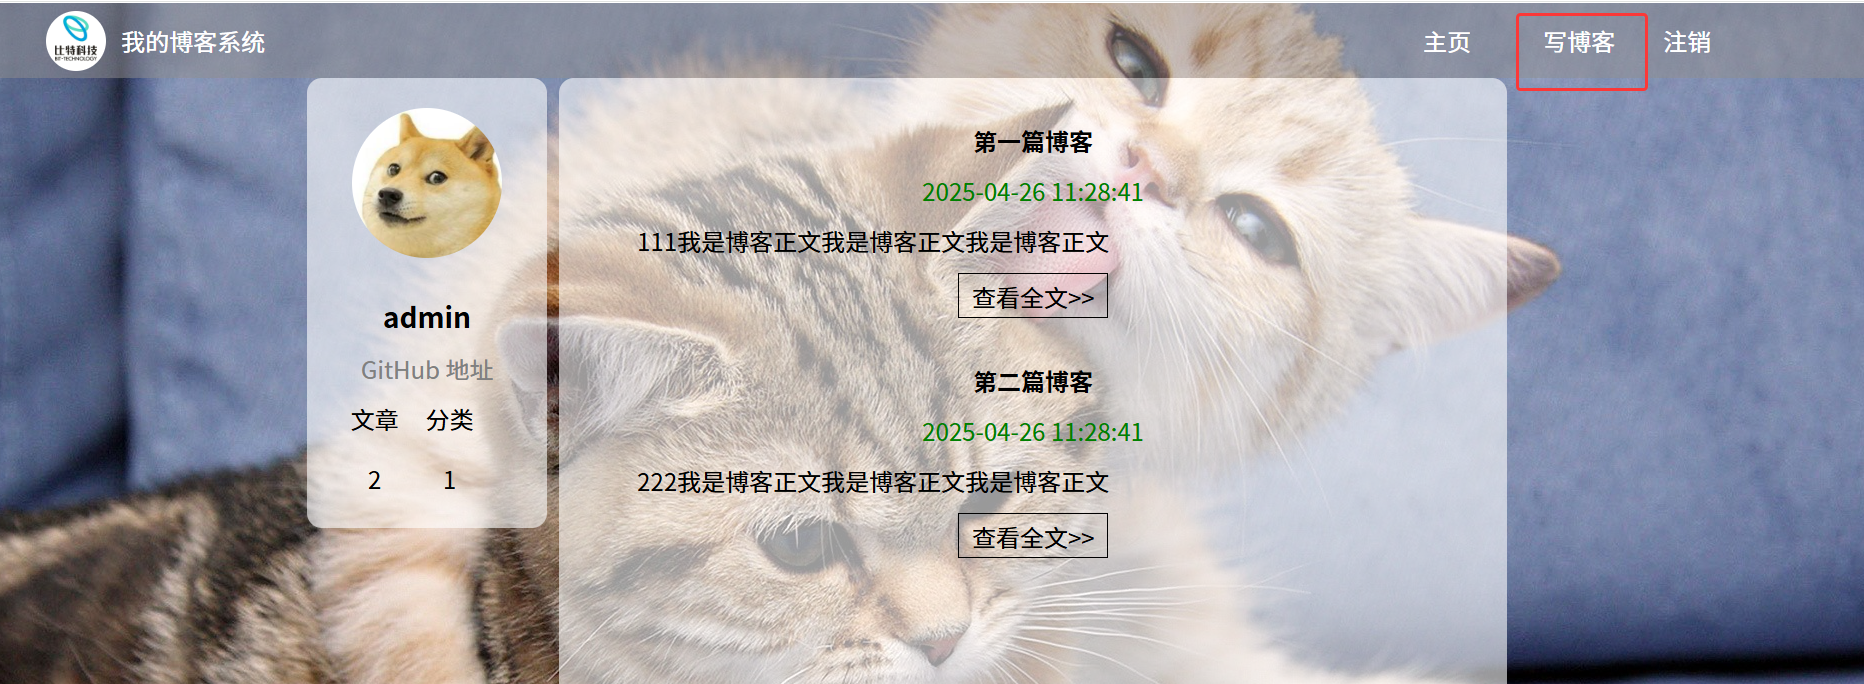
重新登录,点击查看全文按钮,进入 blog_detail.html 页面,点击注销:
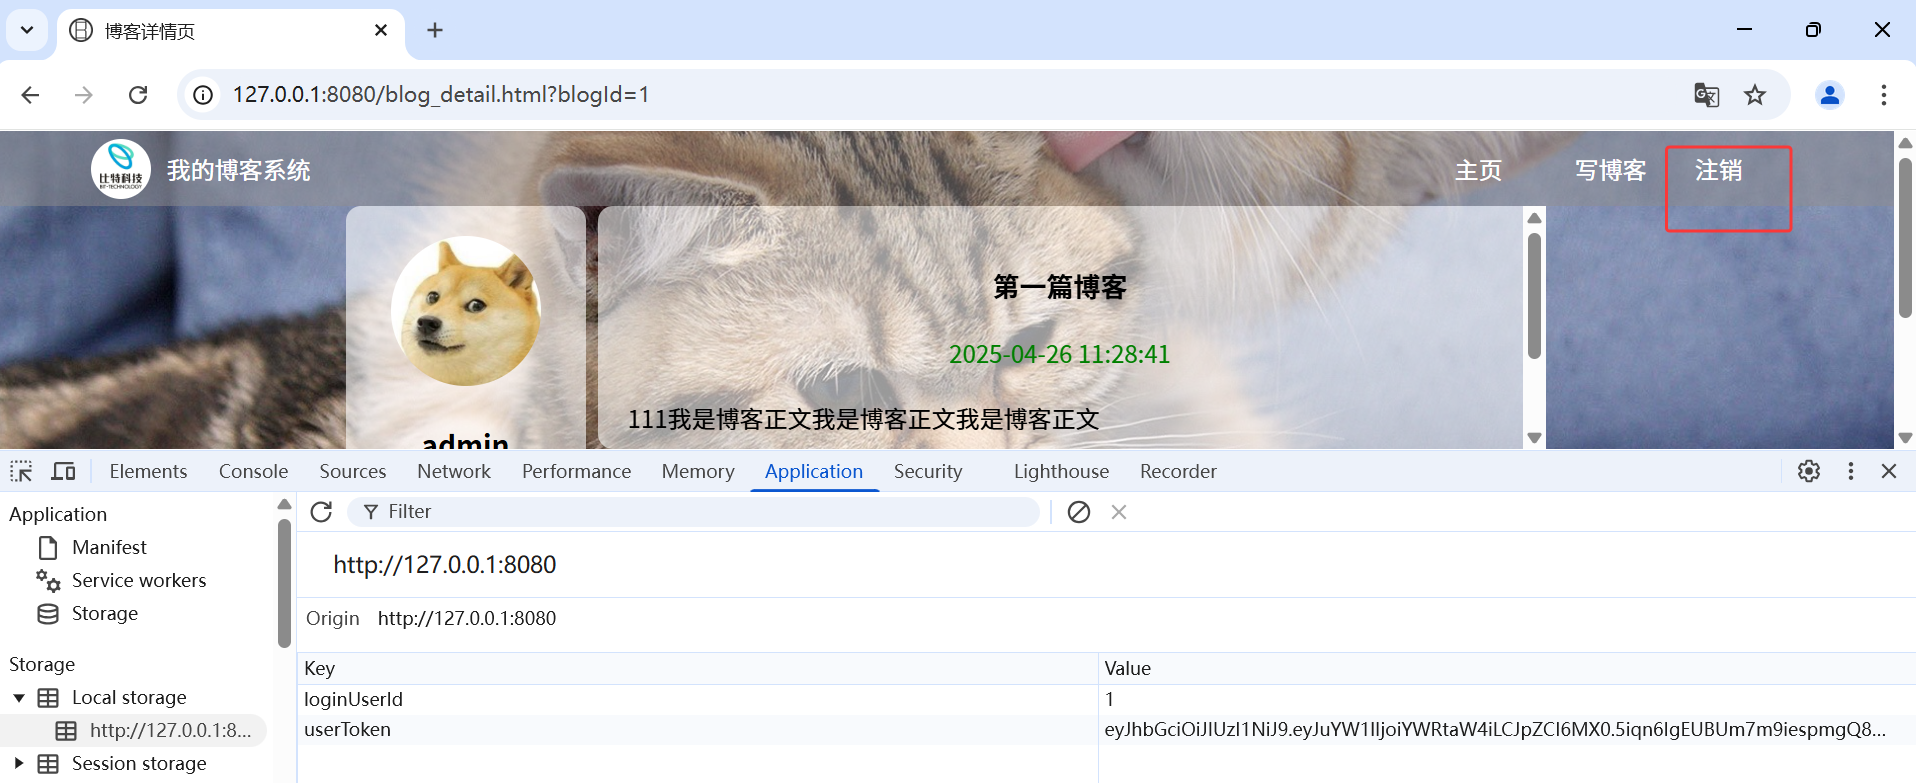
localStorage 再次被清除,同时跳转到登录页面:
实现发布博客接口
点击写博客按钮,会跳转到 markdown 编辑器
markdown 编辑器并不是我们自己写的,而是使用第三方插件,我们要实现点击发布文章后的逻辑:
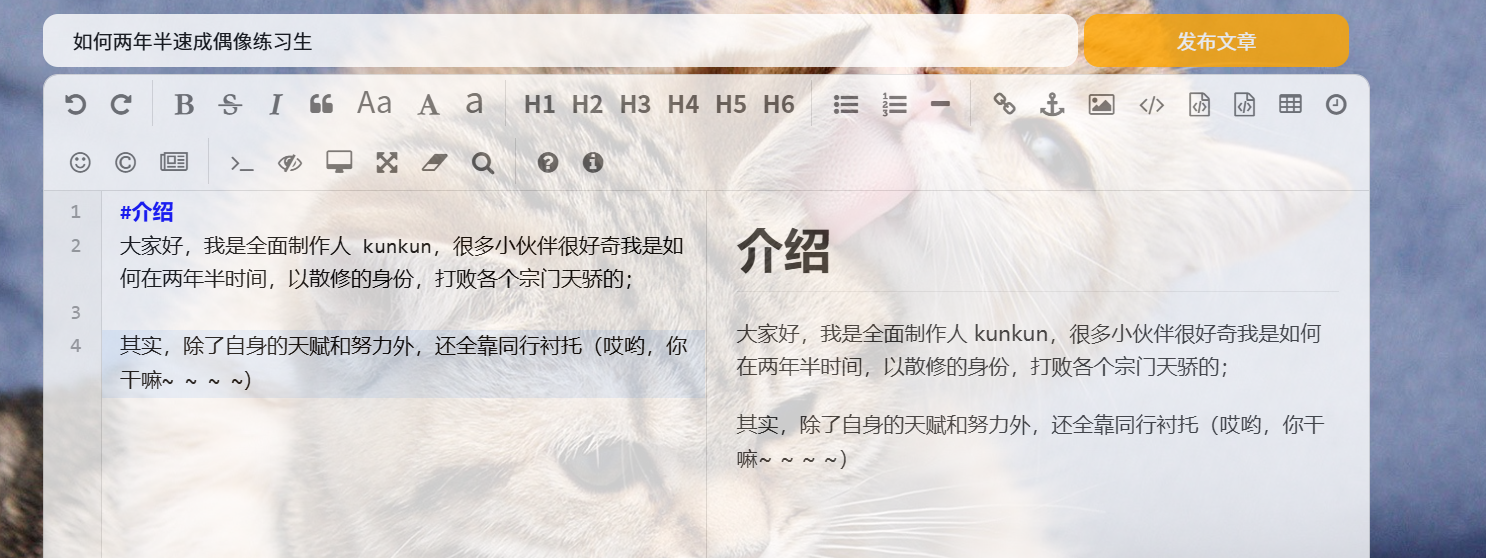
我们写好一篇博客后,点击发布文章,后端会将该文章存储到我们 mysql 对应的数据库中,对数据进行持久化;
约定前后端交互接口
-
[请求]
/blog/add -
[参数]
{ "userId": 1, "title": "标题", "content": "正文" } -
[响应]
{ "code": 200, "msg": "", "data": true }true表示成功false表示失败
实现服务器代码
定义实体类
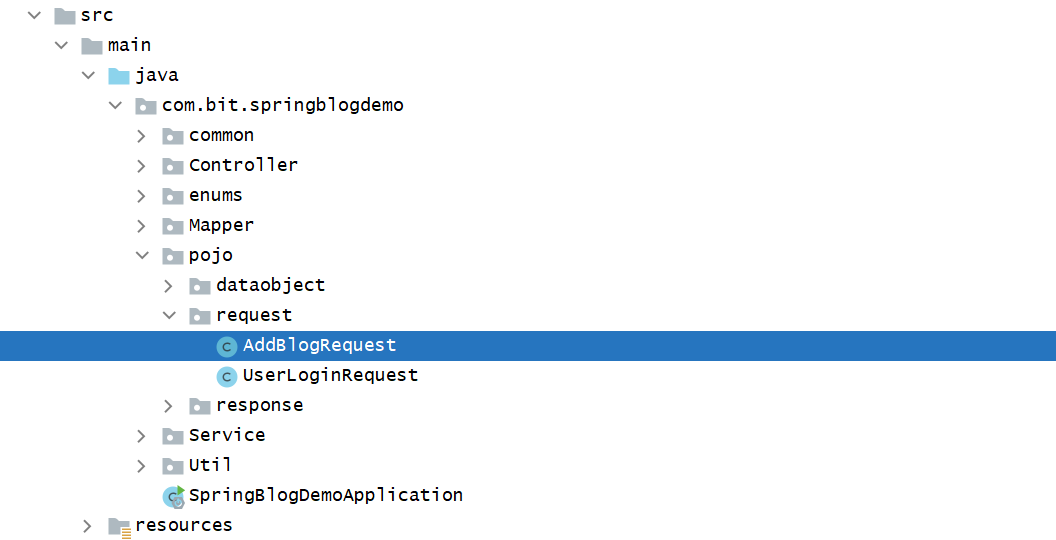
@Data
public class AddBlogRequest {
    private Integer userId;
    private String title;
    private String content;
}
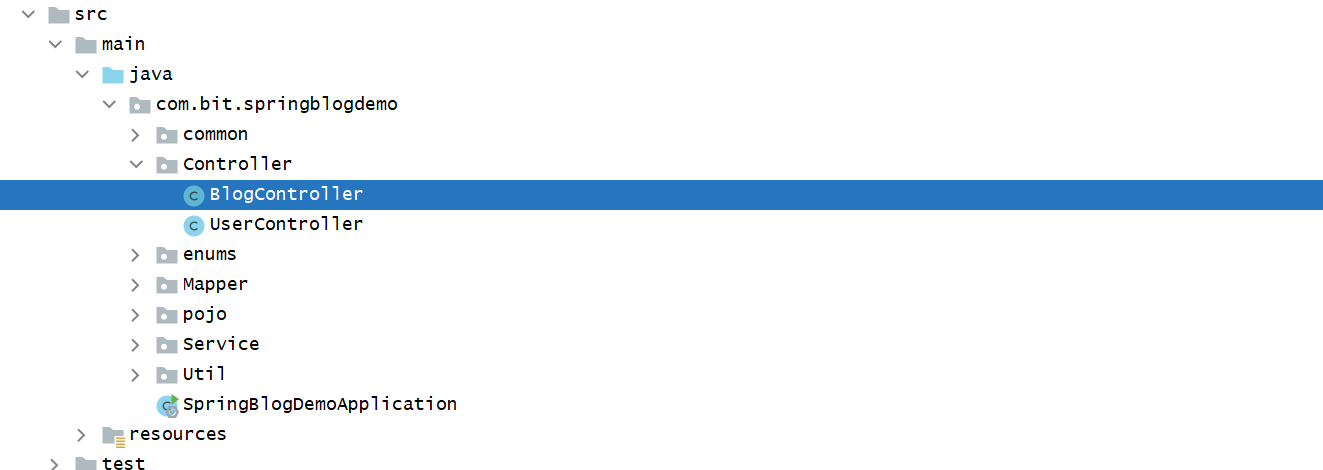
修改 BlogController,新增 add 方法
@Slf4j
@RequestMapping("/blog")
@RestController
public class BlogController {

    @Resource(name = "blogServiceImpl")
    private BlogService blogService;

    @RequestMapping("/add")
    public Boolean addBlog(@RequestBody @Validated AddBlogRequest addBlogRequest){
        // (1) 因为 AddBlogRequest 是 JSON 字符串, 所以需要使用 @RequestBody 来识别
        // (2) 加上 @Validated 注解,方便在 AddBlogRequest 中对属性使用 @NotNull 等注解进行校验

        log.info("发布博客, userId: {}, title: {}", addBlogRequest.getUserId(),addBlogRequest.getTitle());
        return blogService.addBlog(addBlogRequest);
    }
}
在Controller中,对参数使用@Validated注解,进而对AddBlogRequest的属性添加@NotNull、@NotBlank等注解,以此实现校验功能:
@Data
public class AddBlogRequest {
    @NotNull(message = "userId 不能为空")
    private Integer userId;
    @NotBlank(message = "标题不能为空")
    private String title;
    @NotBlank(message = "内容不能为空")
    private String content;
}
BlogService
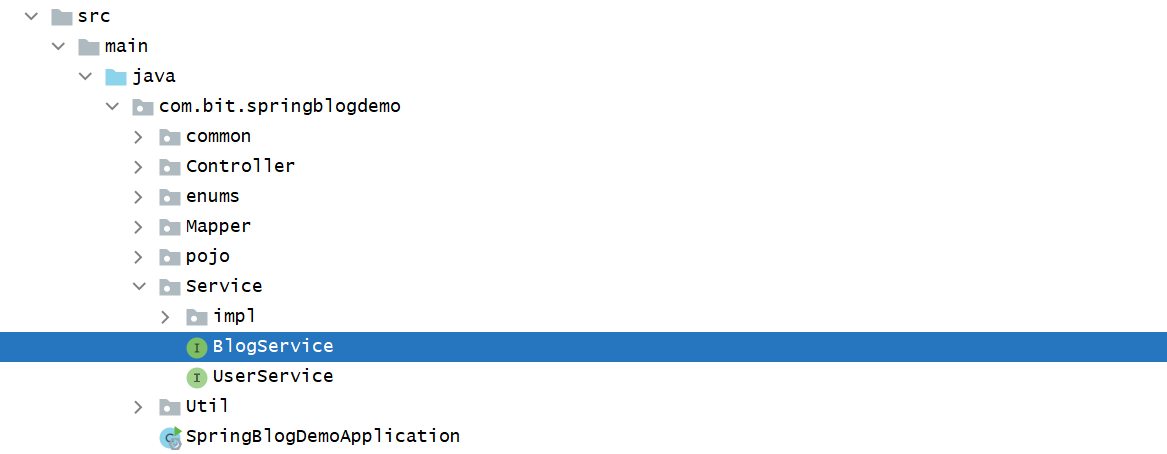
public interface BlogService {

    List<BlogInfoReponse> getList();

    BlogInfoReponse getBlogDetail(Integer blogId);

    BlogInfo getBlogInfo(Integer blogId);

    Boolean addBlog(AddBlogRequest addBlogRequest);
}
BlogServiceImpl
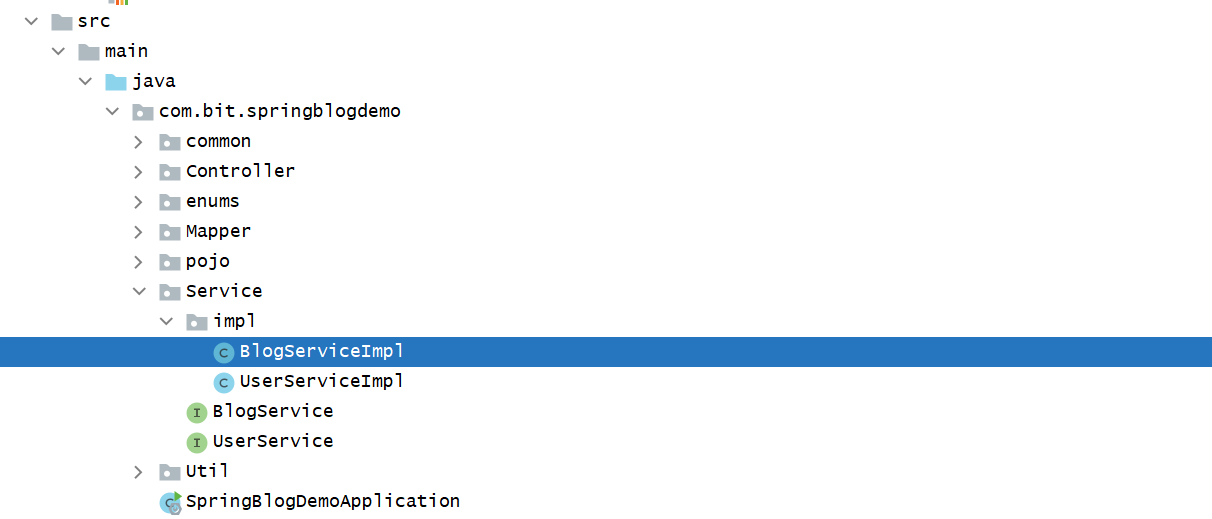
@Service
@Slf4j
public class BlogServiceImpl implements BlogService {
@Autowired
private BlogInfoMapper blogInfoMapper;
@Override
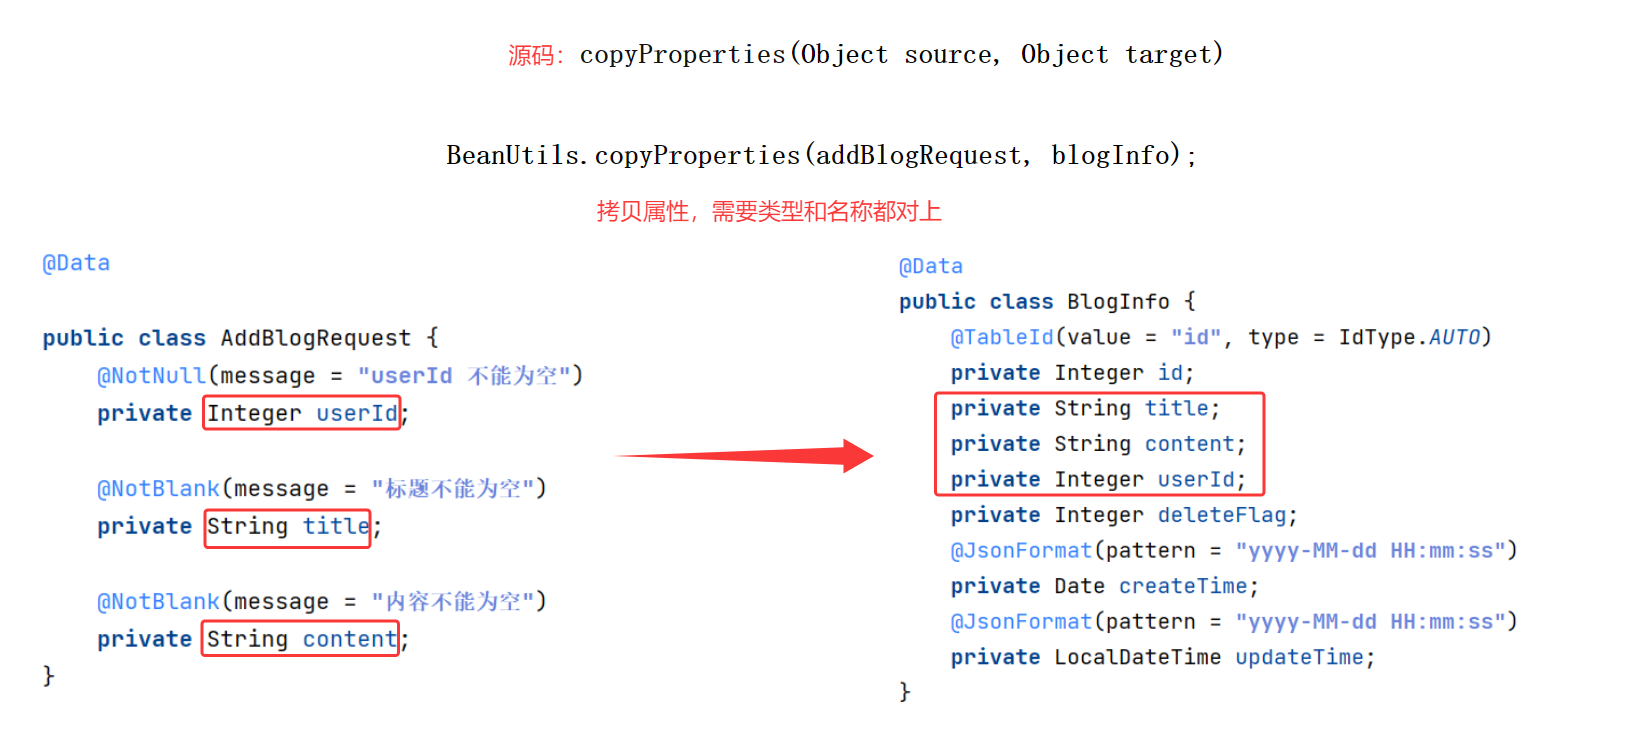
public Boolean addBlog(AddBlogRequest addBlogRequest) {
BlogInfo blogInfo = new BlogInfo();
BeanUtils.copyProperties(addBlogRequest, blogInfo);
try{
Integer result = blogInfoMapper.insert(blogInfo);
// (1) INSERT INTO 表名 (列1, 列2, 列3) VALUES (值1, 值2, 值3);
if(result == 1){
// (2) 上面的 sql 语句会返回受影响行数, 返回结果为 1, 表示成功插入一行数据(一篇博客)到博客数据表中
return true;
}
return false;
}catch (Exception e){
log.error("博客输入失败, e", e);
throw new BlogException("内部错误, 请联系管理员");
// (3) 为了实现统一的结果返回, 我们需要抛出一个异常, 但不直接使用 e.getMessage(), 因为后端的错误信息不应直接暴露给前端
}
}
}
测试接口
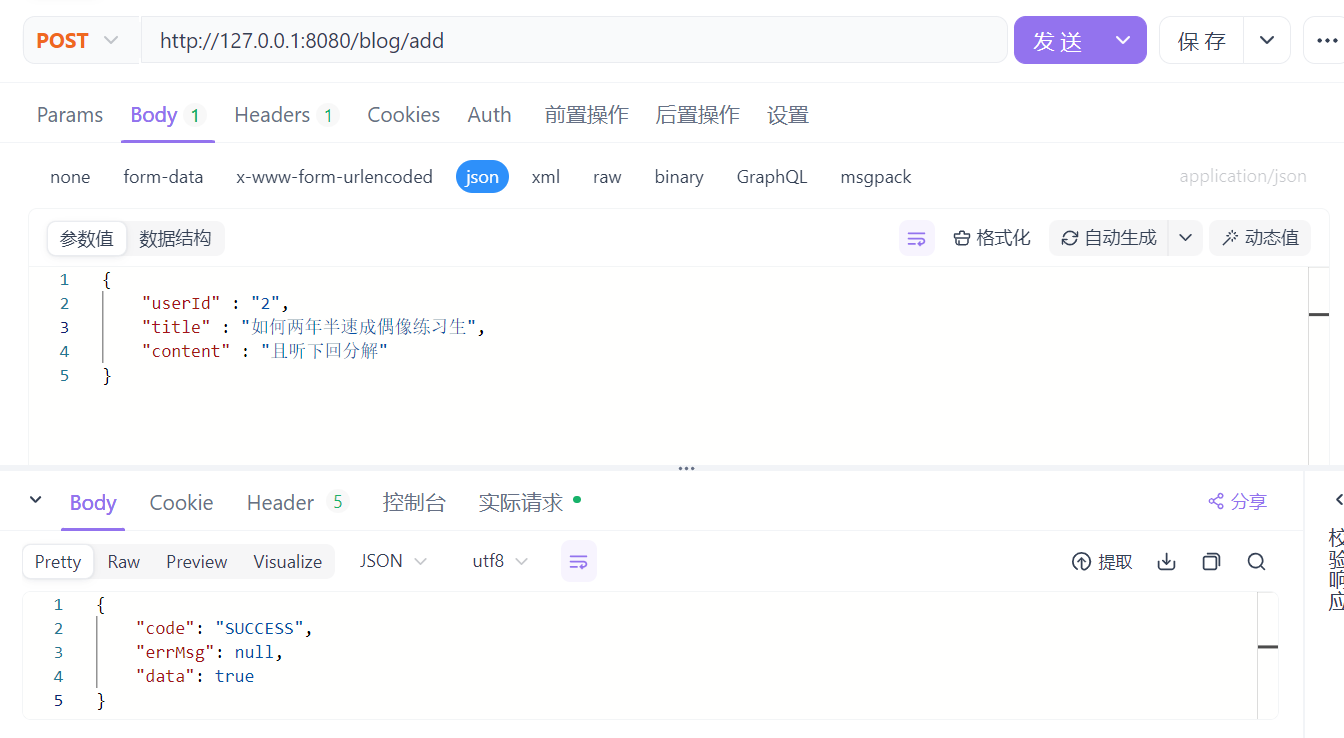
重新运行程序,测试添加博客接口:
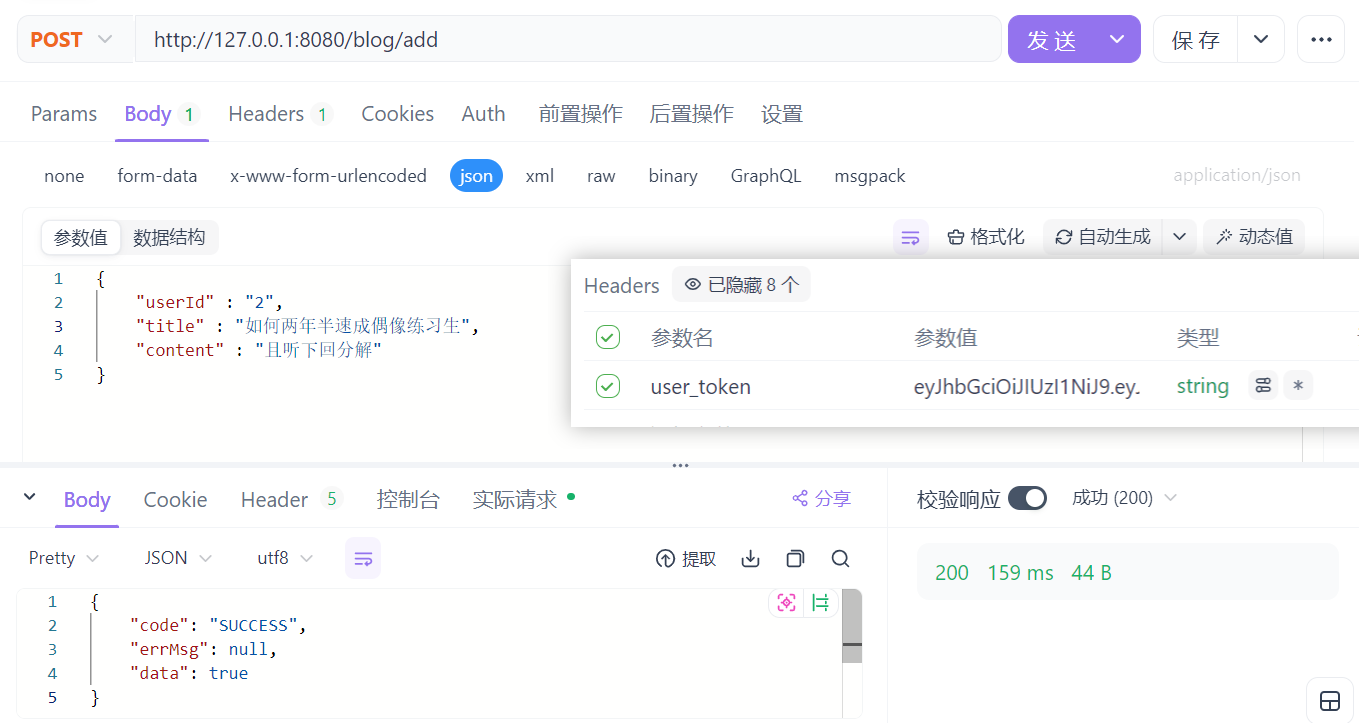
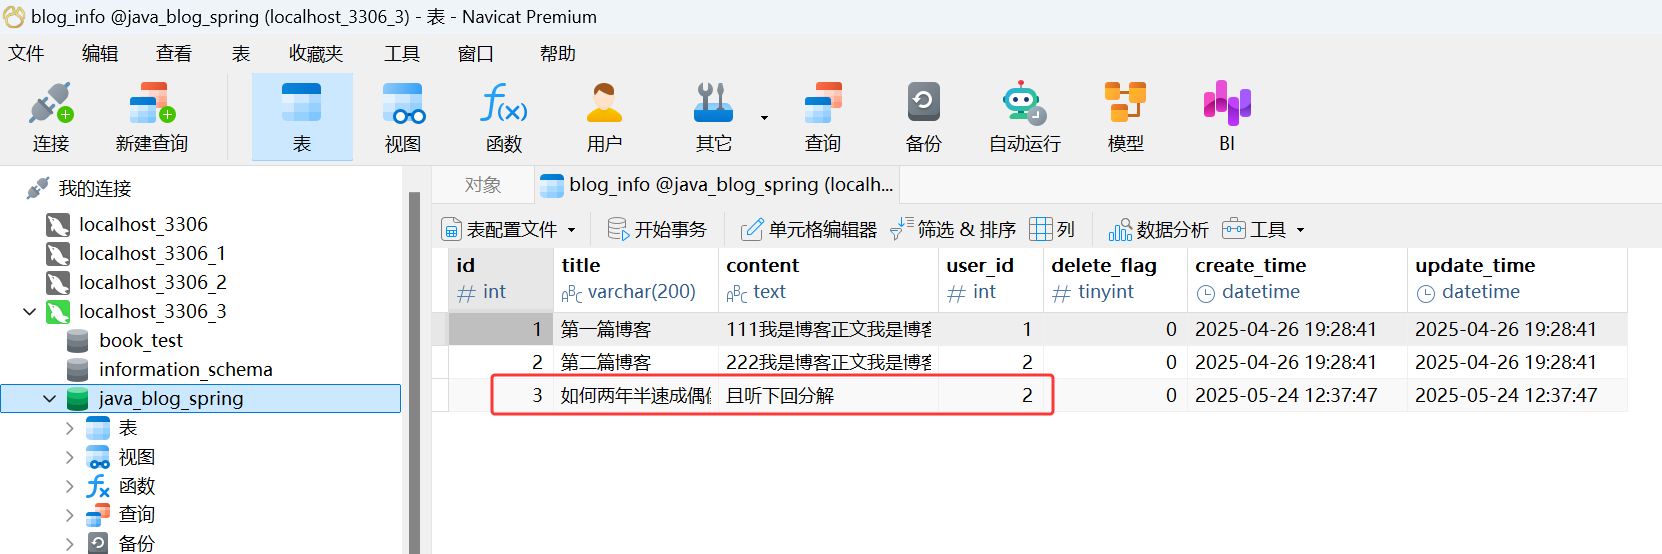
检查数据库:
Editor.md
Editor.md 是一个开源的页面 Markdown 编辑器组件。
使用示例
<link rel="stylesheet" href="editormd/css/editormd.css" />
<div id="test-editor">
    <textarea style="display:none;">### 关于 Editor.md

**Editor.md** 是一款开源的、可嵌入的 Markdown 在线编辑器(组件),基于 CodeMirror、jQuery 和 Marked 构建。
    </textarea>
</div>
<script src="https://cdn.bootcss.com/jquery/1.11.3/jquery.min.js"></script>
<script src="editormd/editormd.min.js"></script>
<script type="text/javascript">
    $(function() {
        var editor = editormd("test-editor", {
            // width : "100%",
            // height : "100%",
            path : "editormd/lib/"
        });
    });
</script>
- 使用时引入对应依赖即可
"test-editor"为 Markdown 编辑器所在的 div 的 id 名称path为 editor.md 依赖所在的路径
实现客户端代码
修改 blog_edit.html
<div class="content-edit">
    <div class="push">
        <input type="text" name="" id="title">
        <input type="button" value="发布文章" id="submit" onclick="submit()">
    </div>
    <!-- markdown 插件 html代码 -->
    <div id="editor">
        <textarea style="display:none;" id="content" name="content">##在这里写下一篇博客</textarea>
    </div>
</div>
点击发布文章按钮,会执行 submit() 方法,接下来,我们来完善一下这个方法;
完善 submit 方法:

我们根据下面的 URL、请求 ( JSON 格式 )、返回响应,来实现 submit() 方法中的 ajax 请求:
contentTypefunction submit() {
    $.ajax({
        type : "post",
        url : "/blog/add",
        // (1) 声明请求内容的类型是 JSON 格式
        content : "application/json",

        // (2) stringify() 将 JavaScript 对象或值转换为 JSON 格式的字符串
        data : JSON.stringify({
            userId : localStorage.getItem("loginUserId"),
            // (3) 可以从 localStorage 获取当前登录用户的 id, 也就是这篇博客的作者对应的 id

            title : $("#title").val(),
            contentType : $("#content").val()
            // (4) title、content 从该页面的输入框中拿到输入的值
        }),

        success : function (result){
            if(result.code == "SUCCESS" && result.data == true){
                location.href = "blog_list.html";
            }else{
                alert("博客发布失败");
            }
        }
    });
}
部署程序,验证效果。
测试接口
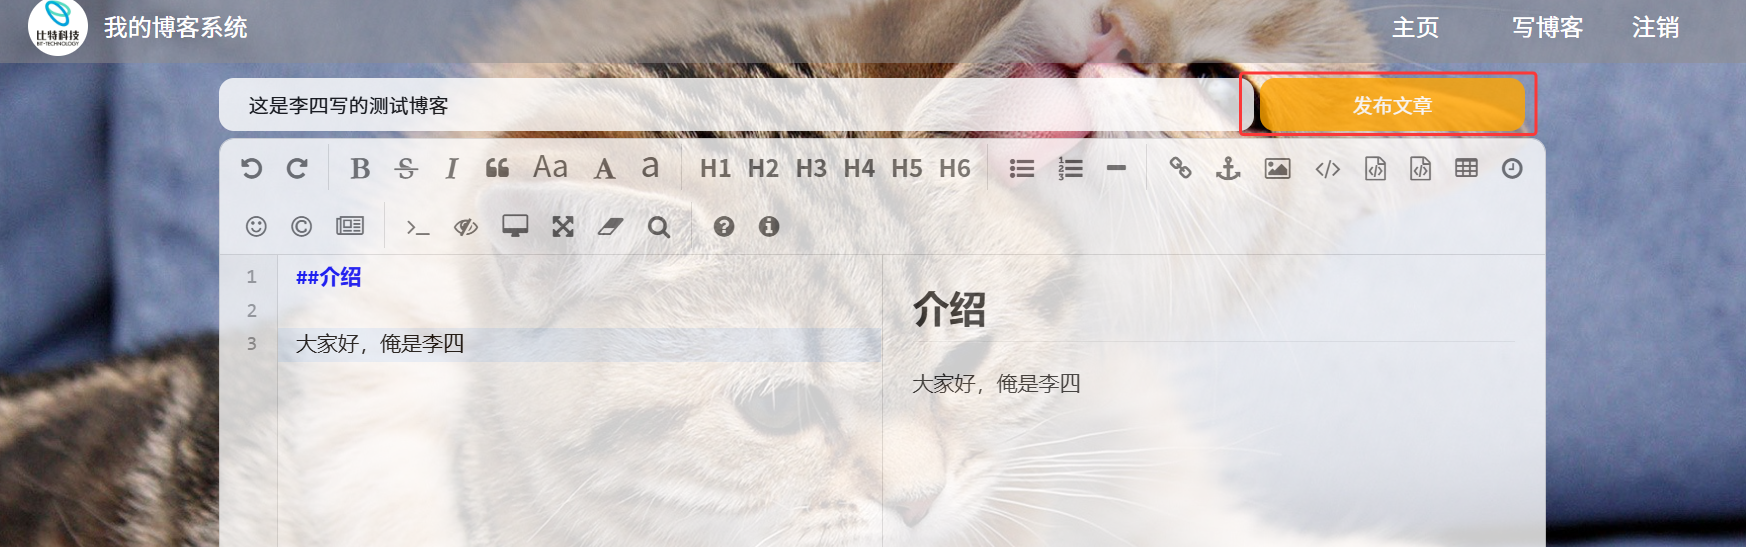
点击发布按钮,跳转页面:
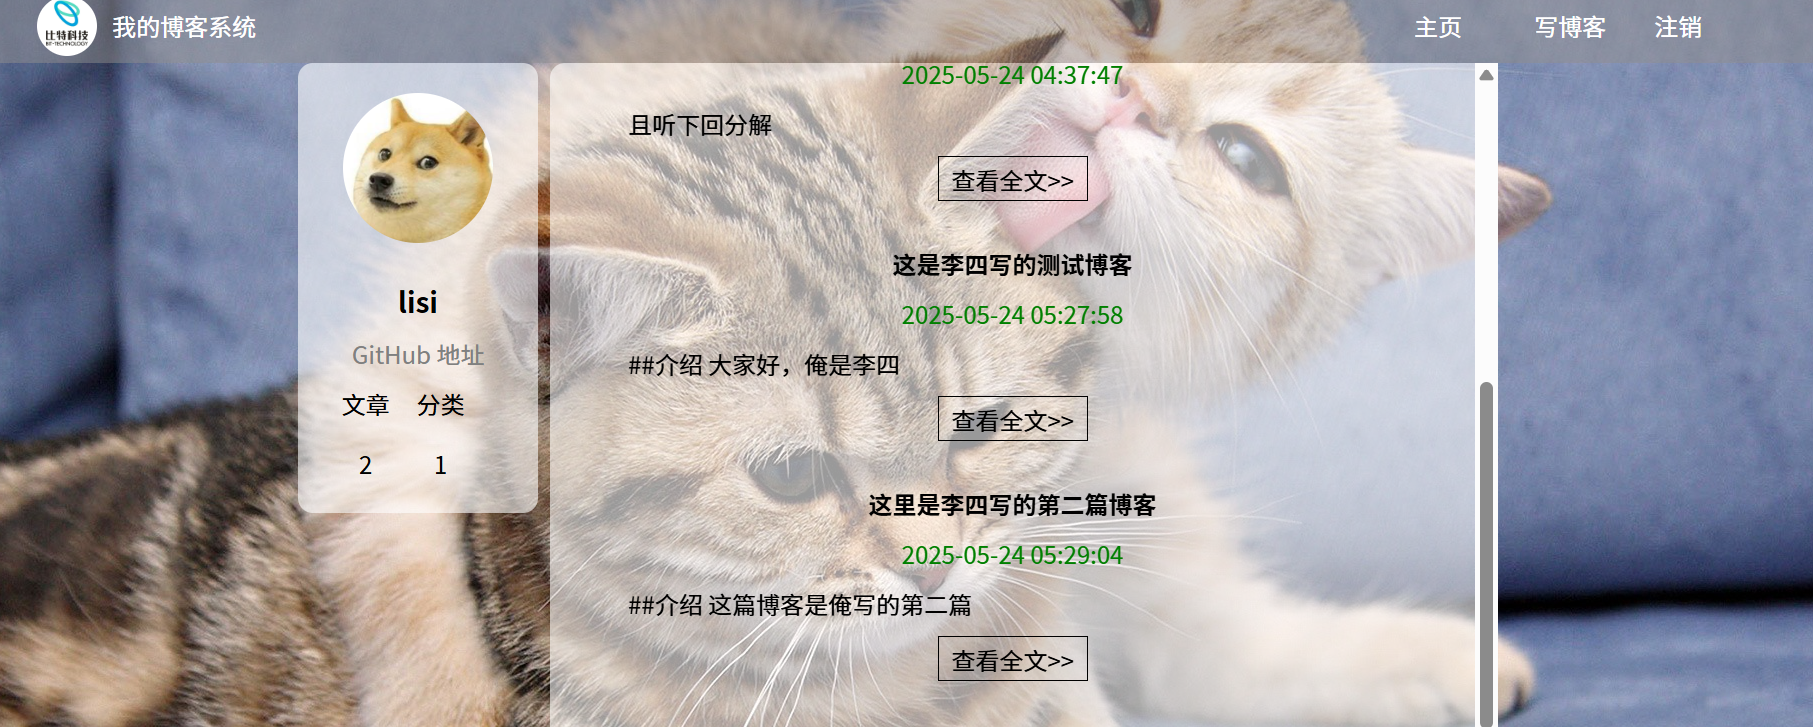
点击查看全文:
修改详情页显示
此时我们还发现一个问题,那就是博客发布后,内容并没有对特殊符号进行处理:
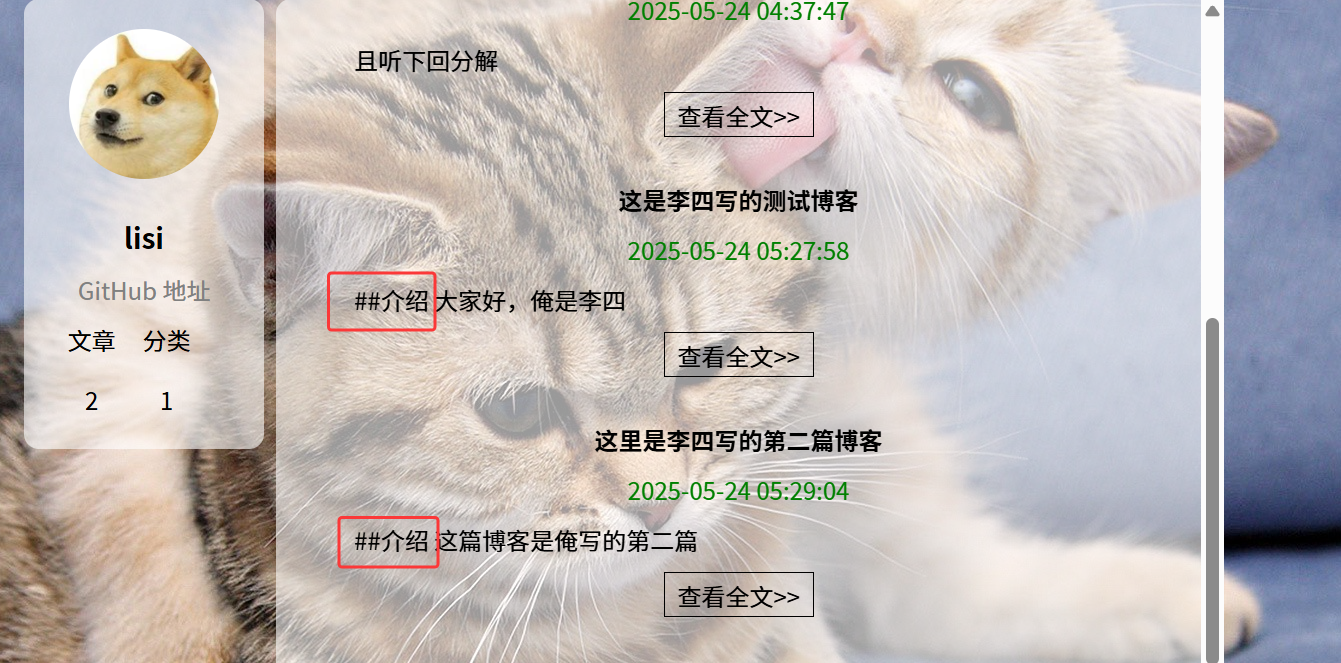
这个博客列表显示的内容,就需要后端截断一些内容,再显示到前端了,该功能后续再做;
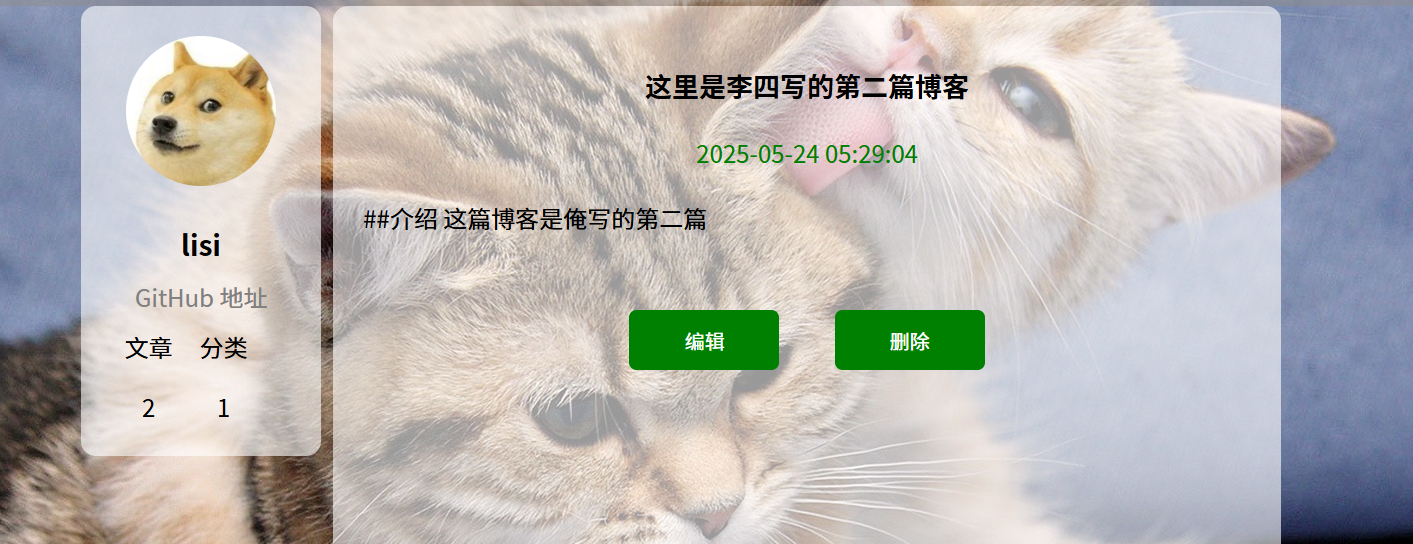
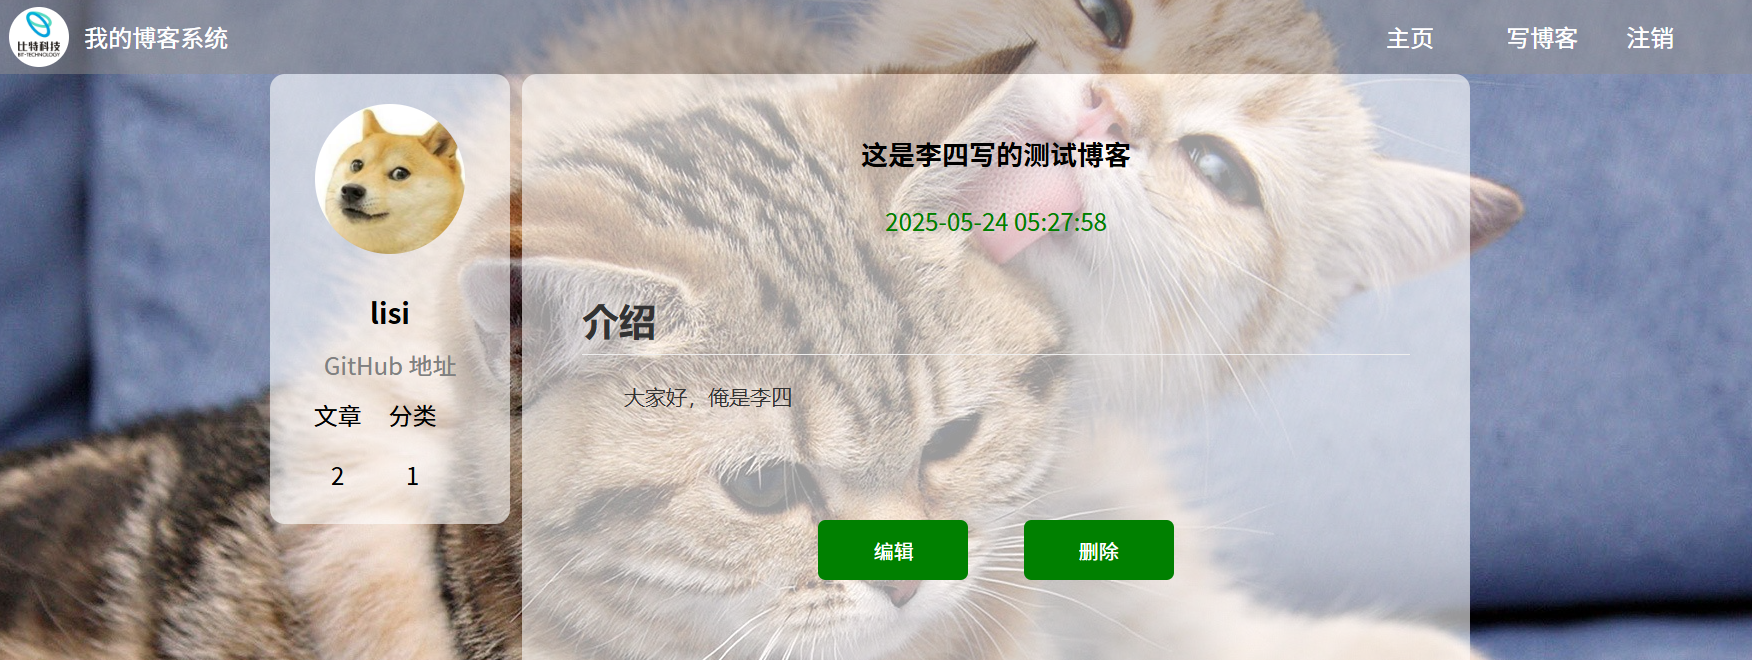
标签博客详情中,也没有把 markdown 语法渲染:
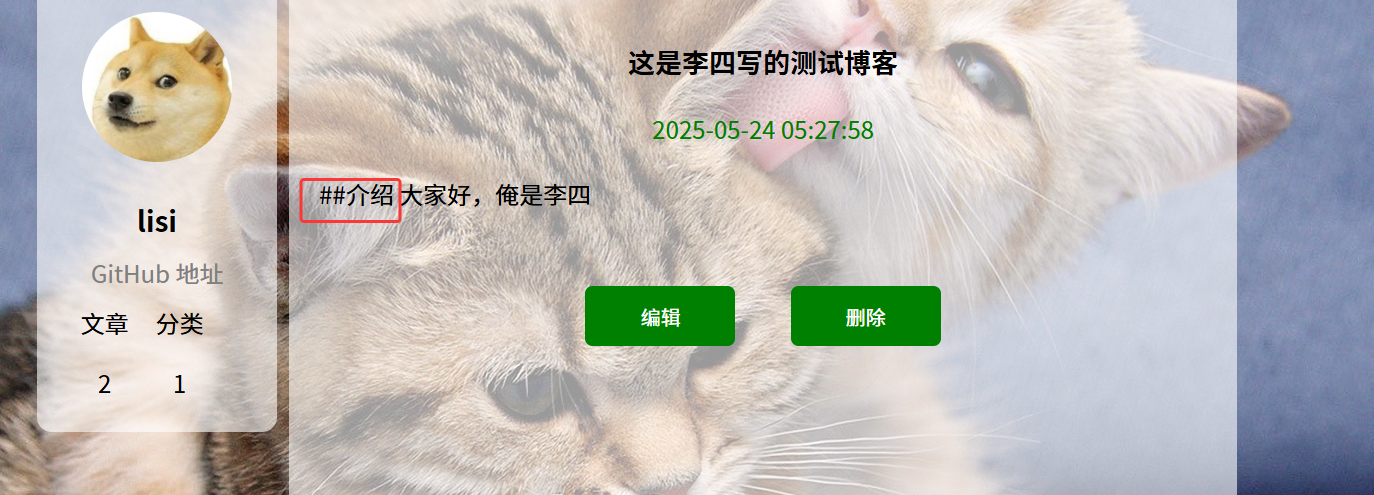
我们需要把markdown语法转为 HTML 语法;
我们先来实现博客详情页中,markdown 转 html 的功能;
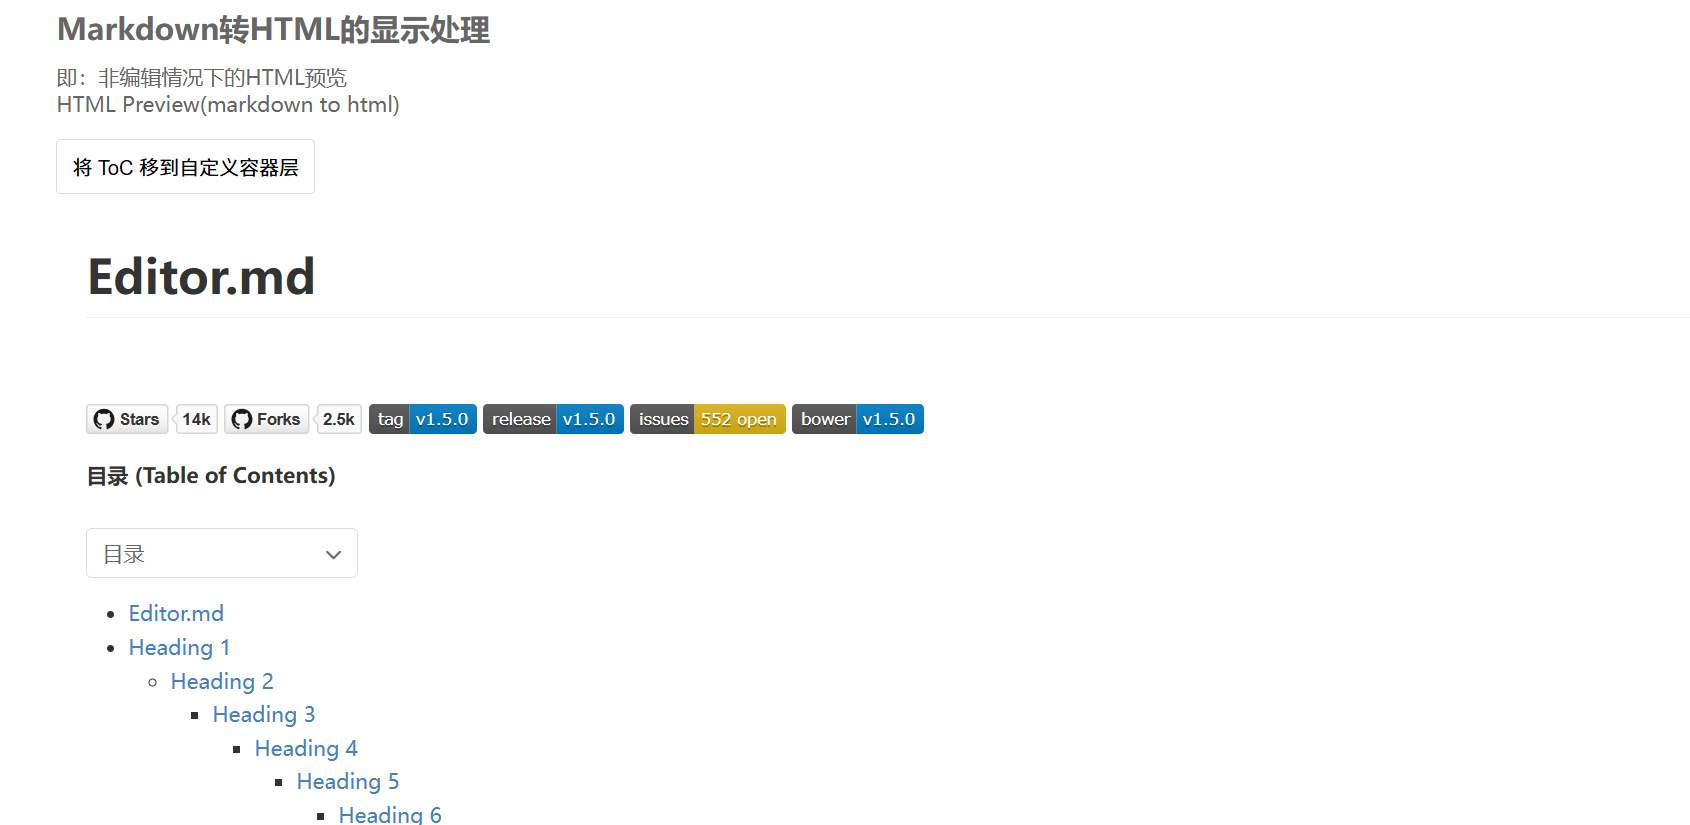
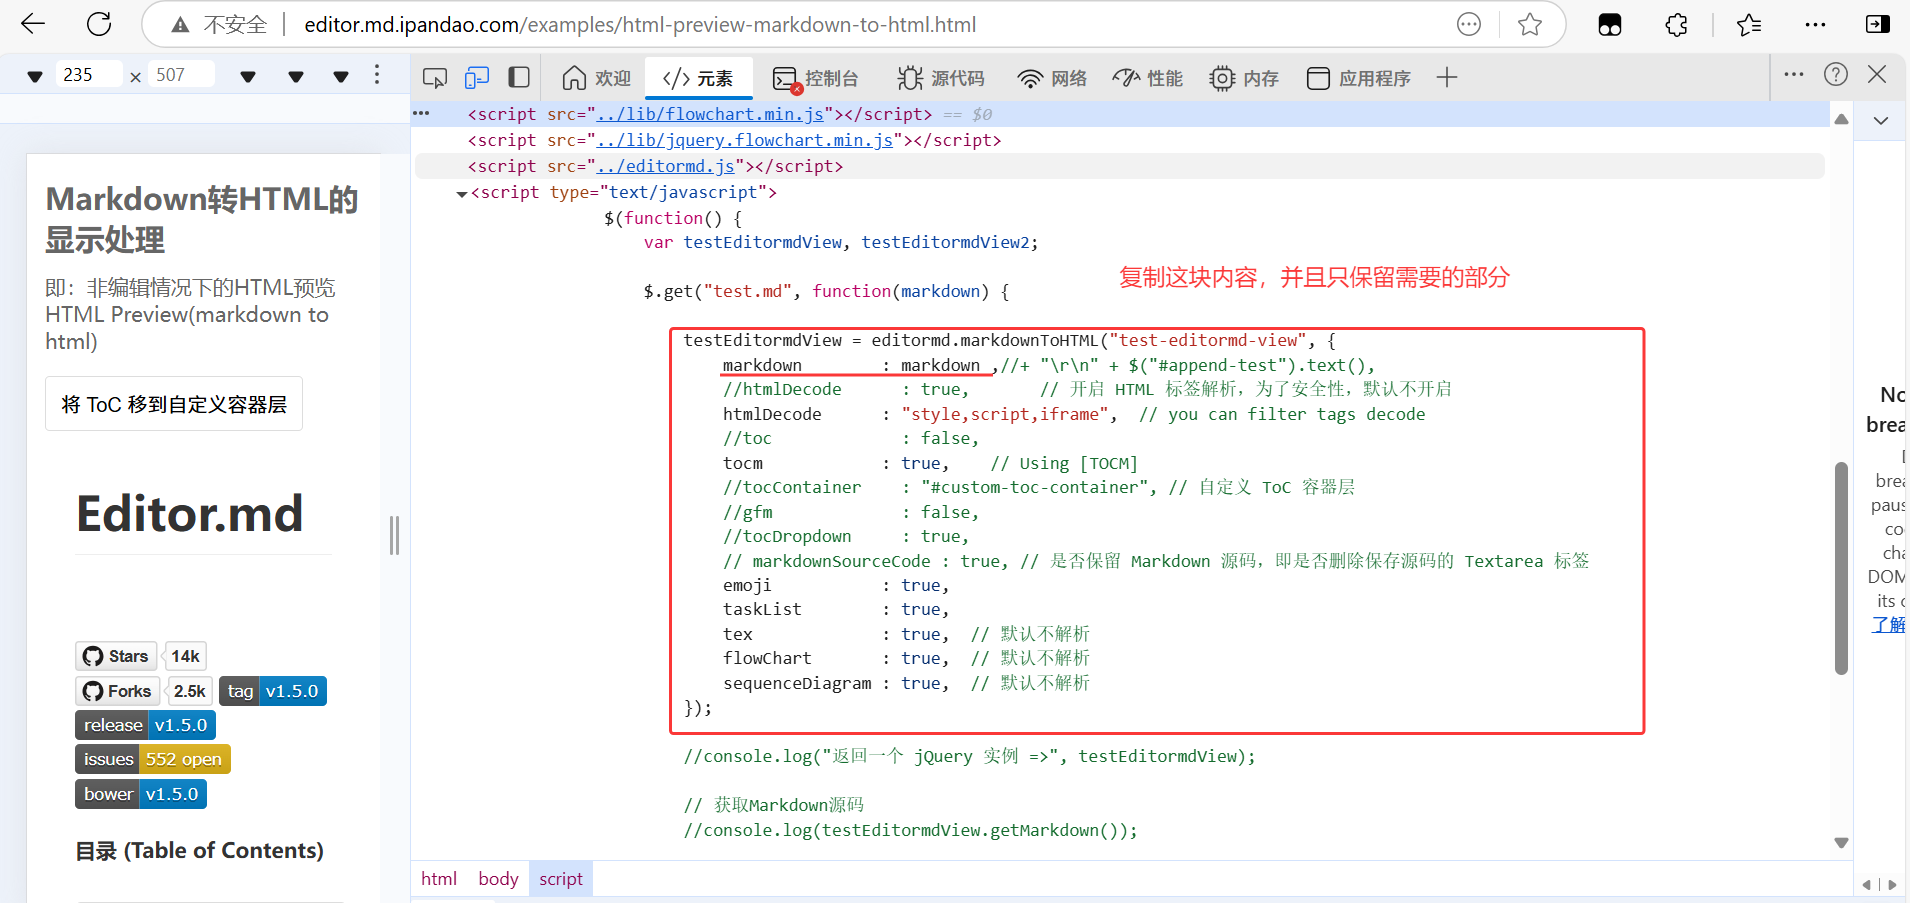
首先,找到 Editor.md 官网的 markdown 转 HTML 页面:
HTML Preview(markdown to html) - Editor.md examples
进入开发者模式,查看前端代码:
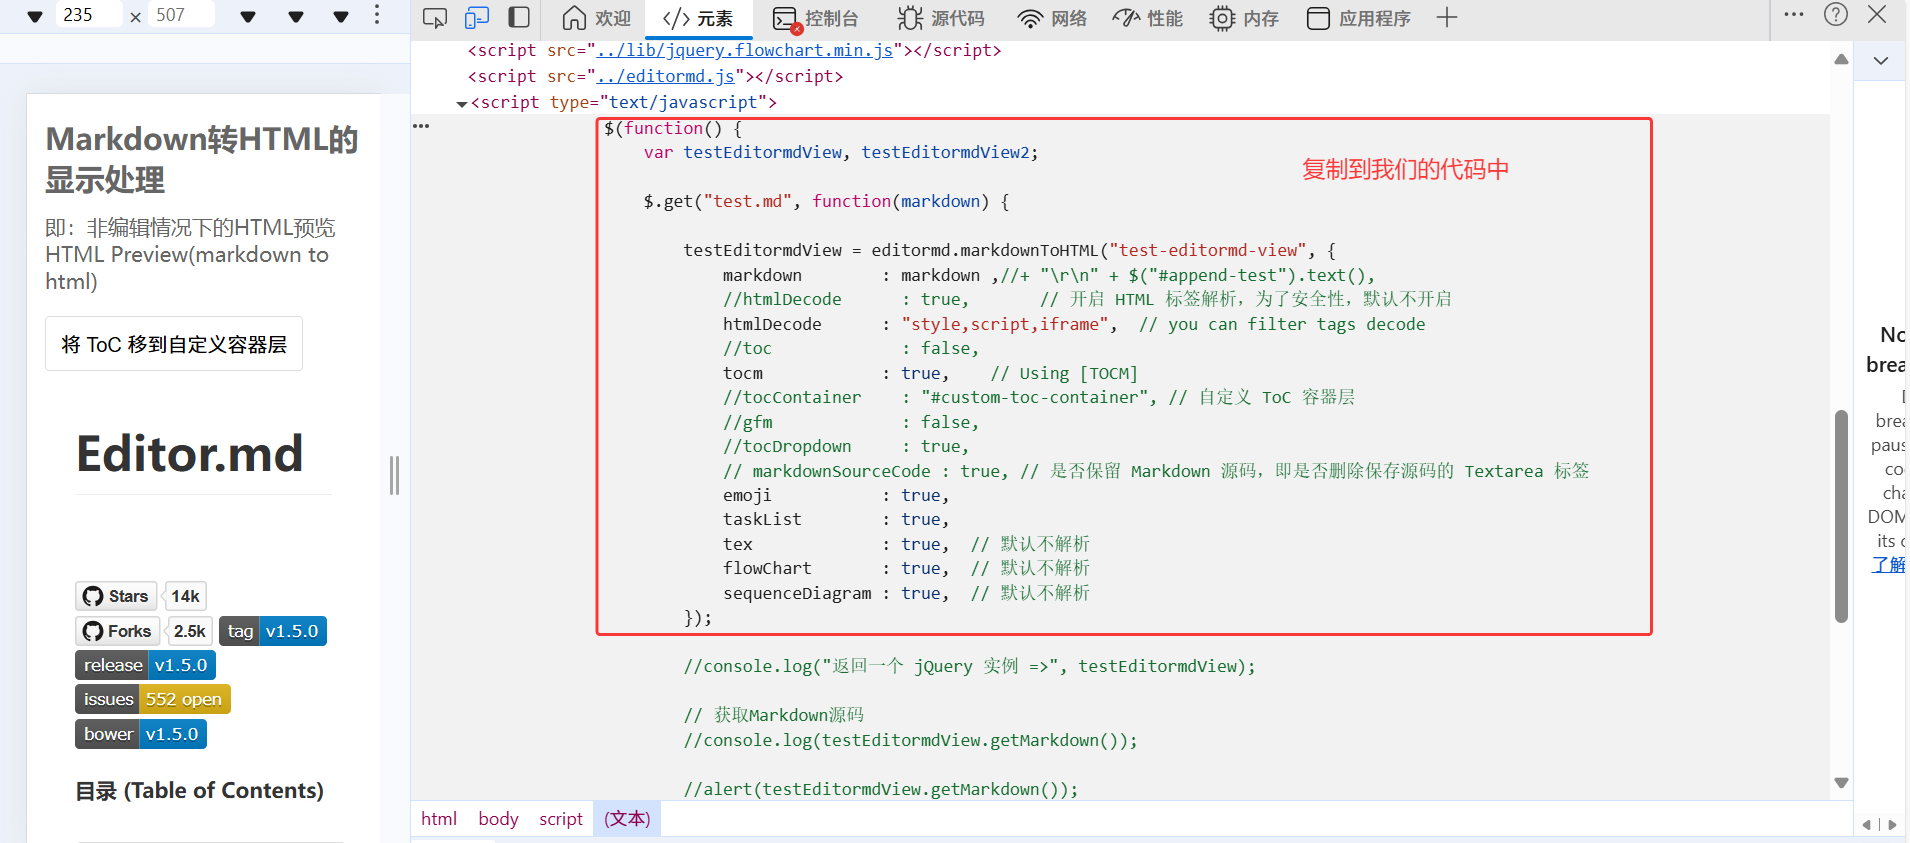
使用 editormd.markdownToHTML 方法,修改博客正文内容的显示,将 Markdown 内容转换为 HTML。
getBlogDetail();
function getBlogDetail(){
    $.ajax({
        type: "get",
        url: "/blog/getBlogDetail" + location.search,
        success: function (result){
            if(result.code == "FAIL"){
                alert(result.errMsg);
                return;
            }

            if(result.code == "SUCCESS" && result.data != null){
                $(".content .title").text(result.data.title);
                $(".content .date").text(result.data.createTime);

                // $(".content .detail").text(result.data.content);  (1) 先注掉这个代码

                // (2) 将数据库中的 content 先从 markdown 转为 html, 再把转好的 html 内容显示到前端页面中

                editormd.markdownToHTML("test-editormd-view", {
                    // (3) "test-editormd-view" 表示转化的 HTML 内容需要放置到哪里, 对应原来的 .content .detail
                    // (4) 注意, "test-editormd-view"  一个 id , 所以我们在 .content .detail 标签中多加一个 id
                    markdown : markdown ,
                });
            }
        }
    });
}
根据上面的注解 (4) ,修改 HTML 部分,将博客正文的 div 标签改为 <div id="detail">,并添加样式:

getBlogDetail();
function getBlogDetail(){
    $.ajax({
        type: "get",
        url: "/blog/getBlogDetail" + location.search,
        success: function (result){
            if(result.code == "FAIL"){
                alert(result.errMsg);
                return;
            }

            if(result.code == "SUCCESS" && result.data != null){
                $(".content .title").text(result.data.title);
                $(".content .date").text(result.data.createTime);
                editormd.markdownToHTML("detail", {
                    // (1) test-editormd-view 改为 detail
                    markdown : result.data.content ,
                    // (2) 右边的 markdown 改为 result.data.content
                });

            }
        }
    });
}
部署程序,观察效果
测试接口


 3511
3511

 被折叠的 条评论
为什么被折叠?
被折叠的 条评论
为什么被折叠?
 到【灌水乐园】发言


