


注册
首先打开雨云官网
雨云官网网址:https://www.rainyun.com/YZJ_?s=xxx

然后登录/注册雨云(登录/注册建在右上角)

如果没注册就点击下方注册,然后如果显示“正在使用优惠通道注册”就照常输入信息

没有则优惠码填“YZJ”

快速安装(小白)
首先,请导入1Panel第三方仓库
在1Panel后台点击“计划任务-创建计划任务”

执行周期建议每天一次
脚本内容中填入下方的源码
之后如果你的1Panel是通过雨云预装的面板,则无需修改任何地方,若自行安装且更改了安装位置,那么需要将下方app_local_dir="/opt/1panel/resource/apps/local"中的内容进行修改,使其能够指向1Panel安装目录下的资源目录-app目录-本地应用目录
完成后点击“执行”即可进行首次拉取,当然你也可以通过手动执行来提前触发cron
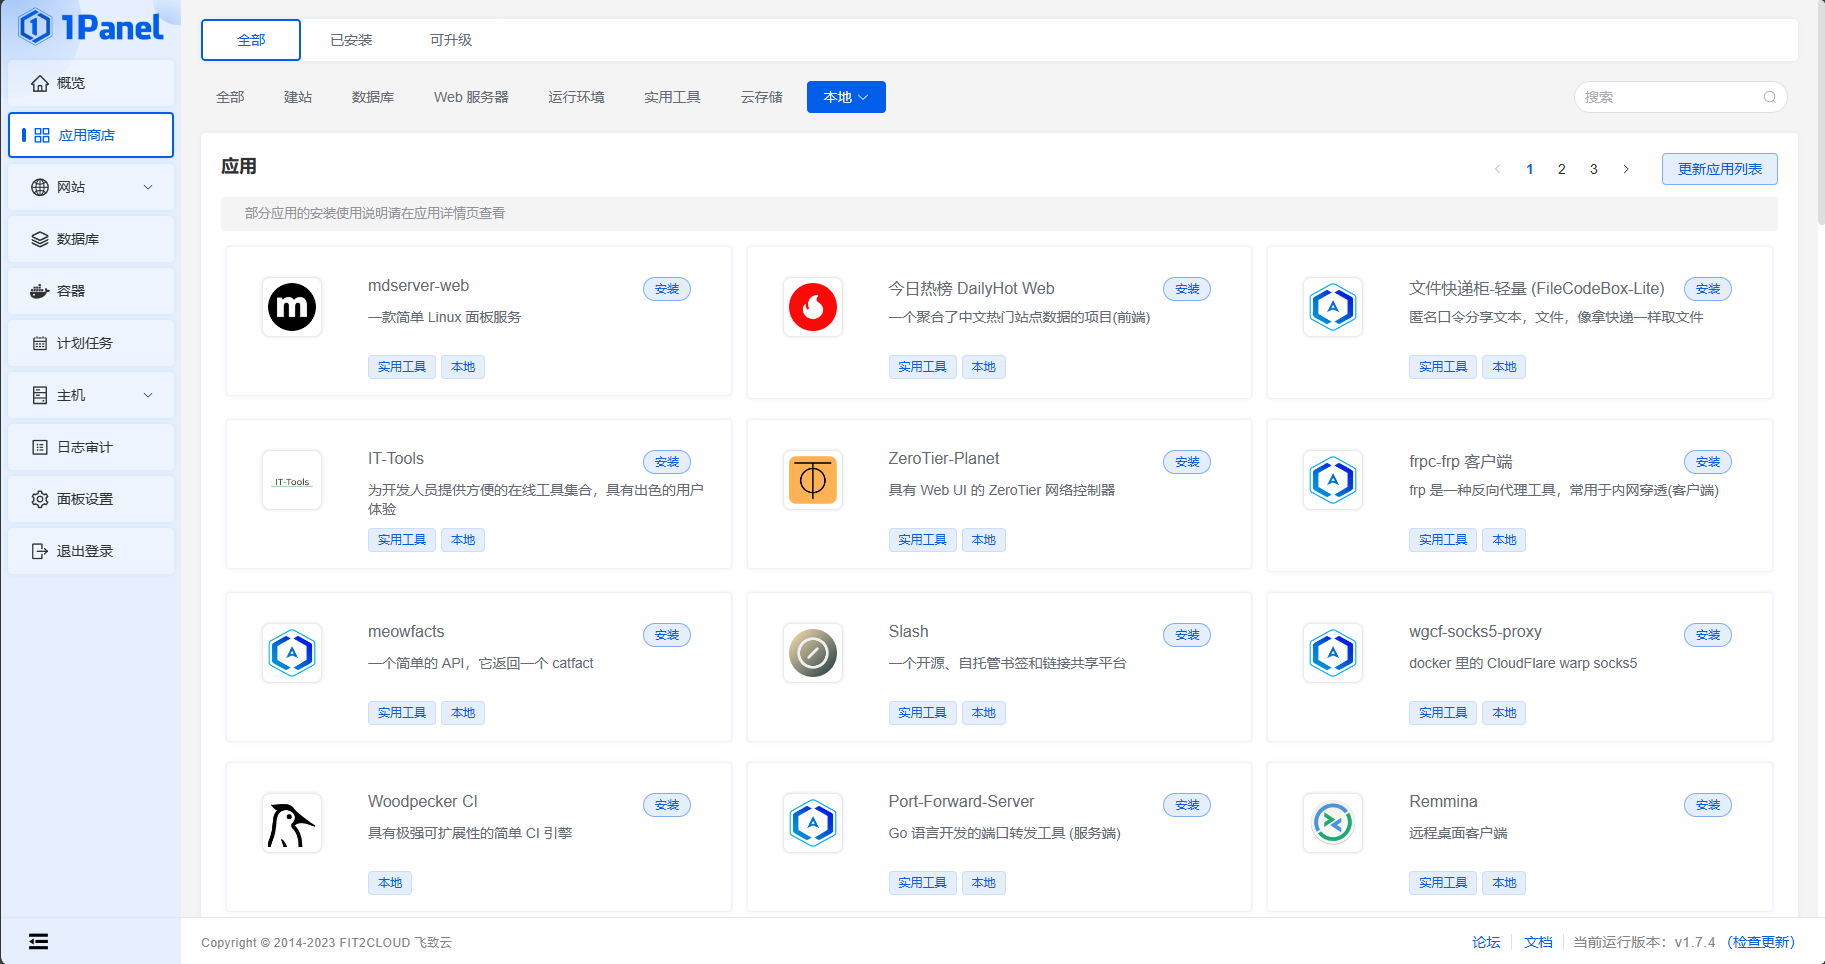
之后前往应用商店,点击右上角“更新应用列表”即可
#!/bin/bash # 这下面是修改配置的地方 # # 1panel本地app的目录(如果不是默认安装,需修改该目录) app_local_dir="/opt/1panel/resource/apps/local" # AppStore的git仓库地址(必选) # git_repo_url="https://github.com/xxxily/local-appstore-for-1Panel" # git_repo_url="https://github.com/1Panel-dev/appstore" git_repo_url="https://github.com/okxlin/appstore" # 访问git仓库的access token,访问私有仓库时用,优先级高于账密(可选) # 建议使用access token,降低账密泄露的风险 git_access_token="" # 访问git仓库的用户名,访问私有仓库时用(可选) git_username="" # 访问git仓库的密码,访问私有仓库时用(可选) git_password="" # 指定克隆的分支(可选) git_branch="" # 指定克隆的深度(可选) git_depth=1 # 拉取远程仓库前是否清空本地app目录(可选) clean_local_app=false # 拉取远程仓库前是否清空远程app缓存(可选) clean_remote_app_cache=false # 设置克隆或拉取远程仓库时使用的代理(可选) proxyUrl="" # 设置示例: # proxyUrl="http://127.0.0.1:7890" # proxyUrl="socks5://127.0.0.1:7890" # proxyUrl="socks5://user:password@host:port" # 将远程app store工程克隆到本地的工作目录 work_dir="/opt/1panel/appstore" # 获取系统信息 os_info=$(uname -a) # 检查是否为Debian系统 if [[ "$os_info" == *"Debian"* ]]; then echo "检测到Debian环境,执行特殊设置" chmod +x /usr/bin/bash sudo su $@ else echo "非Debian,跳过特殊设置" fi # 检测Git是否已安装 echo "检测Git是否安装" if ! command -v git &> /dev/null; then echo "Git未找到,开始安装..." # # apt版 if [[ -f /etc/apt/sources.list ]]; then sudo apt-get update sudo apt-get install git -y fi # yum版 if [[ -f /etc/yum.repos.d/CentOS-Base.repo ]]; then sudo yum install git -y fi echo "Git安装完成." else echo "Git已安装." fi set -e mkdir -p "$work_dir/logs" log_file="$work_dir/logs/local_appstore_sync_helper_$(date +"%Y-%m-%d").log" logs() { local message="$1" if [ -n "$log_file" ]; then mkdir -p "$(dirname "$log_file")" if [ $? -eq 0 ]; then echo -e "[$(date +"%Y-%m-%d %H:%M:%S")] $message" echo "[$(date +"%Y-%m-%d %H:%M:%S")] $message" >>"$log_file" return fi fi echo -e "$message" } # 函数: url_encode # 参数: # - url: 需要进行编码的字符串 # 返回值: # 经过URL编码后的字符串 function url_encode() { local string=$1 local length="${#string}" local url_encoded_string="" local c for ((i = 0; i < length; i++)); do c=${string:i:1} case "$c" in [a-zA-Z0-9.~_-]) url_encoded_string+=$c ;; *) url_encoded_string+=$(printf '%%%02X' "'$c") ;; esac done echo "$url_encoded_string" } # 定义函数,接收一个URL参数和可选的替换字符串参数 replace_protocol() { local url=$1 local replacement=$2 # 如果没有提供替换字符串,则删除"http://"或"https://" if [[ -z $replacement ]]; then local new_url=$(echo $url | sed "s/http:\/\///" | sed "s/https:\/\///") else local new_url=$(echo $url | sed "s/http:\/\//${replacement}/" | sed "s/https:\/\//${replacement}/") fi # 输出替换后的URL echo $new_url } # 函数: clone_git_repo # 参数: # - url: Git仓库URL # - username: 账号(可选) # - password: 密码(可选) # - access_token: 访问令牌(可选) # - branch: 克隆分支(可选) # - depth: 克隆深度(可选,默认为0,即克隆整个仓库) function clone_git_repo() { local url=$1 local username=$2 local password=$3 local access_token=$4 local branch=$5 local depth=$6 branch=${branch:+--branch $branch} depth=${depth:+--depth $depth} echo "branch: $branch, depth: $depth" if [[ -n $access_token ]]; then echo "use access_token to clone" local fix_url=$(replace_protocol "$url") git clone "https://oauth2:$access_token@$fix_url" $branch $depth elif [[ -n $username && -n $password ]]; then local encoded_username=$(url_encode "$username") local encoded_password=$(url_encode "$password") local fix_url=$(replace_protocol "$url") # echo "use username and password to clone, encoded_username: $encoded_username, encoded_password: $encoded_password, fix_url: $fix_url" echo "use username and password to clone" git clone "https://$encoded_username:$encoded_password@$fix_url" $branch $depth else echo "use default clone" git clone "$url" $branch $depth fi } # 取消代理 function proxy_off() { unset http_proxy unset https_proxy unset ALL_PROXY unset no_proxy logs "Proxy Off" } # 开启代理 function proxy_on() { proxy_url="http://127.0.0.1:7890" match_str="://" if [ -n "$1" ]; then if [[ $1 =~ $match_str ]]; then proxy_url=$1 else logs "Incorrect proxy_url, use defualt proxy_url" return fi fi export http_proxy=$proxy_url export https_proxy=$proxy_url export ALL_PROXY=$proxy_url export no_proxy="localhost,127.0.0.1,localaddress,.localdomain.com" logs "Proxy On $proxy_url" } function scriptInfo() { echo "" logs "##################################################################" logs "# Name: local appstore sync helper for 1Panel #" logs "# Version: v1.0.1 #" logs "# Author: xxxily #" logs "# Author: BiliWind #" logs "# Github: https://github.com/xxxily/local-appstore-for-1Panel #" logs "##################################################################" echo "" } function main() { scriptInfo if [ ! -d "$app_local_dir" ]; then logs "未检测到1panel的app目录,请检查1panel是否安装正确,或修改脚本中的app_local_dir变量" exit 1 fi # 检查地址结尾是否包含.git,如果不包含则自动补全 if [[ "$git_repo_url" != *".git" ]]; then git_repo_url="${git_repo_url}.git" fi local repo_username="" local repo_projectname="" # 使用正则表达式匹配仓库地址中的用户名和项目名 if [[ $git_repo_url =~ .*\/(.*)\/(.*)\.git ]]; then repo_username=${BASH_REMATCH[1]} repo_projectname=${BASH_REMATCH[2]} # logs "用户名: $repo_username" # logs "项目名: $repo_projectname" fi if [ -z "$repo_username" ] || [ -z "$repo_projectname" ]; then logs "无法提取用户名和项目名,请检查git_repo_url变量提供的地址是否正确" exit 1 fi mkdir -p "$work_dir/temp" local repo_user_dir="$work_dir/temp/$repo_username" local repo_dir="$repo_user_dir/$repo_projectname" # 根据clean_remote_app_cache变量的值决定是否清空远程app的缓存数据 if [ "$clean_remote_app_cache" = true ] && [ -d "$repo_dir" ]; then rm -rf "$repo_dir" logs "已清空远程app的缓存数据" fi # 根据proxyUrl变量的值决定是否开启代理 if [ -n "$proxyUrl" ]; then proxy_on "$proxyUrl" fi # clone或拉取远程仓库最新代码 logs "准备获取远程仓库最新代码:$git_repo_url" if [ -d "$repo_dir" ]; then logs "执行git pull操作" cd "$repo_dir" # 强行拉取最新代码 git pull --force 2>>"$log_file" else logs "执行git clone操作" mkdir -p "$repo_user_dir" cd "$repo_user_dir" clone_git_repo "$git_repo_url" "$git_username" "$git_password" "$git_access_token" "$git_branch" "$git_depth" 2>>"$log_file" fi logs "远程仓库最新代码获取完成" if [ ! -d "$repo_dir/apps" ]; then logs "未检测到apps目录,请检查远程仓库是否正确" exit 1 fi # 根据clean_local_app变量的值决定是否清空本地app目录 if [ "$clean_local_app" = true ]; then rm -rf "$app_local_dir"/* logs "已清空本地原有的app" fi # 将远程仓库的apps目录下的所有app复制到本地app_local_dir目录下 cd "$repo_dir" cp -rf apps/* "$app_local_dir" pwd ls -lah du -sh # 根据clean_remote_app_cache变量的值决定是否清空远程app的缓存数据 if [ "$clean_remote_app_cache" = true ]; then rm -rf "$repo_dir" fi if [ -n "$proxyUrl" ]; then proxy_off fi logs "1panel本地app同步成功,enjoy it!" } main "$@" logs "脚本由BiliWind-风屿岛站长二改,尊重开源,请不要删除或修改原作者、二改者信息"
之后在应用商店种找到

点击安装,如果使用反向代理的方式使用域名访问,那么无需勾选端口外部访问,如果你希望使用ip:port访问,那么需要勾选
进阶玩法(小白勿入)
首先,安装nodejs
Download | Node.js (nodejs.org)
进入官网下载页后,右击Linux Binaries (x64)后方的下载按钮,选择复制链接
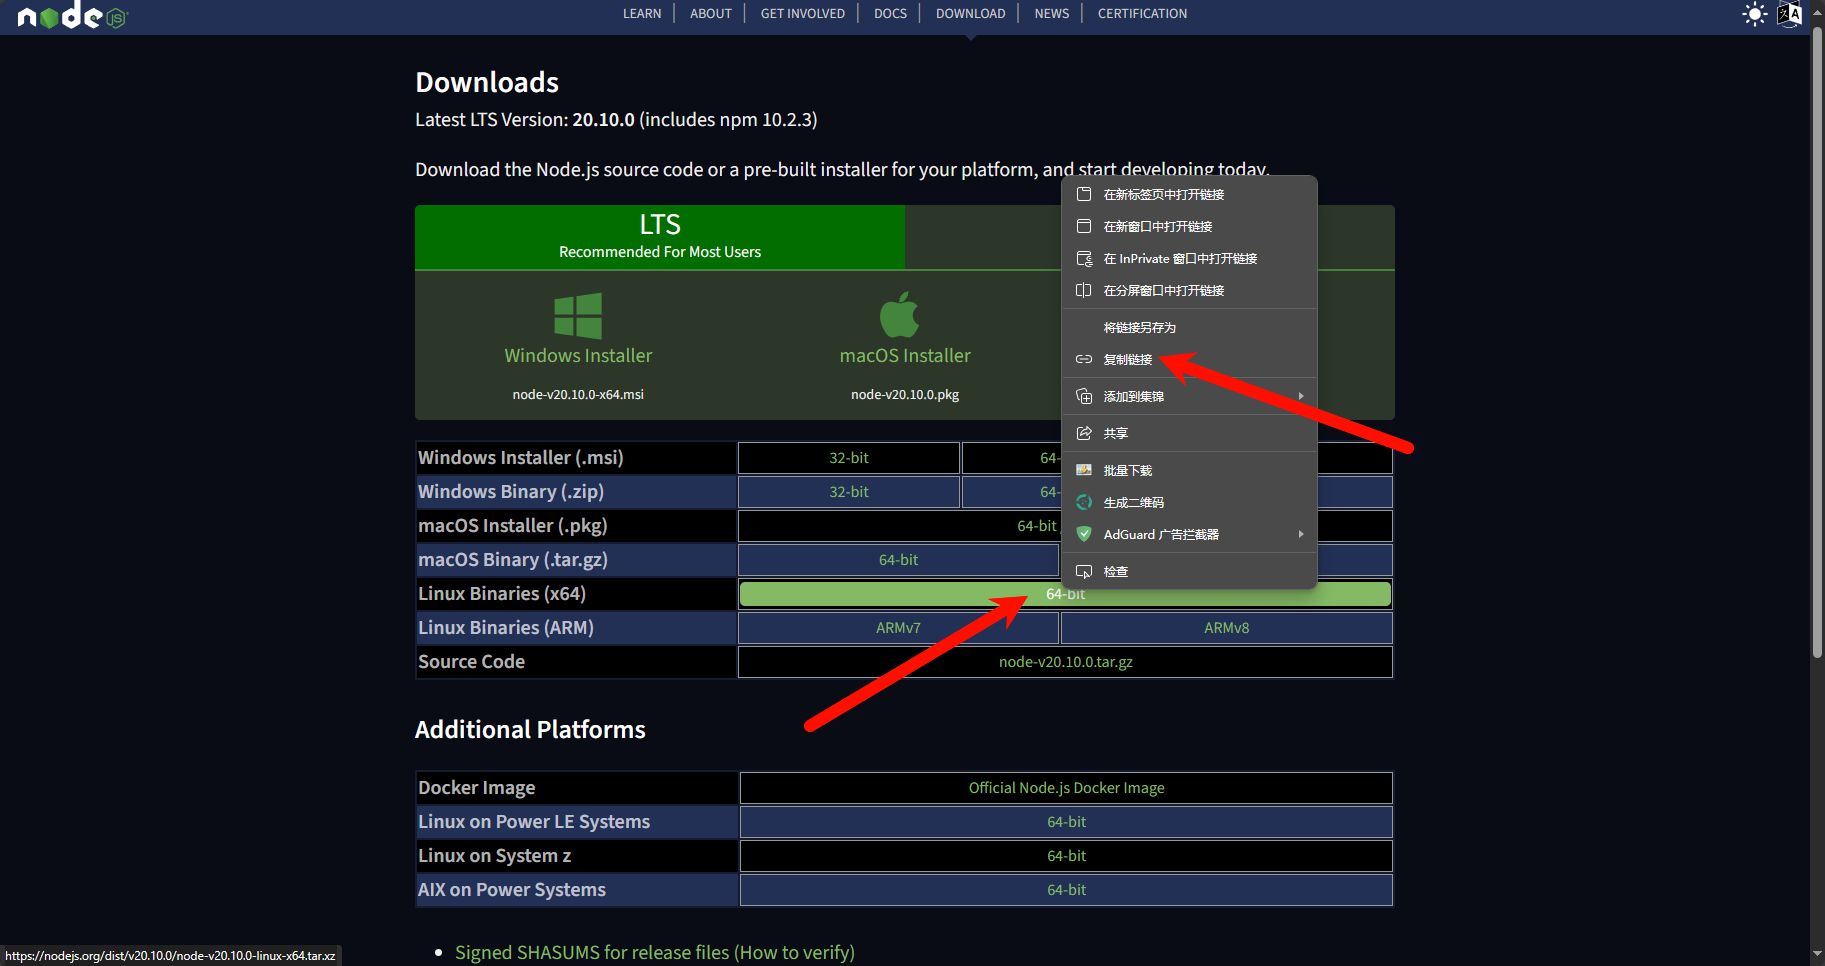
回到终端,使用wget命令下载此文件
使用tar命令解压文件
tar -xvf node-v20.10.0-linux-x64.tar.xz
编辑.bashrc文件
vim /root/.bashrc
在最后一行添加export PATH=$PATH:,并且在冒号后面拼接刚刚解压文件路径种的bin目录,也就是执行pwd后输出的目录加上版本名和/bin
例如此处执行pwd后输出的是/root/nodejs,版本名是node-v20.10.0-linux-x64,那么最终拼接完成的应该是/root/nodejs/node-v20.10.0-linux-x64/bin

保存并退出后刷新bashrc文件
source /root/.bashrc
随后执行node -v应该已经可以看到版本号输出

或者可以使用nvm来安装
nvm install v20.10.0
之后执行corepack enable
然后clone源码到本地
git clone https://github.com/Lissy93/web-check.git
进入目录
cd web-check
启动开发服务器(可选)
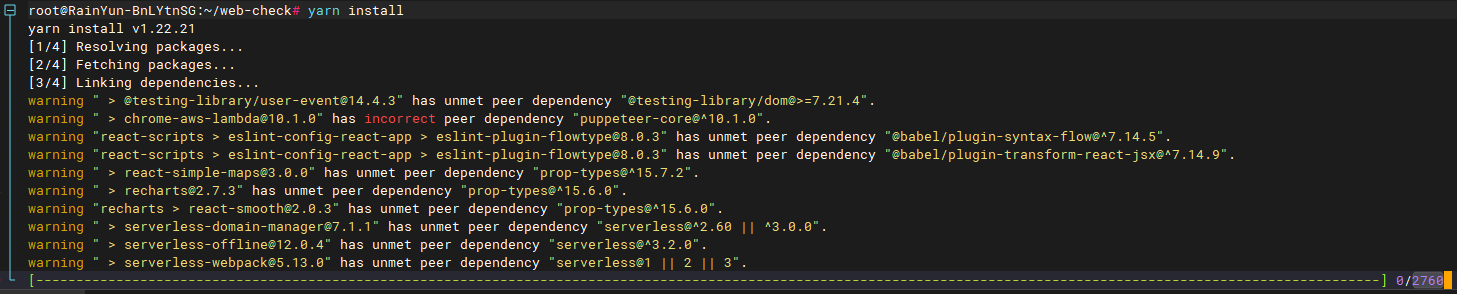
安装依赖
yarn

yarn dev
直接构建
yarn install
yarn build
yarn serve
Docker
在刚刚git clone后,其中也包含了 Dockerfile,可以直接进行构建
环境变量
官方提供了.env文件,可以在里面自定义环境变量,以下是官方对于各个环境变量用处的原话:
GOOGLE_CLOUD_API_KEY - A Google API key (get here). This can be used to return quality metrics for a site REACT_APP_SHODAN_API_KEY - A Shodan API key (get here). This will show associated host names for a given domain REACT_APP_WHO_API_KEY - A WhoAPI key (get here). This will show more comprehensive WhoIs records than the default job SECURITY_TRAILS_API_KEY - A Security Trails API key (get here). This will show org info associated with the IP CLOUDMERSIVE_API_KEY - API key for Cloudmersive (get here). This will show known threats associated with the IP TRANCO_USERNAME - A Tranco email (get here). This will show the rank of a site, based on traffic TRANCO_API_KEY - A Tranco API key (get here). This will show the rank of a site, based on traffic URL_SCAN_API_KEY - A URLScan API key (get here). This will fetch miscalanious info about a site BUILT_WITH_API_KEY - A BuiltWith API key (get here). This will show the main features of a site TORRENT_IP_API_KEY - A torrent API key (get here). This will show torrents downloaded by an IP
具体请见GitHub - Lissy93/web-check: 🕵️♂️ All-in-one OSINT tool for analysing any website 1
可以在执行docker run时加入--env-file .env来使用当前目录下的.env文件


 710
710


 被折叠的 条评论
为什么被折叠?
被折叠的 条评论
为什么被折叠?
 到【灌水乐园】发言


