


为什么用pve
PVE 使用 KVM 作为虚拟机管理程序,它是基于内核的虚拟化技术,支持创建和管理全虚拟化的虚拟机。
KVM 支持多种操作系统(如 Linux、Windows、BSD 等),并且能高效地管理硬件资源。
Web管理界面:PVE提供直观的Web界面,使用户可以轻松地管理虚拟机、容器、存储、网络等资源。
集群支持:PVE允许多台物理服务器组成高可用性集群,提供负载均衡和故障转移功能,保证系统的稳定性和可靠性。
存储管理:支持多种存储类型,包括本地存储 NFS、iSCSI、Ceph等,使用户能够根据需求灵活管理数据存储。
网络管理:PVE提供网络配置工具,允许用户创建虚拟网络和VLAN,实现网络隔离和流量控制。
备份与恢复:PVE内置备份与还原功能,用户可以轻松创建和恢复虚拟机和容器的快照,保证数据的安全性。
性能监控:PVE提供性能监控工具,帮助用户实时查看系统资源使用情况,优化系统性能。
pve的安装
可以,使用裸机在硬件上安装Proxmox VE,也可以在现有的Debian安装之上安装。
裸机安装pve流程
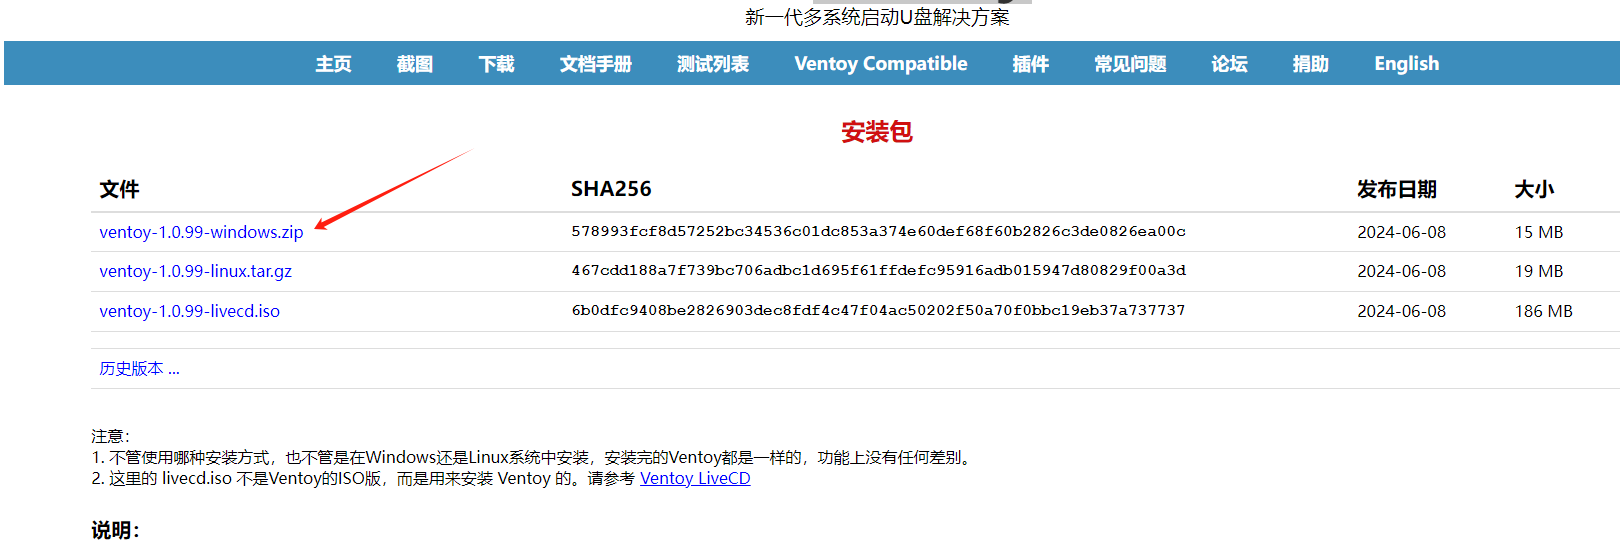
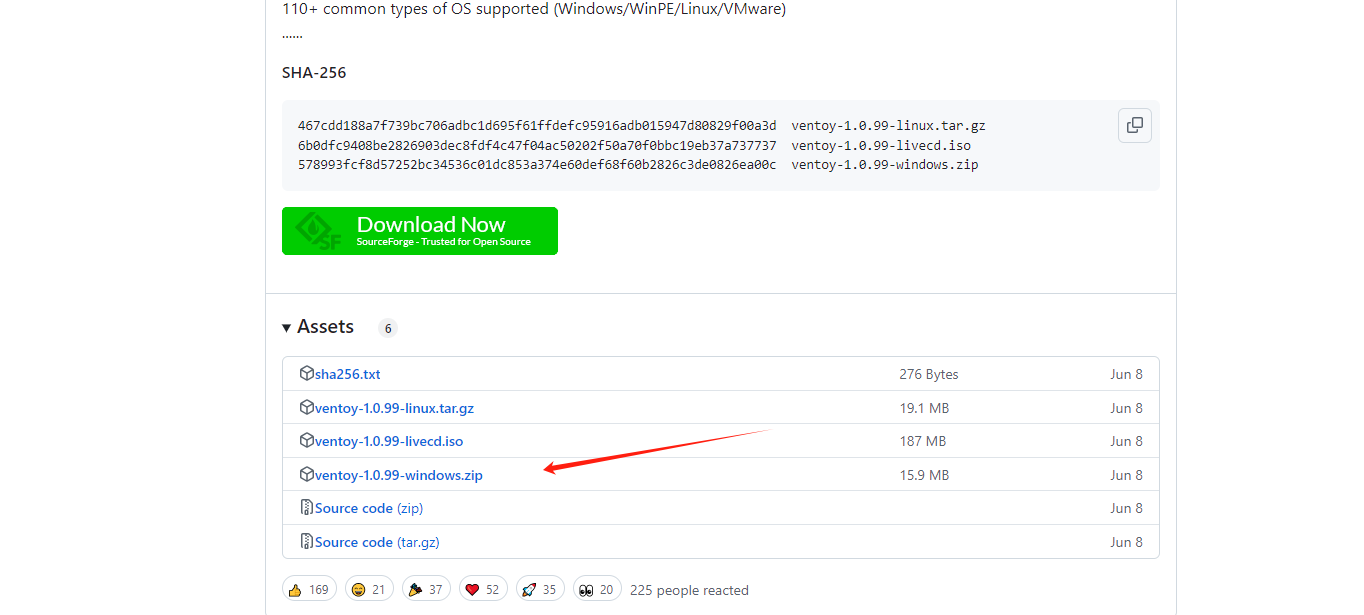
1.Ventoy制作启动镜像
镜像下载地址:
https://www.ventoy.net/cn/download.html
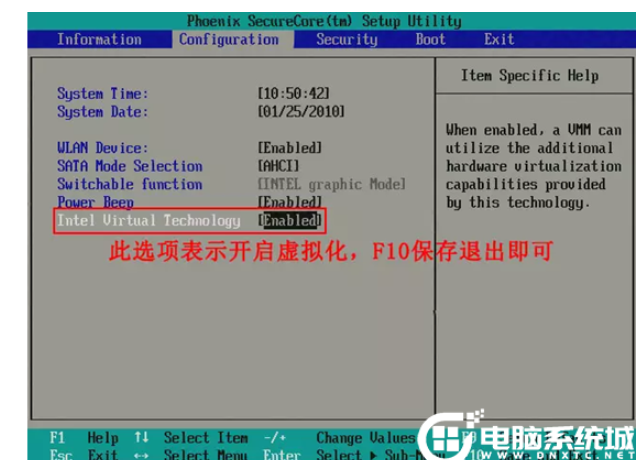
2.启动主机进入BIOS页面
进入系统BIOS菜单
1. 打开主板的虚拟化VT 联想主机默认是拒绝的 这个必须打开不然初始化失败
2. 设置USB 启动 进入 Ventoy
vmware 中也可以安装
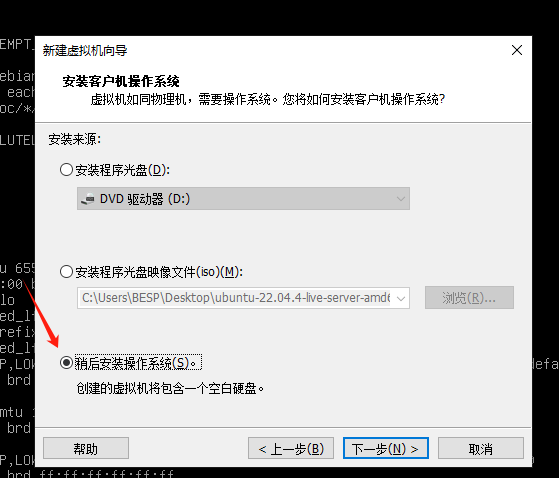
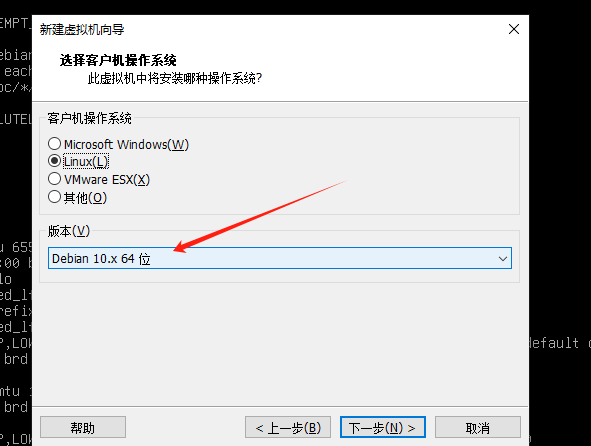
应为pve底层用的Debian系统所以选择debian
然后一直点下一步 建议内存8g cpu4核
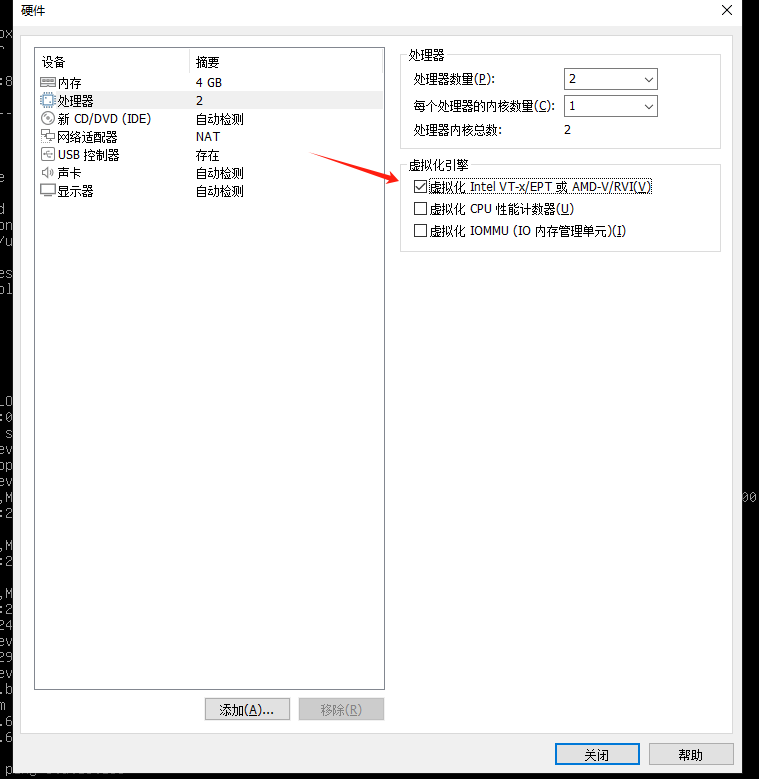
这里非常重要的地方,因为pve需要进行虚拟化 所以我们需要开启网卡的虚拟化
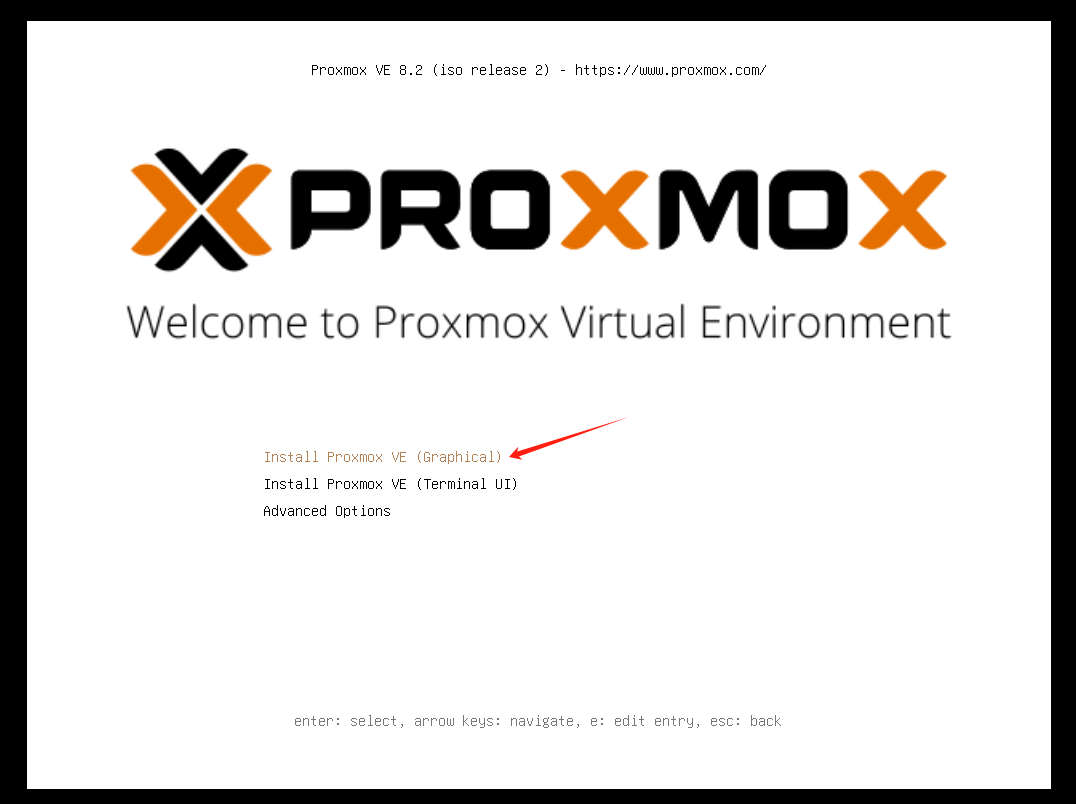
启动程序选择图形化安装
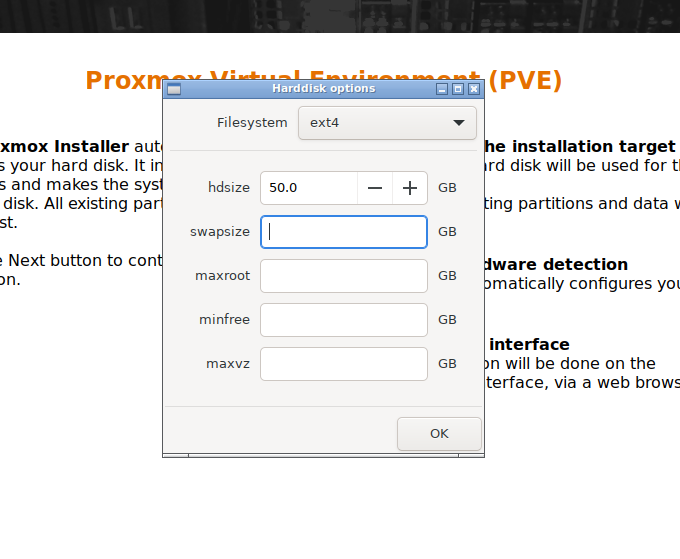
也可以自定义
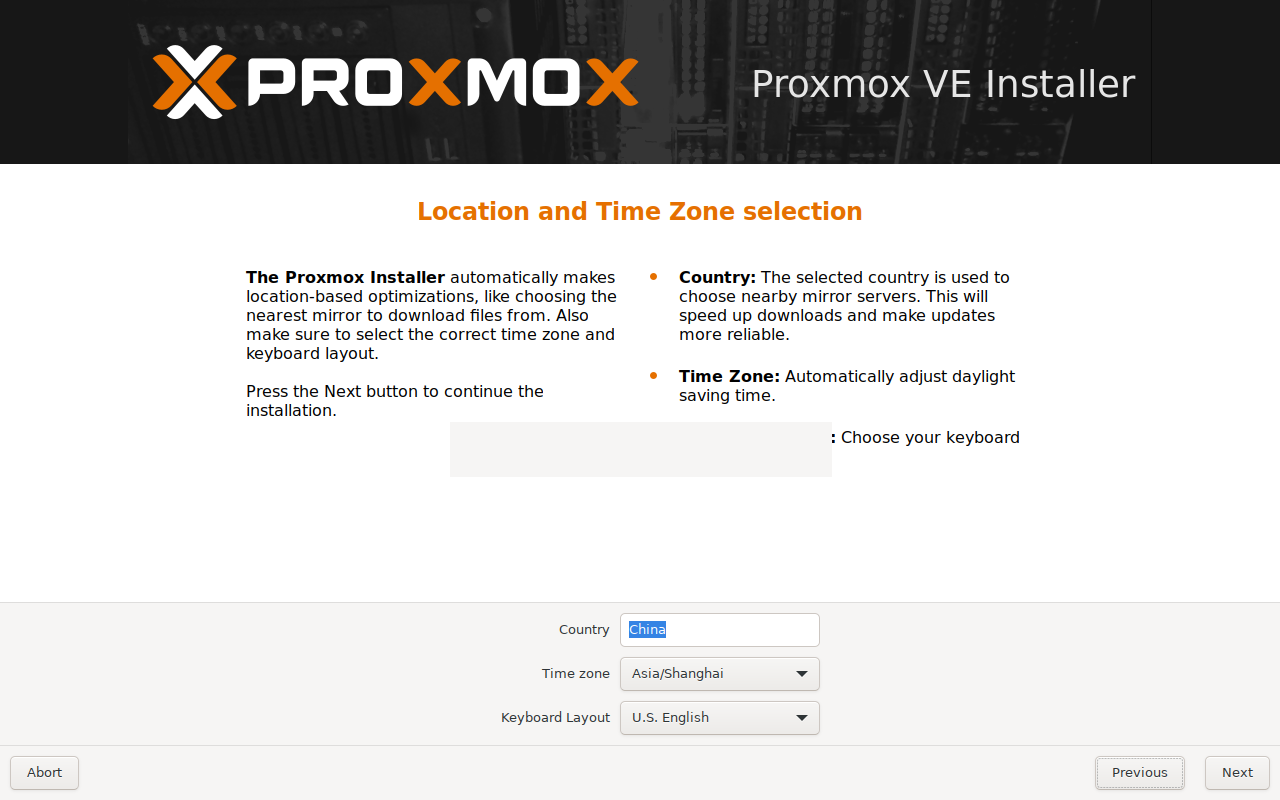
选择China 时区上海 语言英语
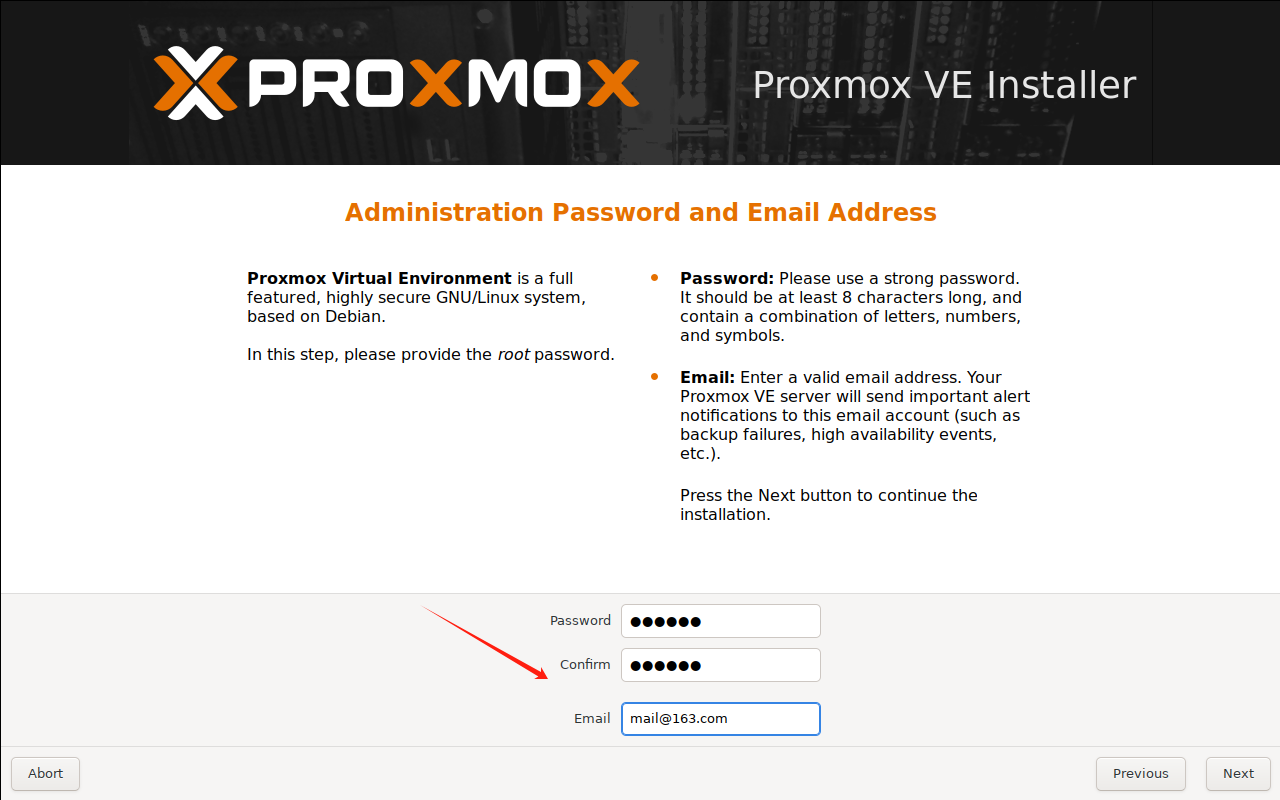
设置root密码以及随便的邮箱
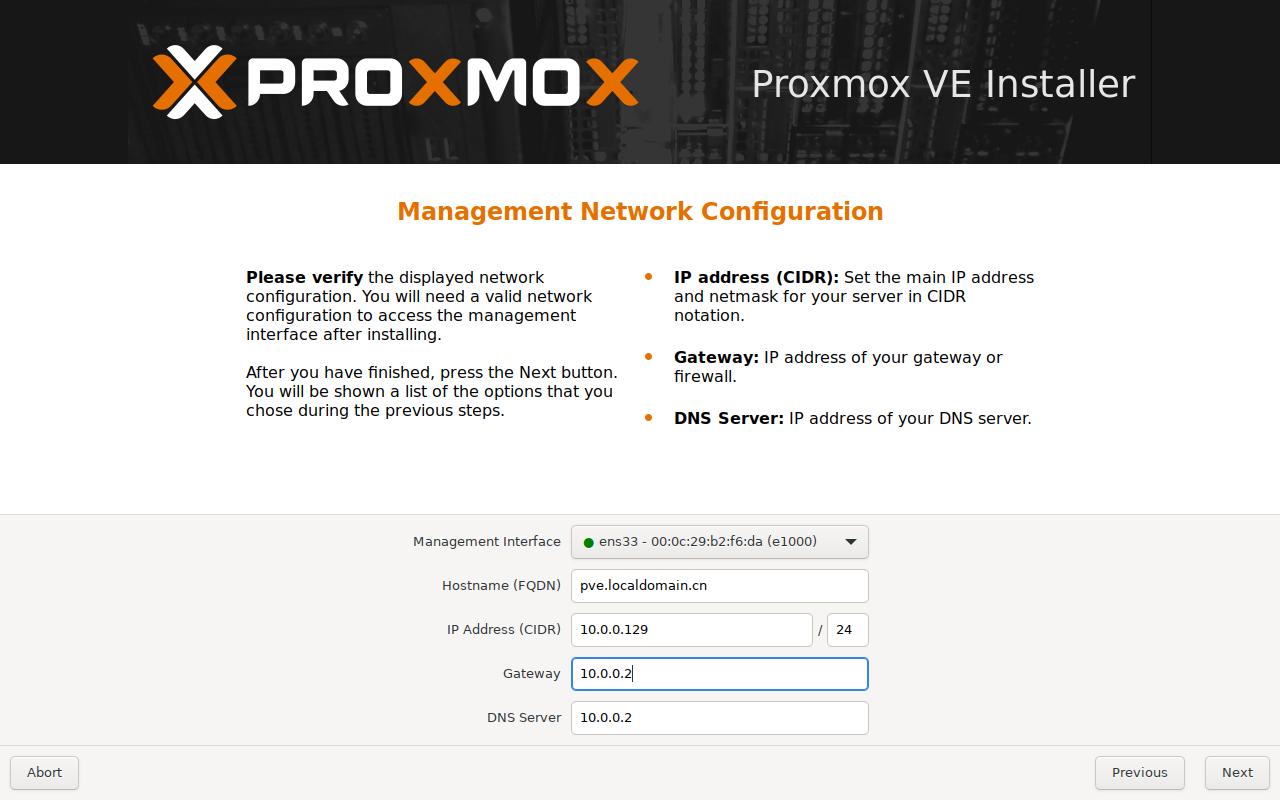
因为用的是nat模式所以需要设置相应的网格,以及ip
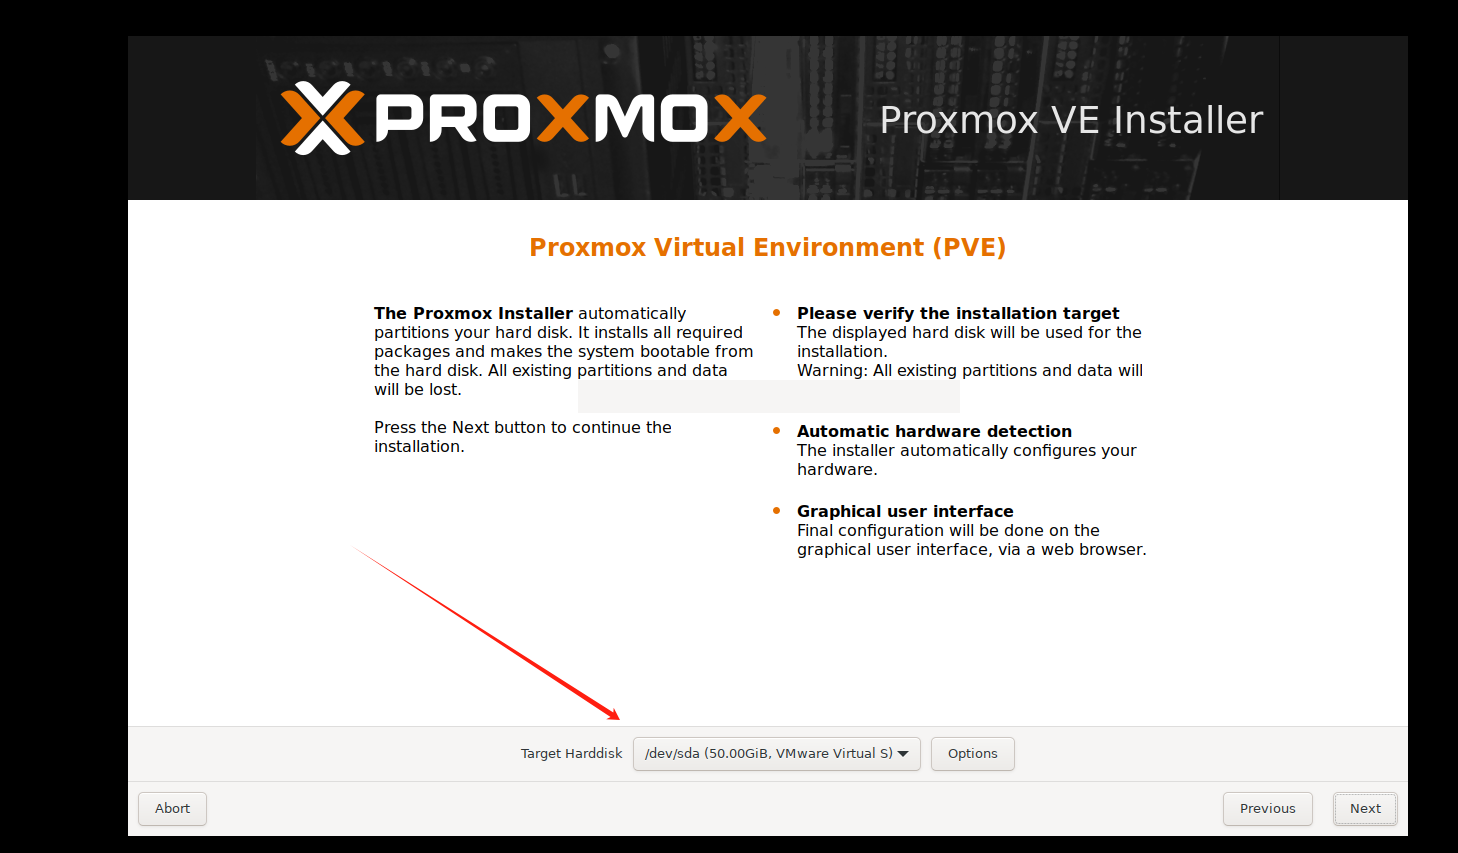
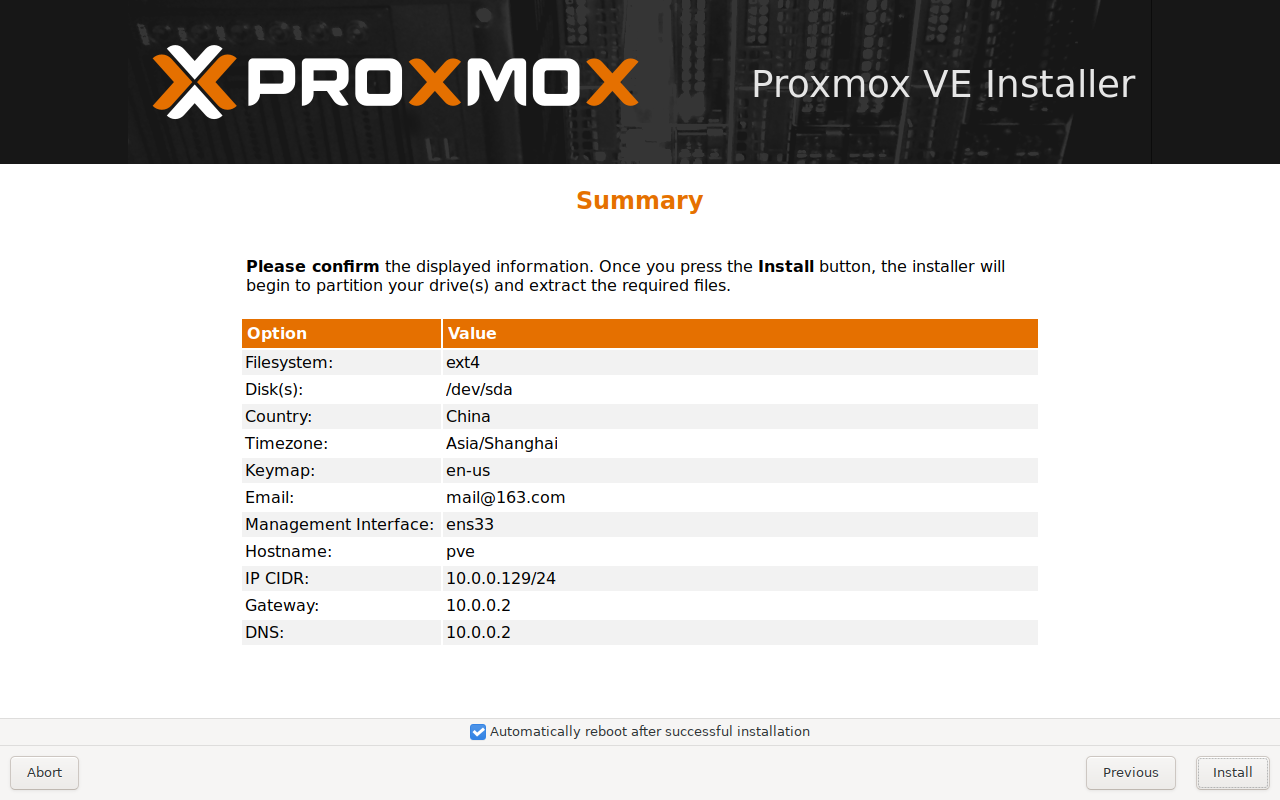
确认信息
3.初始化完成
1. 初始化完成后 会进行加载大约需要5分钟左右, 然后重启系统 login登录root用户 输入密码
2. ps aux|grep 8006 命令行检查8006端口是否启动
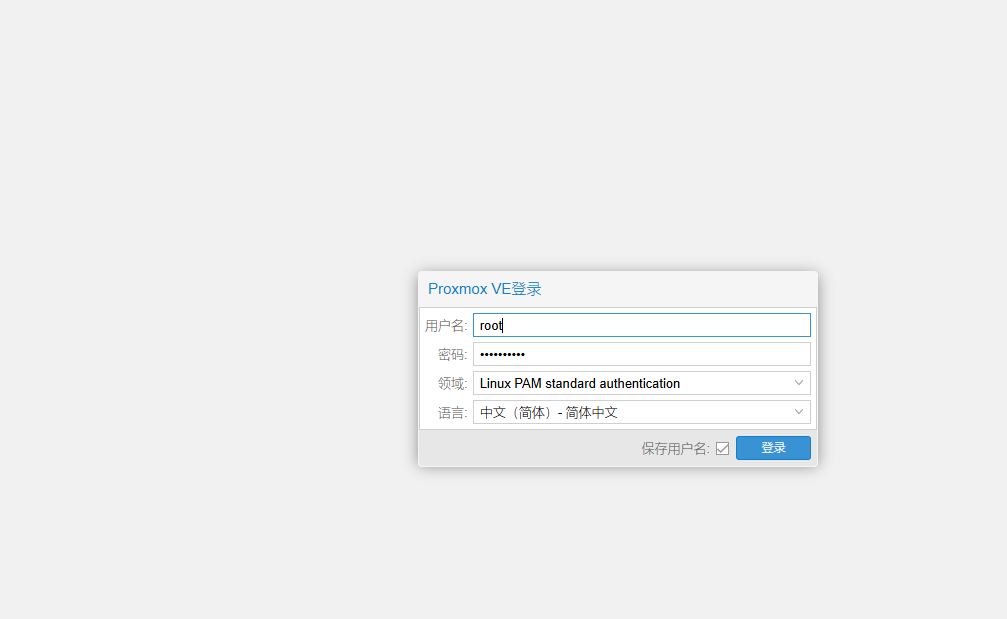
3. webUI进行查看 root 登录 选择linux领域 语言选择中文
忽略“无有效订阅”提示后,浏览器中的 PVE 图形管理界面就呈现在面前了 成功进入
PVE初始化配置(换源)
合并硬盘分区
1.合并分区 lvremove pve/data
2.扩容 lvextend -l +100%FREE -t pve/root
检查网络通信
1.root@pve:~# curl www.baidu.com
<!DOCTYPE html>
<!--STATUS OK--><html> <head><meta http-equiv=content-type content=text/html;charset=utf-8><meta http-equiv=X-UA-Compatible content=IE=Edge><meta content=always name=referrer><link rel=stylesheet type=text/css href=http://s1.bdstatic.com/r/www/cache/bdorz/baidu.min.css><title>百度一下,你就知道</
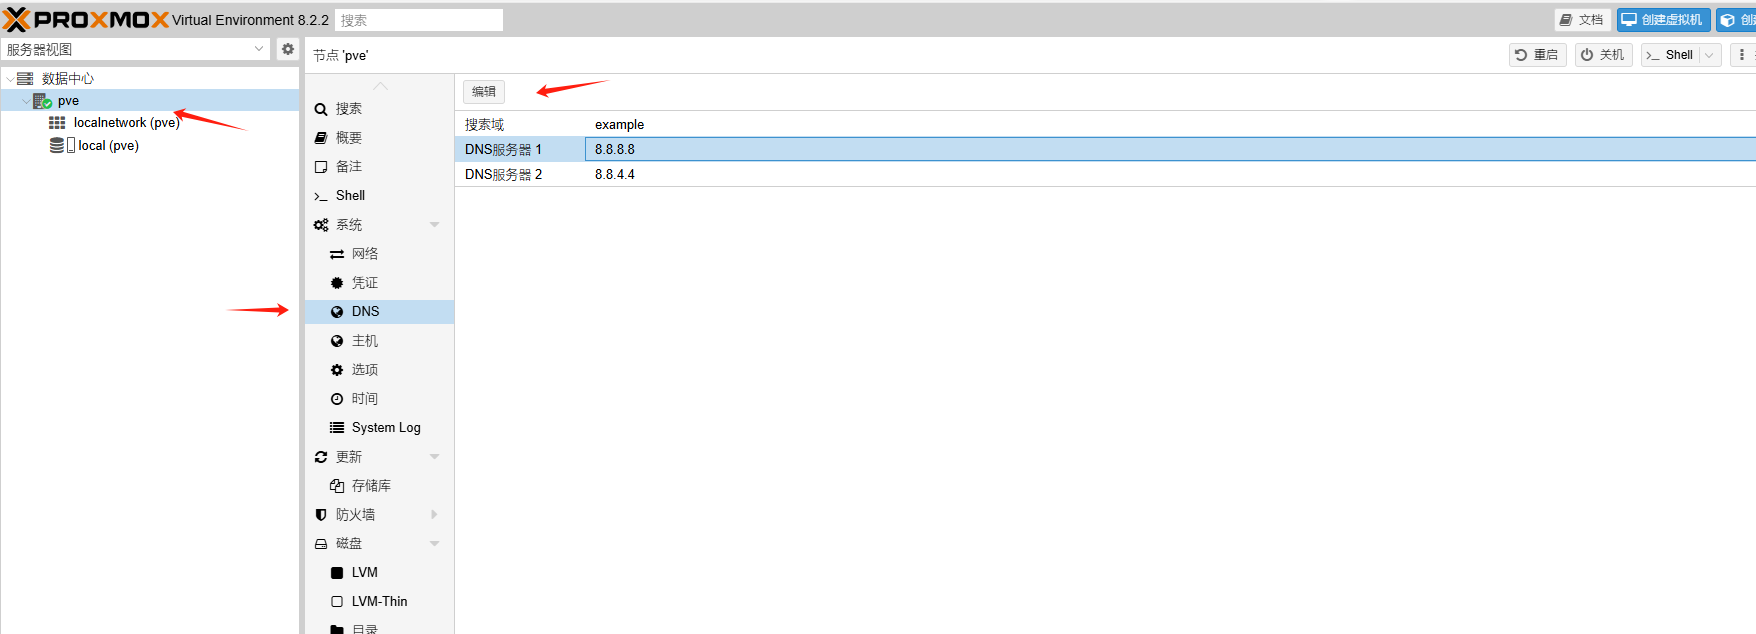
2.如果网不通 图形化页面检查DNS 下图
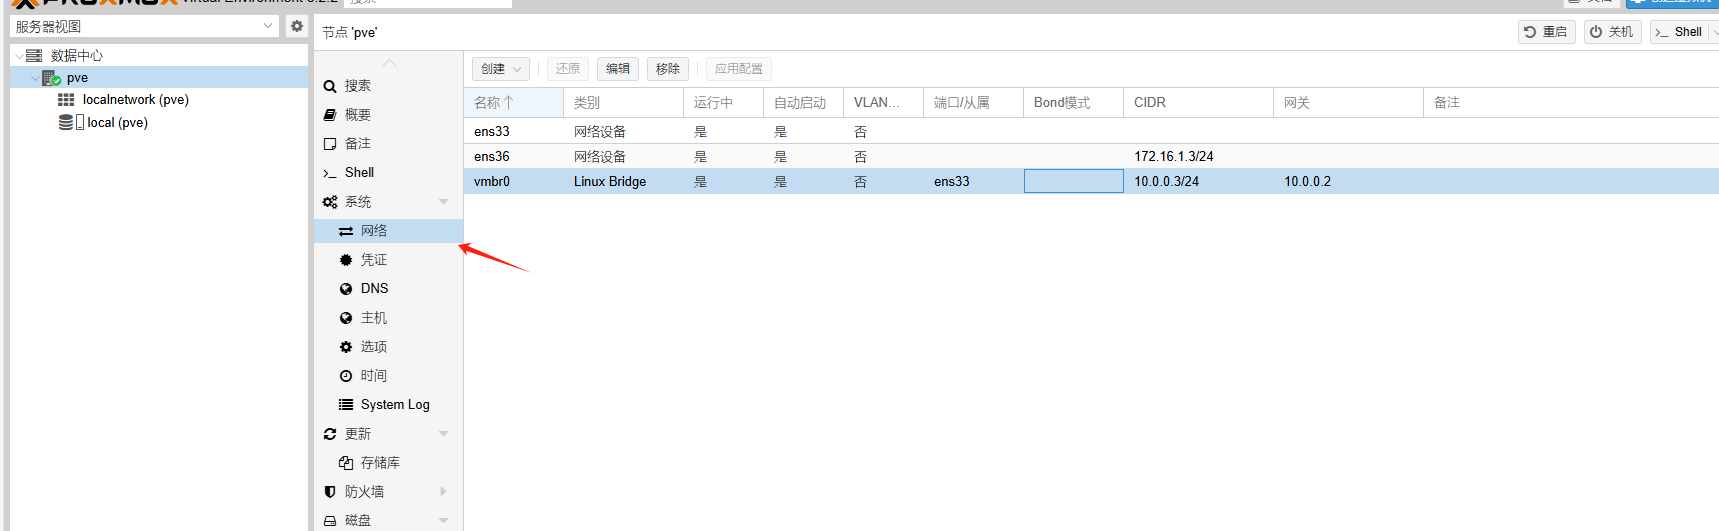
3.检查网络 网关 或 cat /etc/network/interfaces
更换debian软件源
1.清华园官网   https://mirrors.tuna.tsinghua.edu.cn/help/debian/
2.修改apt源  root@pve:~# nano /etc/apt/sources.list
# 默认注释了源码镜像以提高 apt update 速度,如有需要可自行取消注释
deb https://mirrors.tuna.tsinghua.edu.cn/debian/ bookworm main contrib non-free non-free-firmware
# deb-src https://mirrors.tuna.tsinghua.edu.cn/debian/ bookworm main contrib non-free non-free-firmware

deb https://mirrors.tuna.tsinghua.edu.cn/debian/ bookworm-updates main contrib non-free non-free-firmware
# deb-src https://mirrors.tuna.tsinghua.edu.cn/debian/ bookworm-updates main contrib non-free non-free-firmware

deb https://mirrors.tuna.tsinghua.edu.cn/debian/ bookworm-backports main contrib non-free non-free-firmware
# deb-src https://mirrors.tuna.tsinghua.edu.cn/debian/ bookworm-backports main contrib non-free non-free-firmware

# 以下安全更新软件源包含了官方源与镜像站配置,如有需要可自行修改注释切换
#deb https://security.debian.org/debian-security bookworm-security main contrib non-free non-free-firmware
# deb-src https://security.debian.org/debian-security bookworm-security main contrib non-free non-free-firmware
deb https://mirrors.tuna.tsinghua.edu.cn/debian-security bookworm-security main contrib non-free non-free-firmware
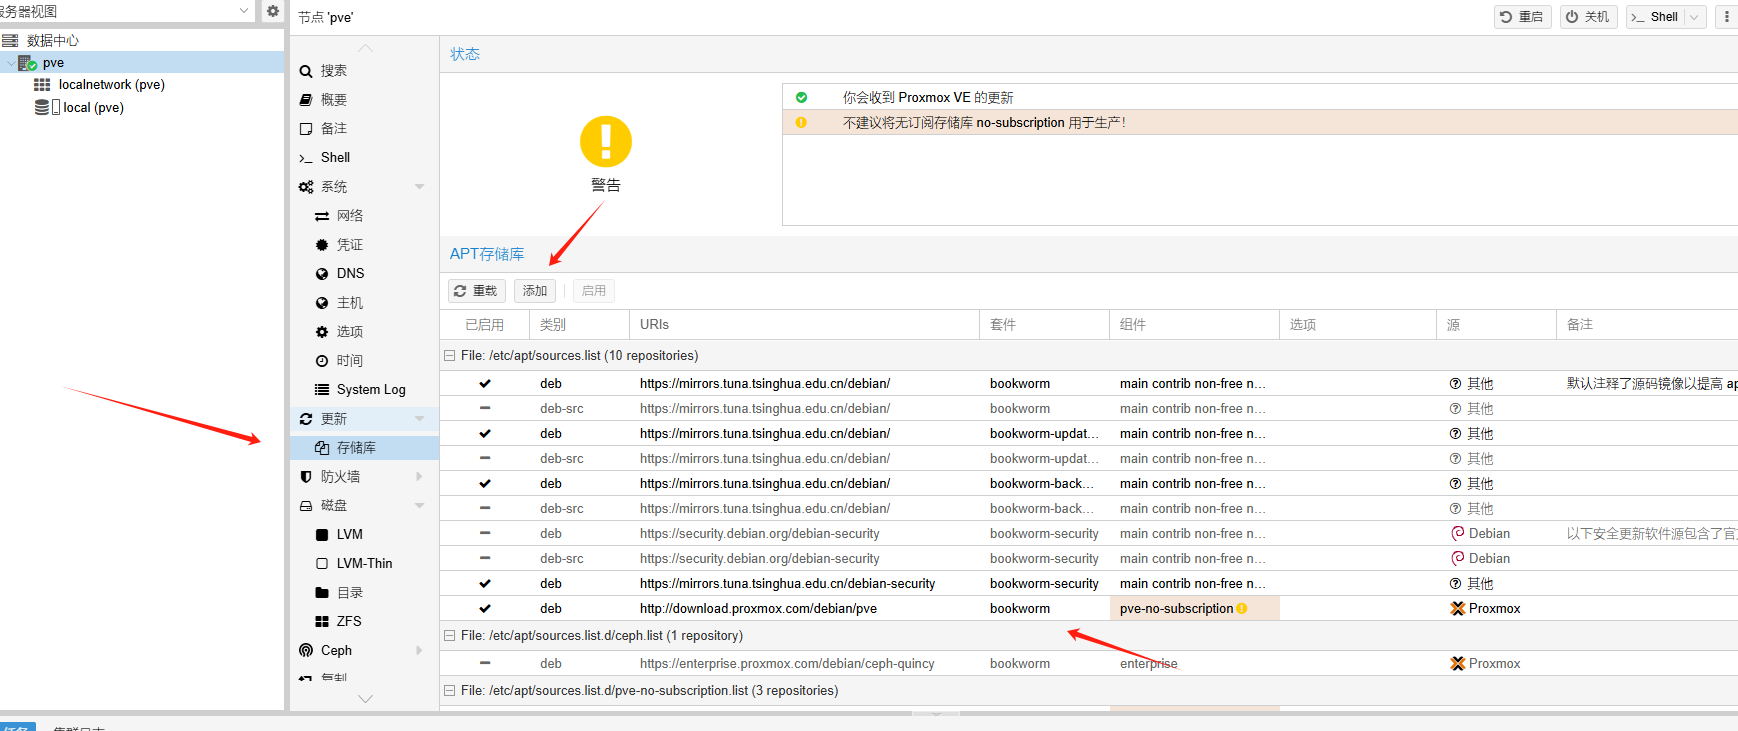
修改pve源
1.清华园官网 https://mirrors.tuna.tsinghua.edu.cn/help/proxmox/
2. 修改文件加入免费源 nano /etc/apt/sources.list.d/pve-no-subscription.list
deb https://mirrors.tuna.tsinghua.edu.cn/proxmox/debian/pve bookworm pve-no-subscription
3.去掉企业源 root@pve:~# \rm /etc/apt/sources.list.d/pve-enterprise.list
4.去掉ceph源
nano /etc/apt/sources.list.d/ceph.list
# deb https://enterprise.proxmox.com/debian/ceph-quincy bookworm enterprise
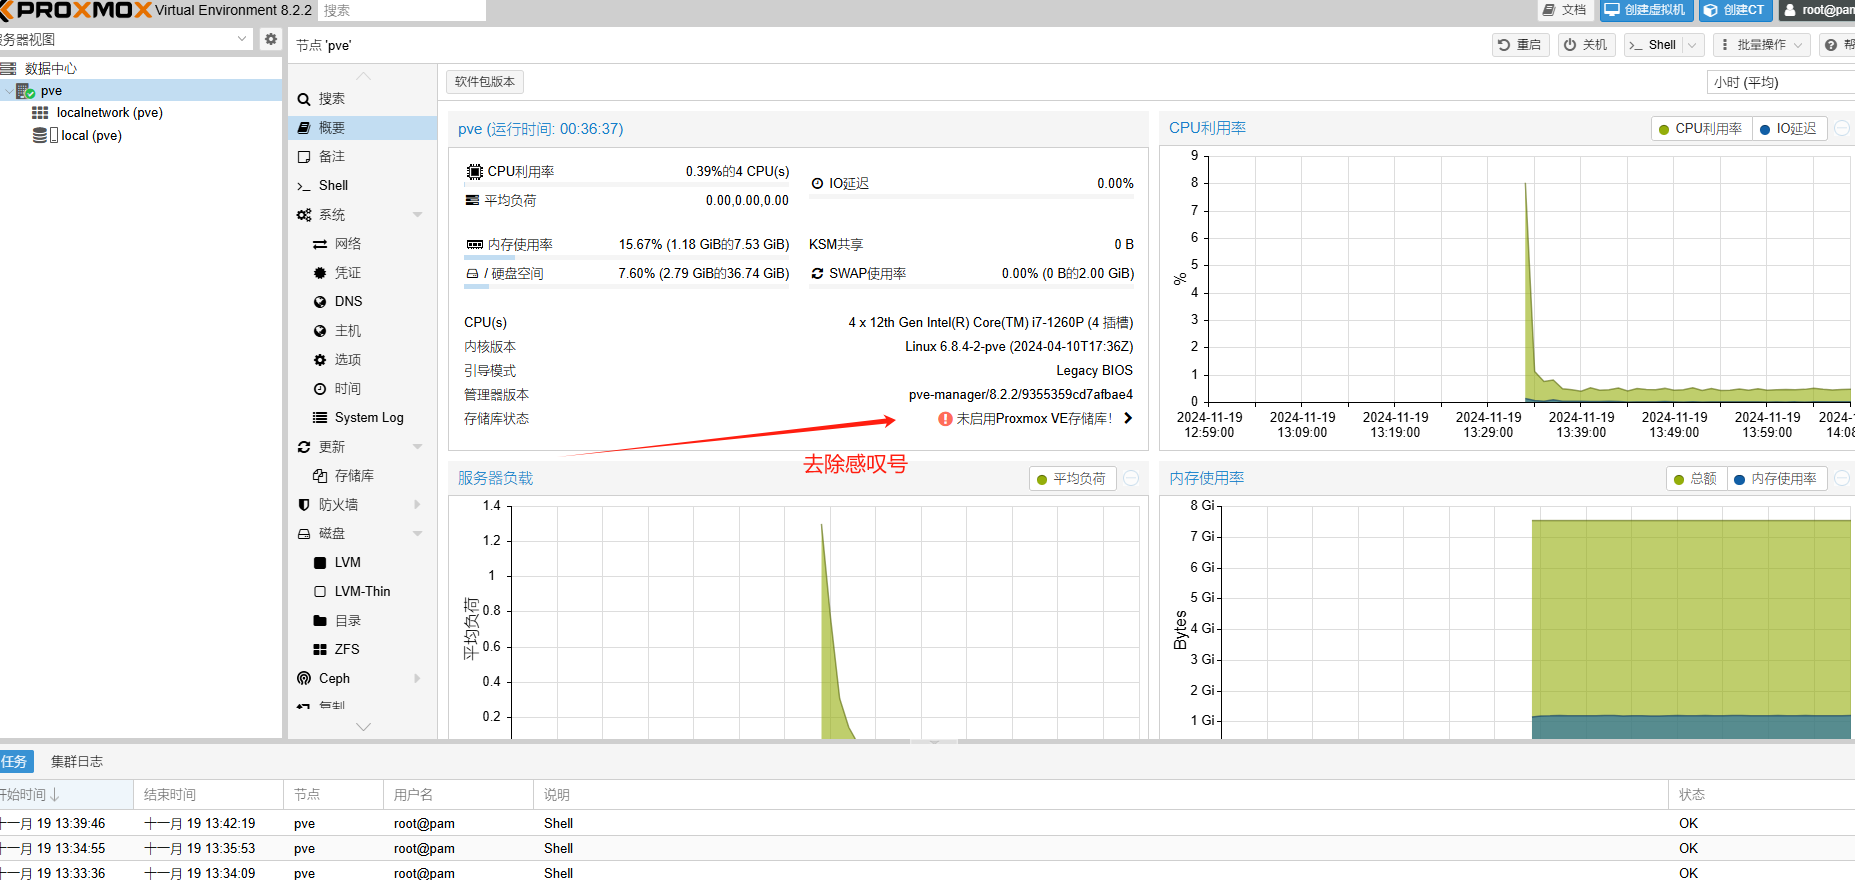
5.修改存储库 异常更新 见图片认证存储库

去掉登录弹窗
sed -i.backup -z "s/res === null || res === undefined || \!res || res\n\t\t\t.data.status.toLowerCase()!== 'active'/false/g" /usr/share/javascript/proxmox-widget-toolkit/proxmoxlib.js && systemctl restart pveproxy.service
更新软件源
1.更新
root@pve:~# apt update
2.升级    -y 所有选择y
root@pve:~# apt upgrade -y

3.发现卡  更新时卡主了
root@pve:~# vim /etc/apt/sources.list
去掉最下面一行内容    重新执行更新
root@pve:~# apt update
root@pve:~# apt upgrade -y

4.开启ipv6
root@pve:~#nano /etc/sysctl.conf

net.ipv6.conf.all.accept_ra=2
net.ipv6.conf.default.accept_ra=2
net.ipv6.conf.vmbr0.accept_ra=2
net.ipv6.conf.all.autoconf=1
net.ipv6.conf.default.autoconf=1
net.ipv6.conf.vmbr0.autoconf=1

5.重启系统
root@pve:~# reboot
PVE中安装Ubuntu22.04系统
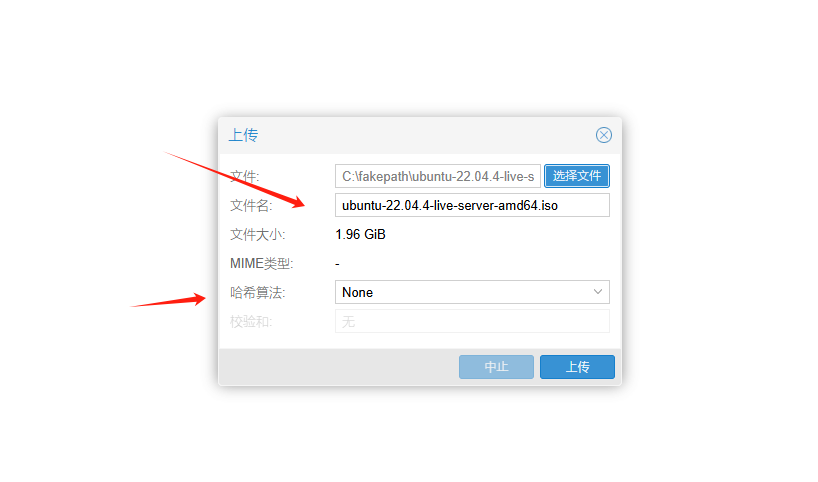
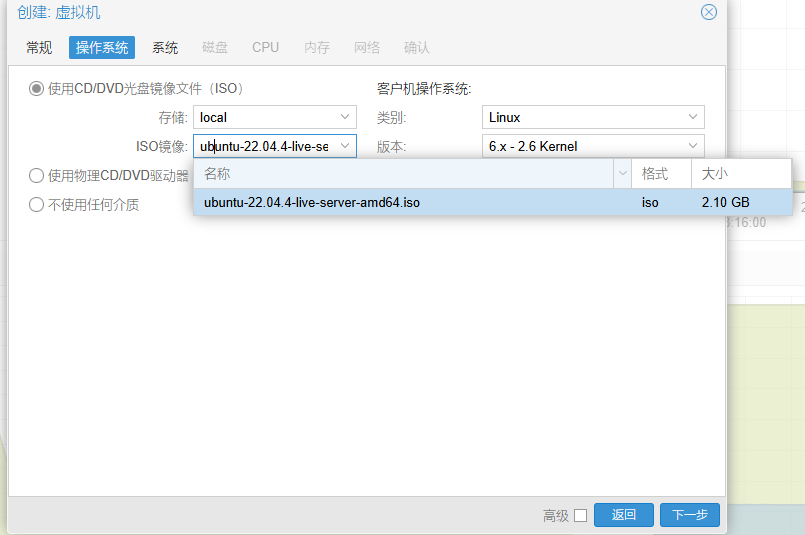
webui 中上传
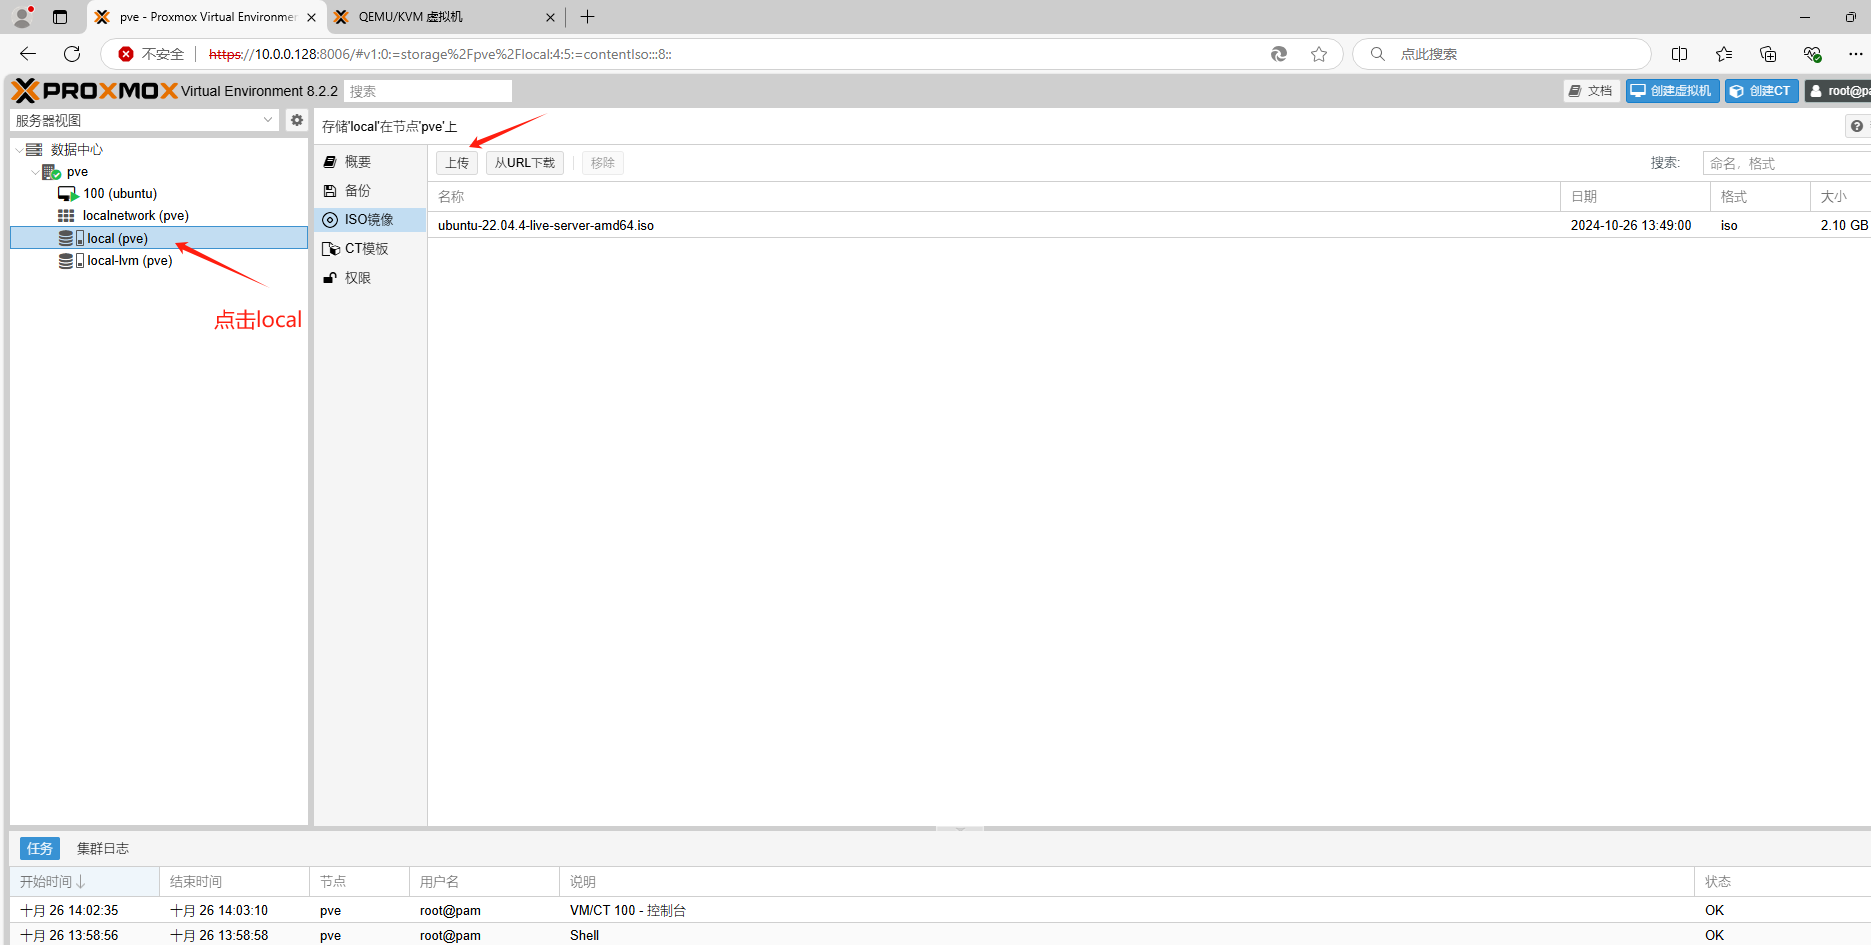
选择上传的镜像 默认从当前电脑上上传
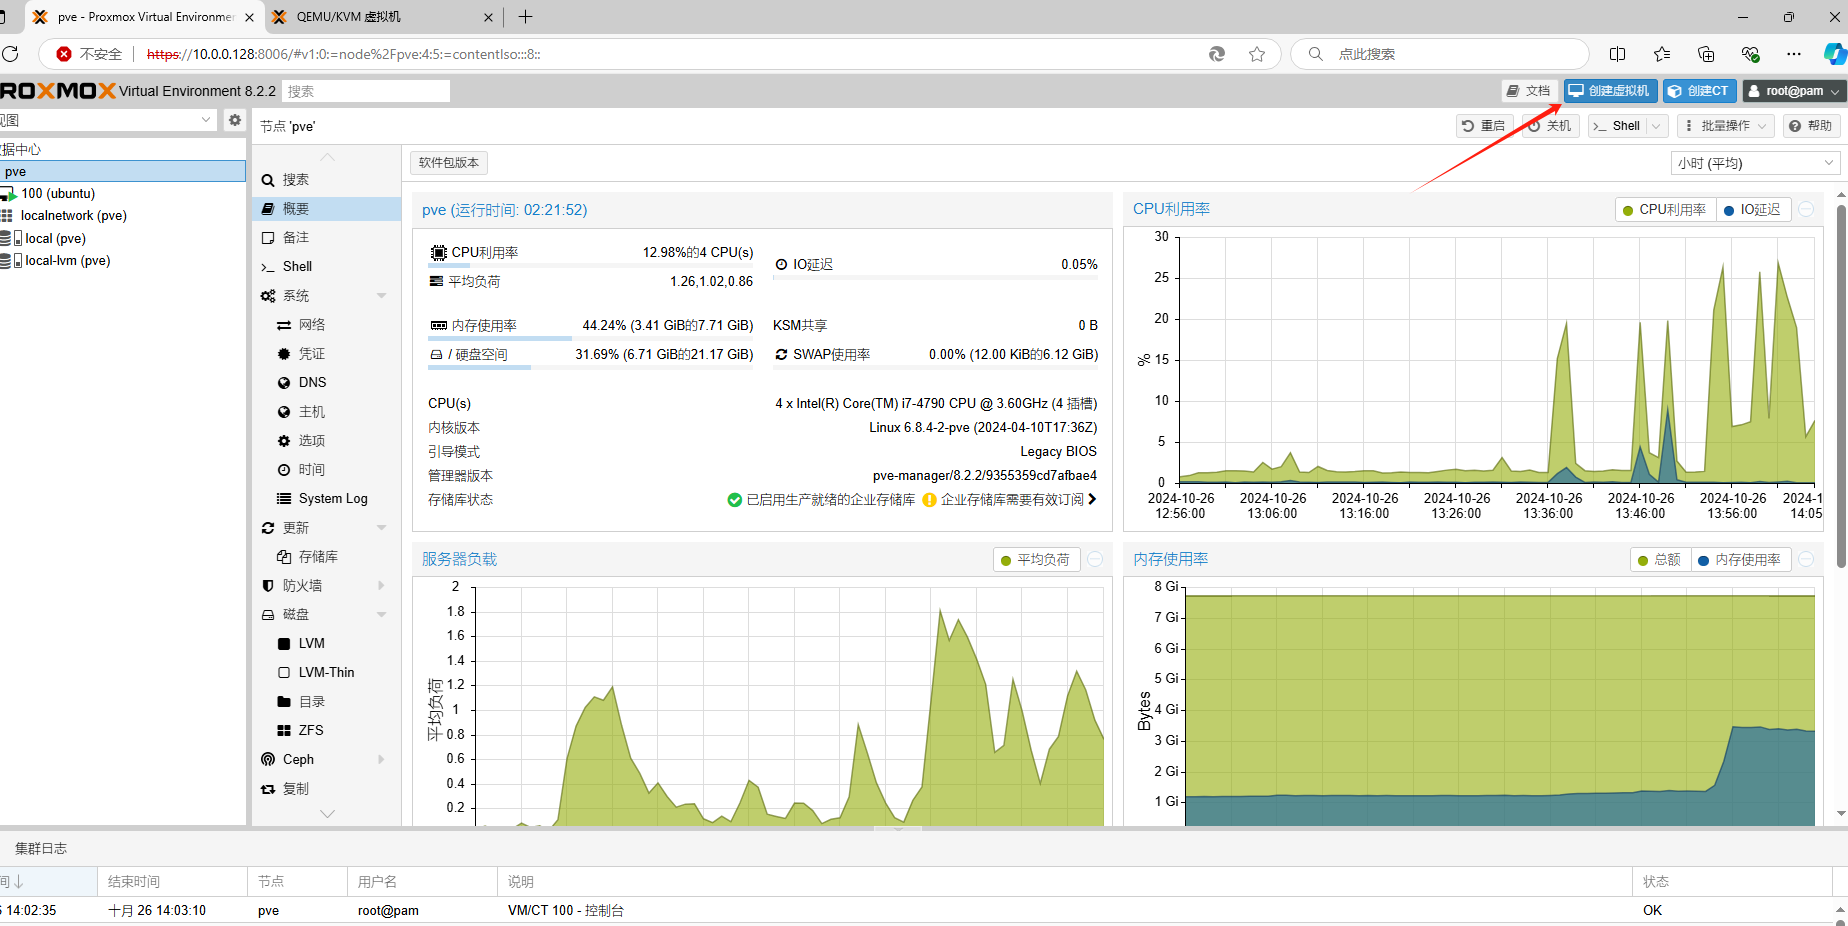
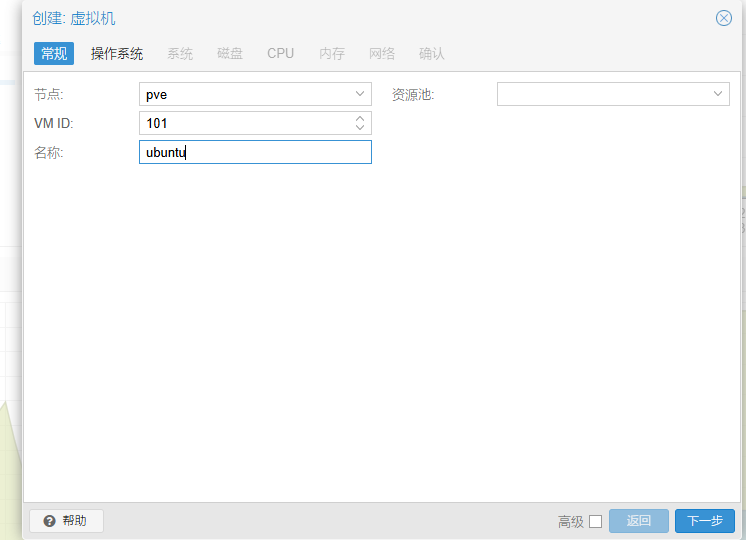
左上角点击添加虚拟机
创建名字
选择操作系统 (这里用ubuntu)
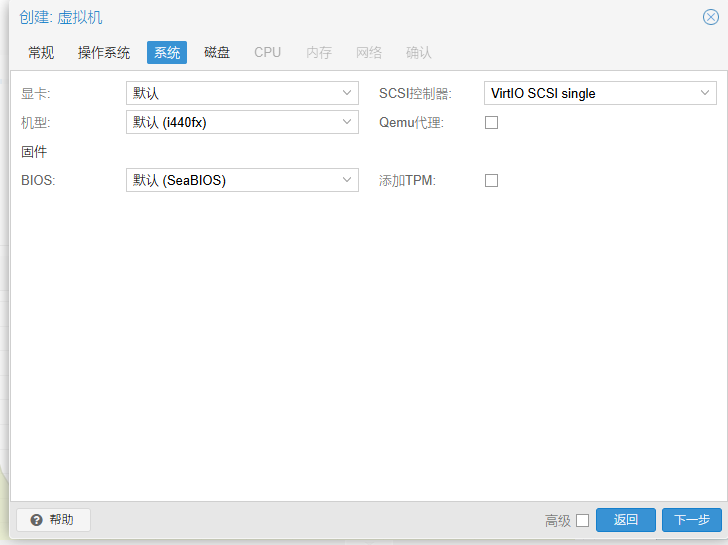
系统基本默认即可
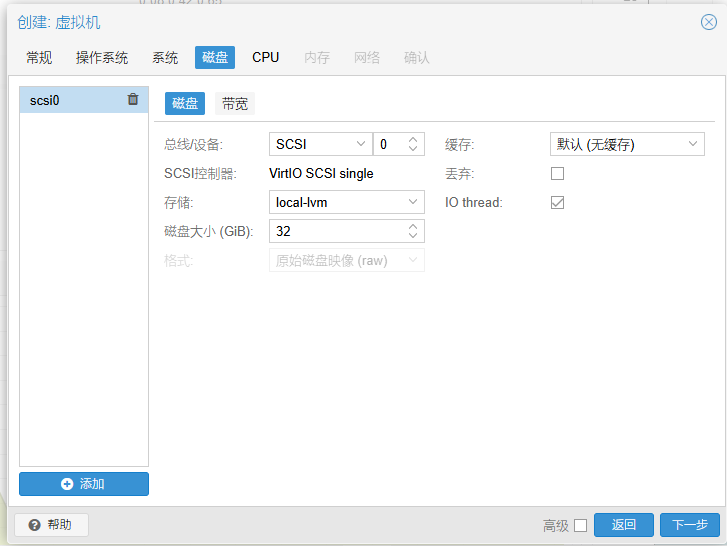
磁盘根据需求进行选择
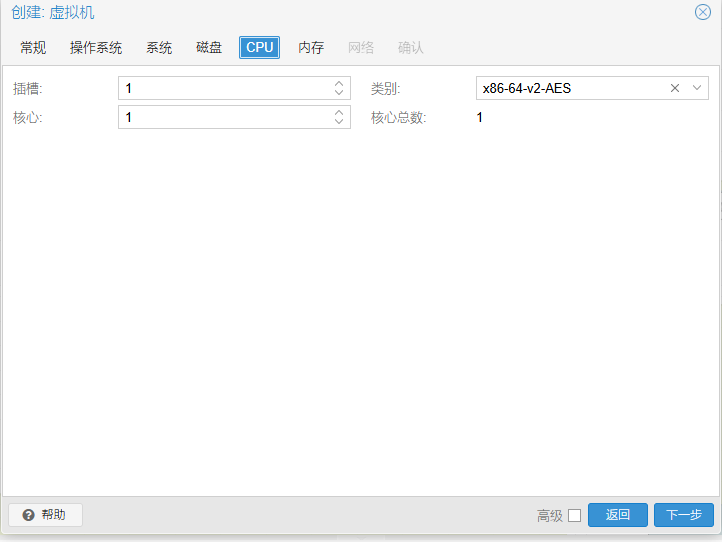
cpu选择核心 ,根据业务进行分配
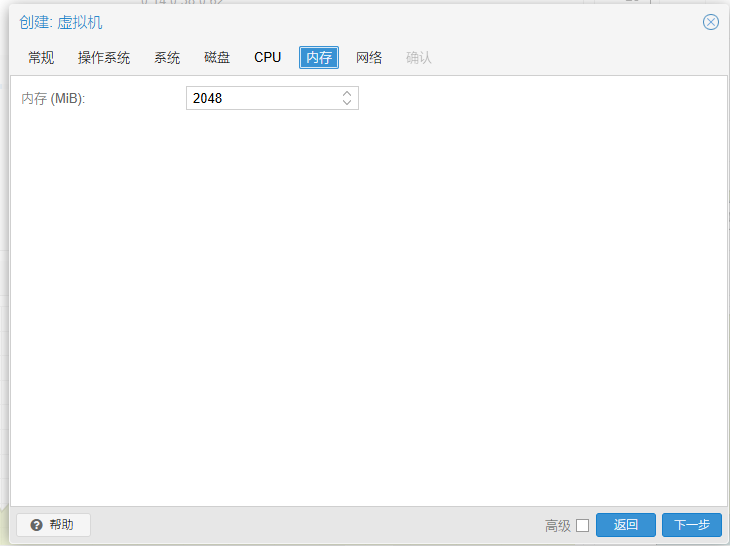
设置内存
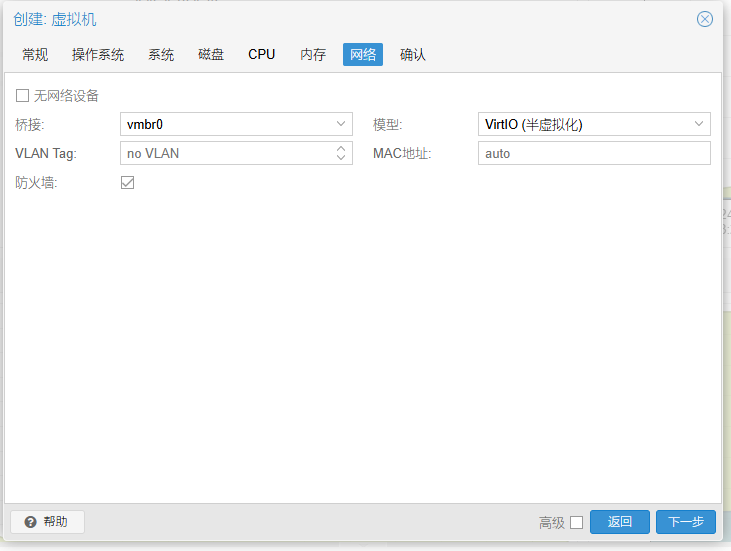
设置网络
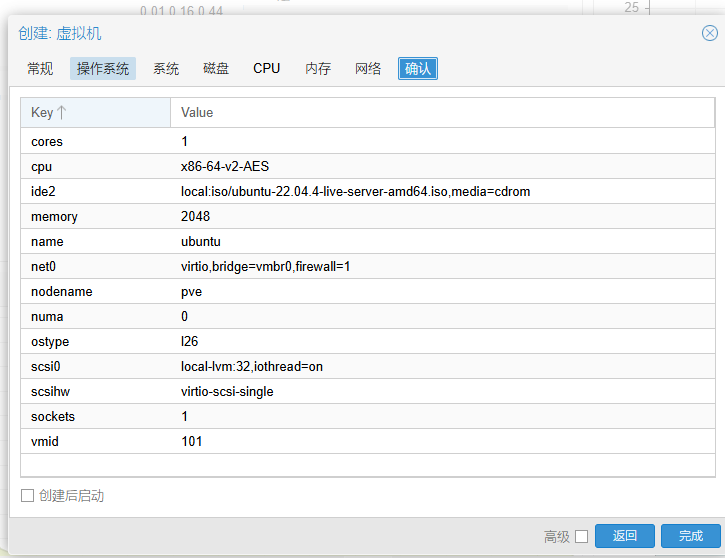
确认信息


 1万+
1万+

 被折叠的 条评论
为什么被折叠?
被折叠的 条评论
为什么被折叠?
 到【灌水乐园】发言


