


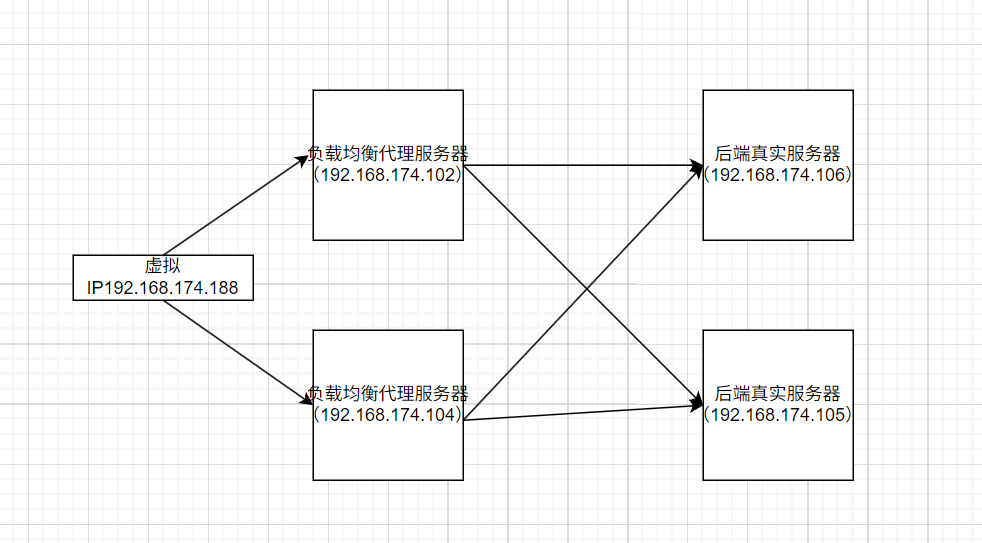
实验前准备:
准备4台虚拟机:2台作为负载均衡器;2台作为后端真实访问服务器
如图:
关闭服务器所有防火墙与核心防护
systemctl disable --now firewalld
setenforce 0
1.后端真实访问服务器
两个后端真实访问服务器配置
1.1号设备配置
yum -y install epel-release
yum -y install nginx
systemctl start nginx.service
vim /usr/share/nginx/html/index.html
cat /usr/share/nginx/html/index.html
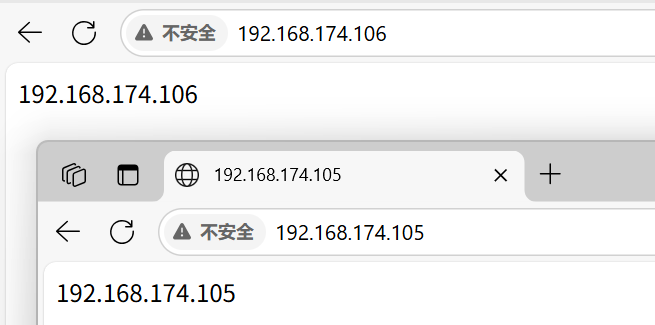
192.168.174.105
systemctl restart nginx.service
systemctl status nginx.service
curl 127.1
192.168.174.1052.2号设备配置
yum -y install epel-release
yum -y install nginx

systemctl start nginx.service
vim /usr/share/nginx/html/index.html

cat /usr/share/nginx/html/index.html
192.168.174.106

systemctl restart nginx.service
systemctl status nginx.service
curl 127.1
192.168.174.106
结果:
2.配置nginx负载均衡器
1.1号负载均衡器
yum -y install epel-release
yum -y install nginx

vim /etc/nginx/conf.d/upstream.conf

cat /etc/nginx/conf.d/upstream.conf
upstream web {
server 192.168.174.105;
server 192.168.174.106;
}
server {
listen 80;
server_name _;
location / {
proxy_pass  http://web;
}
}

systemctl restart nginx.service
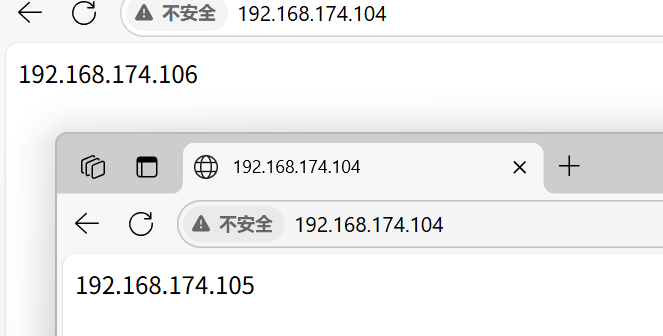
访问结果:
2.2号负载均衡器
yum -y install epel-release
yum -y install nginx

vim /etc/nginx/conf.d/upstream.conf

cat /etc/nginx/conf.d/upstream.conf
upstream web {
server 192.168.174.105;
server 192.168.174.106;
}
server {
listen 80;
server_name _;
location / {
proxy_pass http://web;
}
}

systemctl start nginx.service
访问结果:
3.使用keepalive实现高可用
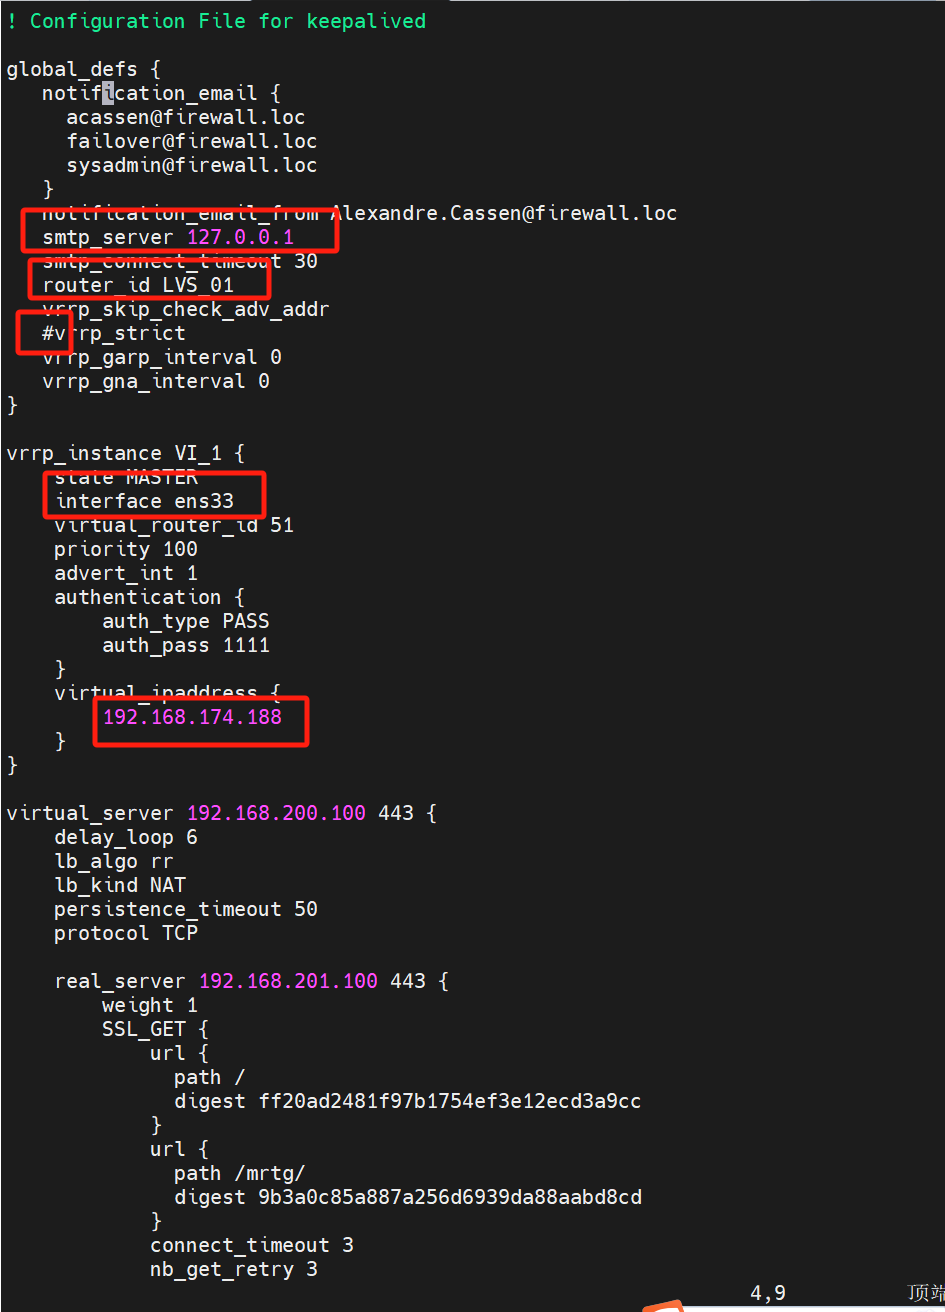
主设备配置
yum -y install keepalived.x86_64
vim /etc/nginx/conf.d/upstream.conf
cat /etc/nginx/conf.d/upstream.conf

global_defs {
   notification_email {
     acassen@firewall.loc
     failover@firewall.loc
     sysadmin@firewall.loc
   }
   notification_email_from Alexandre.Cassen@firewall.loc
   smtp_server 127.0.0.1
   smtp_connect_timeout 30
   router_id LVS_01
   vrrp_skip_check_adv_addr
   #vrrp_strict
   vrrp_garp_interval 0
   vrrp_gna_interval 0
}

vrrp_instance VI_1 {
    state MASTER
    interface ens33
    virtual_router_id 51
    priority 100
    advert_int 1
    authentication {
        auth_type PASS
        auth_pass 1111
    }
    virtual_ipaddress {
        192.168.174.188
    }
}


systemctl start keepalived.service
systemctl status keepalived.service
主要配置内容:
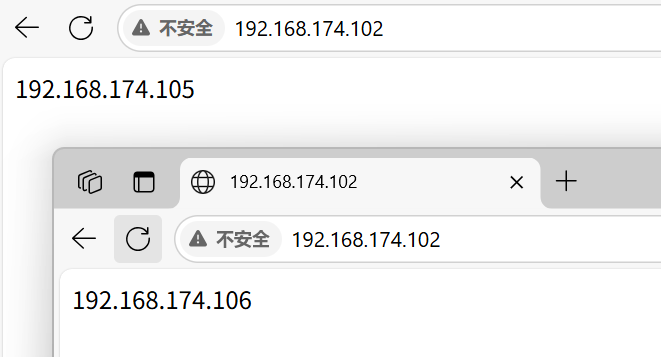
访问结果:

可以使用抓包命令看到现在都是主设备在发送信号

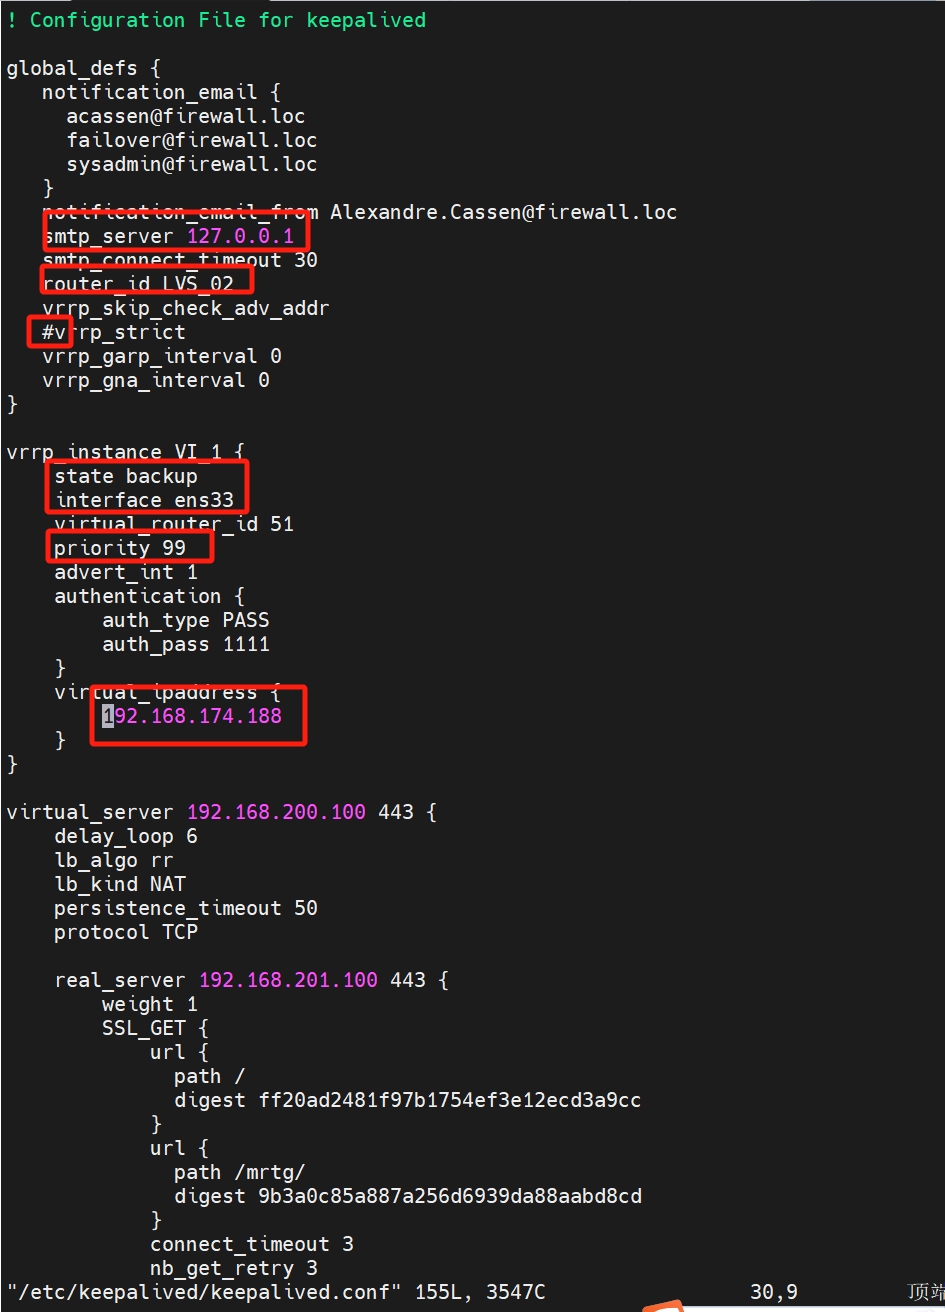
从设备配置
yum -y install keepalived
vim /etc/keepalived/keepalived.conf
cat /etc/keepalived/keepalived.conf

global_defs {
   notification_email {
     acassen@firewall.loc
     failover@firewall.loc
     sysadmin@firewall.loc
   }
   notification_email_from Alexandre.Cassen@firewall.loc
   smtp_server 127.0.0.1
   smtp_connect_timeout 30
   router_id LVS_02
   vrrp_skip_check_adv_addr
   #vrrp_strict
   vrrp_garp_interval 0
   vrrp_gna_interval 0
}

vrrp_instance VI_1 {
    state backup
    interface ens33
    virtual_router_id 51
    priority 99
    advert_int 1
    authentication {
        auth_type PASS
        auth_pass 1111
    }
    virtual_ipaddress {
        192.168.174.188
    }
}


systemctl restart keepalived.service
systemctl status keepalived.service
主要修改内容
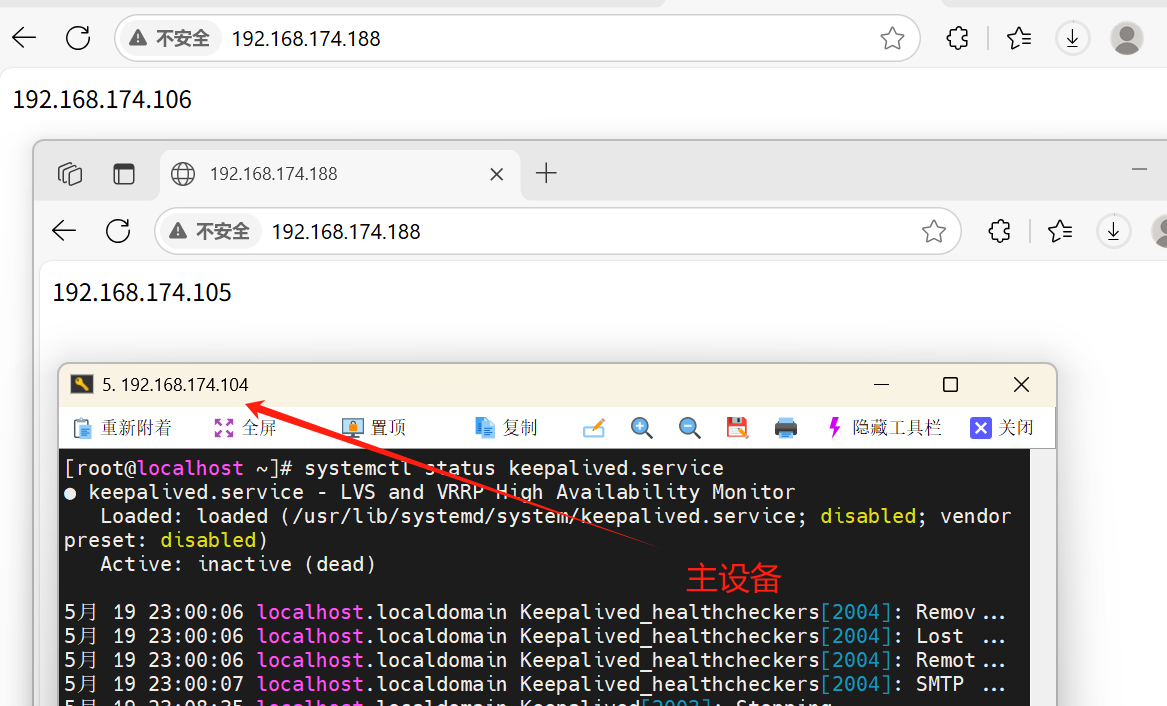
访问结果
注意由于此设备是从设备,想要看到此设备的结果需要关闭主设备的keepalive
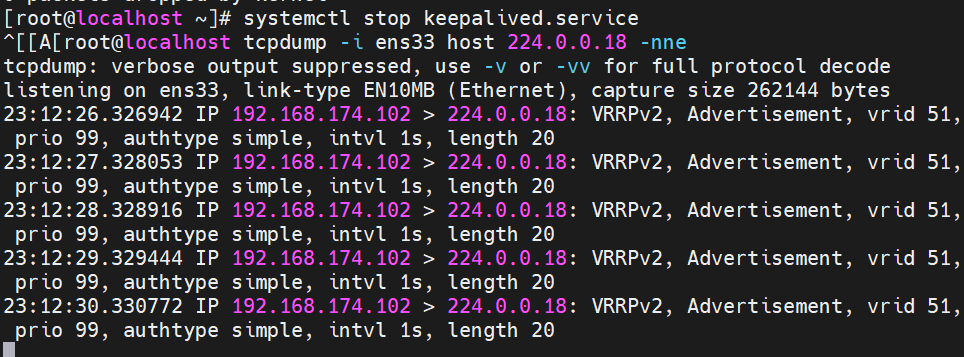
当我们关闭主设备来模拟主设备损坏时,再使用抓包命令得到的结果
至此,实验告一段落。


 4563
4563

 被折叠的 条评论
为什么被折叠?
被折叠的 条评论
为什么被折叠?
 到【灌水乐园】发言


