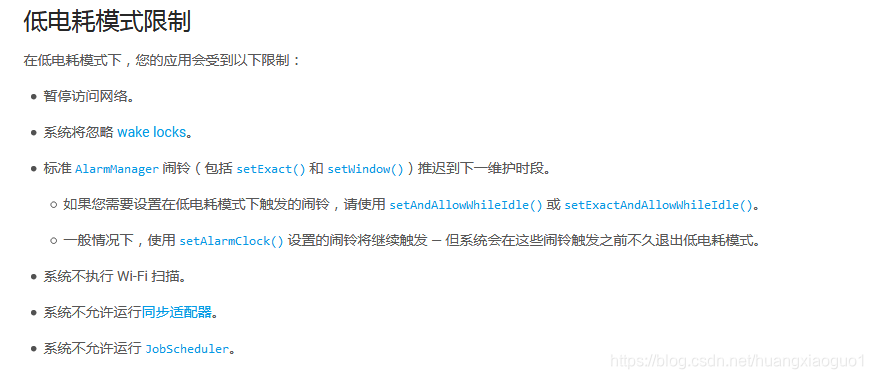
(2)setRepeating(int type,long startTime,long intervalTime,PendingIntent pi)//该方法用于设置可重复执行的定时器。
(3)setInexactRepeating(int type,long startTime,long intervalTime,PendingIntent pi)//该方法用于设置可重复执行的定时器。与setRepeating相比,这个方法更加考虑系统电量,比如系统在低电量情况下可能不会严格按照设定的间隔时间执行闹钟,因为系统可以调整报警的交付时间,使其同时触发,避免超过必要的唤醒设备。
参数说明:
int type: 闹钟类型,常用有五个类型,说明如下:
| 类型 | 描述 |
| :-: | :-: |
| AlarmManager.ELAPSED_REALTIME | 表示闹钟在手机睡眠状态下不可用,就是睡眠状态下不具备唤醒CPU的能力(跟普通Timer差不多了),该状态下闹钟使用相对时间,相对于系统启动开始。 |
| AlarmManager.ELAPSED_REALTIME_WAKEUP | 表示闹钟在睡眠状态下会唤醒系统并执行提示功能,该状态下闹钟也使用相对时间 |
| AlarmManager.RTC | 表示闹钟在睡眠状态下不可用,该状态下闹钟使用绝对时间,即当前系统时间 |
| AlarmManager.RTC_WAKEUP | 表示闹钟在睡眠状态下会唤醒系统并执行提示功能,该状态下闹钟使用绝对时间 |
| AlarmManager.POWER_OFF_WAKEUP | 表示闹钟在手机关机状态下也能正常进行提示功能,5个状态中用的最多的状态之一,该状态下闹钟也是用绝对时间 |
long startTime: 闹钟的第一次执行时间,以毫秒为单位。需要注意的是,本属性与第一个属性(type)密切相关,如果第一个参数对应的闹钟使用的是相对时间(ELAPSED_REALTIME和ELAPSED_REALTIME_WAKEUP),那么本属性就得使用相对时间,比如当前时间就表示为:SystemClock.elapsedRealtime();如果第一个参数对应的闹钟使用的是绝对时间 (RTC、RTC_WAKEUP、POWER_OFF_WAKEUP),那么本属性就得使用绝对时间,当前时间就表示 为:System.currentTimeMillis()。
long intervalTime: 表示两次闹钟执行的间隔时间,也是以毫秒为单位。
PendingIntent pi: 到时间后执行的意图。PendingIntent是Intent的封装类。需要注意的是,如果是通过启动服务来实现闹钟提 示的话,PendingIntent对象的获取就应该采用Pending.getService(Context c,int i,Intent intent,int j)方法;如果是通过广播来实现闹钟提示的话,PendingIntent对象的获取就应该采用 PendingIntent.getBroadcast(Context c,int i,Intent intent,int j)方法;如果是采用Activity的方式来实现闹钟提示的话,PendingIntent对象的获取就应该采用 PendingIntent.getActivity(Context c,int i,Intent intent,int j)方法。
- API>=19和API<23 AlarmManager的常用方法:

am.setExact(AlarmManager.RTC_WAKEUP, time, pendingIntent);
- API>23 AlarmManager的常用方法:

am.setExactAndAllowWhileIdle(AlarmManager.RTC_WAKEUP, time, pendingIntent);
但是setExact(int type, long triggerAtMillis, PendingIntent operation)以及setExactAndAllowWhileIdle(int type, long triggerAtMillis, PendingIntent operation)方法都没有重复提醒的设置,没有setRepeating类似API,都是一次性的闹钟,重复闹钟的实现需要使用借住PendingIntent ,具体如下代码
- 设置闹钟工具类
import android.annotation.SuppressLint;
import android.app.AlarmManager;
import android.app.PendingIntent;
import android.content.Context;
import android.content.Intent;
import android.os.Build;
public class AlarmManagerUtils {
private static final long TIME_INTERVAL = 5 * 1000;//闹钟执行任务的时间间隔
private Context context;
public static AlarmManager am;
public static PendingIntent pendingIntent;
//
private AlarmManagerUtils(Context aContext) {
this.context = aContext;
}
//饿汉式单例设计模式
private static AlarmManagerUtils instance = null;
public static AlarmManagerUtils getInstance(Context aContext) {
if (instance == null) {
synchronized (AlarmManagerUtils.class) {
if (instance == null) {
instance = new AlarmManagerUtils(aContext);
}
}
}
return instance;
}
public void createGetUpAlarmManager() {
am = (AlarmManager) context.getSystemService(Context.ALARM_SERVICE);
Intent intent = new Intent(“tsou.cn.alarmclock.utils.AlarmManagerUtils”);
intent.setPackage(context.getPackageName());
intent.putExtra(“msg”, “赶紧起床”);
pendingIntent = PendingIntent.getBroadcast(context, 0, intent, PendingIntent.FLAG_UPDATE_CURRENT);//每隔5秒发送一次广播
}
/**
- 设置单个闹钟
*/
@SuppressLint(“NewApi”)
public void getUpAlarmManagerStartWork() {
//版本适配
if (Build.VERSION.SDK_INT >= Build.VERSION_CODES.M) {// 6.0及以上
am.setExactAndAllowWhileIdle(AlarmManager.RTC_WAKEUP,
System.currentTimeMillis(), pendingIntent);
} else if (Build.VERSION.SDK_INT >= Build.VERSION_CODES.KITKAT) {// 4.4及以上
am.setExact(AlarmManager.RTC_WAKEUP, System.currentTimeMillis(),
pendingIntent);
} else {
am.setRepeating(AlarmManager.RTC_WAKEUP,
System.currentTimeMillis(), TIME_INTERVAL, pendingIntent);
}
}
/**
- 设置单个闹钟
*/
@SuppressLint(“NewApi”)
public void getUpAlarmManagerStartWork(long time) {
if (System.currentTimeMillis() > time) {
return;
}
//版本适配
if (Build.VERSION.SDK_INT >= Build.VERSION_CODES.M) {// 6.0及以上
am.setExactAndAllowWhileIdle(AlarmManager.RTC_WAKEUP,
time, pendingIntent);
} else if (Build.VERSION.SDK_INT >= Build.VERSION_CODES.KITKAT) {// 4.4及以上
am.setExact(AlarmManager.RTC_WAKEUP, time,
pendingIntent);
} else {
am.setRepeating(AlarmManager.RTC_WAKEUP,
time, TIME_INTERVAL, pendingIntent);
}
}
/**
- 设置闹钟重复
*/
@SuppressLint(“NewApi”)
public void getUpAlarmManagerWorkOnReceiver() {
//高版本重复设置闹钟达到低版本中setRepeating相同效果
if (Build.VERSION.SDK_INT >= Build.VERSION_CODES.M) {// 6.0及以上
am.setExactAndAllowWhileIdle(AlarmManager.RTC_WAKEUP,
System.currentTimeMillis() + TIME_INTERVAL, pendingIntent);
} else if (Build.VERSION.SDK_INT >= Build.VERSION_CODES.KITKAT) {// 4.4及以上
am.setExact(AlarmManager.RTC_WAKEUP, System.currentTimeMillis()
- TIME_INTERVAL, pendingIntent);
}
}
/**
- 取消闹钟
*/
public void cancelAlarmManagerWork() {
am.cancel(pendingIntent);
}
}
PendingIntent在这里使用的是BroadcastReceiver,具体看广播的实现
- 接收数据
import android.annotation.SuppressLint;
import android.content.BroadcastReceiver;
import android.content.Context;
import android.content.Intent;
import android.util.Log;
import tsou.cn.alarmclock.service.MyIntentService;
public class MyBroadcastReceiver extends BroadcastReceiver {
private static final String TAG = “huangxiaoguo”;
@SuppressLint(“NewApi”)
@Override
public void onReceive(Context context, Intent intent) {
//高版本重复设置闹钟达到低版本中setRepeating相同效果
// AlarmManagerUtils.getInstance(context).getUpAlarmManagerWorkOnReceiver();
//
String extra = intent.getStringExtra(“msg”);
Log.i(TAG, “extra ========================” + extra);
context.startService(new Intent(context,MyIntentService.class));
}
}
注册广播
<receiver
android:name=“.receiver.MyBroadcastReceiver”
android:enabled=“true”
android:exported=“true”>
BroadcastReceiver 接收到数据一般需要进行操作,一般都是比较耗时工作所以放到IntentService里面操作,BroadcastReceiver +IntentService这一般是android中的绝配
- 对数据进行操作
import android.app.IntentService;
import android.content.Intent;
import android.os.SystemClock;
import android.util.Log;
import tsou.cn.alarmclock.utils.SoundUtils;
import tsou.cn.alarmclock.utils.VibrateUtils;
public class MyIntentService extends IntentService {
public MyIntentService() {
super(“MyIntentService”);
}
@Override
protected void onHandleIntent(Intent intent) {
// VibrateUtils.Vibrate(this,2000);
long[] pattern = new long[]{0, 3000, 2000, 3000, 2000, 3000};
VibrateUtils.Vibrate(pattern, false);
SoundUtils.startAlarm();
new Thread(new Runnable() {
@Override
public void run() {
SystemClock.sleep(7000);
VibrateUtils.VibrateCancel();
SoundUtils.stopAlarm();
}
}).start();
}
@Override
public void onDestroy() {
super.onDestroy();
Log.d(“huangxiaoguo”, “MyIntentService-----------onDestroy”);
}
}
注册服务
<service
android:name=“.service.MyIntentService”
android:process=“:alarmclock” />
- 震动
import android.annotation.SuppressLint;
import android.app.Service;
import android.os.Vibrator;
import android.util.Log;
public class VibrateUtils {
private static Vibrator vib;
/**
-
。两个Vibrate函数的参数简单介绍如下:
-
Context :调用该方法的Context实例
-
long milliseconds :震动的时长,单位是毫秒
-
long[] pattern :自定义震动模式 。数组中数字的含义依次是[静止时长,震动时长,静止时长,震动时长。。。]
-
时长的单位是毫秒
-
boolean isRepeat : 是否反复震动,如果是true,反复震动,如果是false,只震动一次
-
@param milliseconds
*/
@SuppressLint(“MissingPermission”)
public static void Vibrate(long milliseconds) {
vib = (Vibrator) UIUtils.getContext().getSystemService(Service.VIBRATOR_SERVICE);
vib.vibrate(milliseconds);
}
@SuppressLint(“MissingPermission”)
public static void Vibrate(long[] pattern, boolean isRepeat) {
vib = (Vibrator) UIUtils.getContext().getSystemService(Service.VIBRATOR_SERVICE);
vib.vibrate(pattern, isRepeat ? 1 : -1);
}
/**
- 震动取消
*/
@SuppressLint(“MissingPermission”)
public static void VibrateCancel() {
if (vib != null && vib.hasVibrator()) {
vib.cancel();
vib=null;
}
}
}
- 声音
import android.media.MediaPlayer;
import android.media.RingtoneManager;
import android.net.Uri;
public class SoundUtils {
private static MediaPlayer mMediaPlayer;
//播放默认铃声
public static void startAlarm() {
Uri mediaUri = RingtoneManager.getDefaultUri(RingtoneManager.TYPE_RINGTONE);


 被折叠的 条评论
为什么被折叠?


