


工作中经常需要自己去定义View去实现自己的功能,却一直没有系统的去了解自定义view,接下来我们就按自定义view的分类一步一步的看看各种自定义是如何实现的。
看郭霖大神把自定义View的实现方式分为这三种,自绘控件、组合控件、和继承控件。 个人对“自定义ViewGroup”应该分为哪类不确定,鉴于这个姿势点稍多,就在后面再单独对“自定义ViewGroup”写一篇博客做一个学习。
1、组合控件
组合控件个人感觉是自定义view中最简单的一种,组合控件就是我们不需要去绘制视图,只需要用系统原生的空间组合到一起,组建成一个新的控件。
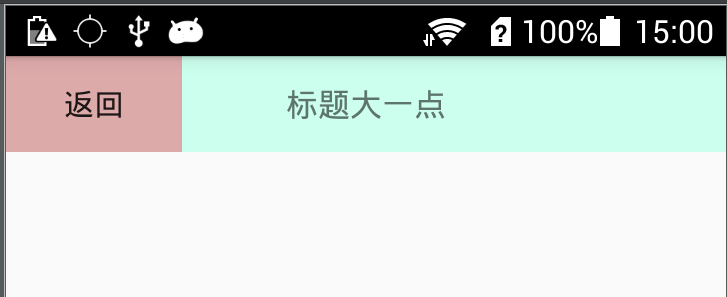
下面我们就来写一个界面上常用的标题栏的Dome,我们把一个“返回”按钮和一个标题textview组合到一个控件CombinationView中,之后每个需要用到这个标题栏的界面都可以直接导入CombinationView就可以了。
先看看组合控件的view_combination.xml文件
<?xml version="1.0" encoding="utf-8"?>
<RelativeLayout xmlns:android="http://schemas.android.com/apk/res/android"
    android:layout_width="match_parent"
    android:layout_height="wrap_content"
    android:background="#ccffee">


    <Button
        android:id="@+id/button"
        android:layout_width="wrap_content"
        android:layout_height="wrap_content"
        android:background="#ddaaaa"
        android:text="返回"
        android:textSize="15sp" />

    <TextView
        android:id="@+id/title"
        android:layout_width="wrap_content"
        android:layout_height="wrap_content"
        android:layout_centerInParent="true"
        android:text="标题大一点"
        android:textSize="16sp" />
上面的代码就是组合控件界面的实现,一个button和一个textview放在一个RelativeLayout中
再定义组合控件CombinationView继承RelativeLayout,实现代码
public class CombinationView extends RelativeLayout {

    private Button button;
    private TextView textView;

    public CombinationView(Context context, AttributeSet attrs) {
        super(context, attrs);
        LayoutInflater.from(context).inflate(R.layout.view_combination , this);

        button = (Button) findViewById(R.id.button);
        textView = (TextView) findViewById(R.id.title);

        button.setOnClickListener(new OnClickListener() {
            @Override
            public void onClick(View view) {
                ((Activity)(getContext())).finish();
            }
        });
    }

    public void setTitle(String titles){
        textView.setText(titles);
    }

    //可以通过自定方法设置文字、颜色、大小、背景、监听事件等等
    public void setTitleColor(int color){
        textView.setTextColor(color);
    }

    public void setButton(String buttons){
        button.setText(buttons);
    }

    public void setButtonClickLiseter(OnClickListener liseter){
        button.setOnClickListener(liseter);
    }
}
这步代码也很简单,实现构造方法,通过LayoutInflater的inflate()方法来加载刚定义的view_combination.xml布局, findViewById实现button和textview。根据自己需要创建多个set方法实现需求。
这样组合控件就定义完了,最后在界面的布局中引用就可以了,下面是我的引用布局
<?xml version="1.0" encoding="utf-8"?>
<RelativeLayout xmlns:android="http://schemas.android.com/apk/res/android"
    xmlns:tools="http://schemas.android.com/tools" android:id="@+id/activity_main"
    android:layout_width="match_parent" android:layout_height="match_parent"
    tools:context="ready.mumu.customview.MainActivity">

   <ready.mumu.customview.CombinationView
       android:id="@+id/combination_view"
       android:layout_width="match_parent"
       android:layout_height="wrap_content"/>

</RelativeLayout>
这样就实现了上面图片的效果了,一个标题栏就出来了,其它界面需要也只需这么再引用一下就可以了。
2、继承控件
继承控件就是,我们不需要自己去实现一个控件,只需要去继承一个现有的控件,然后在这个控件上增加一些新的功能,就可以形成一个自定义的控件了。
接下来我们来实现一个点击清空按钮可以清空输入框内输入文字的自定义输入框CombinationEdittext,先看效果
下面来看看CombinationEdittext.java 的代码
public class CombinationEdittext extends EditText implements TextWatcher, View.OnFocusChangeListener {

    /**
     * 左右两侧图片资源
     */
    private Drawable leftDrawable, rightDrawable;

    /**
     * 是否获取焦点,默认没有焦点
     */
    private boolean hasFocus = false;

    /**
     * 手指抬起时的X坐标
     */
    private int xUp = 0;

    public CombinationEdittext(Context context, AttributeSet attrs) {
        super(context, attrs);
        initView();
    }

    private void initView() {

        //获取drawableLeft图片,如果在布局文件中没有drawableLeft属性,则此值为空
        leftDrawable = getCompoundDrawables()[0];
        //获取drawableRight图片
        rightDrawable = getCompoundDrawables()[2];

        //第一次显示,隐藏右侧的删除图标
        setCompoundDrawables(leftDrawable, null, null, null);
        addListeners();

    }

    //添加焦点改变和内容改变监听事件
    private void addListeners() {
        setOnFocusChangeListener(this);
        addTextChangedListener(this);
    }

    @Override
    public void beforeTextChanged(CharSequence charSequence, int i, int i1, int i2) {

    }

    @Override
    public void onTextChanged(CharSequence text, int start, int lengthBefore, int lengthAfter) {

        if (hasFocus) {
            if (TextUtils.isEmpty(text)) {
                // 如果内容为空,则不显示删除图标
                setCompoundDrawablesWithIntrinsicBounds(leftDrawable, null, null, null);
            } else {
                // 如果内容不为空,则显示删除图标
                if (rightDrawable == null) {
                    rightDrawable = getCompoundDrawables()[2];
                }
                setCompoundDrawablesWithIntrinsicBounds(leftDrawable, null, rightDrawable, null);
            }
        }
    }

    @Override
    public void afterTextChanged(Editable editable) {

    }

    @Override
    public void onFocusChange(View view, boolean b) {
        this.hasFocus = b;
    }

    @Override
    public boolean onTouchEvent(MotionEvent event) {
        switch (event.getAction()) {
            case MotionEvent.ACTION_UP:
                // 获取点击时手指抬起的X坐标
                xUp = (int) event.getX();
                // 当点击的坐标到当前输入框右侧的距离小于等于getCompoundPaddingRight()的距离时,则认为是点击了删除图标
                if ((getWidth() - xUp) < getCompoundPaddingRight()) {
                    if (!TextUtils.isEmpty(getText().toString())) {
                        setText("");
                    }
                }
        }
        return super.onTouchEvent(event);
    }
}
里面备注写的很详细,就不再复述了,下面看看调用xml
<?xml version="1.0" encoding="utf-8"?>
<RelativeLayout xmlns:android="http://schemas.android.com/apk/res/android"
    xmlns:tools="http://schemas.android.com/tools" android:id="@+id/activity_main"
    android:layout_width="match_parent" android:layout_height="match_parent"
    tools:context="ready.mumu.customview.MainActivity">

   <ready.mumu.customview.CombinationView
       android:id="@+id/combination_view"
       android:layout_width="match_parent"
       android:layout_height="wrap_content"/>

   <ready.mumu.customview.CombinationEdittext
       android:layout_below="@id/combination_view"
       android:layout_marginTop="10dp"
       android:layout_width="match_parent"
       android:layout_height="wrap_content"
       android:paddingTop="5dp"
       android:paddingBottom="5dp"
       android:paddingRight="10dp"
       android:background="#eeeeee"
       android:drawableLeft="@mipmap/icon_phone"
       android:drawableRight="@mipmap/edit_clear"
       android:hint="请输入手机号"
       android:inputType="number"
       android:textSize="15sp"/>

</RelativeLayout>
继承控件就这样了,继承至系统控件,修改系统控件来实现自己的需求。先写这两个,自绘View和自定义VIewGroup相对较复杂在下一篇博客再细细研究。


 1681
1681

 被折叠的 条评论
为什么被折叠?
被折叠的 条评论
为什么被折叠?
 到【灌水乐园】发言


