


 该文章介绍了如何在SpringBoot项目中利用Redis实现接口限流,防止恶意爆破。通过创建自定义注解`@RateLimiter`,配合AOP切面处理,结合Lua脚本在Redis中进行计数和过期设置,实现了基于IP或特定标识的限流策略。
Redis实现接口限流
Redis 除了做缓存,还能干很多很多事情:分布式锁、限流、处理请求接口幂等性
今日有个需求,提到修改密码这个接口,由于存放在我们redis里的短信验证码过期时间为30分钟,如果被恶意知道了电话号码,可以通过爆破轮询的方式,将验证码给试出来。
前置依赖
首先我们创建一个 Spring Boot 工程,引入 Web 和 Redis 依赖,同时考虑到接口限流一般是通过注解来标记,而注解是通过 AOP 来解析的,所以我们还需要加上 AOP 的依赖,最终的依赖如下:
<dependency>
    <groupId>org.springframework.boot</groupId>
    <artifactId>spring-boot-starter-data-redis</artifactId>
</dependency>
<dependency>
    <groupId>org.springframework.boot</groupId>
    <artifactId>spring-boot-starter-web</artifactId>
</dependency>
<dependency>
    <groupId>org.springframework.boot</groupId>
    <artifactId>spring-boot-starter-aop</artifactId>
</dependency>
配置Redis
spring.redis.host=localhost
spring.redis.port=6379
spring.redis.password=xxx
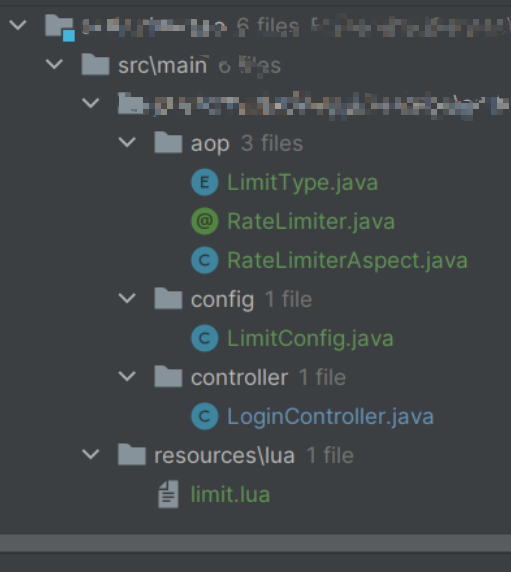
项目结构
LimiteType枚举
public enum LimitType {
    /**
     * 默认策略全局限流
     */
    DEFAULT,
    /**
     * 根据请求者IP进行限流
     */
    IP
}
RateLimiter自定义注解
@Target(ElementType.METHOD)
@Retention(RetentionPolicy.RUNTIME)
@Documented
public @interface RateLimiter {
    /**
     * 限流key
     */
    String key() default "rate_limit:";

    /**
     * 限流时间,单位秒
     */
    int time() default 60;

    /**
     * 限流次数
     */
    int count() default 100;

    /**
     * 限流类型
     */
    LimitType limitType() default LimitType.DEFAULT;
}
RateLimiterAspect切面
@Aspect
@Component
public class RateLimiterAspect {
    private static final Logger log = LoggerFactory.getLogger(RateLimiterAspect.class);

    @Resource
    private RedisTemplate<Object, Object> redisTemplate;

    @Resource
    private RedisScript<Long> limitScript;

    @Before("@annotation(rateLimiter)")
    public void doBefore(JoinPoint point, RateLimiter rateLimiter) throws Throwable {
        String key = rateLimiter.key();
        int time = rateLimiter.time();
        int count = rateLimiter.count();

        String combineKey = getCombineKey(rateLimiter, point);
        List<Object> keys = Collections.singletonList(combineKey);
        try {
            Long number = redisTemplate.execute(limitScript, keys, count, time);
            if (number==null || number.intValue() > count) {
                throw new GlobalServiceException("访问过于频繁,请稍候再试");
            }
            log.info("限制请求'{}',当前请求'{}',缓存key'{}'", count, number.intValue(), key);
        } catch (GlobalServiceException e) {
            throw e;
        } catch (Exception e) {
            throw new RuntimeException("服务器限流异常,请稍候再试");
        }
    }

    public String getCombineKey(RateLimiter rateLimiter, JoinPoint point) {
        StringBuffer stringBuffer = new StringBuffer(rateLimiter.key());
        if (rateLimiter.limitType()==LimitType.IP) {
//            stringBuffer.append(IpUtils.getIpAddr(((ServletRequestAttributes) RequestContextHolder.currentRequestAttributes()).getRequest())).append("-");
            stringBuffer.append(RequestUtil.getRemoteHost());
        }
        MethodSignature signature = (MethodSignature) point.getSignature();
        Method method = signature.getMethod();
        Class<?> targetClass = method.getDeclaringClass();
        stringBuffer.append(targetClass.getName()).append("-").append(method.getName());
        return stringBuffer.toString();
    }
}
这个切面就是拦截所有加了 @RateLimiter 注解的方法,在前置通知中对注解进行处理。

首先获取到注解中的 key、time 以及 count 三个参数。

获取一个组合的 key,所谓的组合的 key,就是在注解的 key 属性基础上,再加上方法的完整路径,如果是 IP 模式的话,就再加上 IP 地址。以 IP 模式为例,最终生成的 key 类似这样:rate_limit:127.0.0.1-org.javaboy.ratelimiter.controller.HelloController-hello(如果不是 IP 模式,那么生成的 key 中就不包含 IP 地址)。

将生成的 key 放到集合中。

通过 redisTemplate.execute 方法取执行一个 Lua 脚本,第一个参数是脚本所封装的对象,第二个参数是 key,对应了脚本中的 KEYS,后面是可变长度的参数,对应了脚本中的 ARGV。

将 Lua 脚本执行的结果与 count 进行比较,如果大于 count,就说明过载了,抛异常就行了。
Config配置类
把lua脚本放在resource文件夹下,通过new ClassPathResource去加载
@Configuration
public class LimitConfig {
    @Bean
    public DefaultRedisScript<Long> limitScript() {
        DefaultRedisScript<Long> redisScript = new DefaultRedisScript<>();
        redisScript.setScriptSource(new ResourceScriptSource(new ClassPathResource("lua/limit.lua")));
        redisScript.setResultType(Long.class);
        return redisScript;
    }
}
开发 Lua 脚本
- 直接在 Java 代码中将 Lua 脚本定义好,然后发送到 Redis 服务端去执行。
Spring Data Redis 中也提供了操作 Lua 脚本的接口,还是比较方便的,我们在 resources 目录下新建 lua 文件夹专门用来存放 lua 脚本,脚本内容如下
local key = KEYS[1]
local count = tonumber(ARGV[1])
local time = tonumber(ARGV[2])
local current = redis.call('get', key)
if current and tonumber(current) > count then
    return tonumber(current)
end
current = redis.call('incr', key)
if tonumber(current) == 1 then
    redis.call('expire', key, time)
end
return tonumber(current)
KEYS 和 ARGV 都是一会调用时候传进来的参数,tonumber 就是把字符串转为数字,redis.call 就是执行具体的 redis 指令

具体流程是这样:

首先获取到传进来的 key 以及 限流的 count 和时间 time。

通过 get 获取到这个 key 对应的值,这个值就是当前时间窗内这个接口可以访问多少次。

如果是第一次访问,此时拿到的结果为 nil,否则拿到的结果应该是一个数字,所以接下来就判断,如果拿到的结果是一个数字,并且这个数字还大于 count,那就说明已经超过流量限制了,那么直接返回查询的结果即可。

如果拿到的结果为 nil,说明是第一次访问,此时就给当前 key 自增 1,然后设置一个过期时间。

最后把自增 1 后的值返回就可以了。
附上RequestUtil(获取目标请求的ip)
public class RequestUtil {

    private static Logger LOG = LoggerFactory.getLogger(RequestUtil.class);

    public static final MediaType MEDIA_TYPE_JSON = MediaType.parse("application/json; charset=utf-8");

    private RequestUtil(){}

    /**
     * 获取request
     * @return
     */
    public static HttpServletRequest getRequest(){
        return ((ServletRequestAttributes) RequestContextHolder.getRequestAttributes()).getRequest();
    }

    /**
     * 获取Response
     * @return
     */
    public static HttpServletResponse getResponse(){
        return ((ServletRequestAttributes) RequestContextHolder.getRequestAttributes()).getResponse();
    }

    /**
     * 获取请求链接
     *
     * @return
     */
    public static String getRequestUrl(){
        return getRequest().getRequestURI();
    }

    /**
     * 是否是Ajax请求
     *
     * @param request
     * @return boolean
     */
    public static boolean isAjaxRequest(HttpServletRequest request) {
        String requestedWith = request.getHeader("x-requested-with");
        return (requestedWith != null && requestedWith.equalsIgnoreCase("XMLHttpRequest"));
    }

    /**
     * 获取目标主机的ip
     *
     * @return
     */
    public static String getRemoteHost() {
        return getRemoteHost(getRequest());
    }

    /**
     * 获取目标主机的ip
     *
     * @param request
     * @return
     */
    public static String getRemoteHost(HttpServletRequest request) {
        String ip = request.getHeader("x-forwarded-for");
        if (ip == null || ip.length() == 0 || "unknown".equalsIgnoreCase(ip)) {
            ip = request.getHeader("Proxy-Client-IP");
        }
        if (ip == null || ip.length() == 0 || "unknown".equalsIgnoreCase(ip)) {
            ip = request.getHeader("WL-Proxy-Client-IP");
        }
        if (ip == null || ip.length() == 0 || "unknown".equalsIgnoreCase(ip)) {
            ip = request.getRemoteAddr();
        }
        return caseHost(ip);
    }

    /**
     * Case "0:0:0:0:0:0:0:1" to "127.0.0.1"
     *
     * @param ip
     * @return
     */
    public static String caseHost(String ip){
        return "0:0:0:0:0:0:0:1".equals(ip) ? "127.0.0.1" : ip;
    }

    /**
     * @param accessIp
     * @return
     * @throws UnknownHostException
     */
    public static String getHostname(String accessIp) throws UnknownHostException {
        InetAddress ia;
        try {
            String prefix = accessIp;
            if (accessIp.indexOf(":") >= 0)
                prefix = accessIp.split(":")[0];
            ia = InetAddress.getByName(prefix);
        } catch (Exception e) {
            ia = Inet6Address.getByName(accessIp);
        }
        return ia.getHostName();
    }

    /**
     * 是否来自微信手机客户端
     *
     * @return
     */
    public static boolean isWxClient(){
        String userAgent = getRequest().getHeader("user-agent").toLowerCase();
        return userAgent.contains("micromessenger") && ((userAgent.contains("android") && userAgent.contains("mobile")) || userAgent.contains("iphone")) && !userAgent.contains("tablet") ;
    }

}
测试
@RestController
public class HelloController {
    @GetMapping("/hello")
    //表示60秒内只能请求3次
    @RateLimiter(time = 60,count = 3,limitType = LimitType.IP)
    public String hello() {
        return "666";
    }
}
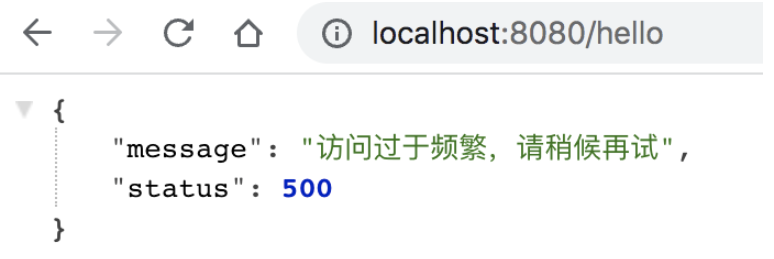
每一个 IP 地址,在 5 秒内只能访问 3 次。这个自己手动刷新浏览器或者postman测试
下图为过载时候的测试效果


 被折叠的 条评论
为什么被折叠?
被折叠的 条评论
为什么被折叠?
 到【灌水乐园】发言


