


发了四篇博客是关于前端react框架的,但是呢从项目开始学就意味着项目为主,接了什么任务就学什么东西,做什么事情,所以这次是关于应用程序app的任务,大概是在现有代码的基础上,把每个页面,功能的ui通过设计稿实现掉,功能不变。
既然我现在是新兵,肯定是大哥指哪里我去打那里,虽然不知道打不打的下来,反正打就对了。项目是用的expo框架,明显这次的学习内容是expo框架,让我们进入文档。

依旧官方文档中文版,虽然英文版更好,但咱这英语水平加上时间比较紧张还是直接中文吧。框架这一块生搬硬套,expo是一个简化 Android 和 iOS 应用开发的框架,直接套公式,react框架的另一种变化,秒了。
直接下手从第一步开始。
创建第一个应用程序,跟react一样套公式npx create-expo-app@latest StickerSmash
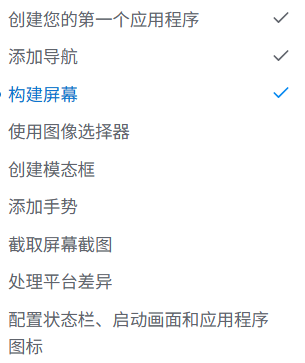
ok现在我们拥有了一个expo应用名字是StickerSmash,哎里面的文件好多。让我们运行 reset-project 脚本,我们将从头开始构建我们的应用,并了解添加基于文件的导航的基础知识。让我们运行reset-project脚本来删除样板代码。
删除完神清气爽,然后我们启动项目,当然这里我用的ios模拟器所以命令是npx expo start --ios 看图

ok现在我们第一步创建启动完成了。接下来看第二个板块。导航栏。我在学react的时候了已经了解了路由相关概念所以呢expo应用的页面是expo框架里面自带的router的库来帮助我们实现页面的,就是我们只要把名字搞对,比如index.tsx应用入口也就是开始的页面,然后-layout.tsx是导航栏目,里面我们不需要写什么,只要默认返回框架对应的router就会帮助我们按照文件名来生成页面。很容易理解,至少我跟着敲一遍是理解了,所以直接跳过。
底层导航栏,也就是微信下面的四个图标,大家都知道,我觉得导航栏就是要实现这个才算是理解了一点,首先是tabs文件我们需要建立,然后router默认帮我们切换了一个导航栏tabs,然后我们给tabs创建文件index.tsx about.tsx setting.tsx然后输入最基本的文本,在tabs里面存放标题,router就自动生成了应用的底层导航栏,当然我们要记得在app/index.tsx用reairect把导航栏路径切换到tabs里面不然如果你设置了+not-found.tsx自动就去那里了。
tabs/_layout.tsx
import { Ionicons } from '@expo/vector-icons';
import { Tabs } from "expo-router";
export default function TabsLayout(){
  return(
       <Tabs
        screenOptions={{
            headerShown:false,
        }}
       >
       <Tabs.Screen name='index' options={{title:'首页',tabBarIcon:({color,size})=>(
        <Ionicons name='home' color={color} size={size} />
       )}}  />
       <Tabs.Screen name='about' options={{title:'关于我们',tabBarIcon:({color,size})=>(
        <Ionicons name='information-circle' color={color} size={size} />
       )}}  />
       <Tabs.Screen name='setting' options={{title:'设置',tabBarIcon:({color,size})=>(
        <Ionicons name='settings' color={color} size={size} />
       )}}  />
       </Tabs>
  )
}
tabs/about.tsx
import { Link } from "expo-router";
import { StyleSheet, Text, View } from "react-native";
export default function About(){
  return(
    <View style={styles.container}>
      <Text style={styles.text}>这是关于页面</Text>
      <Link href="/tabs/setting" style={styles.button}>
        去设置页面
      </Link>
    </View>
  )
}
const styles = StyleSheet.create({
    container:{
        flex:1,
        backgroundColor:'#25291e',
        alignItems:'center',
        justifyContent:'center'
    },
    text:{
        fontSize:20,
        color:'red'
    },
    button:{
      borderRadius:'10px'
    }

})
tabs/index.tsx
import Button from '@/components/Button';
import ImageViewer from '@/components/ImageViewer';
import { StyleSheet, View } from "react-native";
const PlaceholderImage = require('../../assets/images/background-image.png');
export default function Index() {
  return (
    <View
      style={styles.container} >
        <View>
           <ImageViewer imgsource={PlaceholderImage} />
        </View>
        <View style={styles.footerContainer}>
          <Button label="Choose a photo"  />
          <Button label="Use this photo" />
        </View>
    </View>
  );
}
const styles = StyleSheet.create({
   container:{
    flex:1,
    backgroundColor:'#25291e',
    alignItems:'center',
    justifyContent:'center'
   },
   text:{
    fontSize:20,
    color:'red'
   },
   buttom:{
    backgroundColor:'#fff',
    padding:10,
    borderRadius:5,
    marginTop:20,
    color:'red'
   },
   image:{
    width:320,
    height:320,
   },
   footerContainer:{
    flex:1/3,
    alignItems:'center',
   }
})
tabs/setting
import Button from '@/components/Button';
import ImageViewer from '@/components/ImageViewer';
import { StyleSheet, View } from "react-native";
const PlaceholderImage = require('../../assets/images/background-image.png');
export default function Index() {
  return (
    <View
      style={styles.container} >
        <View>
           <ImageViewer imgsource={PlaceholderImage} />
        </View>
        <View style={styles.footerContainer}>
          <Button label="Choose a photo"  />
          <Button label="Use this photo" />
        </View>
    </View>
  );
}
const styles = StyleSheet.create({
   container:{
    flex:1,
    backgroundColor:'#25291e',
    alignItems:'center',
    justifyContent:'center'
   },
   text:{
    fontSize:20,
    color:'red'
   },
   buttom:{
    backgroundColor:'#fff',
    padding:10,
    borderRadius:5,
    marginTop:20,
    color:'red'
   },
   image:{
    width:320,
    height:320,
   },
   footerContainer:{
    flex:1/3,
    alignItems:'center',
   }
})
app/index.tsx
import { Redirect } from "expo-router";

export default function Index(){
  return(
    <Redirect href="/tabs" />
  )
}
app/+not -found .tsx
import { Link, Stack } from "expo-router";
import { StyleSheet, View } from "react-native";


export default function NotFoundScreen(){
  return(
         <View>
             <Stack.Screen options={{title:'Oops! Not Found'}} />
          <View style={styles.container}>
            <Link href="/tabs" style={styles.button}>
            Go back The HomeScreen
            </Link>
          </View>
         </View>
  )
}
const styles = StyleSheet.create({
  container:{
    flex:1,
    backgroundColor:'#25291e',
    alignItems:'center',
    justifyContent:'center'
  },
  text:{
    color:'red'
  },
  button:{
    backgroundColor:'#fff',
    padding:10,
    borderRadius:5,
    color:'red',
    marginTop:120

  }
})
这是今天我练习的所有代码,大家想练习的直接去,但我估计没人会这样,然后底层导航栏的核心就是index.tax切换路径给tabs让tabs导航栏使用,然后tabs里面的文件根据router功能自动生成页面,然后tabs里面的layout.tsx里面定义导航栏标题以及对应的页面。
但是认真的人会发现我使用了一些样式组件来给屏幕添加img button等组件样式,我也先把代码抠出来。
components/button
import { Pressable, StyleSheet, Text, View } from "react-native";
//pressable是一个组件专门监听点击事件
type Props = {
    label:string;
    isOutline?:boolean;

}
export default function Button({label, isOutline}:Props){

    return (
        <View style={styles.buttonContainer}>
            <Pressable style={[styles.button, isOutline && styles.outlineButton]}  onPress={()=>alert('you pressed a button.')}>

                <Text style={styles.buttonLabel}>{label}</Text>
            </Pressable>
        </View>
    )
}
//这个组件的功能是显示一个带文字的按钮点击后弹出提示
const styles = StyleSheet.create({
    buttonContainer:{
        width:320,
        height:68,
        marginHorizontal:20,
        alignItems:'center',
        justifyContent:'center',
        padding:3,
    },
    button:{
        borderRadius:10,
        width:'100%',
        height:'100%',
        alignItems:'center',
        justifyContent:'center',
        flexDirection:'row',
    },
    buttonLabel:{
        color:'#fff',
        fontSize:16,
        marginLeft:8,
    },
    outlineButton:{
        borderColor:'#fff',
        borderWidth:2,
    }
})
components/ImageViewer
import { Image } from "expo-image";
import { ImageSourcePropType, StyleSheet } from "react-native";

type Props = {
  imgsource: ImageSourcePropType;

};
export default function ImageViewer({imgsource}:Props){
    return (
        <Image source={imgsource} style={styles.image}  />
    )
}
//这是一个函数组件接受imgsource作为参数 类型是props 也就是上面的内容 然后返回的是Image组件设置啦图片的来源和样式
const styles = StyleSheet.create({
    image:{
        width:320,
        height:320,
    }
})
ok这是我学的第三个模块的内容,构建屏幕,我发现框架里面都有自己的UI组件使用方式,跟积木一样,先设计好各自你想要的形状然后拼凑,比如我想要在屏幕添加一个图片,我要在组件里面设置我需要图片的格式,然后接受的参数是什么类型,然后直接传参来使用组件。这个会让开发变的高效以及思路清晰,按钮同理,但是我想要第一个按钮或者某一个按钮添加特殊的样式,我们会发现这其实就是切换主题的思路,我们要设计一个参数然后通过有没有传传输来决定是false还是true,true来决定它是按钮的那个样式,就是传一个参数,然后通过判断有没有来确定布尔值。
如果是真就渲染后面的样式。
好的,这就是我今天学习的内容了,内容不多,但胜在动手操作然后理解思路,如果有问题的地方大家可以评论,毕竟我是初学者,大家每天见。


 被折叠的 条评论
为什么被折叠?
被折叠的 条评论
为什么被折叠?
 到【灌水乐园】发言


