


Android-Intent两种启动方式
Intent是安卓提供跳转页面的类,那么它有显式的跳转和隐式的跳转,个人认为显式和隐式并没有太大
的区别,所以我就只复习了显式跳转,然而显式的跳转也有两种方式,一个是从第一个页面跳转到第二
个页面,并且可以发送数据给第二个页面,第二张方式是回调方式,第二个页面销毁之后,回到第一个
页面可以发送数据。
startActivity(Intent intent) 第一种方式
startActivityForResult(Intent intent, int requestCode) 第二种方式
第一个页面:FActivity flayout.xml
第二个页面:SActivity slayout.xml
然后要在AndroidManifest.xml进行注册才可以实现跳转,不然会报错,切记!
进行注册:
<?xml version="1.0" encoding="utf-8"?>
<manifest xmlns:android="http://schemas.android.com/apk/res/android"
    package="com.xieth.as.intentdemo" >

    <application
        android:allowBackup="true"
        android:icon="@mipmap/ic_launcher"
        android:label="@string/app_name"
        android:theme="@style/AppTheme" >
        <activity
            android:name=".MainActivity"
            android:label="@string/app_name" >
        </activity>
        <activity
            android:name=".FActivity"
            android:label="@string/app_name" >
            <intent-filter>
                <action android:name="android.intent.action.MAIN" />

                <category android:name="android.intent.category.LAUNCHER" />
            </intent-filter>
        </activity>
        <activity
            android:name=".SActivity"
            android:label="@string/app_name" >
        </activity>
    </application>

</manifest>
在这里使用FActivity作为第一启动页面:
<activity
android:name=".FActivity"
android:label="@string/app_name" >
<intent-filter>
<action android:name="android.intent.action.MAIN" />
<category android:name="android.intent.category.LAUNCHER" />
</intent-filter>
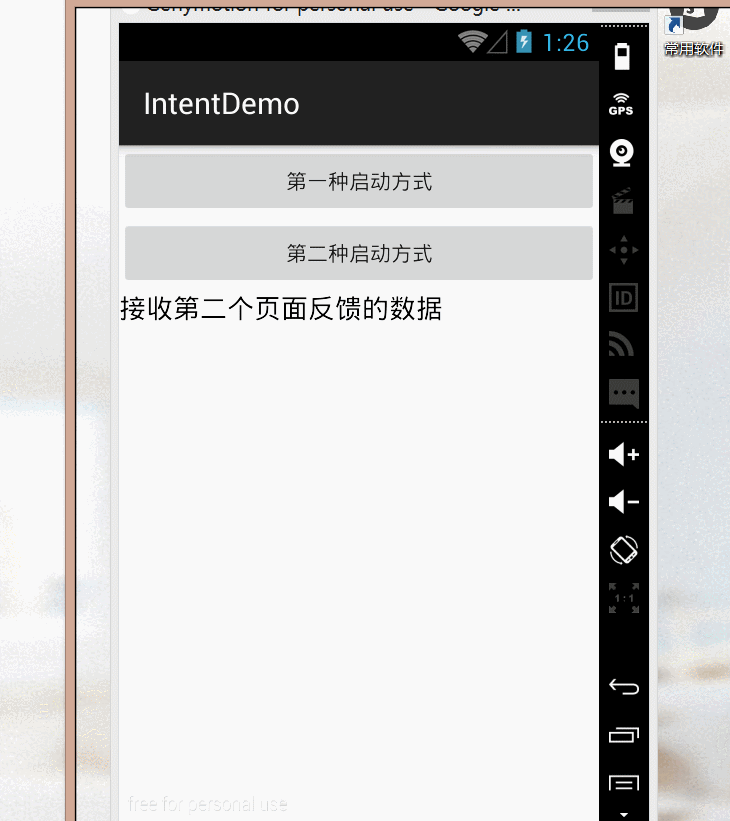
</activity>第一个页面的布局
flayout.xml
<?xml version="1.0" encoding="utf-8"?>
<LinearLayout xmlns:android="http://schemas.android.com/apk/res/android"
              android:orientation="vertical"
              android:layout_width="match_parent"
              android:layout_height="match_parent">

    <Button
        android:layout_width="match_parent"
        android:layout_height="wrap_content"
        android:text="第一种启动方式"
        android:id="@+id/button1"
        />

    <Button
        android:layout_width="match_parent"
        android:layout_height="wrap_content"
        android:text="第二种启动方式"
        android:id="@+id/button2"
        />

    <TextView
        android:layout_width="match_parent"
        android:layout_height="wrap_content"
        android:text="接收第二个页面反馈的数据"
        android:textSize="18dp"
        android:textColor="@android:color/background_dark"
        android:id="@+id/textView"
        />
</LinearLayout>
第二个页面的布局
slayout.xml
<?xml version="1.0" encoding="utf-8"?>
<LinearLayout xmlns:android="http://schemas.android.com/apk/res/android"
              android:orientation="vertical"
              android:layout_width="match_parent"
              android:layout_height="match_parent">

    <Button
        android:layout_width="match_parent"
        android:layout_height="wrap_content"
        android:text="返回第一个页面"
        android:id="@+id/button3"
        />
</LinearLayout>
第一个页面的Activity
package com.xieth.as.intentdemo;

import android.content.Intent;
import android.os.Bundle;
import android.support.v7.app.AppCompatActivity;
import android.view.View;
import android.widget.Button;
import android.widget.TextView;

/**
 * Created by YR on 2016/03/27.
 */
public class FActivity extends AppCompatActivity implements View.OnClickListener {

    private Button btn1 = null;
    private Button btn2 = null;
    private TextView tv = null;

    @Override
    protected void onCreate(Bundle savedInstanceState) {
        super.onCreate(savedInstanceState);
        setContentView(R.layout.flayout);

        initViews();
        eventsViews();
    }

    private void eventsViews() {
        btn1.setOnClickListener(this);
        btn2.setOnClickListener(this);
    }

    private void initViews() {
        btn1 = (Button) findViewById(R.id.button1);
        btn2 = (Button) findViewById(R.id.button2);
        tv = (TextView) findViewById(R.id.textView);
    }

    @Override
    public void onClick(View v) {
        int id = v.getId();
        switch (id) {
            case R.id.button1:
                Intent it1 = new Intent(this, SActivity.class);
                startActivity(it1);
                break;
            case R.id.button2:
                Intent it2 = new Intent(this, SActivity.class);
                startActivityForResult(it2, 1);
                break;
            default:
                break;
        }

    }
}
可以看见两个按钮的监听事件是不同的。
第二个页面的活动:
package com.xieth.as.intentdemo;

import android.content.Intent;
import android.os.Bundle;
import android.support.v7.app.AppCompatActivity;
import android.view.View;
import android.widget.Button;

/**
 * Created by YR on 2016/03/27.
 */
public class SActivity extends AppCompatActivity implements View.OnClickListener {

    private Button btn3 = null;

    // 需要返回的数据
    private String data = "第一个页面你好,我是第二个页面返回的数据.";

    @Override
    protected void onCreate(Bundle savedInstanceState) {
        super.onCreate(savedInstanceState);
        setContentView(R.layout.slayout);

        initViews();
        eventViews();
    }

    private void eventViews() {
        btn3.setOnClickListener(this);
    }

    private void initViews() {
        btn3 = (Button) findViewById(R.id.button3);
    }

    @Override
    public void onClick(View v) {
        int id = v.getId();
        switch (id) {
            case R.id.button3:
                Intent it = new Intent();
                it.putExtra("key", data);
                setResult(2, it);
                finish();
                break;
            default:
                break;
        }
    }
}
这样还是不可以的,我就犯了一个错误,那就是没有重写接收返回数据的方法,在第一个页面:
    @Override
    protected void onActivityResult(int requestCode, int resultCode, Intent data) {
        super.onActivityResult(requestCode, resultCode, data);
        if (requestCode == 1 && resultCode == 2) {
            tv.setText(data.getStringExtra("key").toString());
        }

    }
运行效果:
但是当我们按返回键的时候,还是不可以把数据返回到第一个页面,我们可以重写onBackPressed方法
第二个页面:
@Override
    public void onClick(View v) {
        int id = v.getId();
        switch (id) {
            case R.id.button3:
                getData();
                break;
            default:
                break;
        }
    }

    private void getData() {
        Intent it = new Intent();
        it.putExtra("key", data);
        setResult(2, it);
        finish();
    }

    @Override
    public void onBackPressed() {
        getData();
    }
把返回数据封装成一个方法即可。
运行效果:

鼠标位置有点偏。。


 591
591

 被折叠的 条评论
为什么被折叠?
被折叠的 条评论
为什么被折叠?
 到【灌水乐园】发言


