


1.xml配置通知的方式
1.创建接口以及实现类
public interface PersonService {
void addPerson();
void updatePerson();
}
public class PersonServiceImpl implements PersonService {
@Override
public void addPerson() {
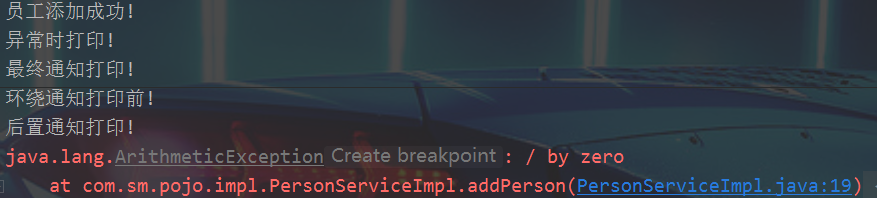
System.out.println("员工添加成功!");
System.out.println(1/0);
}
@Override
public void updatePerson() {
System.out.println("员工修改成功!");
}
}
2.创建切面
public class AspectJ1 {
    //前置通知
    public void before(){
        System.out.println("前置通知打印!");
    }
    //后置通知
    public void afterReturning(){
        System.out.println("后置通知打印!");
    }
    public void around(ProceedingJoinPoint proceedingJoinPoint){
        System.out.println("环绕通知打印前!");
        try {
			proceedingJoinPoint.proceed();//需要增强的连接点(方法)的发生(调用)
        } catch (Throwable throwable) {
            throwable.printStackTrace();
        }
        System.out.println("环绕通知打印后!");
    }
    public void after(){
        System.out.println("最终通知打印!");
    }
    public void afterThrowing(){
        System.out.println("异常时打印!");
    }
}
3.xml的配置
<?xml version="1.0" encoding="UTF-8"?>
<beans xmlns="http://www.springframework.org/schema/beans"
       xmlns:xsi="http://www.w3.org/2001/XMLSchema-instance" xmlns:aop="http://www.springframework.org/schema/aop"
       xsi:schemaLocation="http://www.springframework.org/schema/beans http://www.springframework.org/schema/beans/spring-beans.xsd http://www.springframework.org/schema/aop https://www.springframework.org/schema/aop/spring-aop.xsd">
    <bean id="person" class="com.sm.pojo.impl.PersonServiceImpl"/>
    <bean id="aspectJ1" class="com.sm.aspect.AspectJ1"/>
    <aop:config>
        <aop:aspect ref="aspectJ1">
            <!--
                expression="execution(* com.sm.pojo..*.*(..))
                表示访问修饰符为任意类型 在com.sm.pojo(包括他自己本包)下面的所有类下面的所有的方法 参数有没有无所谓
             -->
			<!--为了减少代码的重复性 将切入点表达式抽取出来-->
            <aop:pointcut id="point" expression="execution(* com.sm.pojo..*.*(..))"/>
            <!--前置通知的配置-->
	        <aop:before method="before" pointcut-ref="point"/>
	        <!--后置通知的配置-->
            <aop:after-returning method="afterReturning" pointcut-ref="point"/>
            <!--环绕通知的配置-->
            <aop:around method="around" pointcut-ref="point"/>
            <!--最终通知的配置 无论有没有异常都会执行-->
            <aop:after method="after" pointcut-ref="point"/>
            <!--异常通知的配置-->
            <aop:after-throwing method="afterThrowing" pointcut-ref="point"/>
        </aop:aspect>
    </aop:config>
</beans>
4.测试
public static void main(String[] args) {
        ApplicationContext context = new ClassPathXmlApplicationContext("config-info.xml");
        PersonService personService = context.getBean("person", PersonService.class);
        personService.addPerson();
}
2.xml配置包扫描+注解的方式
1.创键接口以及实现类 +注解
public interface UserService {
void addUser();
void updateUser();
}
@Component
public class UserServiceImpl implements UserService {
@Override
public void addUser() {
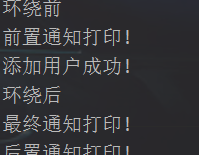
System.out.println("添加用户成功!");
}
@Override
public void updateUser() {
System.out.println("修改用户成功!");
}
}
2.创键切面 +注解
@Component //配置了包扫描 -->加入容器
@Aspect //指定切面
public class AspectJ {
	//将接入点表达式抽取出来 减少代码重复性
    @Pointcut("execution(* com.sm.pojo..*.*(..))")
    public void pointCut() {
    }
    //前置通知
    @Before("pointCut()")  //也可以在引号中直接写切入点表达式
    public void before() {
        System.out.println("前置通知打印!");
    }
    //后置通知
    @AfterReturning("pointCut()")
    public void afterReturning() {
        System.out.println("后置通知打印!");
    }
    @Around("pointCut()")
    public void around(ProceedingJoinPoint proceedingJoinPoint) {
        System.out.println("环绕前");
        try {
            proceedingJoinPoint.proceed();//连接点或者说是需要增强的方法的调用/启用
        } catch (Throwable throwable) {
            throwable.printStackTrace();
        }
        System.out.println("环绕后");
    }
    @After("pointCut()")
    public void after() {
        System.out.println("最终通知打印!");
    }
    @AfterThrowing("pointCut()")
    public void afterThrowing() {
        System.out.println("异常时打印!");
    }
}
3.配置xml
<?xml version="1.0" encoding="UTF-8"?>
<beans xmlns="http://www.springframework.org/schema/beans"
       xmlns:xsi="http://www.w3.org/2001/XMLSchema-instance"
       xmlns:context="http://www.springframework.org/schema/context"
       xmlns:aop="http://www.springframework.org/schema/aop"
       xsi:schemaLocation="http://www.springframework.org/schema/beans http://www.springframework.org/schema/beans/spring-beans.xsd http://www.springframework.org/schema/context https://www.springframework.org/schema/context/spring-context.xsd http://www.springframework.org/schema/aop https://www.springframework.org/schema/aop/spring-aop.xsd">
    <!--配置包扫描-->
    <context:component-scan base-package="com.sm"/>
    <!--配置切面-->
    <aop:aspectj-autoproxy/>
</beans>
4.测试
public class AspectTest {
    public static void main(String[] args) {
        ApplicationContext applicationContext = new ClassPathXmlApplicationContext("user.xml");
        UserService userService = applicationContext.getBean(UserService.class);
        userService.addUser();
    }
}
3.纯注解
1.另外定义一个类
@Configuration  //代替配置文件
@ComponentScan(basePackages = {"com.sm"}) //包扫描
@EnableAspectJAutoProxy //开启aspectj代理
public class MyConfig {

}
2.测试
public class AspectTest {
    public static void main(String[] args) {
        ApplicationContext applicationContext = new AnnotationConfigApplicationContext(MyConfig.class);
        UserService bean = applicationContext.getBean(UserService.class);
        bean.addUser();
    }
}


 750
750


 被折叠的 条评论
为什么被折叠?
被折叠的 条评论
为什么被折叠?
 到【灌水乐园】发言


