


JNI开发
JNI全称是Java Native Interface,即Java本地接口
Java、JNI、C/C++互调
生成so库
使用CMake(跨平台编译工具),配合CMakeList.txt和gradle来使用。
演示
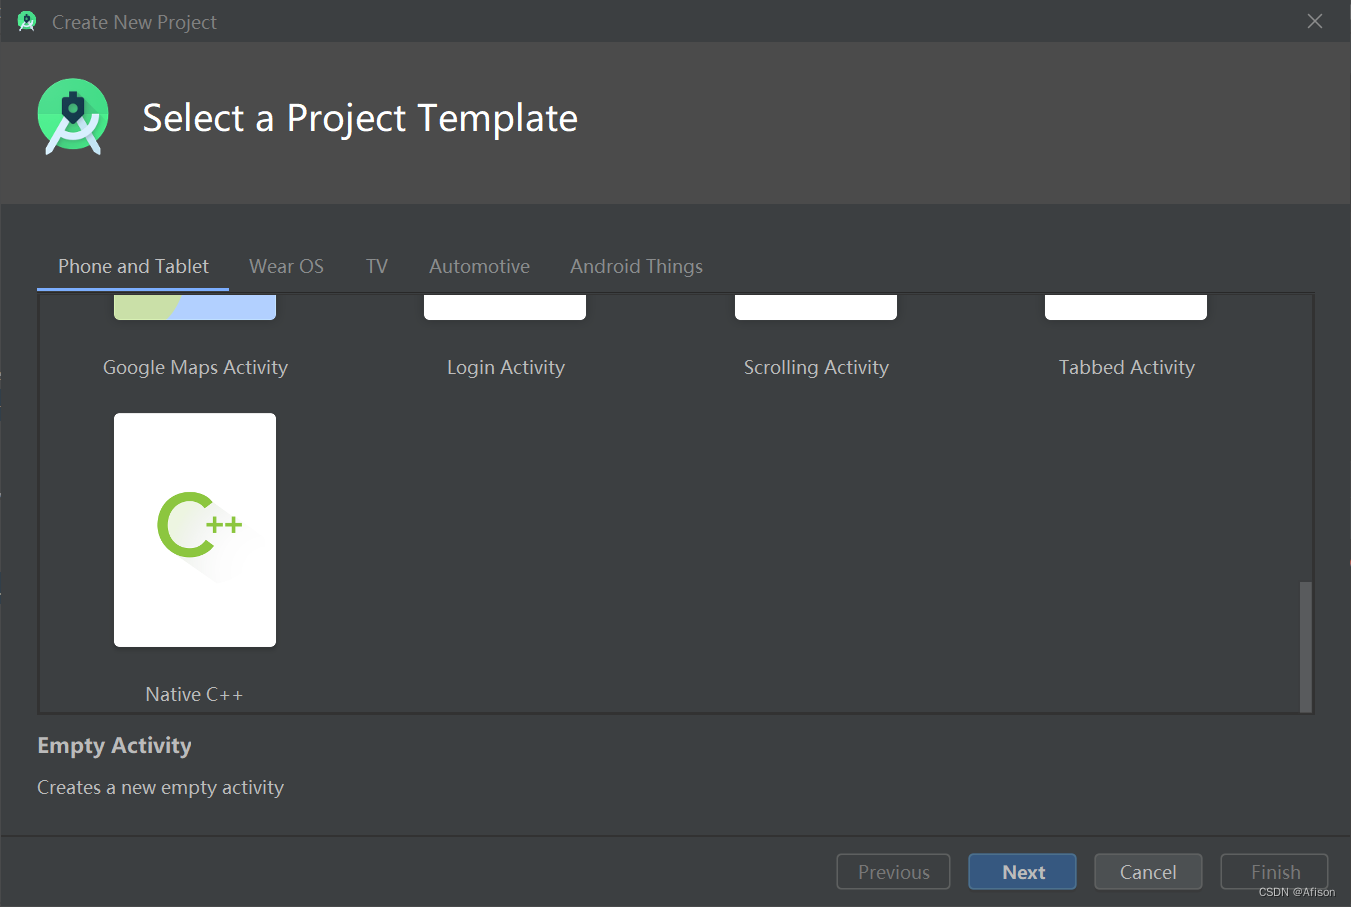
创建项目
打开AndroidStudio创建新项目。(若缺少NDK,先下载NDK)
Select a Project Template 选择Native C++
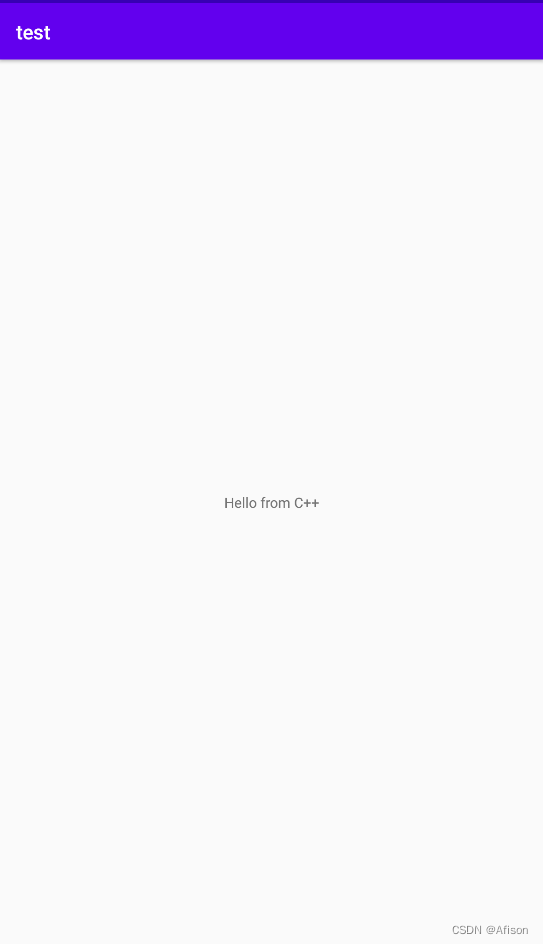
native-lib.cpp实现了显示字符串的代码
#include <jni.h>
#include <string>

/**
*extern "C" 避免编译器按照C++的方法编译C函数,如果编译器安装C++的方法编译,函数就会重*载,会导致编译后函数名发生变化
*JNIEXPORT 类似public,可以让其他函数调用
*jstring 字符串类型	jint,jchar等
*JNICALL 为空 没有含义
*Java_com_afison_test_MainActivity_stringFromJNI Java_包名类名方法名
*JNIEnv* env 与java进行交互的相关函数
*/
extern "C" JNIEXPORT jstring JNICALL
Java_com_afison_test_MainActivity_stringFromJNI(
        JNIEnv* env,
        jobject /* this */) {
    std::string hello = "Hello from C++";
    return env->NewStringUTF(hello.c_str());
}
CMakeList.txt把源文件编译为库文件
# For more information about using CMake with Android Studio, read the
# documentation: https://d.android.com/studio/projects/add-native-code.html

# Sets the minimum version of CMake required to build the native library.

cmake_minimum_required(VERSION 3.4.1)

# Creates and names a library, sets it as either STATIC
# or SHARED, and provides the relative paths to its source code.
# You can define multiple libraries, and CMake builds them for you.
# Gradle automatically packages shared libraries with your APK.

add_library( # Sets the name of the library.
             native-lib

             # Sets the library as a shared library.
             SHARED

             # Provides a relative path to your source file(s).
             native-lib.cpp )

# Searches for a specified prebuilt library and stores the path as a
# variable. Because CMake includes system libraries in the search path by
# default, you only need to specify the name of the public NDK library
# you want to add. CMake verifies that the library exists before
# completing its build.

find_library( # Sets the name of the path variable.
              log-lib

              # Specifies the name of the NDK library that
              # you want CMake to locate.
              log )

# Specifies libraries CMake should link to your target library. You
# can link multiple libraries, such as libraries you define in this
# build script, prebuilt third-party libraries, or system libraries.

target_link_libraries( # Specifies the target library.
                       native-lib

                       # Links the target library to the log library
                       # included in the NDK.
                       ${log-lib} )
生成的so库文件
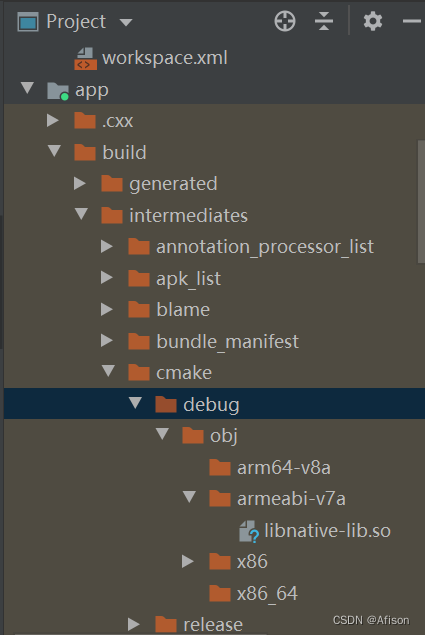
libnative-lib.so就是得到的库文件,可以直接调用so库实现对应方法。
仿写JNI代码–点亮led
打开native-lib.cpp文件,添加头文件,与c类似
#include <stdio.h>
#include <stdlib.h>
#include <fcntl.h>
#include <errno.h>
#include <unistd.h>
#include <sys/types.h>
#include <sys/stat.h>
#include <string.h>
#include <stdint.h>
#include <termios.h>
#include <android/log.h>//安卓打印调试信息的头文件
#include <sys/ioctl.h>
int fd = 0;//句柄,open之后的返回值

extern "C" JNIEXPORT jstring JNICALL
Java_com_afison_jnitest_MainActivity_LedOpen(
        JNIEnv* env,
        jobject /* this */) {
    fd = open("/dev/leds_ctl",O_RDWR | O_NDELAY | O_NOCTTY);
    if(fd <=0){
        __android_log_print(ANDROID_LOG_INFO,"serial","open /dev/leds_ctl Error");
    }else{
        __android_log_print(ANDROID_LOG_INFO,"serial","open /dev/leds_ctl Success fd=%d",fd);
    }
    return 0;
}

extern "C" JNIEXPORT jstring JNICALL
Java_com_afison_jnitest_MainActivity_LedClos(
        JNIEnv* env,
        jobject /* this */) {
    if(fd > 0) close(fd);
    return 0;
}

extern "C" JNIEXPORT jstring JNICALL
Java_com_afison_jnitest_MainActivity_LedIoctl(
        JNIEnv* env,
        jobject, /* this */
        jint num,
        jint en) {
    ioctl(fd,num,en);
    return 0;
}
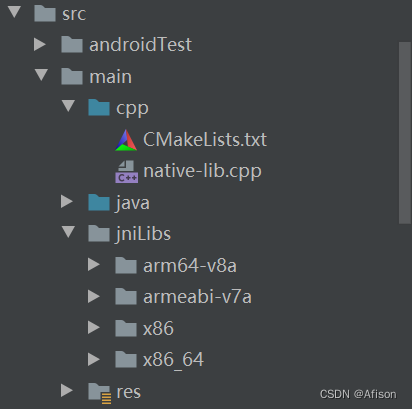
点击小锤子编译,生成不同平台的CPU库

虽然生成的库很多,但是实际不需要这么多库,可以只用armeabi-v7a即可满足大部分需求,armeabi-v7a兼容X86,ARMV7,ARMV8。
若想更改库路径
(1)更改so库的生成目录,我们打开CMakeList.txt,添加下面的一句设置:
set(CMAKE_LIBRARY_OUTPUT_DIRECTORY
C M A K E C U R R E N T S O U R C E D l R / . . / j n i L i b s / {CMAKE_CURRENT_SOURCE_DlR}/../jniLibs/ CMAKECURRENTSOURCEDlR/../jniLibs/{ANDROlD_ABI})
简化这个设置就是:
set (原路径,目标路径,生成那些平台对应的库文件)
参数解析如下:
CMAKE_CURRENT_SOURCE_DIR:这个是cmake 的库的原路径
/…/jniLibs/: 这个是指与 CMakeList.txt所在目录的同一级目录
ANDROID_ABI : 生成那些平台对应的库文件。
我们打开CMakeList.txt,在里面添加这句代码,代码如下:
set(CMAKE_LIBRARY_OUTPUT_DIRECTORY ${CMAKE_CURRENT_SOURCE_DIR}/../jniLibs/${ANDROID_ABI})
这样找库就方便很多
(2)生成指定平台的so库,我们打开gradle,这句代码的意思就是说添加只生成 armeabi-v7a的库。在build.gradle(:app)中添加如下代码
abiFilters "armeabi-v7a"


使用编译好的so库
选择一个空的Activity
包名要和生成好的so库包名一样com_afison_jnitest
native-lib.cpp底下包名
Java_com_afison_jnitest_MainActivity_LedIoctl(
        JNIEnv* env,
        jobject, /* this */
        jint num,
        jint en) {
    ioctl(fd,num,en);
    return 0;
}
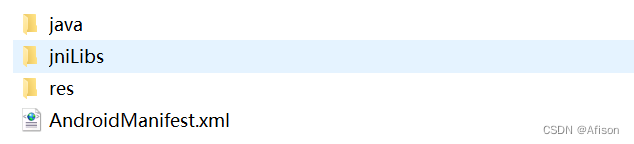
拷贝jniLibs
导入库
    /**
     * 导入库
     */
    static {
        System.loadLibrary("native-lib");
    }

    /**
     * 声明方法
     */
    public native int LedOpen();
    public native int LedClos();
    public native int LedIoctl(int num,int en);
安卓UI
<?xml version="1.0" encoding="utf-8"?>
<androidx.constraintlayout.widget.ConstraintLayout xmlns:android="http://schemas.android.com/apk/res/android"
    xmlns:app="http://schemas.android.com/apk/res-auto"
    xmlns:tools="http://schemas.android.com/tools"
    android:layout_width="match_parent"
    android:layout_height="match_parent"
    tools:context=".MainActivity">

    <LinearLayout
        android:layout_width="match_parent"
        android:layout_height="match_parent"
        android:orientation="vertical"
        android:gravity="center">

    <Button
        android:id="@+id/button1"
        android:layout_width="wrap_content"
        android:layout_height="wrap_content"
        android:text="LED1 ON"/>

    <Button
        android:id="@+id/button2"
        android:layout_width="wrap_content"
        android:layout_height="wrap_content"
        android:text="LED2 OFF"/>
    </LinearLayout>
</androidx.constraintlayout.widget.ConstraintLayout>

MainActivity
public class MainActivity extends AppCompatActivity {

    /**
     * 导入库
     */
    static {
        System.loadLibrary("native-lib");
    }

    /**
     * 声明方法
     */
    public native int LedOpen();

    public native int LedClos();

    public native int LedIoctl(int num, int en);

    private Button led_on;
    private Button led_off;


    @Override
    protected void onCreate(Bundle savedInstanceState) {
        super.onCreate(savedInstanceState);
        setContentView(R.layout.activity_main);
        initView();
        initListener();
    }

    private void initView() {
        led_on = findViewById(R.id.button1);
        led_off = findViewById(R.id.button2);
    }

    private void initListener() {
        led_on.setOnClickListener(new View.OnClickListener() {
            @Override
            public void onClick(View view) {
                LedOpen();
                LedIoctl(1,1);
            }
        });
        led_off.setOnClickListener(new View.OnClickListener() {
            @Override
            public void onClick(View view) {
                LedOpen();
                LedIoctl(0,0);
            }
        });
    }
}


 762
762


 被折叠的 条评论
为什么被折叠?
被折叠的 条评论
为什么被折叠?
 到【灌水乐园】发言


