


前言
在这个文章中,我将与大家分享我在学习和应用Spring Boot过程中的经验和心得。我会尽力以一种简洁明了的方式来解释Spring Boot的概念和核心特性,帮助那些对这个框架感兴趣的同学们快速入门,并且能够从中受益。
我相信,通过学习和实践Spring Boot,我们可以拓宽自己的技术视野,并为未来的职业发展打下坚实的基础。我希望通过这个博客系列,能够为大家提供有价值的内容,并与大家一起共同成长和进步。
Spring Boot 概览
1.SpringBoot是什么
从2002年开始,Spring一直在飞速的发展,如今已经成为了在JavaEE开发中真正意义上的标准,但是随着技术的发展,JavaEE使用Spring逐渐变得笨重起来,大量的XML文件存在于项目之中。繁琐的配置,整合第三方框架的配置问题,导致了开发和部署效率的降低。2012年10月MikeYoungstrom在Springjira中创建了一个功能请求,要求在Spring框架中支持无容器Web应用程序体系结构。他谈到了在主容器引导spring容器内配置Web容器服务。这是jira请求的摘录:我认为Spring的Web应用体系结构可以大大简化,如果它提供了从上到下利用Spring组件和配置模型的工具和参考体系结构。在简单的main()方法引导的Spring容器内嵌入和统一这些常用Web容器服务的配置。这一要求促使了2013年初开始的SpringBoot项目的研发,到今天SpringBoot的版本已经到了3.2.0。SpringBoot并不是用来替代Spring的解决方案,而是和Spring框架紧密结合用于提升Spring开发者体验的工具。它集成了大量常用的第三方库配置,SpringBoot应用中这些第三方库几乎可以是零配置的开箱即用outofthebox,大部分的SpringBoot应用都只需要非常少量的Java配置代码,开发者能够更加专注于业务逻辑。
2.为什么学习SpringBoot
2.1从Spring官方来看
打开Spring的官方网站http://spring.io/。可以看到官方对SpringBoot的定位:BuildAnything,Build任何东西。SpringBoot旨在尽可能快地启动和运行,并且只需最少的Spring前期配置。同时也可以看到官方两个的定位:
1、SpringCloud:CoordinateAnything协调任何事情;
2、SpringCloudDataFlow:Connecteverything连接任何东西。Spring官网对SpringBoot、SpringCloud和SpringCloudDataFlow三者定位的措辞非常有味道,同时也可以看出,Spring官方对这三个技术非常重视,是现在以及今后学习的重点。
2.2从SpringBoot的优点来看
1、减少开发,测试时间和努力。
2、使用JavaConfig有助于避免使用XML。
3、避免大量的Maven导入和各种版本冲突。
4、提供意见发展方法。
5、通过提供默认值快速开始开发。
6、没有单独的Web服务器需要。这意味着你不再需要启动Tomcat,Glassfish或其他任何东西。
7、需要更少的配置因为没有web.xml文件。只需添加用Configuration注释的类,然后添加用Bean注释的方法,Spring将自动加载对象并像以前一样对其进行管理。您甚至可以将Autowired添加到bean方法中,以使Spring自动装入需要的依赖关系中。
8、基于环境的配置使用这些属性,可以将正在使用的环境传递到应用程序:例如命令行参数配置值为-Dspring.profiles.active={enviornment}。在加载主应用程序属性文件后,Spring将在(application-{environment}.properties)中加载后续的应用程序属性文件。
2.2.1良好的基因
SpringBoot是伴随着Spring4.0诞生的,从字面理解,Boot是引导的意思,因此SpringBoot旨在帮助开发者快速搭建Spring框架。SpringBoot继承了原有Spring框架的优秀基因,使Spring在使用中更加方便快捷。
2.2.2简化编码
举个例子,如要创建一个web项目,使用Spring的人都知道,在使用Spring的时候,需要在pom文件中添加多个依赖,而SpringBoot则会帮助开发着快速启动一个web容器,在SpringBoot中只需要在pom文件中添加一个starter-web依赖即可。
<dependency>

        <groupId>org.springframework.boot</groupId>

        <artifactId>spring-boot-starter-web</artifactId>

</dependency>
点击进入该依赖后可以看到,SpringBoot这个starter-web已经包含了多个依赖,包括之前在Spring工程中需要导入的依赖
<dependency>

        <groupId>org.springframework</groupId>

        <artifactId>spring-web</artifactId>

        <scope>compile</scope>

</dependency>

<dependency>

        <groupId>org.springframework</groupId>

        <artifactId>spring-webmvc</artifactId>

        <scope>compile</scope>

</dependency>
由此可以看出,SpringBoot大大简化了编码,不用一个个导入依赖,直接一个依赖即可。
2.2.3简化配置
Spring虽然使JavaEE轻量级框架,但由于其繁琐的配置,一度被人认为是配置地狱。各种XML、Annotation配置会让人眼花缭乱,而且配置多的话,如果出错了也很难找出原因。SpringBoot更多的是采用JavaConfig的方式,对Spring进行配置。新建一个类但是不用@Service注解,也就是说,它是个普通的类,那么如何使它也成为一个Bean让Spring去管理呢?
只需要@Configuration和@Bean两个注解即可
publicclassTestService{

        publicStringsayHello(){

                return"HelloSpringBoot!";

}

}

//对应的配置类

importorg.springframework.context.annotation.Bean;

importorg.springframework.context.annotation.Configuration;

@ConfigurationpublicclassJavaConfig{

@BeanpublicTestServicegetTestService(){returnnewTestService();}}
@Configuration表示该类是个配置类,@Bean表示该方法返回一个Bean。这样就把TestService作为Bean让Spring去管理了,在其他地方如果需要使用该Bean,和原来一样,直接使用@Resource注解注入进来即可使用,非常方便。
@Resource

privateTestServicetestService;
另外部署配置方面,原来Spring有多个xml和properties配置,在SpringBoot中只需要个application.yml即可。
2.2.4简化部署
在使用Spring时项目部署时需要在服务器上部署tomcat,然后把项目打成war包扔到tomcat里,在使用SpringBoot后,不需要在服务器上去部署tomcat,因为SpringBoot内嵌了tomcat,只需要将项目打成jar包,然后使用java-jarxxx.jar一键式启动项目。另外,也降低对运行环境的基本要求,环境变量中有JDK即可。
2.2.5简化监控
可以引入spring-boot-start-actuator依赖,直接使用REST方式来获取进程的运行期性能参数,从而达到监控的目的,比较方便。但是SpringBoot只是个微框架,没有提供相应的服务发现与注册的配套功能,没有外围监控集成方案,没有外围安全管理方案,所以在微服务架构中,还需要SpringCloud来配合一起使用。
2.3从未来发展的趋势来看
微服务是未来发展的趋势,项目会从传统架构慢慢转向微服务架构,因为微服务可以使不同的团队专注于更小范围的工作职责、使用独立的技术、更安全更频繁地部署。而继承了Spring的优良特性,与Spring一脉相承,而且支持各种RESTAPI的实现方式。SpringBoot也是官方大力推荐的技术,可以看出,SpringBoot是未来发展的一个大趋势。
1、Spring Boot 开发环境
1. jdk 的配置
使用 IDEA 进行开发,在 IDEA 中配置 jdk 的方式很简单,打开 File->Project Structure
1. 选择 SDKs
2. 在 JDK home path 中选择本地 jdk 的安装目录
3. 在 Name 中为 jdk 自定义名字
通过以上三步骤,即可导入本地安装的 jdk。如果是使用 STS 或者 eclipse 可以通过两步骤添加:
1、window->preference->java->Instralled JRES 来添加本地 jdk。
2、window-->preference-->java-->Compiler 选择 jre,和 jdk 保持一致。
2. Spring Boot 工程的构建
2.1 IDEA 快速构建
IDEA 中可以通过 File->New->Project 来快速构建 Spring Boot 工程。选择 Spring Initializr,在 Project SDK 中
选择刚刚导入的 jdk,点击 Next,到了项目的配置信息。
Group:填企业域名,一般采用域名反装的方式定义,例如使用 com.yan
Artifact:填项目名称,例如工程名 demo,如果项目规模较大这里可能会采用模块名称
Dependencies:可以添加项目中所需要的依赖信息,根据实际情况来添加,这里只需要选择 Web 即可。
2.2 官方构建
第二种方式可以通过官方构建,步骤如下:
1、访问 http://start.spring.io/或者 http://start.aliyun.com/。
2、在页面上输入相应的 Spring Boot 版本、Group 和 Artifact 信息以及项目依赖,然后创建项目。
3、下载解压后,使用 IDEA 导入该 maven 工程:File->New->Model from Existing Source,然后选择解
压后的项目文件夹即可。如果是使用 eclipse 可以通过 Import->Existing Maven Projects->Next,然后选择解
压后的项目文件夹即可。
2.3 maven 配置
创建 Spring Boot 项目后需要进行 maven 配置。打开 File->settings,搜索 maven,配置一下本地的 maven 信
息。
在 Maven home directory 中选择本地 Maven 的安装路径;在 User settings file 中选择本地 Maven 的配置文件
所在路径。在配置文件中配置一下国内阿里的镜像,这样在下载 maven 依赖时,速度很快。
<mirror>
<id>nexus-aliyun</id>
<mirrorOf>*</mirrorOf>
<name>Nexus aliyun</name>
<url>http://maven.aliyun.com/nexus/content/groups/public</url>
</mirror>
如果是使用 eclipse 可以通过 window-->preference-->Maven-->User Settings 来配置,配置方式和上面一致。
2.4 编码配置
同样地新建项目后,一般都需要配置编码,这点非常重要,很多初学者都会忘记这一步,所以要养成良好的习惯。
IDEA 中仍然是打开 File->settings,搜索 encoding,配置一下本地的编码信息。
如果是使用 eclipse 有两个地方需要设置一下编码:
1、window--> perferences-->General-->Workspace,将 Text file encoding 改成 utf-8
2、window-->perferences-->General-->content types,选中 Text,将 Default encoding 填入 utf-8
这样编码设置完成即可启动项目工程了。
3. Spring Boot 项目工程结构
Spring Boot 项目总共有三个模块
src/main/java 路径:主要编写业务程序
src/main/resources 路径:存放静态文件和配置文件
src/test/java 路径:主要编写测试程序
默认情况下会创建一个启动类 Demo01Application,该类上面有个@SpringBootApplication 注解,该启动类中
有个 main 方法,Spring Boot 启动只要运行该 main 方法即可,非常方便。另外 Spring Boot 内部集成了 tomcat,
不需要人为手动去配置 tomcat,开发者只需要关注具体的业务逻辑即可。
到此为止 Spring Boot 就启动成功了,为了比较清楚的看到效果,可以写一个 Controller 来测试。注意后续开
发中定义的包必须是主包的子包,例如主包为 com.xuan,则以后的包名称为 com.xuan.biz 业务、com.xuan.dao等。
import org.springframework.web.bind.annotation.RequestMapping;
import org.springframework.web.bind.annotation.RestController;
@RestController 复合注解@Controller+@ResponseBody,@Controller 用于声明当前类是一个控制器类,
而且通过自动组件扫描会成为受管 bean。@ResponseBody 用于声明当前类方法的返回值会自动转换为 JSON格式
@RequestMapping("/start") 针对当前类中的所有方法声明名空间。定义@RequestMapping 时如果没有属性名称则默认名称为 value,value 实际上是 path 属性的别名,只有一个属性 value 时,value 可以省略;如果多个属性时则 value 不能省略。如果不定义 method 请求方法时,则所有的请求方法均可匹配
public class StartController {
@RequestMapping("/springboot") 针对方法进行地址映射,这里的请求 URL 地址为/start/springboot,
不是/springboot
public String startSpringBoot() {
return "Welcome to the world of Spring Boot!";
}
}
重新运行 main 方法启动项目,在浏览器中输入 localhost:8080/start/springboot,如果看到 Welcome to the world of Spring Boot!,那么项目启动成功!Spring Boot 就是这么简单方便!端口号默认是 8080,如果想要修改,可以在 application.yml 文件中使用 server.port 来人为指定端口,如 8001 端口:
server:
    port: 8001
在具体的应用开发中可以使用 properties 配置文件或者 yaml 配置文件两种
spring.datasource.driver-class-name=com.mysql.cj.jdbc.Driver
spring.datasource.url=jdbc:mysql:///test?serverTimezone=UTC
spring.datasource.username=root
spring.datasource.password=root
一般建议开发中首选 yml 格式的文件,文件后缀可以是 yml 或者 yaml。可以通过格式缩进的方式表达层次结构。解析 yml 格式的文件需要依赖 snakeyaml,这个依赖由 web-starter 依赖引入
server:
    port: 8099
spring:
    datasource:
        driver-class-name: com.mysql.cj.jdbc.Driver
        url: jdbc : mysql:/lltest?serverTimezone=UTC
        username: root
password: root
为什么选择使用 SpringBoot2.6.13,不使用 SpringBoot3?
是因为后期开发中需要使用 SpringCloud ali 和 JDK1.8
4. 总结
学习了在 IDEA 中导入 jdk 以及使用 IDEA 如何配置 maven 和编码,如何快速的创建和启动 Spring Boot 工程。IDEA 对 Spring Boot 的支持非常友好,建议使用 IDEA 。
2、Spring Boot 返回 Json 数据
XML 文件的解析
常见的解析工具有 DOM4j、JDOM 等,为了标准化 XML 文件解析,Java 中提出了 JAXP 规范,使用的解析模
型有
1. DOM:将标记语言文档一次性加载进入内存中,在内存中形成一颗 DOM 树(服务器端常用)
* 优点:操作方便,可以对文档进行 CRUD 的所有操作
* 缺点:一次性加载进入内存形成 DOM 树,非常消耗资源
2. SAX:逐行读取,基于事件驱动(安卓终端常用)
* 优点:不消耗资源
* 缺点:只能读取,不能增删改
public class Test2 {
public static void main(String[] args) throws Exception {

SAXParserFactory parserFactory = SAXParserFactory.newInstance();
SAXParser saxParser = parserFactory.newSAXParser();
final List<Student> studentList = new ArrayList<Student>();
//因为 SAX 解析并不缓存数据,所以解析过程中的数据需要自行编程实现存储

saxParser.parse("xml02/students.xml", new DefaultHandler() {
private Student student=null;
private int flag=0;
public void startElement(String uri, String localName, String qName, Attributes attributes)throws SAXException {
        if ("student".equals(qName)) {
            student=new Student();
            String id=attributes.getValue("id");            //获取当前标签的指定名称的属性
            if(id!=null && id.trim().length()>0)
                student.setId(id);
        }else if("name".equals(qName))
            flag=1;
        else if("age".equals(qName))
            flag=2;
        else if("sex".equals(qName))
            flag=3;
    }
    @Override
    public void characters(char[] ch, int start, int length) throws SAXException {
            String tmp = new String(ch, start, length);
            if(tmp!=null && tmp.trim().length()>0){
                if(flag==1)
                    student.setName(tmp.trim());
                else if(flag==2){
                    Integer kk=Integer.parseInt(tmp.trim());
                    student.setAge(kk);
                }else if(flag==3)
                    student.setSex(tmp.trim());
            }
        }
    @Override
    public void endElement(String uri, String localName, String qName) throws SAXException {
                flag=0;
                if("student".equals(qName))
                    studentList.add(student);
            }
        });
        studentList.forEach(System.out::println);
    }
}
早期数据传输使用 xml 作为交互格式,例如 webservice 技术,但是由于 xml 解析比较麻烦,所以现在在项目
开发中,在接口与接口之间以及前后端之间数据的传输都使用 Json 格式,在 Spring Boot 中接口返回 Json 格式的数据很简单,在 Controller 中使用@RestController 注解即可返回 Json 格式的数据,@RestController 也是Spring Boot 新增的一个复合注解。
源代码:其中 Target、Retention 和 Documented 是元注解
@Target({ElementType.TYPE})         //用于声明注解可以使用在什么地方,Type 表示可以使用在类上
    @Retention(RetentionPolicy.RUNTIME)// 用于声明注解需要保持到什么阶段,Runtime 表示注解在编译生成的字节码中一直保持到运行时
    @Documented
    @Controller
    @ResponseBody
    public @interface RestController {
        String value() default "";
    }
可以看 出@RestController 注 解包 含 了 原来 的 @Controller 和@ResponseBody 注 解, 使 用 过 Spring 对
@Controller 注解用于声明当前类是控制器类,@ResponseBody 注解是将返回的数据结构转换为 Json 格式。
所以在默认情况下,使用了@RestController 注解即可将返回的数据结构转换成 Json 格式,Spring Boot 中默
认使用的 Json 解析技术框架是 jackson。点开 pom.xml 中的 spring-boot-starter-web 依赖,可以看到一个spring-boot-starter-json 依赖
<dependency>
    <groupId>org.springframework.boot</groupId>
    <artifactId>spring-boot-starter-json</artifactId>
    <scope>compile</scope>
</dependency>
Spring Boot 中对依赖都做了很好的封装,可以看到很多 spring-boot-starter-xxx 系列的依赖,这是 Spring Boot=的特点之一,不需要人为去引入很多相关的依赖了,starter-xxx 系列直接都包含了所必要的依赖,所以再次点进去上面这个 spring-boot-starter-json 依赖,可以看到:
<dependency>
    <groupId>com.fasterxml.jackson.core</groupId>
    <artifactId>jackson-databind</artifactId>
    <scope>compile</scope>
</dependency>
<dependency>
    <groupId>com.fasterxml.jackson.datatype</groupId>
    <artifactId>jackson-datatype-jdk8</artifactId>
    <scope>compile</scope>
</dependency>
<dependency>
    <groupId>com.fasterxml.jackson.datatype</groupId>
    <artifactId>jackson-datatype-jsr310</artifactId>
    <scope>compile</scope>
</dependency>
<dependency>
    <groupId>com.fasterxml.jackson.module</groupId>
    <artifactId>jackson-module-parameter-names</artifactId>
    <scope>compile</scope>
</dependency
到此为止知道了 Spring Boot 中默认使用的 json 解析框架是 jackson。默认的 jackson 框架对常用数据类型的转 Json 处理。
1. Spring Boot 默认对 Json 的处理
在实际项目中,常用的数据结构无非有类对象、List 对象、Map 对象,默认的 jackson 框架对这三个常用的数
据结构都可以转成 json 的格式。
1.1 创建 User 实体类
需要创建一个实体类 User。
public class User {
    private Long id;
    private String username;
    private String password;
//省略 get、set 和带参构造方法
}
1.2 创建 Controller 类
然后创建一个 Controller,分别返回 User 对象、List<User>和 Map<String, Object>。
import org.springframework.web.bind.annotation.RequestMapping;
import org.springframework.web.bind.annotation.RestController;
import java.util.ArrayList;
import java.util.HashMap;
import java.util.List;
import java.util.Map;

@RestController
@RequestMapping("/json")
public class JsonController {

@RequestMapping("/user")
public User getUser() {
    return new User(1, "aix", "123456");
}

@RequestMapping("/list")
public List<User> getUserList() {
    List<User> userList = new ArrayList<>();
    User user1 = new User(1, "aix", "123456");
    User user2 = new User(2, "aix2", "123456");
    userList.add(user1);
    userList.add(user2);
    return userList;
}

@RequestMapping("/map")
public Map<String, Object> getMap() {
    Map<String, Object> map = new HashMap<>(3);
    User user = new User(1, "aix", "123456");
    map.put("作者信息", user);
    map.put("CSDN 地址", "https://blog.csdn.net/Aixxn");
    return map;
}
}
1.3测试不同数据类型返回的 json
写好了接口,分别返回了一个 User 对象、一个 List 集合和一个 Map 集合,其中 Map 集合中的 value 存的是不同的数据类型
在浏览器中输入:localhost:8080/json/user 返回 json:
{"id":1,"username":"aix","password":"123456"}
在浏览器中输入:localhost:8080/json/list 返回 json:
```javascript
[{"id":1, "username":"aix", "password":"123456"}, {"id":2, "username":"aix1", "password":"123456"}]
在浏览器中输入:`localhost:8080/json/map 返回 json:
{" 作 者 信 息 " : {"id":1, "username":" aix ", "password":"123456"}, "CSDN 地 址 " :"http://blog.csdn.net/Aixxn",
可以看出 map 中不管是什么数据类型,都可以转成相应的 json 格式,这样就非常方便
1.4 jackson 中对 null 的处理
在实际项目中,难免会遇到一些 null 值出现,转 json 时是不希望有这些 null 出现的,比如期望所有的 null 在转 json 时都变成""这种空字符串,这个时候在 Spring Boot 中做一下配置即可,新建一个 jackson 的配置类:
import com.fasterxml.jackson.core.JsonGenerator;
import com.fasterxml.jackson.databind.JsonSerializer;
import com.fasterxml.jackson.databind.ObjectMapper;
import com.fasterxml.jackson.databind.SerializerProvider;
import org.springframework.boot.autoconfigure.condition.ConditionalOnMissingBean;
import org.springframework.context.annotation.Bean;
import org.springframework.context.annotation.Configuration;
import org.springframework.context.annotation.Primary;
import org.springframework.http.converter.json.Jackson2ObjectMapperBuilder;
import java.io.IOException;

    @Configuration 用于声明当前类是一个配置类,最新的注解为@SpringBootConfiguration
public class JacksonConfig {
    @Bean 用于在配置类中,表示方法的返回值是一个受管 bean
    @Primary 如果多个配置,则以当前的为主
    @ConditionalOnMissingBean(ObjectMapper.class) 条件注解,表示如果受管 bean 中没有 ObjectMapper类型的对象,则需要构建

public ObjectMapper jacksonObjectMapper(Jackson2ObjectMapperBuilder builder) {
        ObjectMapper objectMapper = builder.createXmlMapper(false).build();
        objectMapper.getSerializerProvider().setNullValueSerializer(new JsonSerializer<Object>() {
            @Override
            public void serialize(Object o, JsonGenerator jsonGenerator, SerializerProvider serializerProvider)throws IOException {
                jsonGenerator.writeString("");  //针对 null 内容输出空字符串
            }
        });
            return objectMapper;
    }
}
然后修改一下上面返回 map 的接口,将几个值改成 null 测试一下:
@RequestMapping("/map")
public Map<String, Object> getMap() {
    Map<String, Object> map = new HashMap<>(3);
    User user = new User(1, "aix", null);
    map.put("作者信息", user);
    map.put("博客地址", "https://blog.csdn.net/Aixxn");
    map.put("CSDN 地址", null);
    return map;
}
重启项目再次输入 localhost:8080/json/map,可以看到 jackson 已经将所有 null 字段转成了空字符串了。例如返回数据为{"作者信息":{"id":1,"username":"aix","password":""},"CSDN 地址":"",博客地
址":"https://blog.csdn.net/Aixxn"}
配置属性不参与映射输出
@JsonIgnore 指定该属性不参与 JSON 字符串的映射
private String password;
配置日期类型数据的映射格式
@JsonFormat(pattern = "yyyy-MM-dd")
private Date birth=new Date();
2. 整合通用 Mapper 的开发方法
通用 mapper 就是基于 mybatis 的一款 MyBatis 增强插件,可以提供一些常用增、删、改、查的操作,不需要重复写一些常用的 sql。简化操作,精简代码,并且达到代码风格统一的目的。它的出现不是为了替代 mybatis,而是让 mybatis 的开发更方便。
添加依赖:
<dependency>
<groupId>tk.mybatis</groupId>
<artifactId>mapper-spring-boot-starter</artifactId>
<version>4.2.2</version>
</dependency>
使用通用 mapper 的开发方式,采用注解定义映射关系,自动生成常见的 SQL 语句,不需要 xml 映射元文件
1.表名默认使用类名,驼峰转下划线(只对大写字母进行处理),如 TestUser 默认对应的表名为 test_user
2.表名可以使用@Table(name = "tableName")进行指定,对不符合第一条默认规则的可以通过这种方式指定表
名.
3.字段默认和@Column 一样,都会作为表字段,表字段默认为 Java 对象的 Field 名字驼峰转下划线形式.
4.可以使用@Column(name = "fieldName")指定不符合第 3 条规则的字段名
5.使用@Transient 注解可以忽略字段,添加该注解的字段不会作为表字段使用.
6.建议一定是有一个@Id 注解作为主键的字段,可以有多个@Id 注解的字段作为联合主键.
7.默认情况下,实体类中如果不存在包含@Id 注解的字段,所有的字段都会作为主键字段进行使用(这种效率极
低).
8.实体类可以继承使用,可以参考测试代码中的 tk.mybatis.mapper.model.UserLogin2 类.
9.由于基本类型,如 int 作为实体类字段时会有默认值 0,而且无法消除,所以实体类中建议不要使用基本类型. 10.@NameStyle 注解,用来配置对象名/字段和表名/字段之间的转换方式,该注解优先于全局配置 style,可选值:
normal:使用实体类名/属性名作为表名/字段名
camelhump:这是默认值,驼峰转换为下划线形式
uppercase:转换为大写
lowercase:转换为小写
@Entity //用于声明当前类是一个实体类
@Table(name="tbl_users") // 用于声明当前类所对应的表名称
public class User implements Serializable {
@Id //用于声明标识属性,对应表中的主键
@GeneratedValue(strategy = GenerationType.IDENTITY) 声明主键生成策略
private Long id;
@Column //如果属性名称和列名称不一致,则需要通过@Column 进行配置对应的列名称
private String username;
private String password;
private Date birth;
private Boolean sex;
}
定义 mapper 接口
public interface UserMapper extends BaseMapper<User> {
}
针对 mapper 接口进行注册,一般是依赖自动扫描实现。可以在主类或者配置上添加一个注解配置

SpringBoot 针对 Junit 的单元测试有很好的支持
@SpringBootTest
class CommonMapperApplicationTests {
    @Autowired
    private UserMapper userMapper;
    @Test
    void contextLoads() {
    }
    @Test
    void testCreate(){
        User user=new User();
        user.setUsername("张三丰");
        user.setPassword("333333");
        user.setSex(true);
        int len = userMapper.insertSelective(user);
        Assertions.assertEquals(1,len);
    }
}
需要控制器调用业务,业务再通过 Mapper 访问数据库,最终返回 JSON 字符
3. 使用阿里巴巴 FastJson 的设置
3.1 jackson 和 fastJson 的对比
有很多人已经习惯于使用阿里巴巴的 fastJson 来做项目中 json 转换的相关工作,比如目前项目中使用的就是阿里的 fastJson

关于 fastJson 和 jackson 的对比,网上有很多资料可以查看,主要是根据自己实际项目情况来选择合适的框架。从扩展上来看,fastJson 没有 jackson 灵活,从速度或者上手难度来看,fastJson 可以考虑,项目中目前使用的是阿里的 fastJson,挺方便的。
3.2 fastJson 依赖导入
使用 fastJson 需要导入依
<dependency>
    <groupId>com.alibaba</groupId>
    <artifactId>fastjson</artifactId>
</dependency>
3.3 使用 fastJson 处理 null
使用 fastJson 时,对 null 的处理和 jackson 有些不同,需要继承 WebMvcConfigurationSupport 类或者实现WebMvcConfiguration 接口,然后覆盖 configureMessageConverters 方法,在方法中可以选择对要实现 null转换的场景,配置好即可。
import com.alibaba.fastjson.serializer.SerializerFeature;
import com.alibaba.fastjson.support.config.FastJsonConfig;
import com.alibaba.fastjson.support.spring.FastJsonHttpMessageConverter;
import org.springframework.context.annotation.Configuration;
import org.springframework.http.MediaType;
import org.springframework.http.converter.HttpMessageConverter;
import org.springframework.web.servlet.config.annotation.WebMvcConfigurationSupport;
import java.nio.charset.Charset;
import java.util.ArrayList;
import java.util.List;


@Configuration
    public class fastJsonConfig extends WebMvcConfigurationSupport {
    //使用阿里 FastJson 作为 JSON MessageConverter
    @Override
    public void configureMessageConverters(List<HttpMessageConverter<?>> converters) {
        FastJsonHttpMessageConverter converter = new FastJsonHttpMessageConverter();
        FastJsonConfig config = new FastJsonConfig();
        config.setSerializerFeatures(
                SerializerFeature.WriteMapNullValue, // 保留 map 空的字段
                SerializerFeature.WriteNullStringAsEmpty, // 将 String 类型的 null 转成""
                SerializerFeature.WriteNullNumberAsZero, // 将 Number 类型的 null 转成
                SerializerFeature.WriteNullListAsEmpty, // 将 List 类型的 null 转成[]
                SerializerFeature.WriteNullBooleanAsFalse, // 将 Boolean 类型的 null 转成 false
                SerializerFeature.DisableCircularReferenceDetect); // 避免循环引用
        converter.setFastJsonConfig(config);
        converter.setDefaultCharset(Charset.forName("UTF-8"));
        List<MediaType> mediaTypeList = new ArrayList<>();
        // 解决中文乱码问题,相当于在 Controller 上的@RequestMapping 中加了个属性produces=application/json"
         mediaTypeList.add(MediaType.APPLICATION_JSON);
        converter.setSupportedMediaTypes(mediaTypeList);
        converters.add(converter);
}
测试工具 postman
如果直接测试,则需要编写页面和 js 代码才能进行验证,可以使用 postman 避免这些繁琐的操作

4. 封装统一返回的数据结构
在实际项目中,除了要封装数据之外,往往需要在返回的 json 中添加一些其他信息,比如返回一些状态码 code
==【注意不是 response 的响应状态码】,返回一些 msg 给调用者,这样调用者可以根据 code 或者 msg 做一些==
逻辑判断。所以在实际项目中,需要封装一个统一的 json 返回结构存储返回信息。
4.1 定义统一的 json 结构
由于封装的 json 数据的类型不确定,所以在定义统一的 json 结构时需要用到泛型。统一的 json 结构中属性包
括数据、状态码、提示信息即可,构造方法可以根据实际业务需求做相应的添加即可,一般来说,应该有默认
的返回结构,也应该有用户指定的返回结构。
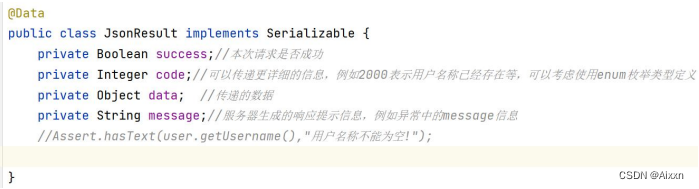
public class JsonResult<T> {
    private T data; //需要传递的数据
    private int code; //用户自定义相应码,注意不是服务器响应状态码。如果不需要传递详细信息还可以使
用 boolean success
    private String msg; // 服务器回传信息
    public JsonResult() { 若没有数据返回,默认状态码为 0,提示信息为:操作成功!
        this.code = 0;
        this.msg = "操作成功!";
    }
public JsonResult(int code, String msg) { 若没有数据返回,可以人为指定状态码和提示信息
        this.code = code;
        this.msg = msg;
    }
public JsonResult(T data) { 有数据返回时,状态码为 0,默认提示信息为:操作成功!
        this.data = data;
        this.code = 0;
        this.msg = "操作成功!";
    }
public JsonResult(T data, String msg) { 有数据返回,状态码为 0,人为指定提示信息
        this.data = data;
        this.code = 0;
        this.msg = msg;
    }
// 省略 get 和 set 方法
}
4.2 修改 Controller 中的返回值类型及测试
由于 JsonResult 使用了泛型,所以所有的返回值类型都可以使用该统一结构,在具体的场景将泛型替换成具体
的数据类型即可,非常方便,也便于维护。在实际项目中,还可以继续封装,比如状态码和提示信息可以定义
一个枚举类型,以后只需要维护这个枚举类型中的数据即可。根据以上的 JsonResult 可以改写一下 Controller
@RestController
@RequestMapping("/jsonresult")
public class JsonResultController {
    @RequestMapping("/user")
    public JsonResult<User> getUser()
        User user = new User(1, "aix", "123456");
        return new JsonResult<>(user);
    }
    @RequestMapping("/list")
    public JsonResult<List> getUserList() {
        List<User> userList = new ArrayList<>();
        User user1 = new User(1, "aix", "123456");
        User user2 = new User(2, "aix1", "123456");
        userList.add(user1);
        userList.add(user2);
        return new JsonResult<>(userList, "获取用户列表成功");
    }
    @RequestMapping("/map")
    public JsonResult<Map> getMap() {
        Map<String, Object> map = new HashMap<>(3);
        User user = new User(1, "aix", null);
        map.put("作者信息", user);
        map.put("博客地址", "https://blog.csdn.net/Aixxn");
        map.put("CSDN 地址", null);
return new JsonResult<>(map);
    }
}
重新在浏览器中输入:localhost:8080/jsonresult/user 返回 json:
{"code":0,"data":{"id":1,"password":"123456","username":"aix"},"msg":"操作成功!"}
输入:localhost:8080/jsonresult/list,返回 json 格式:
{"code":0, "data":[{"id":1, "password":"123456", "username":"aix"}, {"id":2,"password":"123456", "username":"aix1"}], "msg":"获取用户列表成功"}
输入:localhost:8080/jsonresult/map,返回 json 格式:
{"code":"0", "data":{"作者信息":{"id":1, "password":"","username":"aix"},"CSDN 地址":null,
"博客地址":"http:https://blog.csdn.net/Aixxn//"},"msg":"操作成功!"}
通过封装,不但将数据通过 json 传给前端或者其他接口,还带上了状态码和提示信息,这在实际项目场景中应用非常广泛。

5. 总结
这部分主要是对 Spring Boot 中 json 数据的返回做了详细的分析,从 Spring Boot 默认的 jackson 框架到阿里的fastJson 框架,分别对它们的配置做了相应的描述。另外,结合实际项目情况,总结了实际项目中使用的 json封装结构体,加入了状态码和提示信息,使得返回的 json 数据信息更加的完整了。


 1320
1320

 被折叠的 条评论
为什么被折叠?
被折叠的 条评论
为什么被折叠?
 到【灌水乐园】发言


