Springmvc+hibernate+spring简单实例实现(个人编译通过)

自己花了两天时间去网上查找了相关资料,搭建的一个综合springmvc、hibernatespring三种框架类型的环境,进行了一些简单的实例实践,下面贴出搭建步骤和代码,方便大家交流学习,也方便日后自己回来查阅

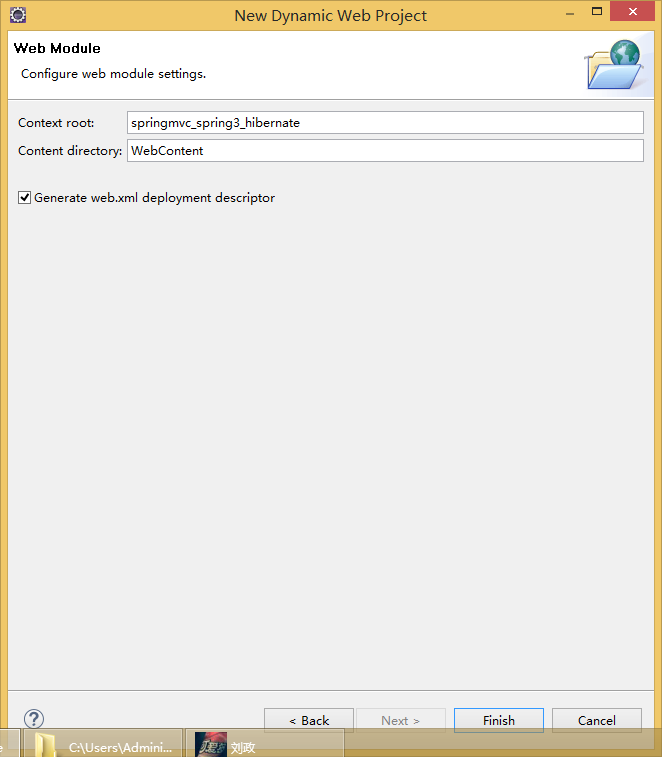
1.创建一个Java网站,创建的网站类型为Dynamic web 
创建动态网站

勾选Generate web.xml,生成web.xml文件,点Finish 
勾选Generate web.xml

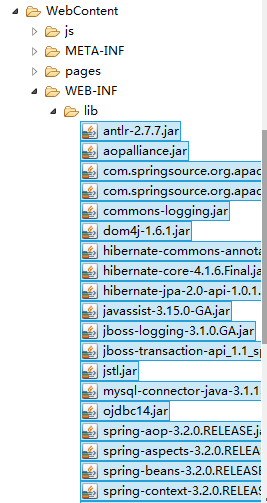
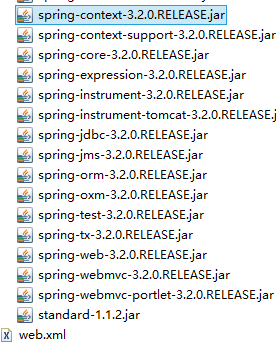
2.导入相关jar包,把jar包放到WEB-INF的lib文件夹下,我这里导入了34个相关包,附上图给大家 
jar包 
jar包

3.下面是web.xml文件配置,这一步很重要,一定要一个个去核对下自己的代码

<?xml version="1.0" encoding="UTF-8"?>
<web-app xmlns:xsi="http://www.w3.org/2001/XMLSchema-instance" xmlns="http://java.sun.com/xml/ns/javaee" xsi:schemaLocation="http://java.sun.com/xml/ns/javaee http://java.sun.com/xml/ns/javaee/web-app_3_0.xsd" id="WebApp_ID" version="3.0">
  <display-name>springmvc_spring3_hibernate4</display-name>
  <welcome-file-list>
    <welcome-file>index.jsp</welcome-file>
  </welcome-file-list>

  <!-- 加载所有的spring配置文件 -->
  <context-param>
    <param-name>contextConfigLocation</param-name>
    <param-value>classpath*:config/spring-*.xml</param-value>
  </context-param>

  <!-- 配置spring监听 -->
  <listener>
    <listener-class>org.springframework.web.context.ContextLoaderListener</listener-class>
  </listener>


  <!-- 配置spring mvc -->
  <servlet>
    <servlet-name>springMVC</servlet-name>
    <servlet-class>org.springframework.web.servlet.DispatcherServlet</servlet-class>

    <init-param>
        <param-name>contextConfigLocation</param-name>
        <param-value>classpath*:config/spring-mvc.xml</param-value>
    </init-param>
    <load-on-startup>1</load-on-startup>
  </servlet>

  <servlet-mapping>
    <servlet-name>springMVC</servlet-name>
    <url-pattern>/</url-pattern>
  </servlet-mapping>

  <!-- 设置字符集 -->
  <filter>
    <filter-name>encodingFilter</filter-name>
    <filter-class>org.springframework.web.filter.CharacterEncodingFilter</filter-class>
    <init-param>
        <param-name>encoding</param-name>
        <param-value>UTF-8</param-value>
    </init-param>
    <init-param>
        <param-name>forceEncoding</param-name>
        <param-value>true</param-value>
    </init-param>
  </filter>

  <filter-mapping>
    <filter-name>encodingFilter</filter-name>
    <url-pattern>/*</url-pattern>
  </filter-mapping>

  <!--配置session控制器开关  -->
  <filter>
    <filter-name>openSession</filter-name>
    <filter-class>org.springframework.orm.hibernate4.support.OpenSessionInViewFilter</filter-class>
  </filter>

  <filter-mapping>
    <filter-name>openSession</filter-name>
    <url-pattern>/*</url-pattern>
  </filter-mapping>

</web-app>
 
 
  • 1
  • 2
  • 3
  • 4
  • 5
  • 6
  • 7
  • 8
  • 9
  • 10
  • 11
  • 12
  • 13
  • 14
  • 15
  • 16
  • 17
  • 18
  • 19
  • 20
  • 21
  • 22
  • 23
  • 24
  • 25
  • 26
  • 27
  • 28
  • 29
  • 30
  • 31
  • 32
  • 33
  • 34
  • 35
  • 36
  • 37
  • 38
  • 39
  • 40
  • 41
  • 42
  • 43
  • 44
  • 45
  • 46
  • 47
  • 48
  • 49
  • 50
  • 51
  • 52
  • 53
  • 54
  • 55
  • 56
  • 57
  • 58
  • 59
  • 60
  • 61
  • 62
  • 63
  • 64
  • 65
  • 66
  • 67

4.在与web.xml配置的相应位置建立相关的xml文件,下面是根据我的web配置,我创建的相关xml配置文件的位置截图 
创建与web.xml配置中相对应的配置文件

5.配置spring文件,下面贴出spring-commom.xml的代码,代码有注释,不懂的可以看注释

<?xml version="1.0" encoding="UTF-8"?>
<beans xmlns="http://www.springframework.org/schema/beans"  
    xmlns:context="http://www.springframework.org/schema/context" xmlns:p="http://www.springframework.org/schema/p"  
    xmlns:mvc="http://www.springframework.org/schema/mvc" xmlns:xsi="http://www.w3.org/2001/XMLSchema-instance" 

    xsi:schemaLocation="http://www.springframework.org/schema/beans    
      http://www.springframework.org/schema/beans/spring-beans-3.0.xsd 

      http://www.springframework.org/schema/context    
      http://www.springframework.org/schema/context/spring-context.xsd    
      http://www.springframework.org/schema/mvc
      http://www.springframework.org/schema/mvc/spring-mvc-3.0.xsd">

      <!--配置数据源 ,可将property value放置在配置文件中 -->
    <context:property-placeholder location="classpath:/config/scottDB.properties"/>
    <bean id="dataSource"
            class="org.springframework.jdbc.datasource.DriverManagerDataSource">
        <property name="driverClassName" value="${scott.jdbc.driverClassName}"></property>
        <property name="url" value="${scott.jdbc.url}"></property> 
        <property name="username" value="${scott.jdbc.username}"></property>   
        <property name="password" value="${scott.jdbc.password}"></property>
    </bean>

      <!-- 配置hibernate SessionFactory -->
    <bean id="sessionFactory" class="org.springframework.orm.hibernate4.LocalSessionFactoryBean">
      <property name="dataSource" ref="dataSource"></property>
      <property name="hibernateProperties">
        <props>
            <prop key="hibernate.dialect">org.hibernate.dialect.OracleDialect</prop>
            <!-- <prop key="hibernate.hbm2ddl.auto">update</prop> -->
            <prop key="hibernate.show_sql">${hibernate.show_sql}</prop>
            <prop key="hibernate.format_sql">${hibernate.format_sql}</prop>
        </props>
      </property>  
      <property name="annotatedClasses">
        <list>
            <value>com.firstest.entity.SpringUser</value>
        </list>
      </property>   
    </bean>

      <!-- 事务管理器 -->
      <bean id="transactionManager" class="org.springframework.orm.hibernate4.HibernateTransactionManager">
        <property name="sessionFactory" ref="sessionFactory"></property>
      </bean>

      <!-- 事务代理拦截器 -->
      <bean id="transactionBase" class="org.springframework.transaction.interceptor.TransactionInterceptor">
            <property name="transactionManager" ref="transactionManager"></property>
            <property name="transactionAttributes">
                <props>
                <prop key="add*">PROPAGATION_REQUIRED,-Exception</prop>  
                <prop key="modify*">PROPAGATION_REQUIRED,-myException</prop>  
                <prop key="del*">PROPAGATION_REQUIRED</prop>  
                <prop key="*">PROPAGATION_REQUIRED</prop>  
                </props>
            </property>  

      </bean>

</beans>
 
 
  • 1
  • 2
  • 3
  • 4
  • 5
  • 6
  • 7
  • 8
  • 9
  • 10
  • 11
  • 12
  • 13
  • 14
  • 15
  • 16
  • 17
  • 18
  • 19
  • 20
  • 21
  • 22
  • 23
  • 24
  • 25
  • 26
  • 27
  • 28
  • 29
  • 30
  • 31
  • 32
  • 33
  • 34
  • 35
  • 36
  • 37
  • 38
  • 39
  • 40
  • 41
  • 42
  • 43
  • 44
  • 45
  • 46
  • 47
  • 48
  • 49
  • 50
  • 51
  • 52
  • 53
  • 54
  • 55
  • 56
  • 57
  • 58
  • 59
  • 60
  • 61

6.spring-mvc配置文件的代码

<?xml version="1.0" encoding="UTF-8"?>
<beans xmlns="http://www.springframework.org/schema/beans"  
    xmlns:context="http://www.springframework.org/schema/context" xmlns:p="http://www.springframework.org/schema/p"  
    xmlns:mvc="http://www.springframework.org/schema/mvc" 
    xmlns:xsi="http://www.w3.org/2001/XMLSchema-instance"  
    xsi:schemaLocation="http://www.springframework.org/schema/beans    
      http://www.springframework.org/schema/beans/spring-beans-3.0.xsd    
      http://www.springframework.org/schema/context    
      http://www.springframework.org/schema/context/spring-context.xsd 

      http://www.springframework.org/schema/mvc    
      http://www.springframework.org/schema/mvc/spring-mvc-3.0.xsd">


    <!--注解扫描的包 ,bean实例化使用注解@Component -->
    <context:component-scan base-package="com.firstest"></context:component-scan>

    <!--开启注解  -->
    <mvc:annotation-driven/>

    <!--拦截以Service结尾的类,实现事务代理  -->       
      <bean class="org.springframework.aop.framework.autoproxy.BeanNameAutoProxyCreator">
        <property name="beanNames">
            <list>
                <value>*Service</value>
            </list>
        </property>
        <property name="interceptorNames">
            <list>
                <value>transactionBase</value>
            </list>
        </property>
      </bean>

    <!-- 静态资源(js/image)访问 -->
    <mvc:resources location="/img/" mapping="/img/**"/>
    <mvc:resources location="/js/" mapping="/js/**"/>

    <!-- 视图解析器 -->
    <bean id="viewResolver" class="org.springframework.web.servlet.view.InternalResourceViewResolver">
        <property name="prefix" value="/"></property>
        <property name="suffix" value=".jsp"></property>
    </bean>
</beans>
 
 
  • 1
  • 2
  • 3
  • 4
  • 5
  • 6
  • 7
  • 8
  • 9
  • 10
  • 11
  • 12
  • 13
  • 14
  • 15
  • 16
  • 17
  • 18
  • 19
  • 20
  • 21
  • 22
  • 23
  • 24
  • 25
  • 26
  • 27
  • 28
  • 29
  • 30
  • 31
  • 32
  • 33
  • 34
  • 35
  • 36
  • 37
  • 38
  • 39
  • 40
  • 41
  • 42
  • 43
  • 44
  • 1
  • 2
  • 3
  • 4
  • 5
  • 6
  • 7
  • 8
  • 9
  • 10
  • 11
  • 12
  • 13
  • 14
  • 15
  • 16
  • 17
  • 18
  • 19
  • 20
  • 21
  • 22
  • 23
  • 24
  • 25
  • 26
  • 27
  • 28
  • 29
  • 30
  • 31
  • 32
  • 33
  • 34
  • 35
  • 36
  • 37
  • 38
  • 39
  • 40
  • 41
  • 42
  • 43
  • 44

7.scottDB.properties配置文件,用于存放数据库的连接信息,这里相信大家应该都能看懂的,看不懂的自己上网查阅一下相关资料,上面有许多介绍properties配置文件的内容

#oracle 11g
scott.jdbc.driverClassName = oracle.jdbc.driver.OracleDriver
scott.jdbc.url = jdbc:oracle:thin:@192.168.0.134:1521:THUND
scott.jdbc.username = scott
scott.jdbc.password = tiger


#hibernatep配置
hibernate.show_sql = true
hibernate.format_sql = true
 
 
  • 1
  • 2
  • 3
  • 4
  • 5
  • 6
  • 7
  • 8
  • 9
  • 10
  • 1
  • 2
  • 3
  • 4
  • 5
  • 6
  • 7
  • 8
  • 9
  • 10

8.到这里,基本上的轮廓已经出来了,下面就是javabean的创建,以及dao层,service层的编写,还有后台的controller后台实现代码的编写,这里最需要注意的是dao层中接口的实现类UserManage以及service层的实现类UserManageService这两个类,因为刚刚前面所说的报错,基本上都是出现在这两个类中间,下面我一 一贴上代码。

Javabean代码

package com.firstest.entity;

import java.io.Serializable;

import javax.persistence.Column;
import javax.persistence.Entity;
import javax.persistence.GeneratedValue;
import javax.persistence.Id;
import javax.persistence.Table;

import org.hibernate.annotations.GenericGenerator;

@Entity
@Table(name="SPRINGMVC_USERS",schema="SCOTT")
public class SpringUser implements Serializable{

    private static final long serialVersionUID = -7010217787841007904L;
    private String userId;  //用户id
    private String userName;    //用户名
    private String phone;   //手机号码
    private String age;     //年龄

    @Id
    @GeneratedValue(generator="system-uuid")
    @GenericGenerator(name = "system-uuid",strategy="uuid")
    @Column(name="USERID")
    public String getUserId() {
        return userId;
    }
    public void setUserId(String userId) {
        this.userId = userId;
    }
    @Column(name="USERNAME")
    public String getuserName() {
        return userName;
    }
    public void setuserName(String userName) {
        this.userName = userName;
    }
    @Column(name="PHONE")
    public String getPhone() {
        return phone;
    }
    public void setPhone(String phone) {
        this.phone = phone;
    }
    @Column(name="AGE")
    public String getAge() {
        return age;
    }
    public void setAge(String age) {
        this.age = age;
    }

}


  • 1
  • 2
  • 3
  • 4
  • 5
  • 6
  • 7
  • 8
  • 9
  • 10
  • 11
  • 12
  • 13
  • 14
  • 15
  • 16
  • 17
  • 18
  • 19
  • 20
  • 21
  • 22
  • 23
  • 24
  • 25
  • 26
  • 27
  • 28
  • 29
  • 30
  • 31
  • 32
  • 33
  • 34
  • 35
  • 36
  • 37
  • 38
  • 39
  • 40
  • 41
  • 42
  • 43
  • 44
  • 45
  • 46
  • 47
  • 48
  • 49
  • 50
  • 51
  • 52
  • 53
  • 54
  • 55
  • 56

dao层的接口类和实现类

package com.firstest.dao;

import java.util.List;

import com.firstest.entity.SpringUser;

public interface IUserManage {

    public List<SpringUser> getSpringUser();
    public void addSpringUser(SpringUser springUser);
}


  • 1
  • 2
  • 3
  • 4
  • 5
  • 6
  • 7
  • 8
  • 9
  • 10
  • 11
  • 12
  • 1
  • 2
  • 3
  • 4
  • 5
  • 6
  • 7
  • 8
  • 9
  • 10
  • 11
  • 12
package com.firstest.dao.impl;

import java.util.List;

import javax.annotation.Resource;

import org.hibernate.Query;
import org.hibernate.SessionFactory;
import org.springframework.beans.factory.annotation.Autowired;
import org.springframework.stereotype.Component;
import org.springframework.stereotype.Repository;

import com.firstest.dao.IUserManage;
import com.firstest.entity.SpringUser;

@Repository
public class UserManage implements IUserManage{

    @Resource
    @Autowired
    private SessionFactory sessionFactory;


/*  public void setSessionFactory(SessionFactory sessionFactory){
        this.sessionFactory = sessionFactory;
    }*/

    @Override
    public List<SpringUser> getSpringUser(){
        String hql = "from SpringUser";
        Query query = sessionFactory.getCurrentSession().createQuery(hql);
        List<SpringUser> list = query.list();
        return list;
    }

    @Override
    public void addSpringUser(SpringUser springUser){
        sessionFactory.getCurrentSession().save(springUser);
    }


}


  • 1
  • 2
  • 3
  • 4
  • 5
  • 6
  • 7
  • 8
  • 9
  • 10
  • 11
  • 12
  • 13
  • 14
  • 15
  • 16
  • 17
  • 18
  • 19
  • 20
  • 21
  • 22
  • 23
  • 24
  • 25
  • 26
  • 27
  • 28
  • 29
  • 30
  • 31
  • 32
  • 33
  • 34
  • 35
  • 36
  • 37
  • 38
  • 39
  • 40
  • 41
  • 42
  • 43
  • 1
  • 2
  • 3
  • 4
  • 5
  • 6
  • 7
  • 8
  • 9
  • 10
  • 11
  • 12
  • 13
  • 14
  • 15
  • 16
  • 17
  • 18
  • 19
  • 20
  • 21
  • 22
  • 23
  • 24
  • 25
  • 26
  • 27
  • 28
  • 29
  • 30
  • 31
  • 32
  • 33
  • 34
  • 35
  • 36
  • 37
  • 38
  • 39
  • 40
  • 41
  • 42
  • 43

service层的接口类和实现类

package com.firstest.service;

import java.util.List;

import com.firstest.entity.SpringUser;

public interface IUserManageService {

    public List<SpringUser> getSpringUser();
    public void addSpringUser(SpringUser springUser);
}


  • 1
  • 2
  • 3
  • 4
  • 5
  • 6
  • 7
  • 8
  • 9
  • 10
  • 11
  • 12
  • 1
  • 2
  • 3
  • 4
  • 5
  • 6
  • 7
  • 8
  • 9
  • 10
  • 11
  • 12
package com.firstest.service.impl;

import java.util.List;

import javax.annotation.Resource;

import org.springframework.beans.factory.annotation.Autowired;
import org.springframework.stereotype.Component;

import com.firstest.dao.IUserManage;
import com.firstest.entity.SpringUser;
import com.firstest.service.IUserManageService;

@Service
public class UserManageService implements IUserManageService{

    @Resource
    @Autowired
    private IUserManage iUserManage;

    /**
     * 获取用户信息
     */
    @Override
    public List<SpringUser> getSpringUser(){
        return iUserManage.getSpringUser();
    }

    /**
     * 新增用户
     */
    @Override
    public void addSpringUser(SpringUser springUser) {
        iUserManage.addSpringUser(springUser);
    }

}


  • 1
  • 2
  • 3
  • 4
  • 5
  • 6
  • 7
  • 8
  • 9
  • 10
  • 11
  • 12
  • 13
  • 14
  • 15
  • 16
  • 17
  • 18
  • 19
  • 20
  • 21
  • 22
  • 23
  • 24
  • 25
  • 26
  • 27
  • 28
  • 29
  • 30
  • 31
  • 32
  • 33
  • 34
  • 35
  • 36
  • 37
  • 38
  • 39
  • 1
  • 2
  • 3
  • 4
  • 5
  • 6
  • 7
  • 8
  • 9
  • 10
  • 11
  • 12
  • 13
  • 14
  • 15
  • 16
  • 17
  • 18
  • 19
  • 20
  • 21
  • 22
  • 23
  • 24
  • 25
  • 26
  • 27
  • 28
  • 29
  • 30
  • 31
  • 32
  • 33
  • 34
  • 35
  • 36
  • 37
  • 38
  • 39

9.controller后台实现的代码

package com.firstest.controller;

import java.io.IOException;
import java.util.List;

import javax.annotation.Resource;
import javax.servlet.ServletException;
import javax.servlet.http.HttpServletRequest;
import javax.servlet.http.HttpServletResponse;

import org.springframework.stereotype.Controller;
import org.springframework.web.bind.annotation.RequestMapping;
import org.springframework.web.bind.annotation.RequestParam;

import com.firstest.entity.SpringUser;
import com.firstest.service.IUserManageService;

@Controller
@RequestMapping("/user")
public class UserManageController {

    @Resource(name="iUserManageService")
    private IUserManageService iUserManageService;

    /**
     * 查询所有用户
     * @param request
     * @param response
     * @return /pages/show
     */
    @RequestMapping(value="/getSpringUser")
    public String getSpringUser(HttpServletRequest request,HttpServletResponse response){

        List<SpringUser> list = iUserManageService.getSpringUser();
        request.setAttribute("list", list);

            return "/pages/show";


    }


    /**
     * 添加用户
     * @param springUser
     * @param request
     * @param response
     * @return /user/getSpringUser
     */
    @RequestMapping(value="/addSpringUser")
    public String addSpringUser(SpringUser springUser,
            HttpServletRequest request,HttpServletResponse response){

        iUserManageService.addSpringUser(springUser);

        return "redirect:/user/getSpringUser";

    }
}


  • 1
  • 2
  • 3
  • 4
  • 5
  • 6
  • 7
  • 8
  • 9
  • 10
  • 11
  • 12
  • 13
  • 14
  • 15
  • 16
  • 17
  • 18
  • 19
  • 20
  • 21
  • 22
  • 23
  • 24
  • 25
  • 26
  • 27
  • 28
  • 29
  • 30
  • 31
  • 32
  • 33
  • 34
  • 35
  • 36
  • 37
  • 38
  • 39
  • 40
  • 41
  • 42
  • 43
  • 44
  • 45
  • 46
  • 47
  • 48
  • 49
  • 50
  • 51
  • 52
  • 53
  • 54
  • 55
  • 56
  • 57
  • 58
  • 59
  • 60

10.最后就是页面展现啦,在spring-mvc.xml配置文件中,我们已经配置了静态资源的位置,所以,我们只需要按照上面的路径建立pages文件夹,在里面写jsp页面就可以了,下面是页面的代码。

addUser.jsp

<%@ page language="Java" contentType="text/html; charset=UTF-8"
    pageEncoding="UTF-8"%>
<%@taglib prefix="c" uri="http://java.sun.com/jsp/jstl/core" %>
<%
String path = request.getContextPath();
String basePath = request.getScheme()+"://"+request.getServerName()+":"+request.getServerPort()+path+"/";
%>
<!DOCTYPE HTML PUBLIC "-//W3C//DTD HTML 4.01 Transitional//EN">
<html>
  <head>
    <base href="<%=basePath%>">    
    <title>添加用户</title>
    <script type="text/javascript">
        function adduser() {
            var form = document.forms[0];
            form.action = "/springmvc_spring3_hibernate4/user/addSpringUser";
            form.mothod = "POST";
            form.submit();
        }
    </script>
 </head>
 <body>
    <h2 align="center">添加用户</h2>
    <form name="forms_user" action="">
        <table width="320" height="180" align="center" border="0">
            <tr>
                <td>用户名:</td>
                <td><input type="text" name="userName"></td>                
            </tr>
            <tr>
                <td>手机号码:</td>
                <td><input type="text" name="phone"></td>
            </tr>
            <tr>
                <td>年龄:</td>
                <td><input type="text" name="age"></td>             
            </tr>
            <tr align="center"><td colspan="2"><input type="button" value="提交" onclick="adduser()"></input></td></tr>
        </table>
    </form>
 </body>
</html>
 
 
  • 1
  • 2
  • 3
  • 4
  • 5
  • 6
  • 7
  • 8
  • 9
  • 10
  • 11
  • 12
  • 13
  • 14
  • 15
  • 16
  • 17
  • 18
  • 19
  • 20
  • 21
  • 22
  • 23
  • 24
  • 25
  • 26
  • 27
  • 28
  • 29
  • 30
  • 31
  • 32
  • 33
  • 34
  • 35
  • 36
  • 37
  • 38
  • 39
  • 40
  • 41
  • 42
  • 1
  • 2
  • 3
  • 4
  • 5
  • 6
  • 7
  • 8
  • 9
  • 10
  • 11
  • 12
  • 13
  • 14
  • 15
  • 16
  • 17
  • 18
  • 19
  • 20
  • 21
  • 22
  • 23
  • 24
  • 25
  • 26
  • 27
  • 28
  • 29
  • 30
  • 31
  • 32
  • 33
  • 34
  • 35
  • 36
  • 37
  • 38
  • 39
  • 40
  • 41
  • 42

index.jsp

<%@ page language="Java" contentType="text/html; charset=UTF-8"
    pageEncoding="UTF-8"%>
<%@taglib prefix="c" uri="http://java.sun.com/jsp/jstl/core" %>
<%
String path = request.getContextPath();
String basePath = request.getScheme()+"://"+request.getServerName()+":"+request.getServerPort()+path+"/";
%>
<!DOCTYPE HTML PUBLIC "-//W3C//DTD HTML 4.01 Transitional//EN">
<html>
  <head>
    <base href="<%=basePath%>">    
    <title>首页</title>        
 </head>
 <body>
    <a href="<%=basePath%>user/getSpringUser">查看已注册用户</a>
    <a href="<%=basePath%>pages/addUser.jsp">添加用户</a>
 </body>
</html>
 
 
  • 1
  • 2
  • 3
  • 4
  • 5
  • 6
  • 7
  • 8
  • 9
  • 10
  • 11
  • 12
  • 13
  • 14
  • 15
  • 16
  • 17
  • 18
  • 1
  • 2
  • 3
  • 4
  • 5
  • 6
  • 7
  • 8
  • 9
  • 10
  • 11
  • 12
  • 13
  • 14
  • 15
  • 16
  • 17
  • 18

show.jsp

<%@ page language="Java" contentType="text/html; charset=UTF-8"
    pageEncoding="UTF-8"%>
<%@taglib prefix="c" uri="http://java.sun.com/jsp/jstl/core" %>
<%
String path = request.getContextPath();
String basePath = request.getScheme()+"://"+request.getServerName()+":"+request.getServerPort()+path+"/";
%>
<!DOCTYPE HTML PUBLIC "-//W3C//DTD HTML 4.01 Transitional//EN">
<html>
  <head>
    <base href="<%=basePath%>">    
    <title>用户信息</title>        

 </head>
 <body>
 <h2 align="center">注册用户信息</h2>
 <form name="form">
        <table width="320" align="center" border="0">
            <tr>
                <td>用户名</td>
                <td>年龄</td>
                <td>手机号码</td>

            </tr>

            <c:forEach var="list" items="${list}">
            <tr>
                <td>${list.userName }</td>
                <td>${list.age }</td>  
                <td>${list.phone }</td>
            </tr>   
            </c:forEach>    
        </table>
    </form>
 </body>
</html>
 
 
  • 1
  • 2
  • 3
  • 4
  • 5
  • 6
  • 7
  • 8
  • 9
  • 10
  • 11
  • 12
  • 13
  • 14
  • 15
  • 16
  • 17
  • 18
  • 19
  • 20
  • 21
  • 22
  • 23
  • 24
  • 25
  • 26
  • 27
  • 28
  • 29
  • 30
  • 31
  • 32
  • 33
  • 34
  • 35
  • 36
  • 1
  • 2
  • 3
  • 4
  • 5
  • 6
  • 7
  • 8
  • 9
  • 10
  • 11
  • 12
  • 13
  • 14
  • 15
  • 16
  • 17
  • 18
  • 19
  • 20
  • 21
  • 22
  • 23
  • 24
  • 25
  • 26
  • 27
  • 28
  • 29
  • 30
  • 31
  • 32
  • 33
  • 34
  • 35
  • 36

第一次写博客,有点小激动,写的不好还请大家多多包涵,有错误请给我留言。spring拥有强大的注解功能,这项功能方便了大家进行代码的编写,所以大家可以多多使用注解。这一个实例我实现的功能比较简单,只是实现了增和查这两个功能,大家有兴趣的同学可以继续往下写,可以补充改跟删这两个功能,由于之前在网上有查阅过相关的资料,下面给大家贴出一个链接,大家可以继续看看别的大神的文章: 
http://blog.csdn.net/bjyfb/article/details/8998267 
http://blog.csdn.net/bjyfb/article/details/8998439

下面也附上我的工程文件下载链接: 
http://download.csdn.net/detail/tianxiezuomaikong/9675156

  • 1
    点赞
  • 2
    收藏
    觉得还不错? 一键收藏
  • 2
    评论
评论 2
添加红包

请填写红包祝福语或标题

红包个数最小为10个

红包金额最低5元

当前余额3.43前往充值 >
需支付:10.00
成就一亿技术人!
领取后你会自动成为博主和红包主的粉丝 规则
hope_wisdom
发出的红包
实付
使用余额支付
点击重新获取
扫码支付
钱包余额 0

抵扣说明:

1.余额是钱包充值的虚拟货币,按照1:1的比例进行支付金额的抵扣。
2.余额无法直接购买下载,可以购买VIP、付费专栏及课程。

余额充值