


前置条件:ionic5 + angular 10 + code-push 实现 热更新
我有一个私有的codePush服务器,因此我将部署到私有服务器上面
先将我的app添加至服务器
1.登录热更新服务器:
执行命令:code-push login http://xxxxxxx
2.创建项目:(只需创建一次即可,以后都用这个)
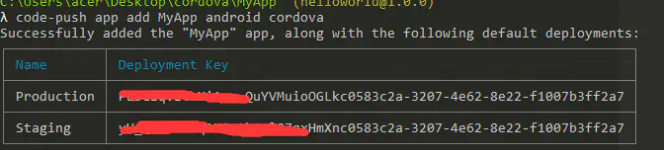
执行命令:code-push app add 项目名称 android cordova
默认会有两个环境:Production 和 Staging ,也可以执行命令:code-push deployment add 项目名称 环境名称。每个环境对应一个不同的key,这个key是我们配置项目需要的
准备工作已完成,接着开始配置我们的项目
项目配置:
1. 下载插件
$ ionic cordova plugin add cordova-plugin-code-push
$ npm install --save @ionic-native/code-push@4
2. 修改config.xml,因为我只需要android的,因此只配置了android。IOS的应该也是一样的配置
    <platform name="android">
        <config-file parent="/manifest" target="AndroidManifest.xml" xmlns:android="http://schemas.android.com/apk/res/android">
            <uses-permission android:name="android.permission.REQUEST_INSTALL_PACKAGES" />
        </config-file>
        <preference name="CodePushDeploymentKey" value="热更新的key" />
        <preference name="CodePushServerUrl" value="私有服务地址,如果不是私有的,忽略这一行" />
</platform>

// 热更新的key指的是:前面我们在热更新服务中添加的项目的key,不只一个,替换成你想要推送的环境对应的key就行
3. config.xml中,如果你使用了<access origin="*" /> ,则忽略此步骤,否则需要添加以下代码
<access origin="https://codepush.appcenter.ms" />
<access origin="https://codepush.blob.core.windows.net" />
<access origin="https://codepushupdates.azureedge.net" />
4.index.html中新增meta
<meta http-equiv="Content-Security-Policy" content="default-src https://codepush.appcenter.ms 'self' data: gap: https://ssl.gstatic.com 'unsafe-eval'; style-src 'self' 'unsafe-inline'; media-src *" />

// 私有codePush服务,请将https://codepush.appcenter.ms 修改为自己的服务器地址
5.执行命令:cordova plugin ls 检查是否有 cordova-plugin-whitelist 插件,如果没有执行 cordova plugin add cordova-plugin-whitelist,添加至你的项目,如果有,那现在已经OK了
为我们的项目添加热更新的提示
1. app.module.ts中引入CodePush
import { NgModule } from '@angular/core';
import { BrowserModule } from '@angular/platform-browser';
import { RouteReuseStrategy } from '@angular/router';

import { IonicModule, IonicRouteStrategy } from '@ionic/angular';
import { SplashScreen } from '@ionic-native/splash-screen/ngx';
import { StatusBar } from '@ionic-native/status-bar/ngx';

import { AppRoutingModule } from './app-routing.module';
import { AppComponent } from './app.component';
import { Ndef, NFC } from '@ionic-native/nfc/ngx';
import { CodePush } from '@ionic-native/code-push/ngx';


@NgModule({
  declarations: [AppComponent],
  entryComponents: [],
  imports: [BrowserModule, IonicModule.forRoot(), AppRoutingModule],
  providers: [
    StatusBar,
    SplashScreen,
    { provide: RouteReuseStrategy, useClass: IonicRouteStrategy },
    NFC,
    Ndef,
    CodePush
  ],
  bootstrap: [AppComponent]
})
export class AppModule {}
2.app.component.ts中:
import { CodePush, InstallMode, SyncStatus } from '@ionic-native/code-push/ngx';
import { LoadingController, Platform } from '@ionic/angular';

@Component({
  selector: 'app-root',
  templateUrl: 'app.component.html',
  styleUrls: ['app.component.scss']
})
export class AppComponent {
  constructor(
    private platform: Platform,
    private codePush: CodePush,
  ) {
    this.initializeApp();
  }

  initializeApp() {
    this.platform.ready().then(() => {
      this.statusBar.styleDefault();
      this.splashScreen.hide();
      this.checkCodePush()
    });
  }
// 检查热更新
  checkCodePush() {
    this.codePush.sync({
      installMode: InstallMode.IMMEDIATE, //安装模式:马上更新
      updateDialog: {
        mandatoryUpdateMessage: "必须更新后才能使用", //强制更新时的信息
        mandatoryContinueButtonLabel: "立即更新", //强制更新按钮文字
        optionalInstallButtonLabel: "立即更新", //非强制更新时,确认按钮文字
        optionalIgnoreButtonLabel: "下次再说", //非强制更新时,按钮文字
        optionalUpdateMessage: "是否马上更新?", //非强制更新时,检查到更新的消息文本
        updateTitle: "发现新版本", //标题
      }
    }).subscribe((syncStatus) => {
      if (syncStatus == 7) {
        alert('更新中,请不要退出应用')
      }
    }, err => { alert('错误' + err); });
  }

}
打包和推送热更新方式
1. 打包命令:ionic cordova build android --prod --release ,签名成功后生成的apk就是支持热更新的apk
2.每次修改代码以后,先执行ionic cordova build android 命令编译项目以后,再执行热更新推送命令: code-push release-cordova 项目名称 android -d 更新环境 。 完成以后,重启步骤1生成的app。即可看到热更新提示的弹框
这里热更新推送命令的项目名称就是我们再热更新服务中添加的项目名称,更新环境就是我们需要热更新服务中当前项目的环境name。环境name与config.xml中的key需要一一对应。否则可能会失败
踩坑:
1. 在我最新的vue3 + ts 的 cordova应用中,cordova-android:9.1.0 ,编译时报错: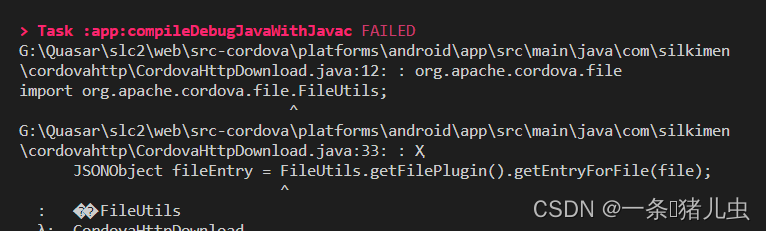
解决方案:
cordova-plugin-file 版本问题,初始时cordova-plugin-file版本为7.0.0,卸载重装6.0.2版本解决问题,执行命令:
cordova plugin remove cordova-plugin-file --force
cordova plugin add cordova-plugin-file@6.0.2
单独重装cordova-plugin-file可能会不成功,还可能需要重装android,执行命令
cordova platform remove android

cordova platform add android


 6248
6248

 被折叠的 条评论
为什么被折叠?
被折叠的 条评论
为什么被折叠?
 到【灌水乐园】发言


