最近在写一系列基于SignalR的实时通信示例,每个示例都会用到服务端,所以单独写一篇文章来说明SignalR服务端的创建过程。本人WPF用的比较多,所以就用WPF来写这个服务端了。
| 开发环境 | 版本说明 |
|---|---|
| 操作系统 | windows 10 professional |
| 编译工具 | VisualStudio 2015 update2 |
本文参考了以下文章:
[Using SignalR in WinForms and WPF]
1创建WPF应用程序
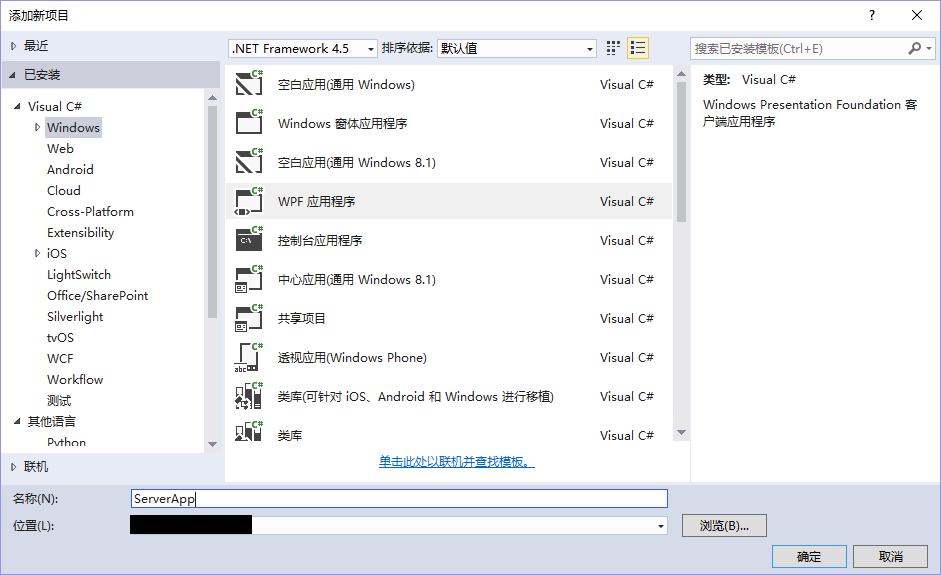
打开VisualStudio2015,新建空白解决方案,添加WPF项目ServerApp。框架选择.NET Framework 4.5,因为官方建议服务端至少要是4.5,客户端的话至少是4.0 。
2添加SignalR程序包
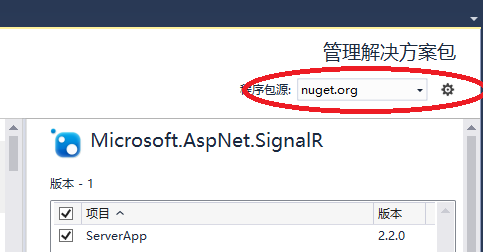
在菜单栏“工具>NuGet包管理器>管理解决方案的NuGet程序包”
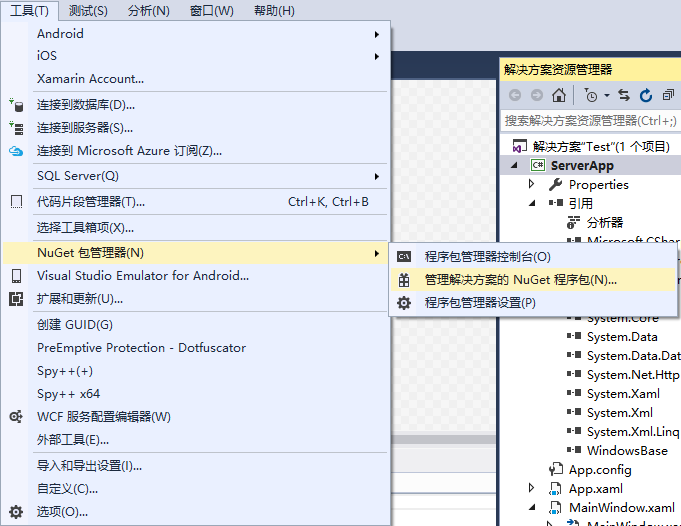
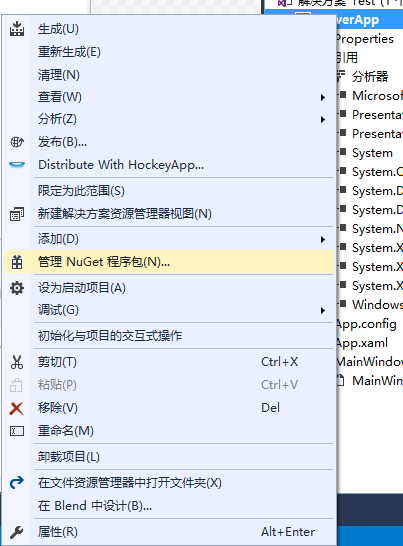
或在项目的右键菜单中选择“管理NuGet程序包”进入NuGet管理器。
搜索SignalR,把相应的包都安装上(反正都装了也不吃亏)。目前SignalR最新的稳定版本是2.2.0
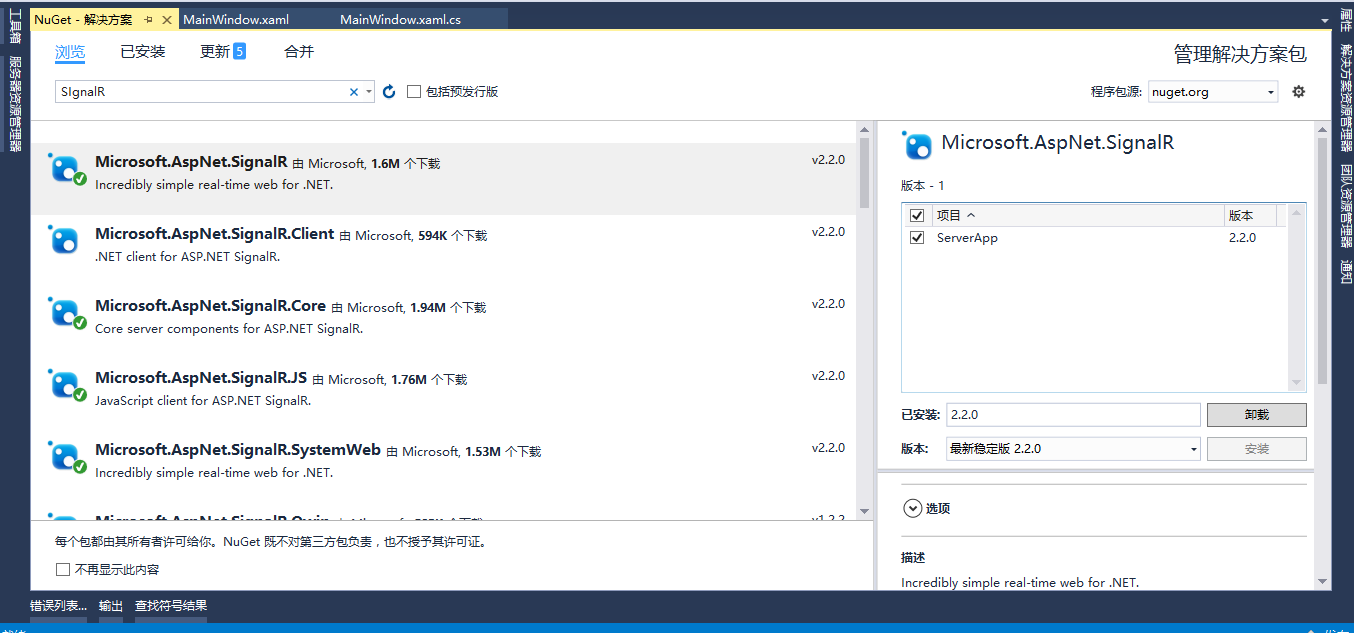
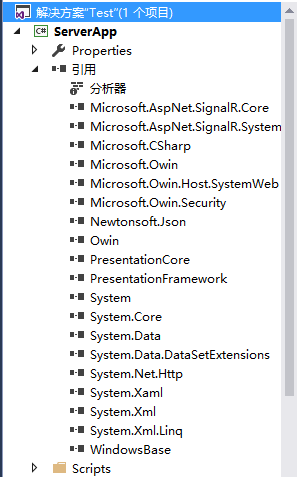
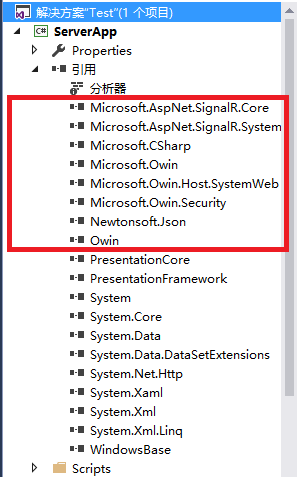
程序包添加完成后,查看项目引用可以看到所需的动态链接库dll已经被引用进来。
这里需要说明一下,联网情况下,程序包是从官方服务器上自动获取的。但如果遇到开发或者部署环境没有网络怎么办?操作如下:
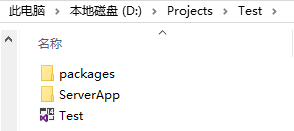
首先要确保本地已经获取了NuGet的程序包,打开解决方案的根目录,“package”文件夹就是NuGet程序包自动下载的位置。
其次打开NuGet管理器,点击设置按钮,或者打开菜单“工具>选项>NuGet包管理器>程序包源”进入程序包源设置页面。
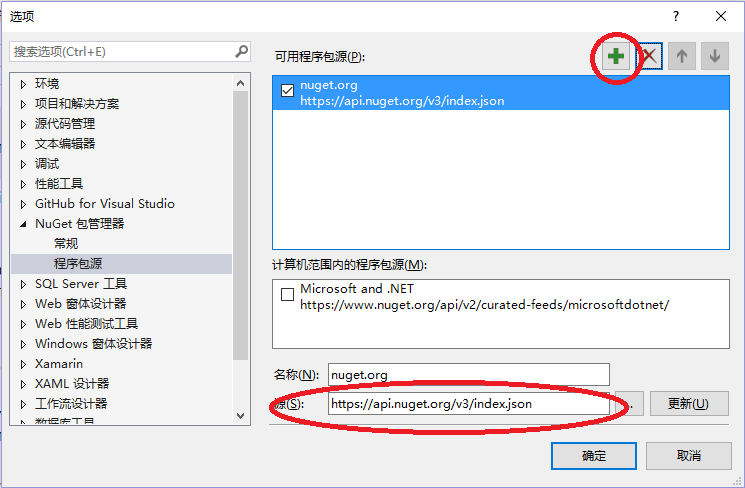
添加一个新的程序包源,将其源路径更改为本地的package文件夹。点击“更新”,然后点击“确定”保存,这样在断网情况下也能使用NuGet添加程序包了。
3添加后台方法及页面布局显示
3.1添加Startup.cs
添加Startup.cs类作为程序的启动入口。
using Owin;//必需的程序集引用

namespace ServerApp
{
    public class Startup
    {
        public void Configuration(IAppBuilder app)
        {
            app.MapSignalR();
        }
    }
}
- 1
- 2
- 3
- 4
- 5
- 6
- 7
- 8
- 9
- 10
- 11
- 12
3.2添加Hub类
添加MyHub.cs作为通信方法类,相关的通信方法都将在这里建立。MyHub.cs继承于Hub并实现其接口。
using Microsoft.AspNet.SignalR;
using System.Collections.Generic;
using System.Data;
using System.Threading.Tasks;
using System.Windows;

namespace ServerApp
{
    public class MyHub:Hub
    {
        public override Task OnConnected()
        {
            return base.OnConnected();
        }
        public override Task OnDisconnected(bool stopCalled)
        {
            return base.OnDisconnected(stopCalled);
        }
        public override Task OnReconnected()
        {
            return base.OnReconnected();
        }
        //自定义方法
        public Task Send(string message)
        {
            return Clients.All.send(message);
        }
    }
}
- 1
- 2
- 3
- 4
- 5
- 6
- 7
- 8
- 9
- 10
- 11
- 12
- 13
- 14
- 15
- 16
- 17
- 18
- 19
- 20
- 21
- 22
- 23
- 24
- 25
- 26
- 27
- 28
- 29
MyHub类是实时通信功能实现的关键,以方法Send(string message)为例,在客户端创建一个名为“MyHub”的连接后,一般会有两个方法,一个On方法用于监听服务端发送的消息–Clients.All.send(message),一个Invoke方法调用(调用这个词可能不太合适)服务端的Send(string message)方法发送消息。
3.3设计程序界面
打开文件MainWindow.xaml,在设计器中添加“启动”和“停止”按钮,用于服务的启动和停止,同时添加富文本框用于运行信息的显示。
<Window x:Class="ServerApp.MainWindow"
        xmlns="http://schemas.microsoft.com/winfx/2006/xaml/presentation"
        xmlns:x="http://schemas.microsoft.com/winfx/2006/xaml"
        Title="服务端" Height="480" Width="800" >
    <Grid>
        <Grid.RowDefinitions>
            <RowDefinition Height="80"></RowDefinition>
            <RowDefinition></RowDefinition>
            <RowDefinition Height="50"></RowDefinition>
        </Grid.RowDefinitions>
        <WrapPanel VerticalAlignment="Center" HorizontalAlignment="Center">
            <Button Name="btn_Start" Click="btn_Start_Click" Height="30" Width="80" Grid.Column="0" Margin="0,0,40,0">启动服务</Button>
            <Button Name="btn_Stop" Click="btn_Stop_Click" Height="30" Width="80" Grid.Column="1">停止服务</Button>
        </WrapPanel>
        <RichTextBox Grid.Row="1" Name="txt_Rich" Margin="10" FontSize="10" IsReadOnly="True" VerticalScrollBarVisibility="Auto">
        </RichTextBox>
    </Grid>
</Window>
- 1
- 2
- 3
- 4
- 5
- 6
- 7
- 8
- 9
- 10
- 11
- 12
- 13
- 14
- 15
- 16
- 17
- 18
3.4添加后台处理程序
using System;
using System.Configuration;
using System.Windows;
using System.Reflection;
using Microsoft.Owin.Hosting;
using System.Threading.Tasks;

namespace ServerApp
{
    /// <summary>
    /// MainWindow.xaml 的交互逻辑
    /// </summary>
    public partial class MainWindow : Window
    {
        #region 通信设置
        public IDisposable SignalR { get; set; }
        //全局通信链接,地址为服务端所在主机IP地址,端口号可任意指定
        static string ServerURI = ConfigurationManager.AppSettings["ServiceUri"];
        #endregion
        public MainWindow()
        {
            InitializeComponent();
            StartServer();
        }
        #region 启动按钮事件
        private void btn_Start_Click(object sender, RoutedEventArgs e)
        {
            WriteToConsole("服务正在启动...");
            btn_Start.IsEnabled = false;
            Task.Run(() => StartServer());
        }
        #endregion
        #region 停止按钮事件
        private void btn_Stop_Click(object sender, RoutedEventArgs e)
        {
            WriteToConsole("服务正在停止...");
            if (SignalR!=null)
            {
                SignalR.Dispose();
            }
            btn_Stop.IsEnabled = false;
            btn_Start.IsEnabled = true;
            WriteToConsole("服务已停止:" + ServerURI);
            //Close();
        }
        #endregion
        #region 启动服务方法
        private void StartServer()
        {
            try
            {
                SignalR = WebApp.Start(ServerURI);
            }
            catch (TargetInvocationException)
            {
                WriteToConsole("已存在运行的服务:" + ServerURI);
                this.Dispatcher.Invoke(() => btn_Start.IsEnabled = true);
                return;
            }
            this.Dispatcher.Invoke(() => btn_Stop.IsEnabled = true);
            WriteToConsole("服务正在运行:" + ServerURI);
        }
        #endregion
        #region 运行信息显示
        public void WriteToConsole(String message)
        {
            if (!(txt_Rich.CheckAccess()))
            {
                this.Dispatcher.Invoke(() =>
                    WriteToConsole(message)
                );
                return;
            }
            string strTime = System.DateTime.Now.ToString("yyyy-MM-dd HH:mm:ss");
            txt_Rich.AppendText("[" + strTime + "]:" + message + "\r");
            if (txt_Rich.ExtentHeight > 400)
            {
                txt_Rich.Document.Blocks.Clear();
            }
        }
        #endregion
    }
}
- 1
- 2
- 3
- 4
- 5
- 6
- 7
- 8
- 9
- 10
- 11
- 12
- 13
- 14
- 15
- 16
- 17
- 18
- 19
- 20
- 21
- 22
- 23
- 24
- 25
- 26
- 27
- 28
- 29
- 30
- 31
- 32
- 33
- 34
- 35
- 36
- 37
- 38
- 39
- 40
- 41
- 42
- 43
- 44
- 45
- 46
- 47
- 48
- 49
- 50
- 51
- 52
- 53
- 54
- 55
- 56
- 57
- 58
- 59
- 60
- 61
- 62
- 63
- 64
- 65
- 66
- 67
- 68
- 69
- 70
- 71
- 72
- 73
- 74
- 75
- 76
- 77
- 78
- 79
- 80
- 81
- 82
- 83
3.5配置服务URI
服务的URI地址在配置文件App.config中设置,部署的时候改下配置文件的URL就行了。
<?xml version="1.0" encoding="utf-8"?>
<configuration>
  <appSettings>
    <!--通信连接地址-->
    <add key="ServiceUri" value="http://127.0.0.1:46900/" />
  </appSettings>
</configuration>
- 1
- 2
- 3
- 4
- 5
- 6
- 7
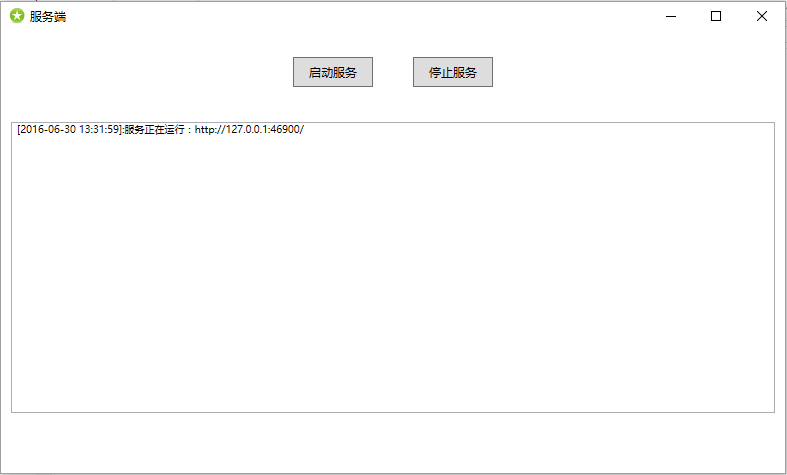
下面是运行效果图:
<?xml version="1.0" encoding="utf-8"?>
<configuration>
  <appSettings>
    <!--通信连接地址-->
    <add key="ServiceUri" value="http://127.0.0.1:46900/" />
  </appSettings>
</configuration>
- 1
- 2
- 3
- 4
- 5
- 6
- 7
3.6辅助功能
为了让服务端更好用,可以添加一些辅助功能。
下面是运行效果图:




 575
575

 被折叠的 条评论
为什么被折叠?


