


开发环境:eclipse
框架:基于Springboot的SSM框架
前端:依赖于Thymeleaf
自己搭建的springboot环境
一、搭建springboot环境
1.新建Maven工程
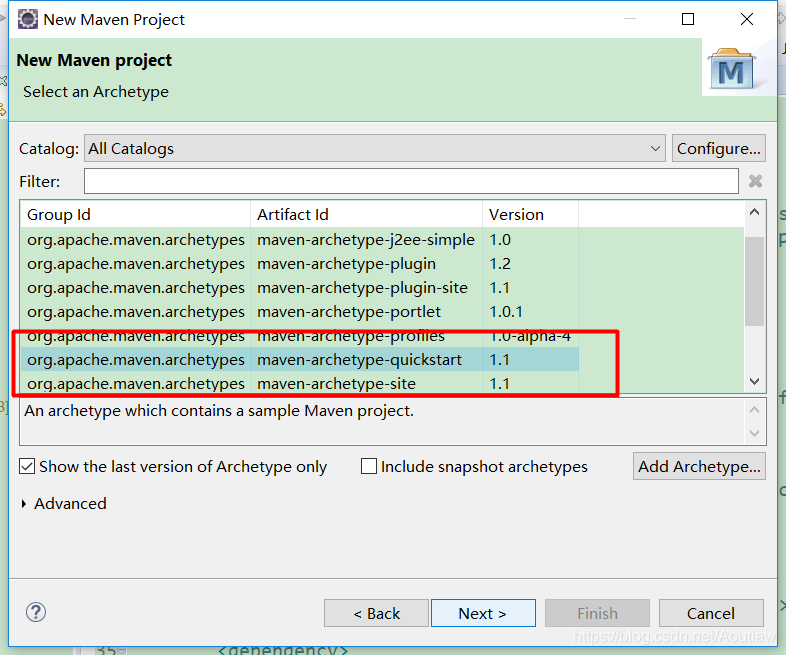
选择这一个
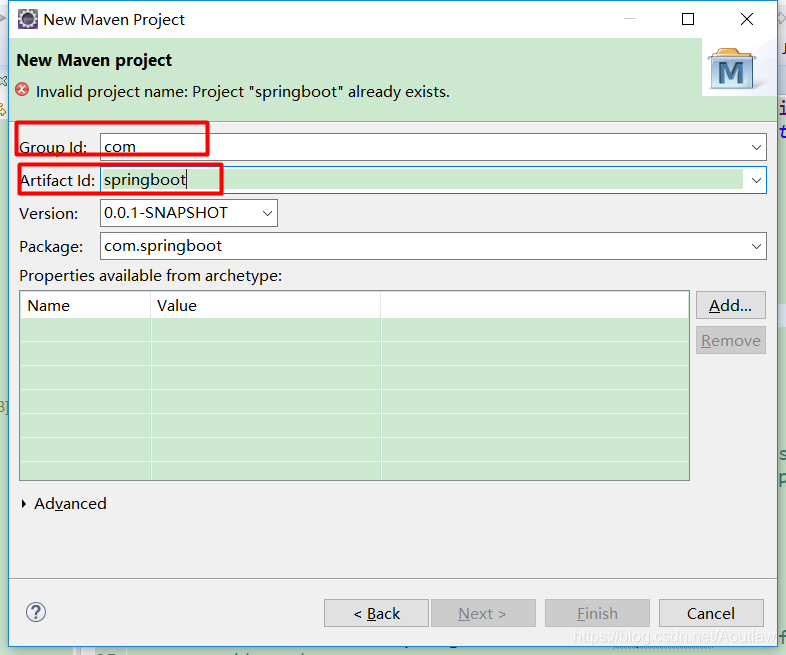
这个名字是唯一标识,可以用来添加依赖
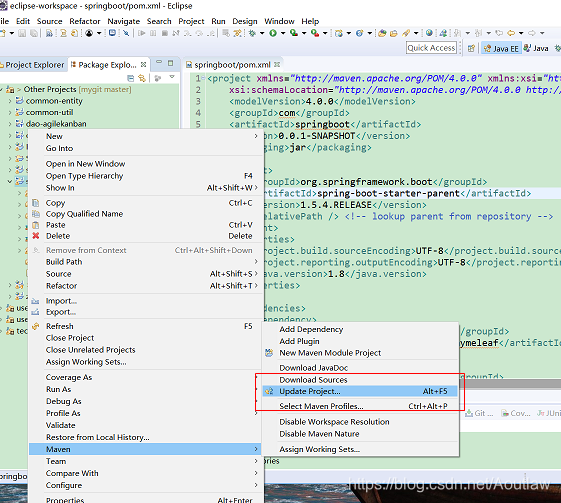
2.更新maven包
3.添加springboot的依赖
删除多余的依赖,保留剩下的
<project xmlns="http://maven.apache.org/POM/4.0.0" xmlns:xsi="http://www.w3.org/2001/XMLSchema-instance"
	xsi:schemaLocation="http://maven.apache.org/POM/4.0.0 http://maven.apache.org/xsd/maven-4.0.0.xsd">
	<modelVersion>4.0.0</modelVersion>
	<groupId>com</groupId>
	<artifactId>springboot</artifactId>
	<version>0.0.1-SNAPSHOT</version>
	<packaging>jar</packaging>

</project>
加入springboot的父亲,加入springboot开发所需的包
<!-- jdk版本 -->
<properties>
	<project.build.sourceEncoding>UTF-8</project.build.sourceEncoding>
	<project.reporting.outputEncoding>UTF-8</project.reporting.outputEncoding>
	<java.version>1.8</java.version>
</properties>
 <!-- Springboot核心jar包 -->
<parent>
	<groupId>org.springframework.boot</groupId>
	<artifactId>spring-boot-starter-parent</artifactId>
	<version>1.5.4.RELEASE</version>
	<relativePath /> <!-- lookup parent from repository -->
</parent>

<!-- 相关jar包 -->
<dependencies>
    <!-- web开发包:包含Tomcat和Springmvc -->
    <dependency>
        <groupId>org.springframework.boot</groupId>
        <artifactId>spring-boot-starter-web</artifactId>
    </dependency>
</dependencies>
springboot测试所用的包
<dependency>
	<groupId>org.springframework.boot</groupId>
	<artifactId>spring-boot-starter-test</artifactId>
	<scope>test</scope>
</dependency>
4.在update工程,然后建立App.class和Controller的类
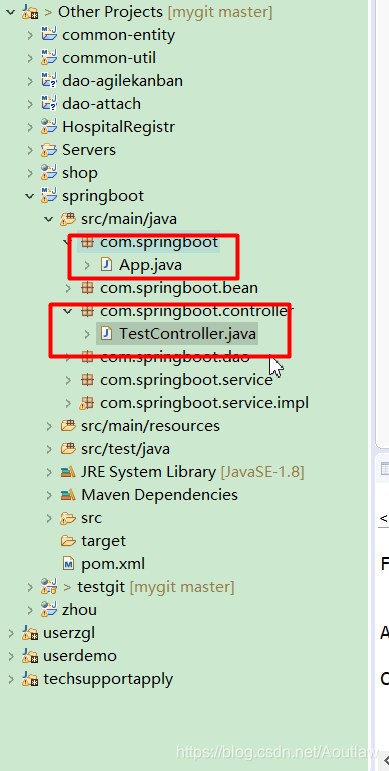
package com.springboot;


import org.springframework.boot.SpringApplication;
import org.springframework.boot.autoconfigure.SpringBootApplication;

/**
 * 项目启动类
 */
@SpringBootApplication

public class App {

    public static void main(String[] args) {
        SpringApplication.run(App.class, args);
    }

}
package com.springboot.controller;


import org.springframework.stereotype.Controller;
import org.springframework.web.bind.annotation.RequestMapping;
import org.springframework.web.bind.annotation.ResponseBody;


@Controller
public class TestController {


	@RequestMapping("/hello")
	@ResponseBody
	public String testConhh() {
		return "hello springboot";
	}
}
5.运行项目查看结果
Run as ---》java application
我当时运行的时候一直包未知错误,其实是eclipse的版本太低,一开始用的是2以上的springboot,后来改成了1.5.4就可以了。
常用设置=======
新建:src/main/java/resources
这里添加一个当时参考的博客:https://www.cnblogs.com/zhangyuanqiang/p/9183908.html
建好之后,在建立配置文件application.yml。
#服务器配置,这样可以省略8080
server:
  port: 80
  session-timeout: 30
  tomcat.max-threads: 0
  tomcat.uri-encoding: UTF-8
#spring相关配置,thymeleaf配置后,再代码中返回到那个页面就不用写过多的前缀和后缀了datasource配置数据源
spring:
  thymeleaf:
    prefix: classpath:/templates/
    suffix: .html
    mode: HTML5
    encoding: UTF-8
    content-type: text/html
    cache: false
  datasource:
    url: jdbc:mysql://localhost:3306/boot
    driver-class-name: com.mysql.jdbc.Driver
    username:
    password:
    initial-size: 10
    max-active: 20
    max-idle: 8
    min-idle: 8
  # 使用druid数据源
  type: com.alibaba.druid.pool.DruidDataSourc
  mybatis:
     mapperLocations: classpath:mapper/*.xml
     typeAliasesPackage: com.springboot.bean
这里是键值对,我当时就是学了这几个。前期够用
还有springboot热部署的依赖
<!-- spring-boot热部署 -->
<dependency>
    <groupId>org.springframework.boot</groupId>
    <artifactId>spring-boot-devtools</artifactId>
</dependency>
二、配置前端
1.首先导依赖,建立文件===注意:一定把标签写完整
<dependency>
	<groupId>org.springframework.boot</groupId>
	<artifactId>spring-boot-starter-thymeleaf</artifactId>
</dependency>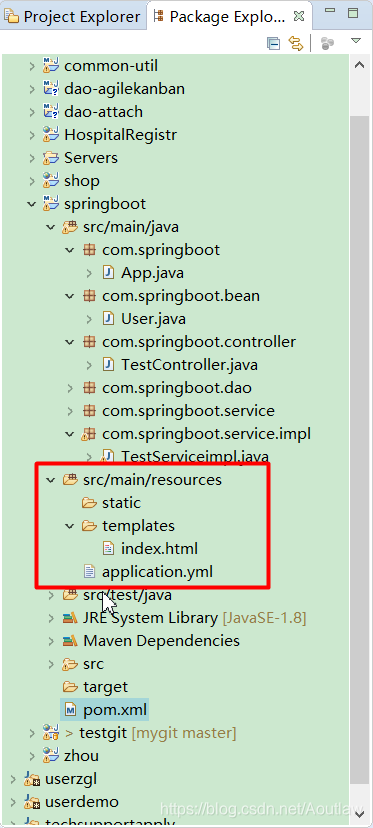
<!DOCTYPE html>
<html>
<head>
<meta charset="UTF-8"/>
<title>Index</title>
</head>
<body>
<form action="/save" method="post">
    姓名:<input type="text" th:value="${name}" name="name"/><br/>
    年龄:<input type="text" th:value="${age}" name="age"/><br/>
    简介:<input type="text" th:value="${info}" name="info"/><br/>
</form>
</body>
</html>
2.在controller层写入方法
@RequestMapping("/index")
public String index(Model model) {
	model.addAttribute("name", "KK");
	model.addAttribute("age", 20);
	model.addAttribute("info", "前端显示");
	return "index";
}
3.运行方法
三、连接数据库
1.导入依赖以及各种配置,在此之前一定要配好yml文件===注意springboot和mybatis的版本兼容问题
<!-- mybatis的依赖 -->
<dependency>
	<groupId>org.mybatis.spring.boot</groupId>
	<artifactId>mybatis-spring-boot-starter</artifactId>
	<version>1.3.0</version>
</dependency>
<!-- mysql的依赖 -->
<dependency>
	<groupId>mysql</groupId>
	<artifactId>mysql-connector-java</artifactId>
</dependency>
<!-- druid的依赖 -->
<dependency>
	<groupId>com.alibaba</groupId>
	<artifactId>druid-spring-boot-starter</artifactId>
	<version>1.1.0</version>
</dependency>
添加mapper层的扫描
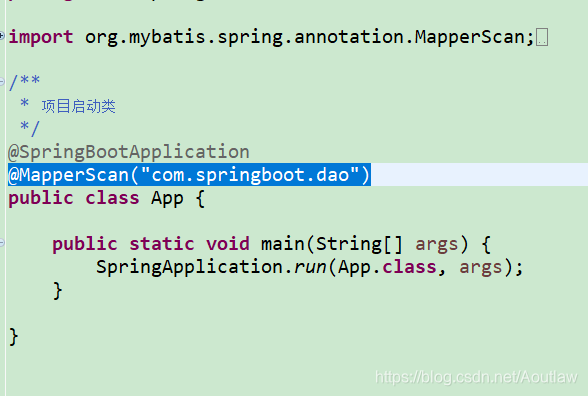
添加好文件
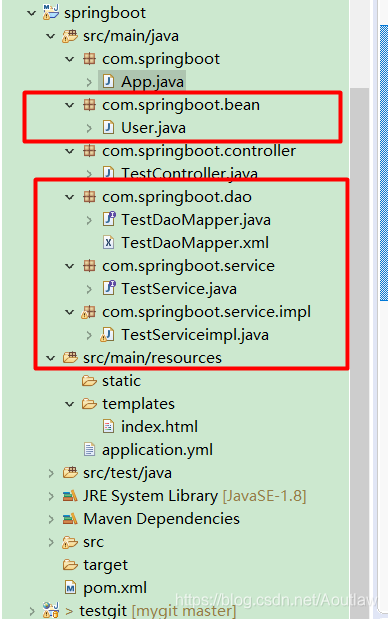
下面我直接粘贴源码
controller层:
	@RequestMapping("/save")
	@ResponseBody
	public String testCon(User user) {
		testService.insertTest(user);
		return "save";
	}
service的实现层:
package com.springboot.service.impl;

import javax.annotation.Resource;
import org.springframework.stereotype.Service;
import com.springboot.bean.User;
import com.springboot.dao.TestDaoMapper;
import com.springboot.service.TestService;

@Service
public class TestServiceimpl implements TestService{

	@Resource
	public TestDaoMapper testDaoMapper;
	public void insertTest(User user) {
		testDaoMapper.qTest(user);
	}

}
dao层及dao层的配置文件
package com.springboot.dao;

import com.springboot.bean.User;

public interface TestDaoMapper {

	void qTest(User user);
}
<?xml version="1.0" encoding="UTF-8"?>
<!DOCTYPE mapper PUBLIC "-//mybatis.org//DTD Mapper 3.0//EN" "http://mybatis.org/dtd/mybatis-3-mapper.dtd">
<mapper namespace="com.springboot.dao.TestDaoMapper">

<insert id="qTest" parameterType="com.springboot.bean.User">
	insert into user(id,name,age,info) values(#{id},#{name},#{age},#{info})
</insert>
</mapper>
bean层

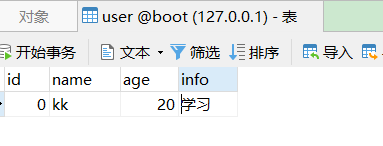
2直接运行就可以了


 1884
1884

 被折叠的 条评论
为什么被折叠?
被折叠的 条评论
为什么被折叠?
 到【灌水乐园】发言


