


基于上一篇继续讲
一、添加项目所需相关Jar包依赖
(1)pom.xml
<project xmlns="http://maven.apache.org/POM/4.0.0" xmlns:xsi="http://www.w3.org/2001/XMLSchema-instance"
	xsi:schemaLocation="http://maven.apache.org/POM/4.0.0 http://maven.apache.org/xsd/maven-4.0.0.xsd">
	<modelVersion>4.0.0</modelVersion>
	<groupId>com.appleyk</groupId>
	<artifactId>spring-boot-web</artifactId>
	<version>0.0.1-SNAPSHOT</version>
	<name>Java-Web</name>

	<!-- 继承官网最新父POM【假设当前项目不再继承其他POM】 -->
	<!-- http://projects.spring.io/spring-boot/#quick-start -->
	<parent>
		<groupId>org.springframework.boot</groupId>
		<artifactId>spring-boot-starter-parent</artifactId>
		<version>1.5.9.RELEASE</version>
	</parent>

	<!-- Starter POMs是可以包含到应用中的一个方便的依赖关系描述符集合 -->
	<!-- 该Starters包含很多你搭建项目, 快速运行所需的依赖, 并提供一致的, 管理的传递依赖集。 -->
	<!-- 大多数的web应用都使用spring-boot-starter-web模块进行快速搭建和运行。 -->
	<!-- spring-boot-starter-web -->
	<!-- 对全栈web开发的支持, 包括Tomcat和 spring-webmvc -->
	<dependencies>
		<dependency>
			<groupId>org.springframework.boot</groupId>
			<artifactId>spring-boot-starter-web</artifactId>
		</dependency>

		<!-- 添加Mybatis、Spring-Mybatis依赖  -->
		<!-- mybatis-spring-boot-starter继承树那是相当全面 -->
        <dependency>
			<groupId>org.mybatis.spring.boot</groupId>
			<artifactId>mybatis-spring-boot-starter</artifactId>
			<version>1.1.1</version>
		</dependency>

		<!-- 添加分页插件PageHelper的依赖 -->
		<!-- pagehelper-spring-boot-starter的继承树那也是相当丰富啊 -->
		<!-- 使用的是PageHelper5.0.1 -->
		<dependency>
			<groupId>com.github.pagehelper</groupId>
			<artifactId>pagehelper-spring-boot-starter</artifactId>
			<version>1.1.1</version>
		</dependency>

        <!-- MySql驱动依赖 -->
        <dependency>
			<groupId>mysql</groupId>
			<artifactId>mysql-connector-java</artifactId>
		</dependency>
		<!-- Spring 单元测试 -->
        <dependency>
			<groupId>org.springframework.boot</groupId>
			<artifactId>spring-boot-starter-test</artifactId>
			<scope>test</scope>
		</dependency>

		<!-- 添加热部署 devtools:监听文件变动-->
		<!-- 当Java文件改动时,Spring-boo会快速重新启动 -->
		<!-- 最简单的测试,就是随便找一个文件Ctrl+S一下,就可以看到效果 -->
		<dependency>
			<groupId>org.springframework.boot</groupId>
			<artifactId>spring-boot-devtools</artifactId>
			<!-- optional=true,依赖不会传递-->
			<!-- 本项目依赖devtools;若依赖本项目的其他项目想要使用devtools,需要重新引入 -->
			<optional>true</optional>
		</dependency>

		<!-- JUnit单元测试 -->
		<dependency>
			<groupId>junit</groupId>
			<artifactId>junit</artifactId>
		</dependency>
	</dependencies>

	<!-- 使用Java8,嘗試使用新特新【stream和lambda】 -->
	<properties>
		<java.version>1.8</java.version>
	</properties>

	<!-- Spring Boot包含一个Maven插件, 它可以将项目打包成一个可执行jar -->
	<build>
	    <!-- 解决配置资源文件被漏掉问题 -->
		<resources>
			<resource>
				<directory>src/main/resources</directory>
				<includes>
					<include>**/*.properties</include>
					<include>**/*.xml</include>
				</includes>
				<filtering>false</filtering>
			</resource>
			<resource>
				<directory>src/main/java</directory>
				<includes>
					<include>**/*.properties</include>
					<include>**/*.xml</include>
				</includes>
				<filtering>false</filtering>
			</resource>
		</resources>
		<plugins>
			<plugin>
				<groupId>org.springframework.boot</groupId>
				<artifactId>spring-boot-maven-plugin</artifactId>
			</plugin>
		</plugins>
	</build>
</project>
(2)依赖jar包一览

二、添加mysql数据源【连接参数】配置
application.properties
#SpringApplication将从以下位置加载application.properties文件, 并把它们添加到Spring Environment中:
#1. 当前目录下的一个/config子目录
#2. 当前目录
#3. 一个classpath下的/config包
#4. classpath根路径(root)
#这个列表是按优先级排序的(列表中位置高的将覆盖位置低的) 。
#注:你可以使用YAML('.yml') 文件替代'.properties'
spring.datasource.max-idle=10
spring.datasource.max-wait=10000
spring.datasource.min-idle=5
spring.datasource.initial-size=5
######MySql连接参数#############
jdbc.url=jdbc\:mysql\://localhost\:3306/test?useUnicode\=true&characterEncoding\=utf-8&useSSL=true
jdbc.username=root
jdbc.password=root
jdbc.driverClassName=com.mysql.jdbc.Driver
server.port=8080
server.session.timeout=10
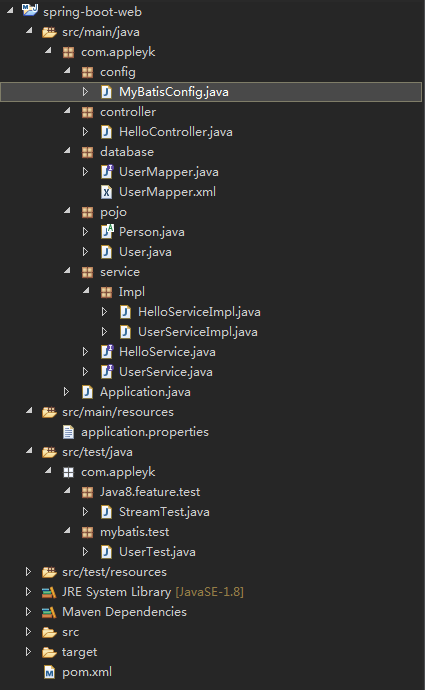
server.tomcat.uri-encoding=utf8三、项目目录结构图
四、全局配置类,包含Mapper包的自动扫描--来自于Mybatis
MyBatisConfig.java
package com.appleyk.config;
import java.util.Properties;
import javax.sql.DataSource;
import org.apache.ibatis.plugin.Interceptor;
import org.apache.ibatis.session.SqlSessionFactory;
import org.mybatis.spring.SqlSessionFactoryBean;
import org.mybatis.spring.SqlSessionTemplate;
import org.mybatis.spring.annotation.MapperScan;
import org.springframework.beans.factory.annotation.Qualifier;
import org.springframework.boot.autoconfigure.jdbc.DataSourceBuilder;
import org.springframework.boot.autoconfigure.jdbc.DataSourceProperties;
import org.springframework.boot.context.properties.ConfigurationProperties;
import org.springframework.boot.context.properties.EnableConfigurationProperties;
import org.springframework.context.annotation.Bean;
import org.springframework.context.annotation.Configuration;
import org.springframework.context.annotation.Primary;
import org.springframework.core.io.support.PathMatchingResourcePatternResolver;
import org.springframework.core.io.support.ResourcePatternResolver;
import org.springframework.jdbc.datasource.DataSourceTransactionManager;
import org.springframework.transaction.PlatformTransactionManager;
import org.springframework.transaction.annotation.EnableTransactionManagement;
import org.springframework.transaction.annotation.TransactionManagementConfigurer;
import com.github.pagehelper.PageInterceptor;
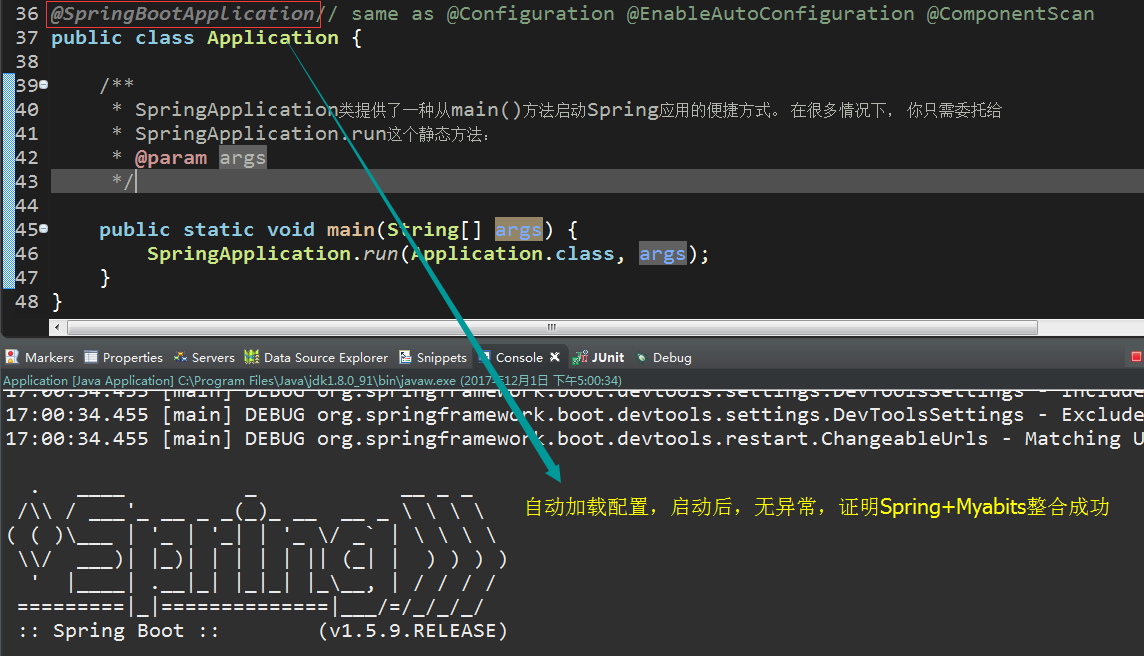
@Configuration
//使用注解 @EnableTransactionManagement 开启事务支持后
//然后在访问数据库的Service方法上添加注解 @Transactional便可。
@EnableTransactionManagement
@EnableConfigurationProperties(DataSourceProperties.class)
@MapperScan("com.appleyk.database")
public class MyBatisConfig implements TransactionManagementConfigurer{
@Bean(name = "dataSource")
//Spring 允许我们通过 @Qualifier注释指定注入 Bean 的名称
@Qualifier(value = "dataSource")
@ConfigurationProperties(prefix="jdbc")
@Primary
public DataSource dataSource()
{
return DataSourceBuilder.create().build();
}
//创建SqlSessionFactory
@Bean(name = "sqlSessionFactory")
public SqlSessionFactory sqlSessionFactoryBean(@Qualifier("dataSource") DataSource dataSource){
SqlSessionFactoryBean bean = new SqlSessionFactoryBean();
//1.设置数据源
bean.setDataSource(dataSource);
//2.给包中的类注册别名,注册后可以直接使用类名,而不用使用全限定的类名(就是不用包含包名)
bean.setTypeAliasesPackage("com.appleyk.database");
// 设置MyBatis分页插件 【PageHelper 5.0.1设置方法】
PageInterceptor pageInterceptor = new PageInterceptor();
Properties properties = new Properties();
properties.setProperty("helperDialect", "mysql");
properties.setProperty("offsetAsPageNum", "true");
properties.setProperty("rowBoundsWithCount", "true");
pageInterceptor.setProperties(properties);
//添加插件
bean.setPlugins(new Interceptor[]{pageInterceptor});
//添加XML目录,进行Mapper.xml扫描
ResourcePatternResolver resolver = new PathMatchingResourcePatternResolver();
try {
//项目中的xxxMapper.xml位于包com.appleyk.database下面
bean.setMapperLocations(resolver.getResources("classpath*:com/appleyk/database/*.xml"));
return bean.getObject();
} catch (Exception e) {
e.printStackTrace();
throw new RuntimeException(e);
}
}
//创建SqlSessionTemplate
@Bean
public SqlSessionTemplate sqlSessionTemplate(SqlSessionFactory sqlSessionFactory) {
return new SqlSessionTemplate(sqlSessionFactory);
}
@Bean
@Override
public PlatformTransactionManager annotationDrivenTransactionManager() {
return new DataSourceTransactionManager(dataSource());
}
}
五、启动项目
六、创建User对应的数据库表
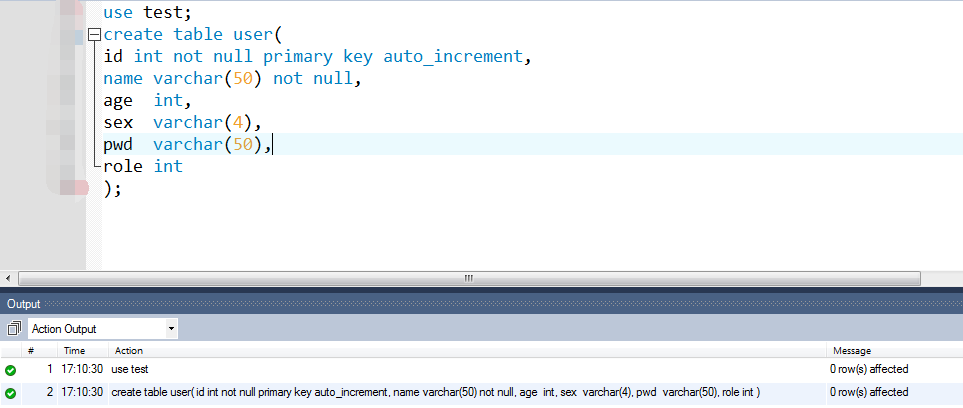
(1)user.sql
use test;
create table user(
id int not null primary key auto_increment,
name varchar(50) not null,
age  int,
sex  varchar(4),
pwd  varchar(50),
role int
);(2)执行sql脚本
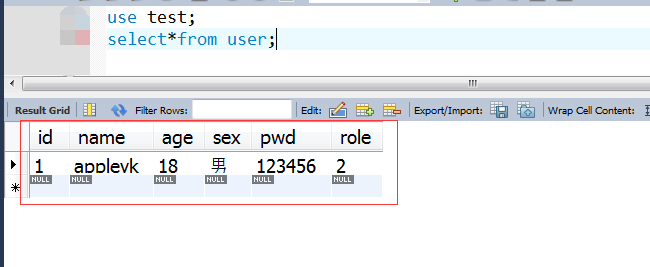
(3)查询

七、创建User表操作对应的Mapper接口
UserMapper.java
package com.appleyk.database;

import org.apache.ibatis.annotations.Param;

import com.appleyk.pojo.User;

public interface UserMapper {

	int insert(
			@Param("user") User user) throws Exception;
}
接口里面可以自行定义增删改查方法,本篇只列举新建insert
八、配置User表操作对应的Mapper接口的xml文件
注意:注意XXXmapper.java和XXXmapper.xml之间的关系
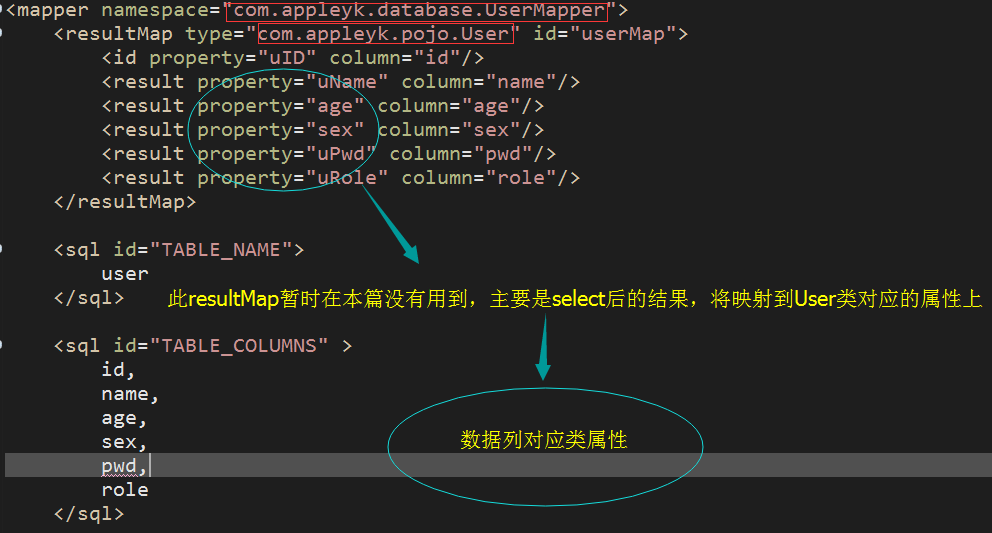
(1)UserMapper.xml
<?xml version="1.0" encoding="UTF-8" ?>
<!DOCTYPE mapper PUBLIC "-//mybatis.org//DTD Mapper 3.0//EN" "http://mybatis.org/dtd/mybatis-3-mapper.dtd">
<mapper namespace="com.appleyk.database.UserMapper">
	<resultMap type="com.appleyk.pojo.User" id="userMap">
		<id property="uID" column="id"/>
		<result property="uName" column="name"/>
		<result property="age" column="age"/>
		<result property="sex" column="sex"/>
		<result property="uPwd" column="pwd"/>
		<result property="uRole" column="role"/>
	</resultMap>

	<sql id="TABLE_NAME">
		user
	</sql>

	<sql id="TABLE_COLUMNS"	>
		id,
		name,
		age,
		sex,
		pwd,
		role
	</sql>

	<insert id="insert" parameterType="com.appleyk.pojo.User">
		INSERT INTO
		<include refid="TABLE_NAME" /> (
			name,
			age,
			sex,
			pwd,
			role
		) VALUES (
			#{user.uName},
			#{user.age},
			#{user.sex},
			#{user.uPwd},
			#{user.uRole}
	    )
	</insert>
</mapper>
(2)需要注意的地方
九、创建User表操作的Service接口和新增业务的实现类
(1)UserService.java
package com.appleyk.service;

import com.appleyk.pojo.User;

/**
 * 用户操作接口
 * @author yukun24@126.com
 * @date   2017年12月1日-下午4:32:34
 */
public interface UserService {

   /**
    * 创建一个新用户
    * @param user
    * @return
    */
   public boolean CreateUser(User user) throws Exception;
}
(2)UserServiceImpl.java
package com.appleyk.service.Impl;

import org.springframework.beans.factory.annotation.Autowired;
import org.springframework.stereotype.Service;

import com.appleyk.database.UserMapper;
import com.appleyk.pojo.User;
import com.appleyk.service.UserService;

@Service
public class UserServiceImpl implements UserService {


	//注入mapper
	@Autowired
	private UserMapper uMapper;

	@Override
	public boolean CreateUser(User user) throws Exception{
		if(uMapper.insert(user)>0){
			return true;
		}

		return false;
	}

}
(3)结构图

十、User用户表操作业务的单元测试
(1)
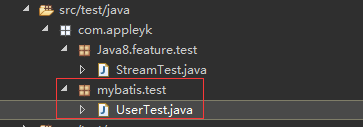
(2)UserTest.java
package com.appleyk.mybatis.test;
import org.junit.Test;
import org.junit.runner.RunWith;
import org.springframework.beans.factory.annotation.Autowired;
import org.springframework.boot.test.context.SpringBootTest;
import org.springframework.test.context.junit4.SpringJUnit4ClassRunner;
import com.appleyk.Application;
import com.appleyk.pojo.User;
import com.appleyk.service.UserService;
@RunWith(SpringJUnit4ClassRunner.class)
@SpringBootTest(classes=Application.class)// 指定spring-boot的启动类
public class UserTest {
@Autowired
private UserService uService;
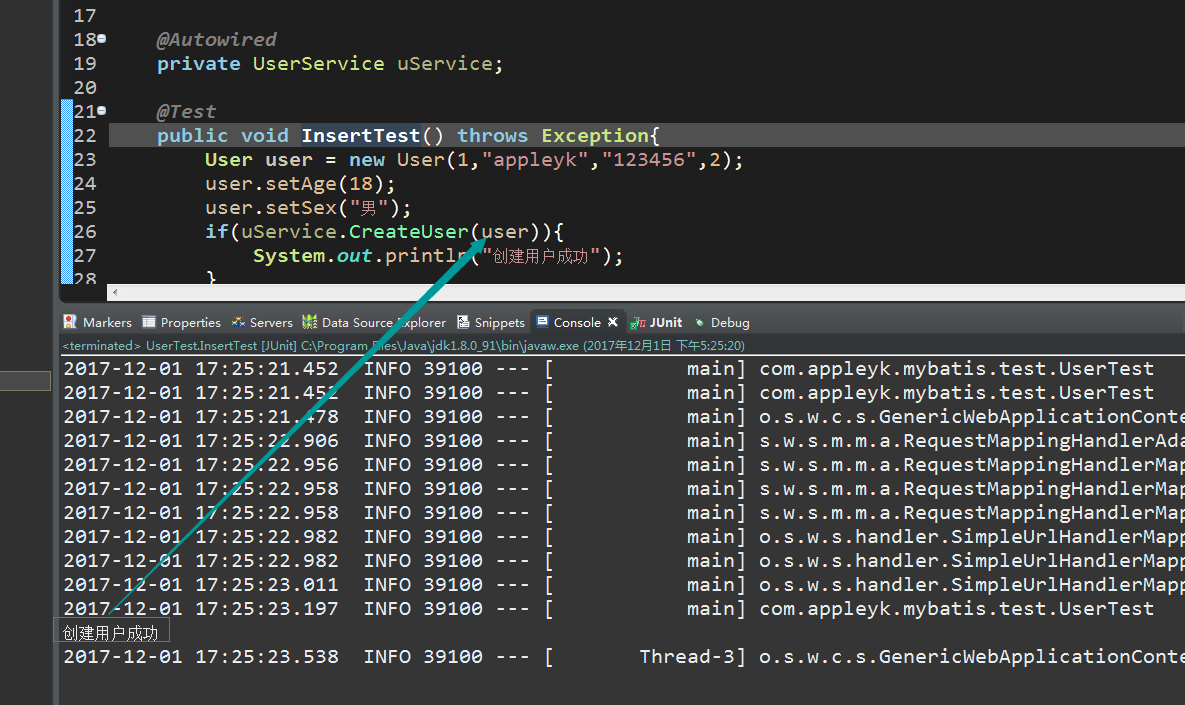
@Test
public void InsertTest() throws Exception{
User user = new User(1,"appleyk","123456",2);
user.setAge(18);
user.setSex("男");
if(uService.CreateUser(user)){
System.out.println("创建用户成功");
}
else{
System.out.println("创建用户失败");
}
}
}
(3)执行单元测试方法
(4)MySql表查询,验证数据
十一、User用户表操作Controller的创建
实现restful风格的API接口
(1)
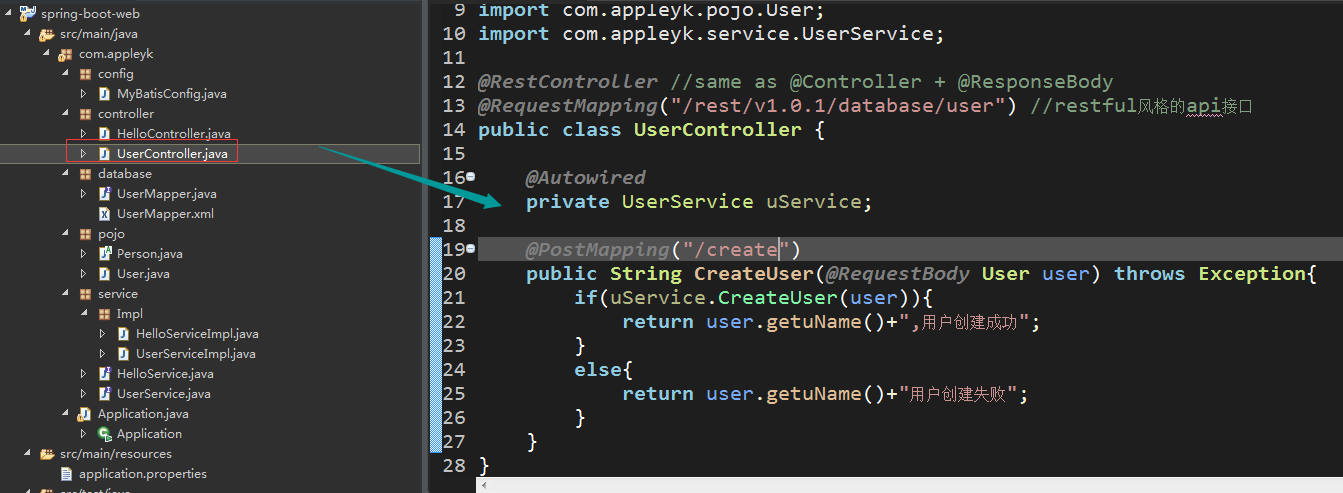
(2)UserController.java
package com.appleyk.controller;

import org.springframework.beans.factory.annotation.Autowired;
import org.springframework.web.bind.annotation.PostMapping;
import org.springframework.web.bind.annotation.RequestBody;
import org.springframework.web.bind.annotation.RequestMapping;
import org.springframework.web.bind.annotation.RestController;

import com.appleyk.pojo.User;
import com.appleyk.service.UserService;

@RestController //same as @Controller + @ResponseBody
@RequestMapping("/rest/v1.0.1/database/user") //restful风格的api接口
public class UserController {

	@Autowired
	private UserService uService;

	@PostMapping("/create")
	public String CreateUser(
			@RequestBody User user) throws Exception{

		if(uService.CreateUser(user)){
			return user.getuName()+",用户创建成功";
		}
		else{
			return user.getuName()+"用户创建失败";
		}
	}
}
(3)Ctrl+S保存后,Spring-Boot自启动,然后API工具测试,发送POST请求
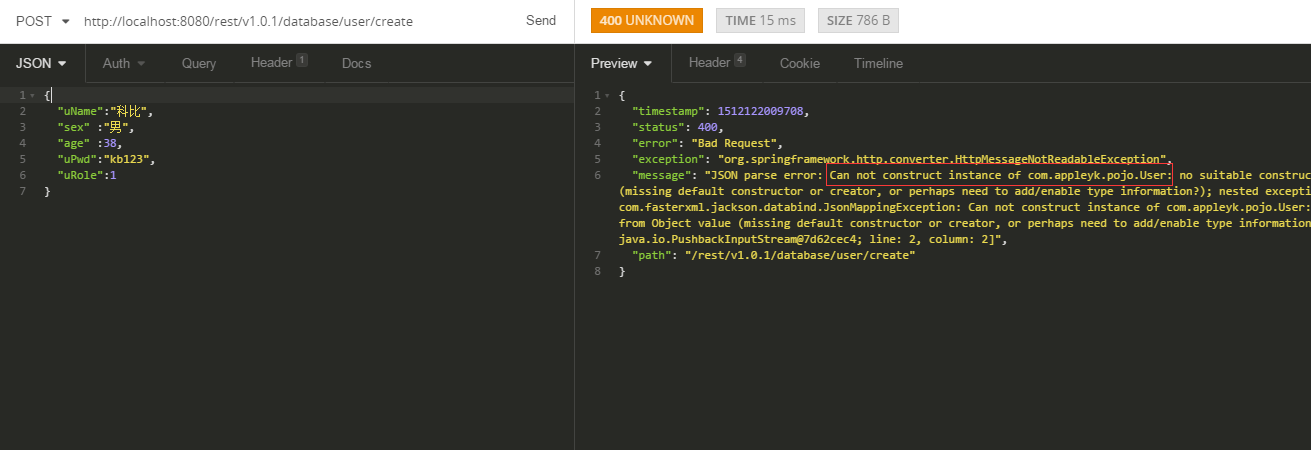
出现上述json转对象异常的问题,在于我们的对应JavaBean中没有定义无参的构造器
(4)改一下我们的User.java如下
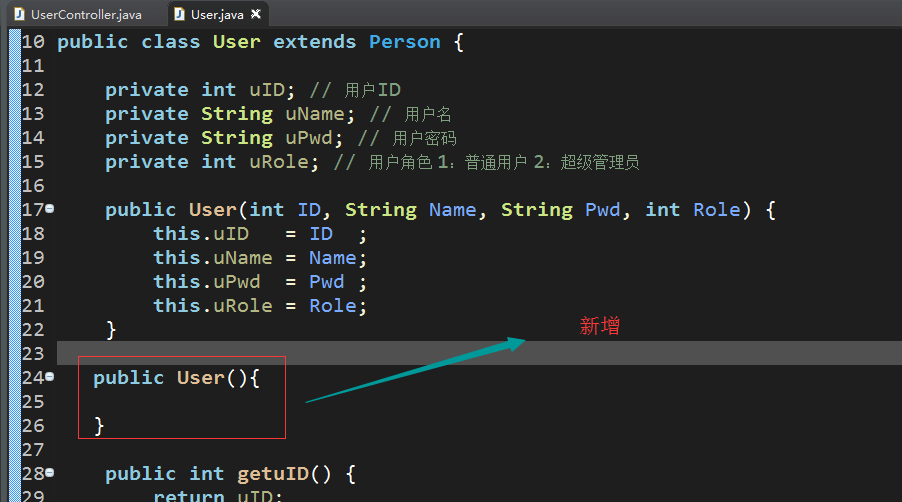
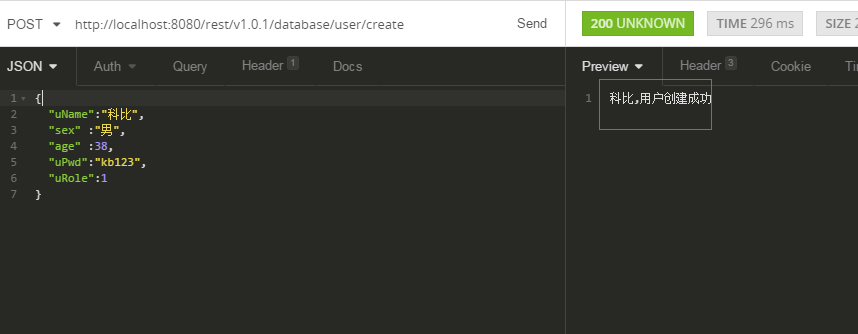
然后再一次,调用api接口测试一下
(5)
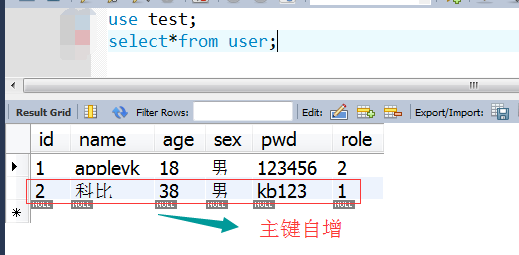
(6)MySql表数据查询验证
相比传统的SSM框架,Spring-Boot框架要写更少的配置文件,而实现的功能却一样不少,而且,我之前说过,对于Mybatis的mapepr.*,不管是接口还是xml文件,我们可以使用Mybatis的那一套逆向工程来自动生成mapper.*,也可以通过手动的去定制属于我们自己的mapper.*,本篇就是一个很好的例子,虽然只演示了简单的insert操作,但是思路很清晰,感兴趣的朋友,下去可以自行就行添加改造。


 181
181

 被折叠的 条评论
为什么被折叠?
被折叠的 条评论
为什么被折叠?
 到【灌水乐园】发言


