


学习资料:https://doc.scrapy.org/en/latest/intro/tutorial.html(英文文档);
https://scrapy-chs.readthedocs.io/zh_CN/0.24/intro/tutorial.html(中文文档)
1.创建一个scrapy项目
在命令行窗口中到你想要创建文件的目录下,打出这行命令:
scrapy startproject 项目名
然后可以看到该目录下生成一个文件夹,文件夹内有一个同名文件夹和cfg后缀的文件,如
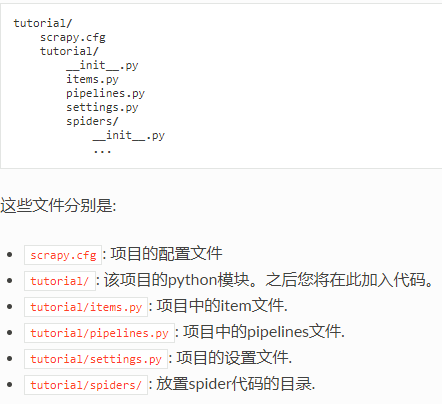
2.使用pycharm打开这个文件
File->Open->对应目录
教程样例1:在tutorial/spiders目录下新建一个quotes_spider.py,编辑如下代码:
	import scrapy
class QuotesSpider(scrapy.Spider):
    name = "quotes" #name是爬虫的标识名,可以唯一标记一个爬虫,后面会用到

    def start_requests(self):
        urls = [
            'http://quotes.toscrape.com/page/1/',
            'http://quotes.toscrape.com/page/2/',
        ]
        for url in urls:
yield scrapy.Request(url=url, callback=self.parse)#爬虫->request:创建;#request->response:获取下载数据#response->爬虫:数据
    def parse(self, response):
        page = response.url.split("/")[-2] #split返回一个列表,获取倒数第二项
        filename = 'quotes-%s.html' % page
        with open(filename, 'wb') as f: #w代表写,b代表二进制存取,wb或rb代表访问二进制文件时的两种访问模式
            f.write(response.body)
self.log('Saved file %s' % filename)可以在命令行窗口中进入项目的根目录,执行scrapy crawl 爬虫的name;或者在pycharm中于根目录新建一个begin.py, 写入:
from scrapy import cmdline

cmdline.execute("scrapy crawl quotes".split())#quotes是爬虫的标识名
点击运行,同样可以得到结果。


 3510
3510

 被折叠的 条评论
为什么被折叠?
被折叠的 条评论
为什么被折叠?
 到【灌水乐园】发言


