


0.大致内容介绍
本次课程设计主题为商城管理后台系统,主要页面包含:登陆注册页面、404页面、首页展示、商品管理及增删改查操作、商品类别增删改查操作、订单管理发货取消订单操作、订单历史记录查询、用户管理及增删改查操作、用户职能管理操作、个人页面展示与修改等。
详细信息可移步远程仓库进行查看:
github地址:https://github.com/Yiyun0422/SimpleMall
gitee地址:https://gitee.com/zlzlx_1/simple-mall
1.效果展示
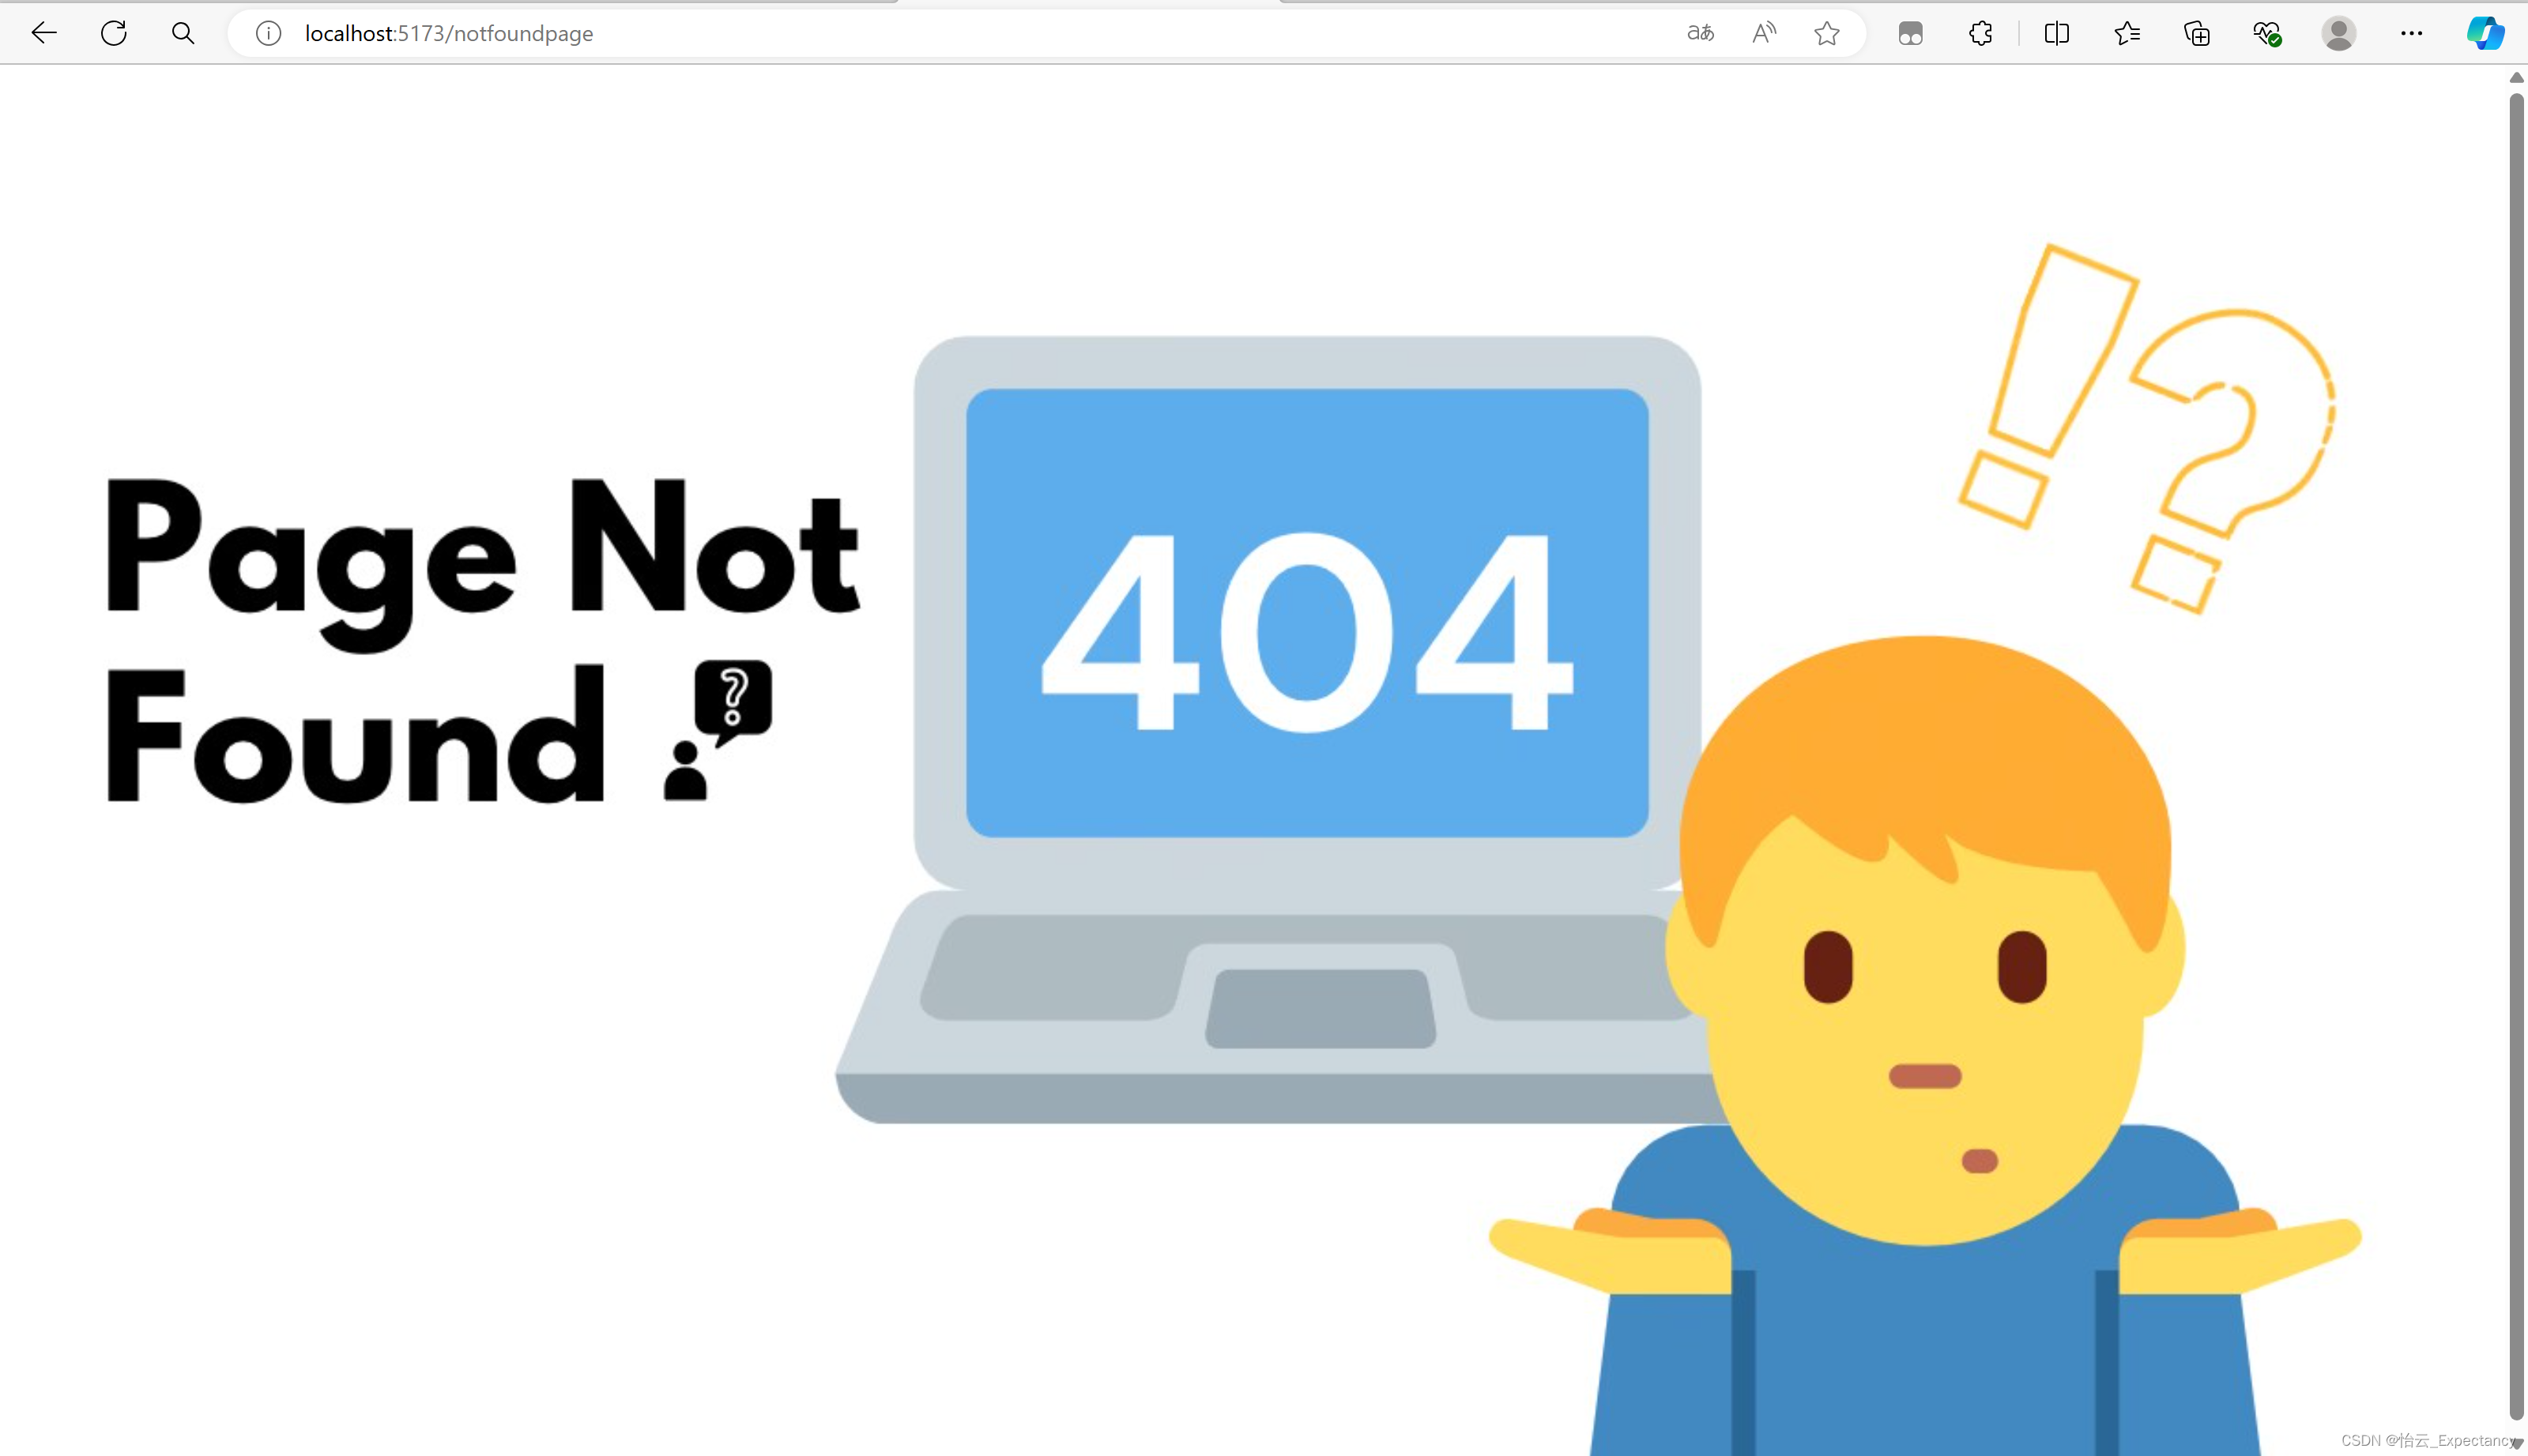
输入错误的url,会显示页面不存在:
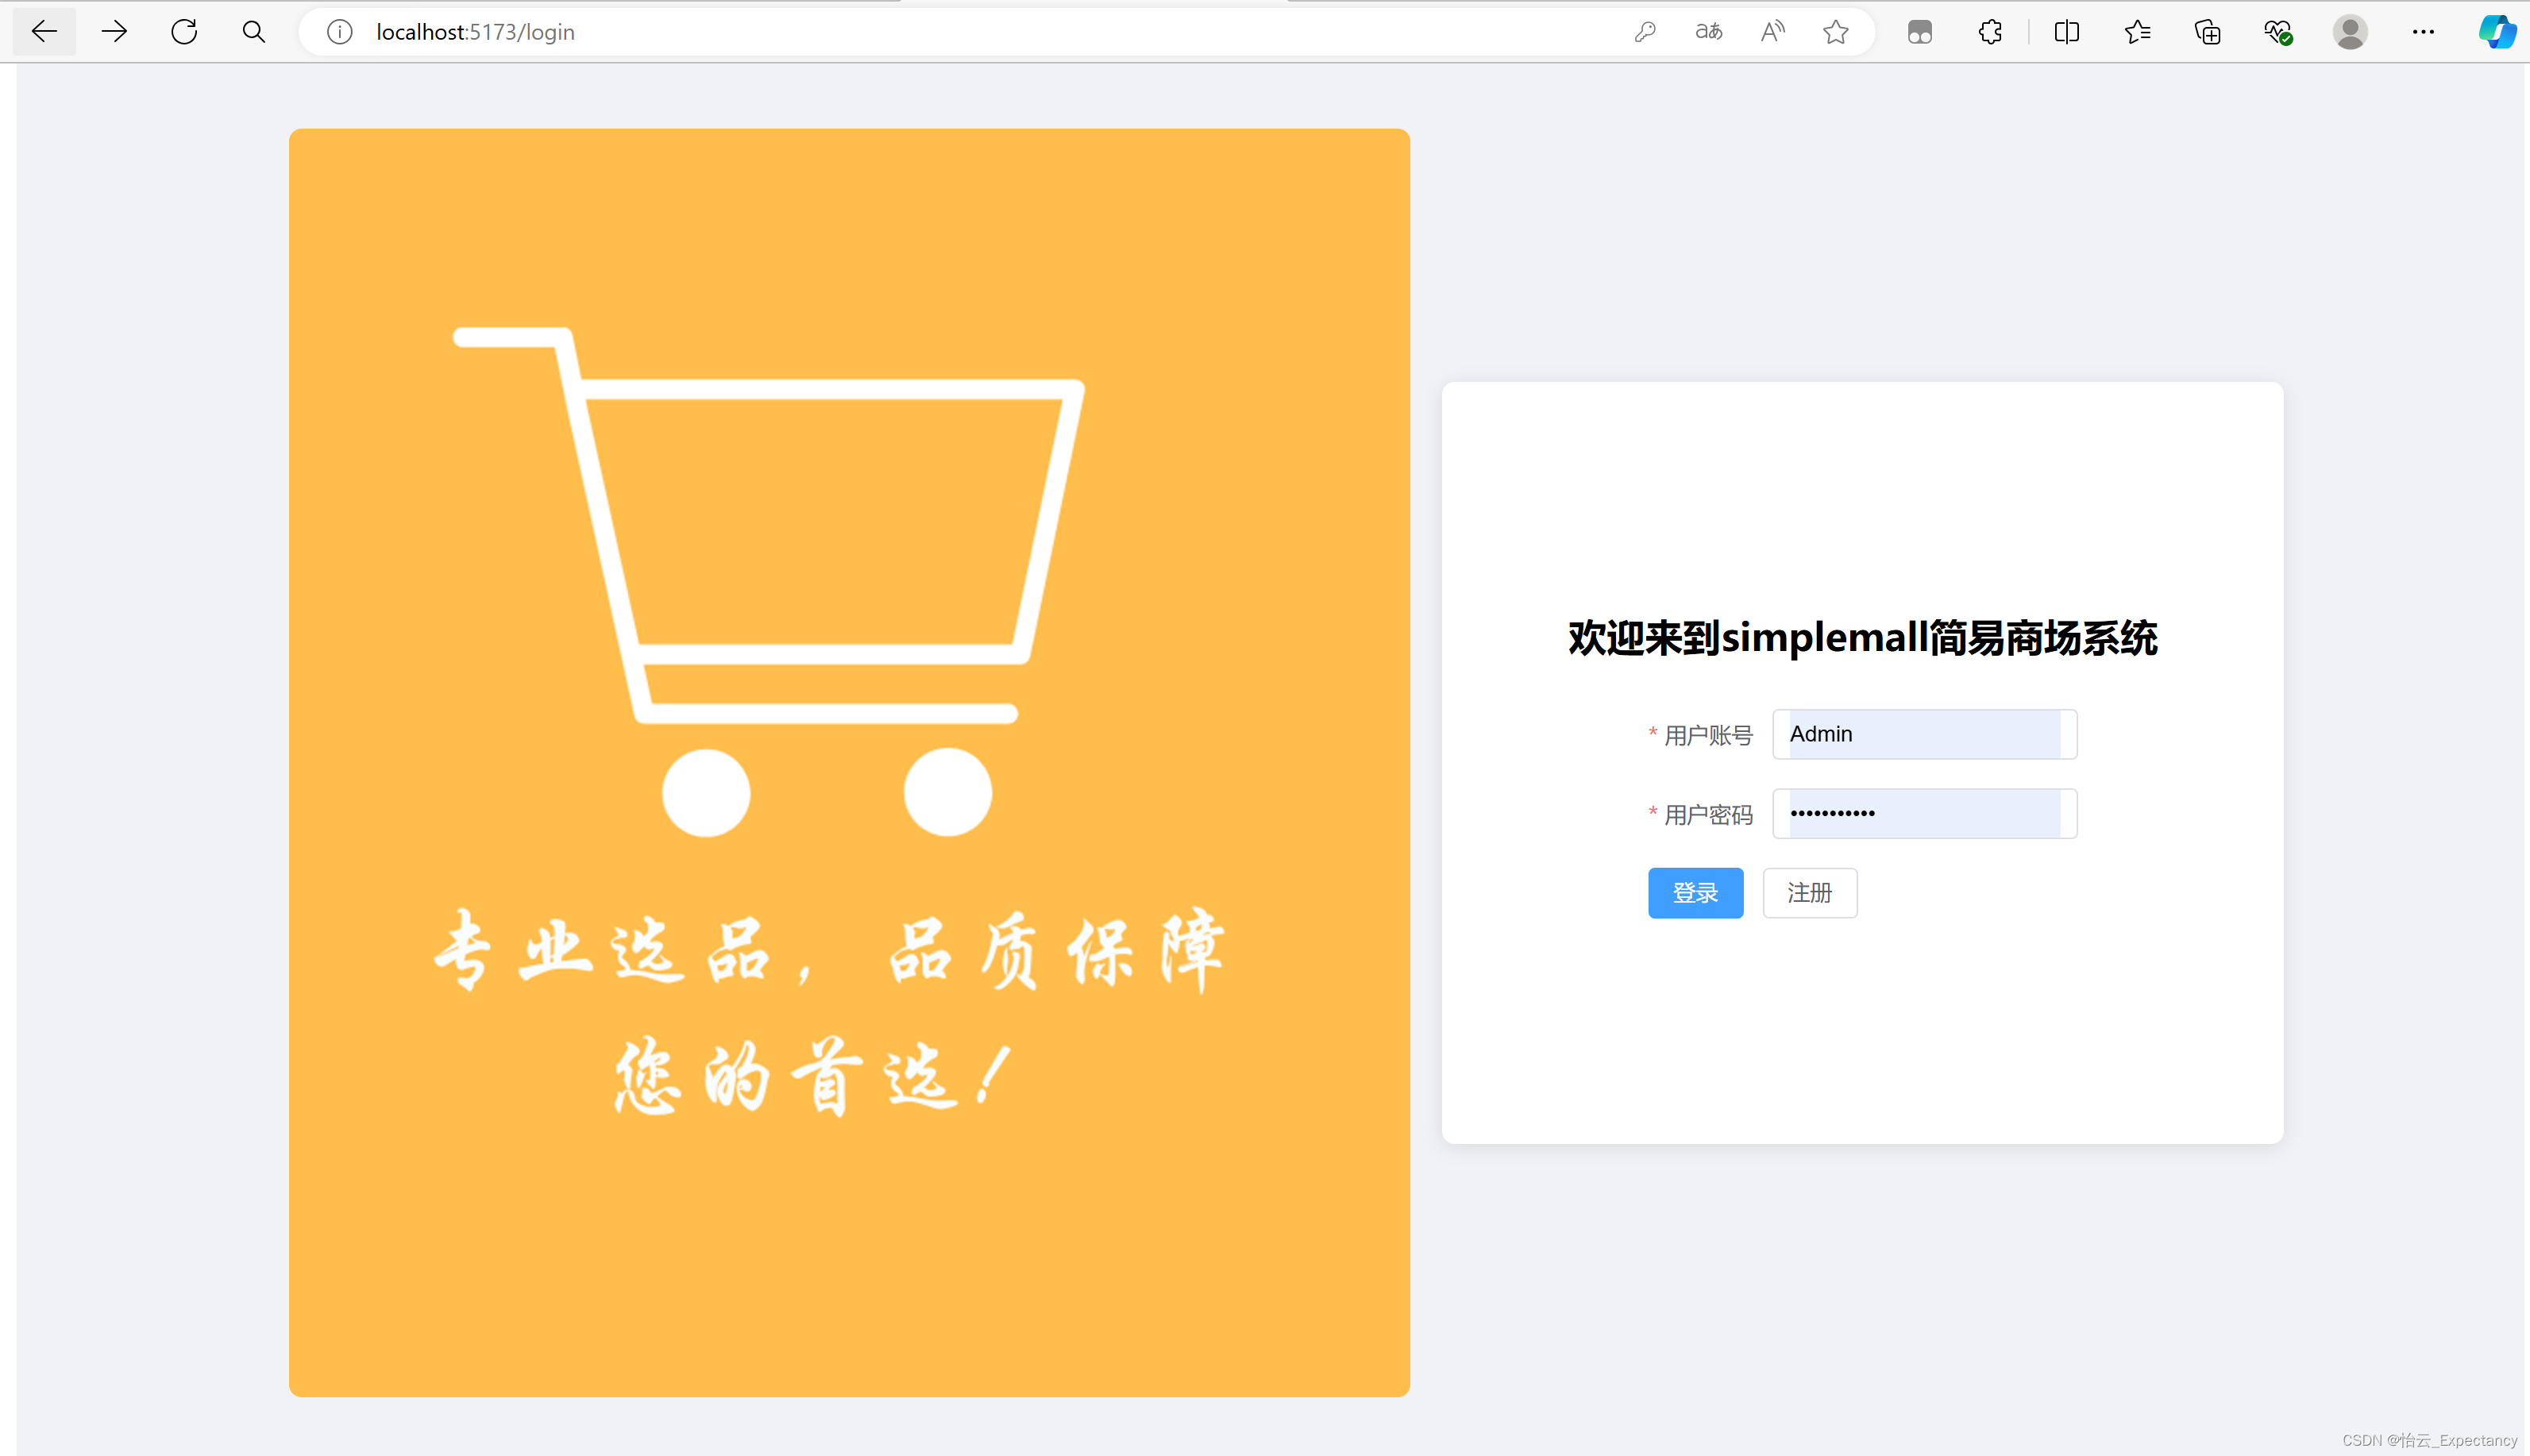
登陆页面:
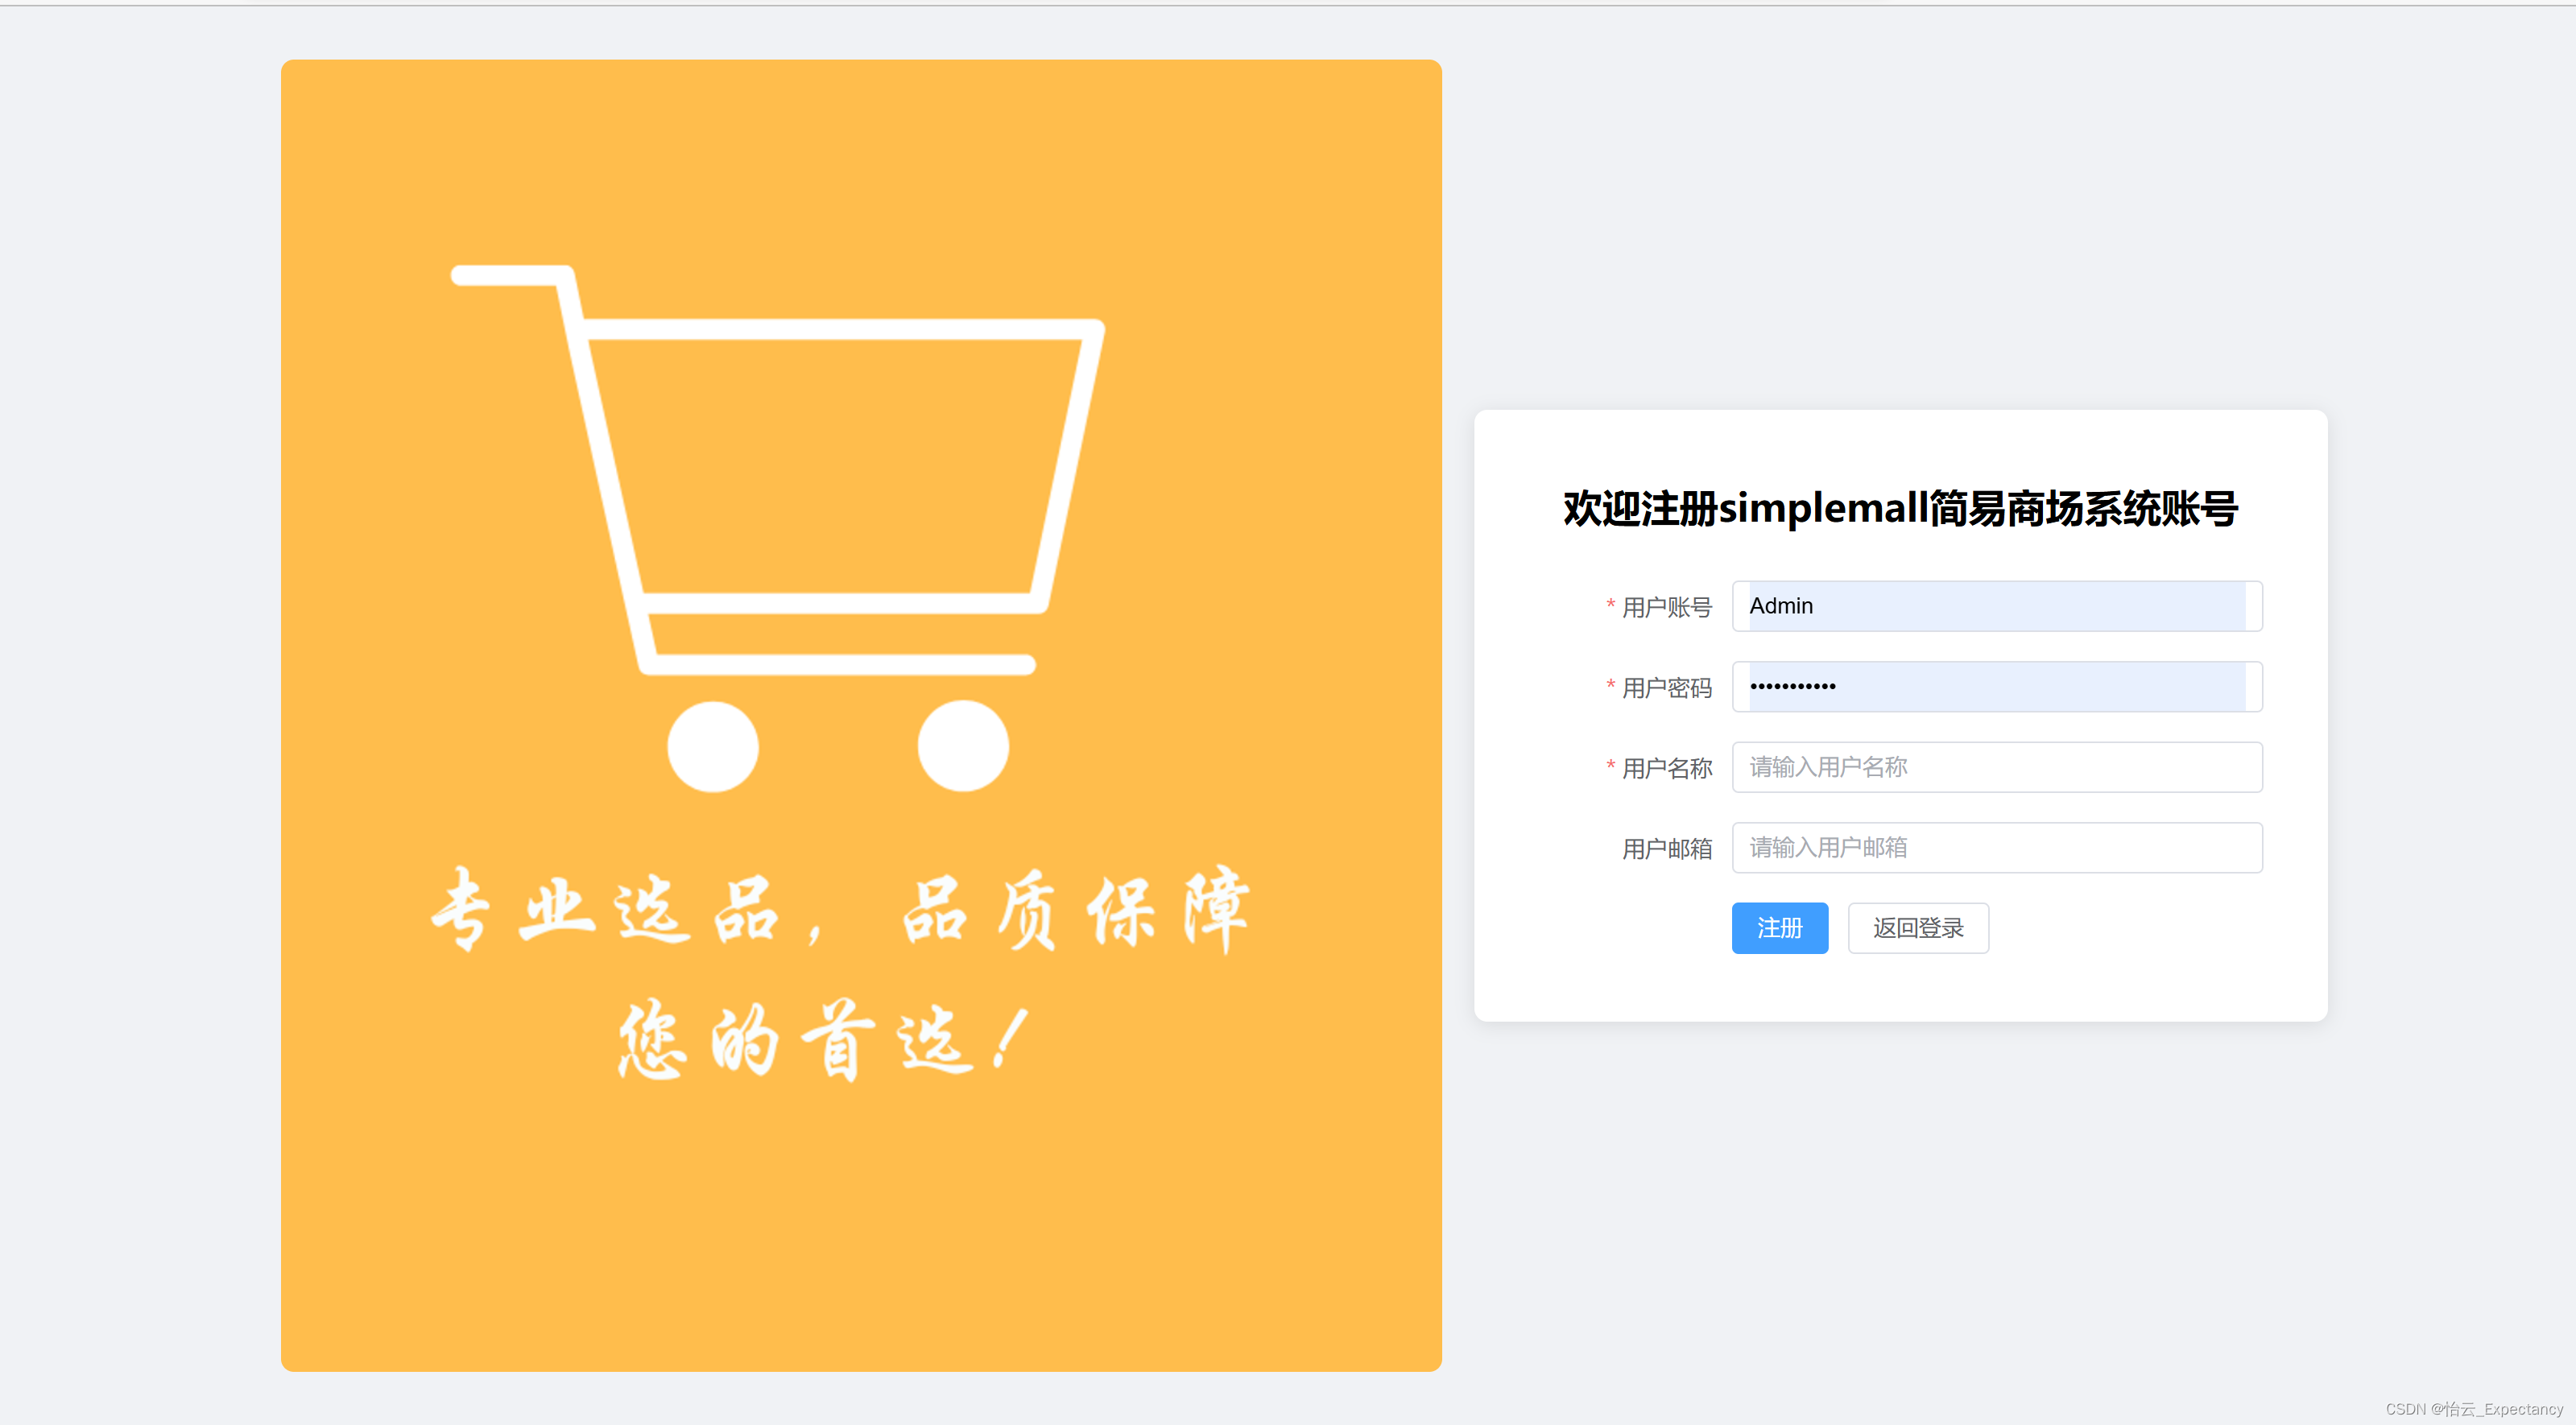
注册页面:
首页效果:
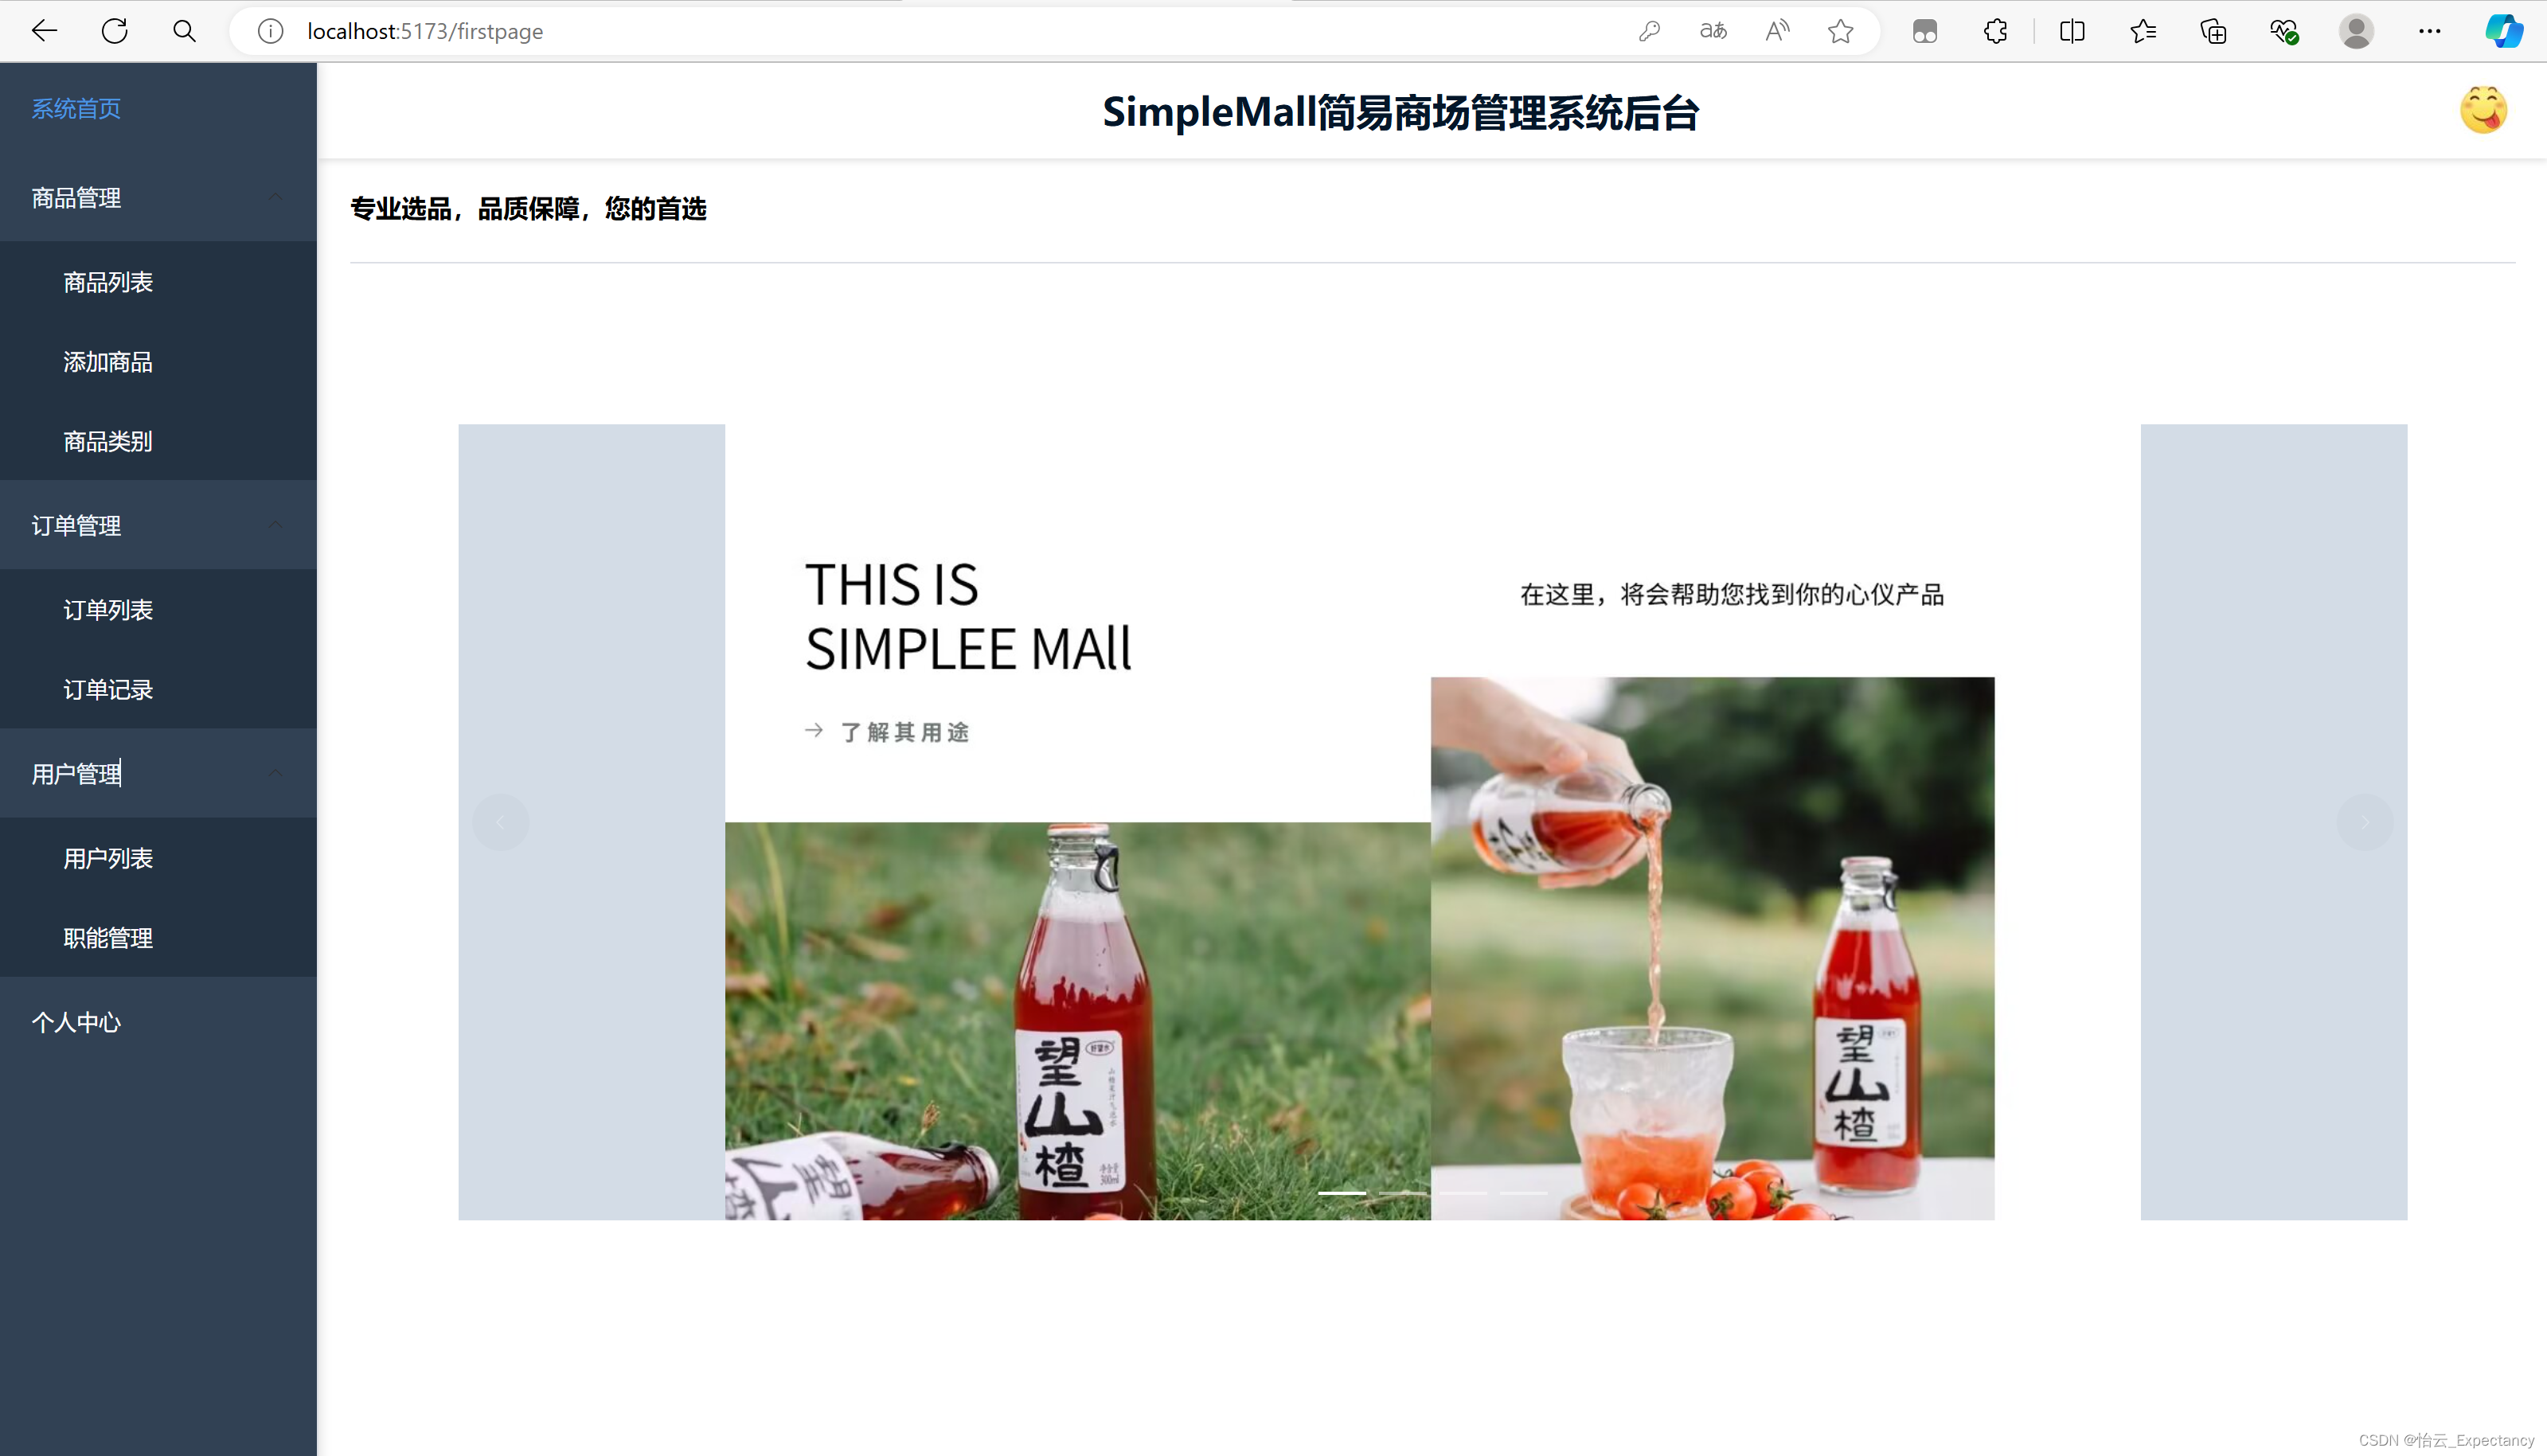
点击右上角头像之后可以选择退出登录或者进入个人主页:
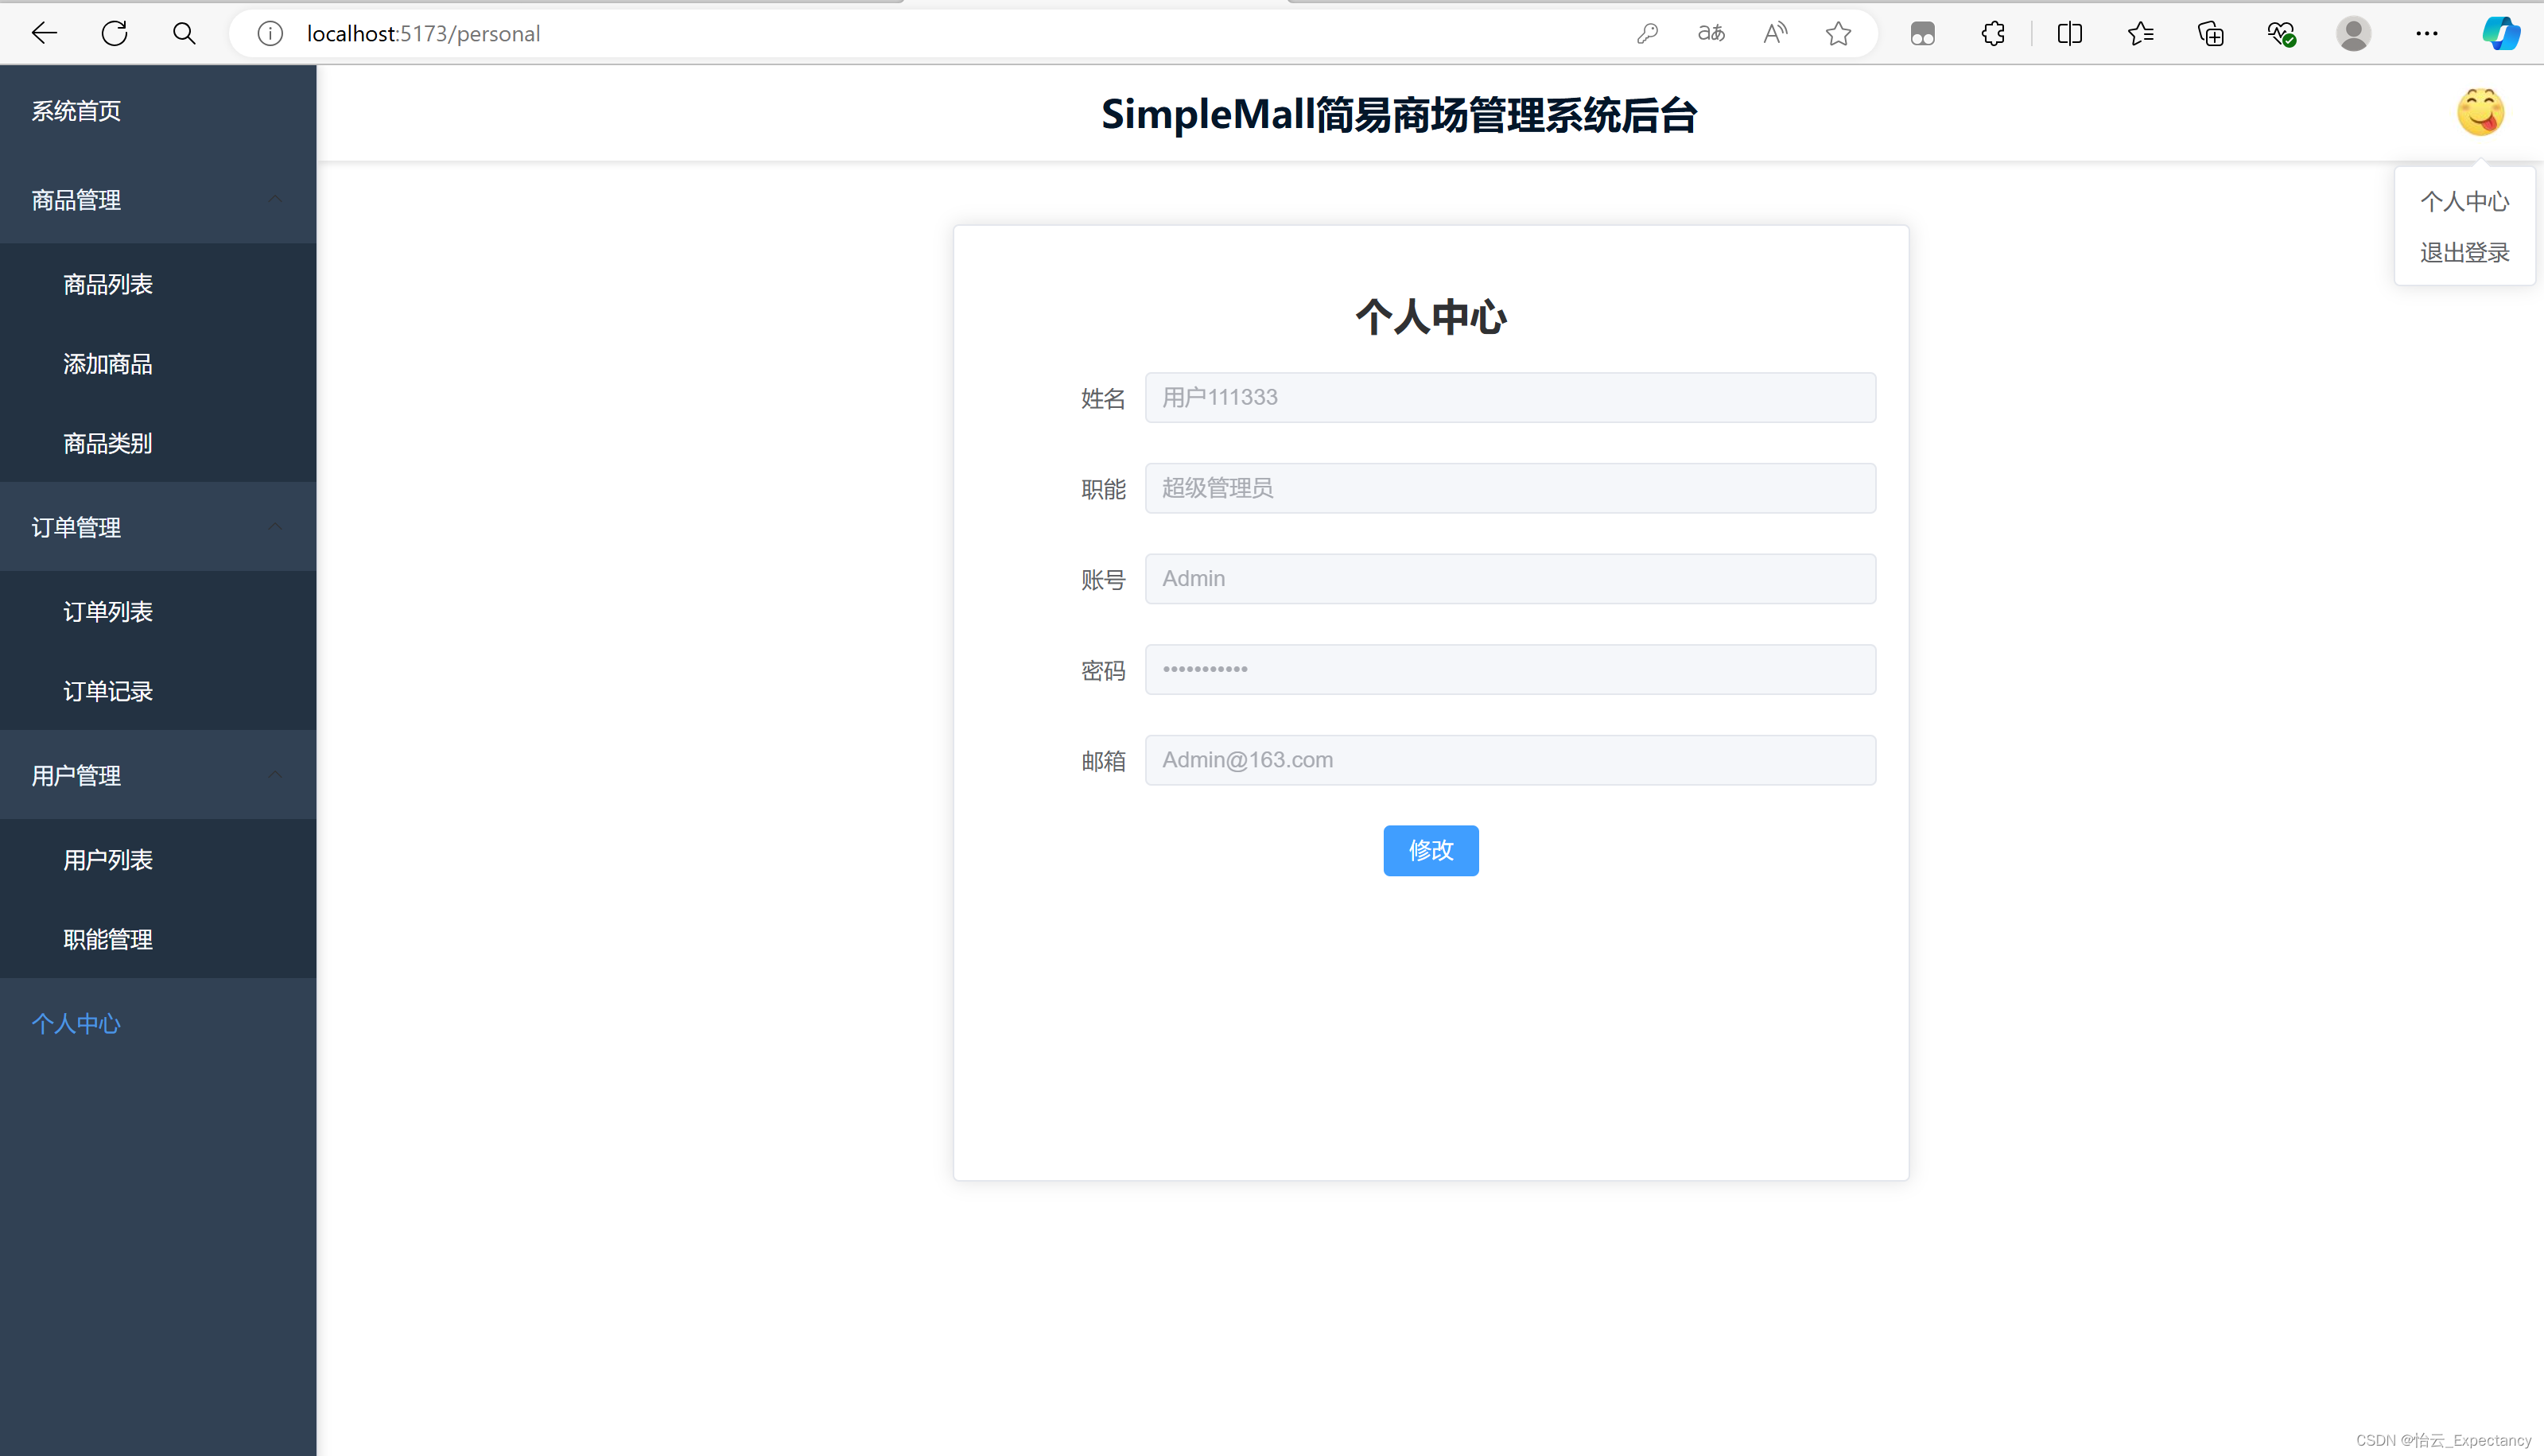
主页内容目前是只读,若要进行修改,需要点击下方修改按钮进行修改操作,这里的修改操作会影响到用户表中的数据。
商品列表页面:
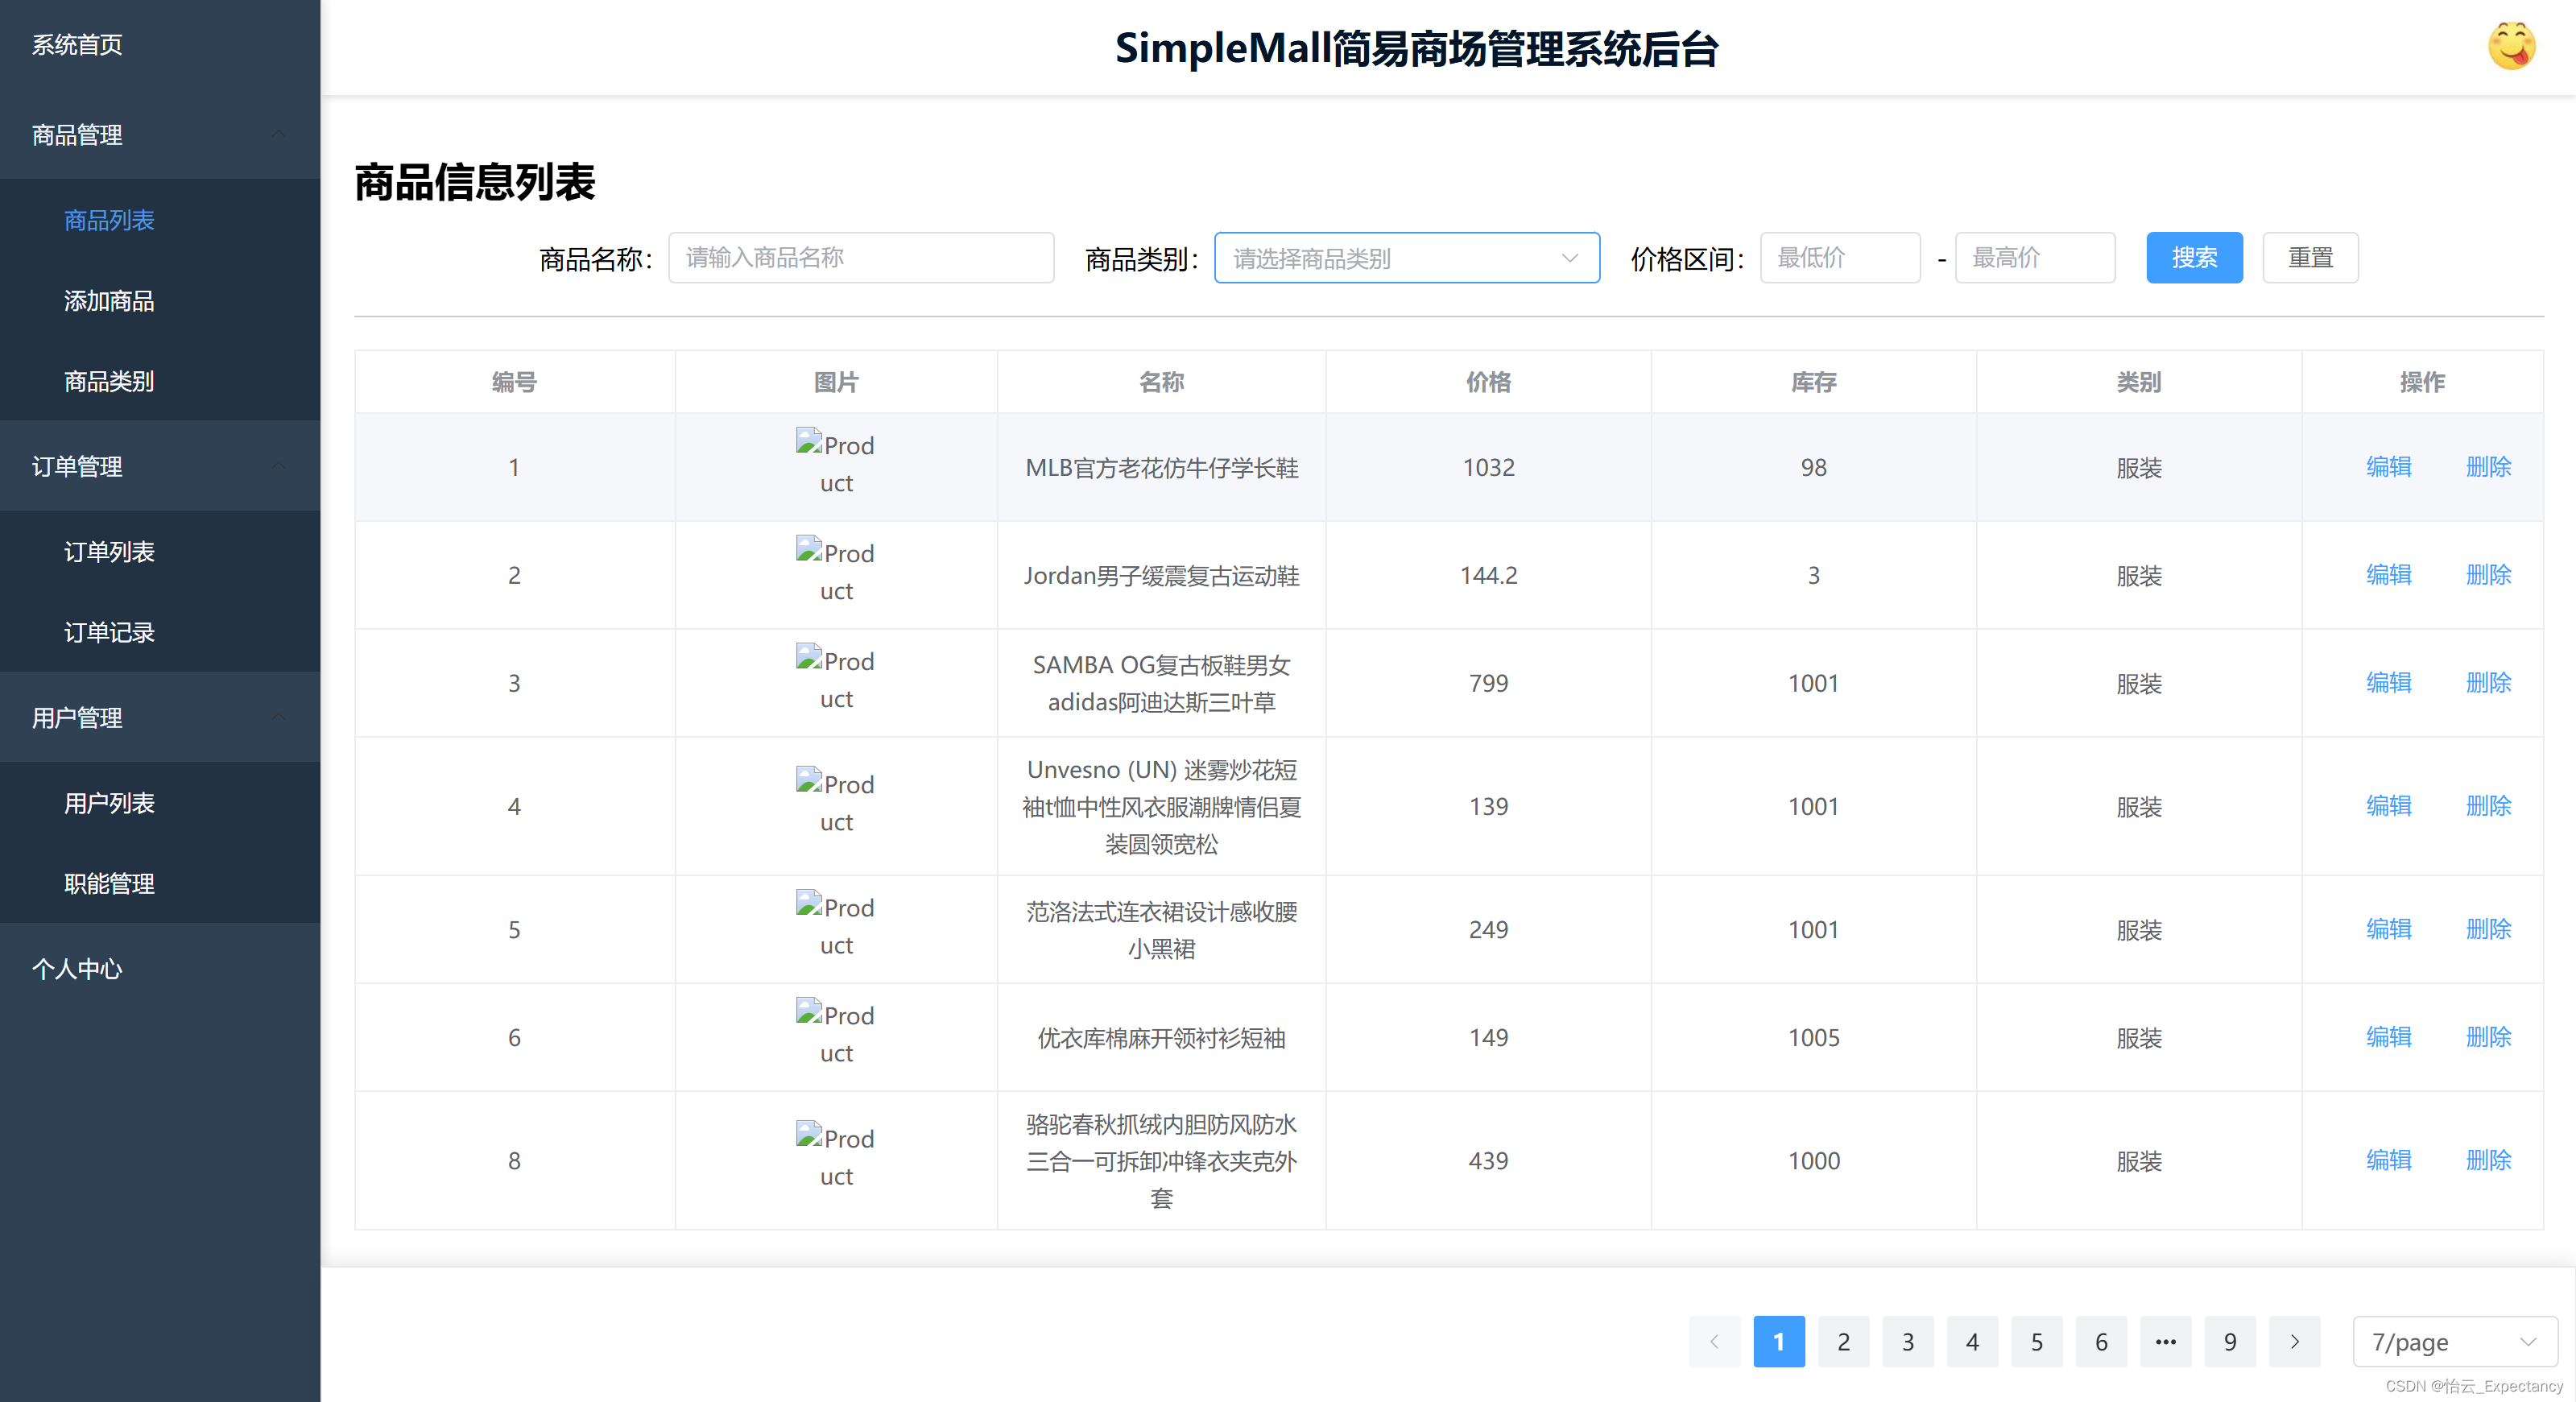
可以进行完整的增删改查操作与分页条件查询操作。
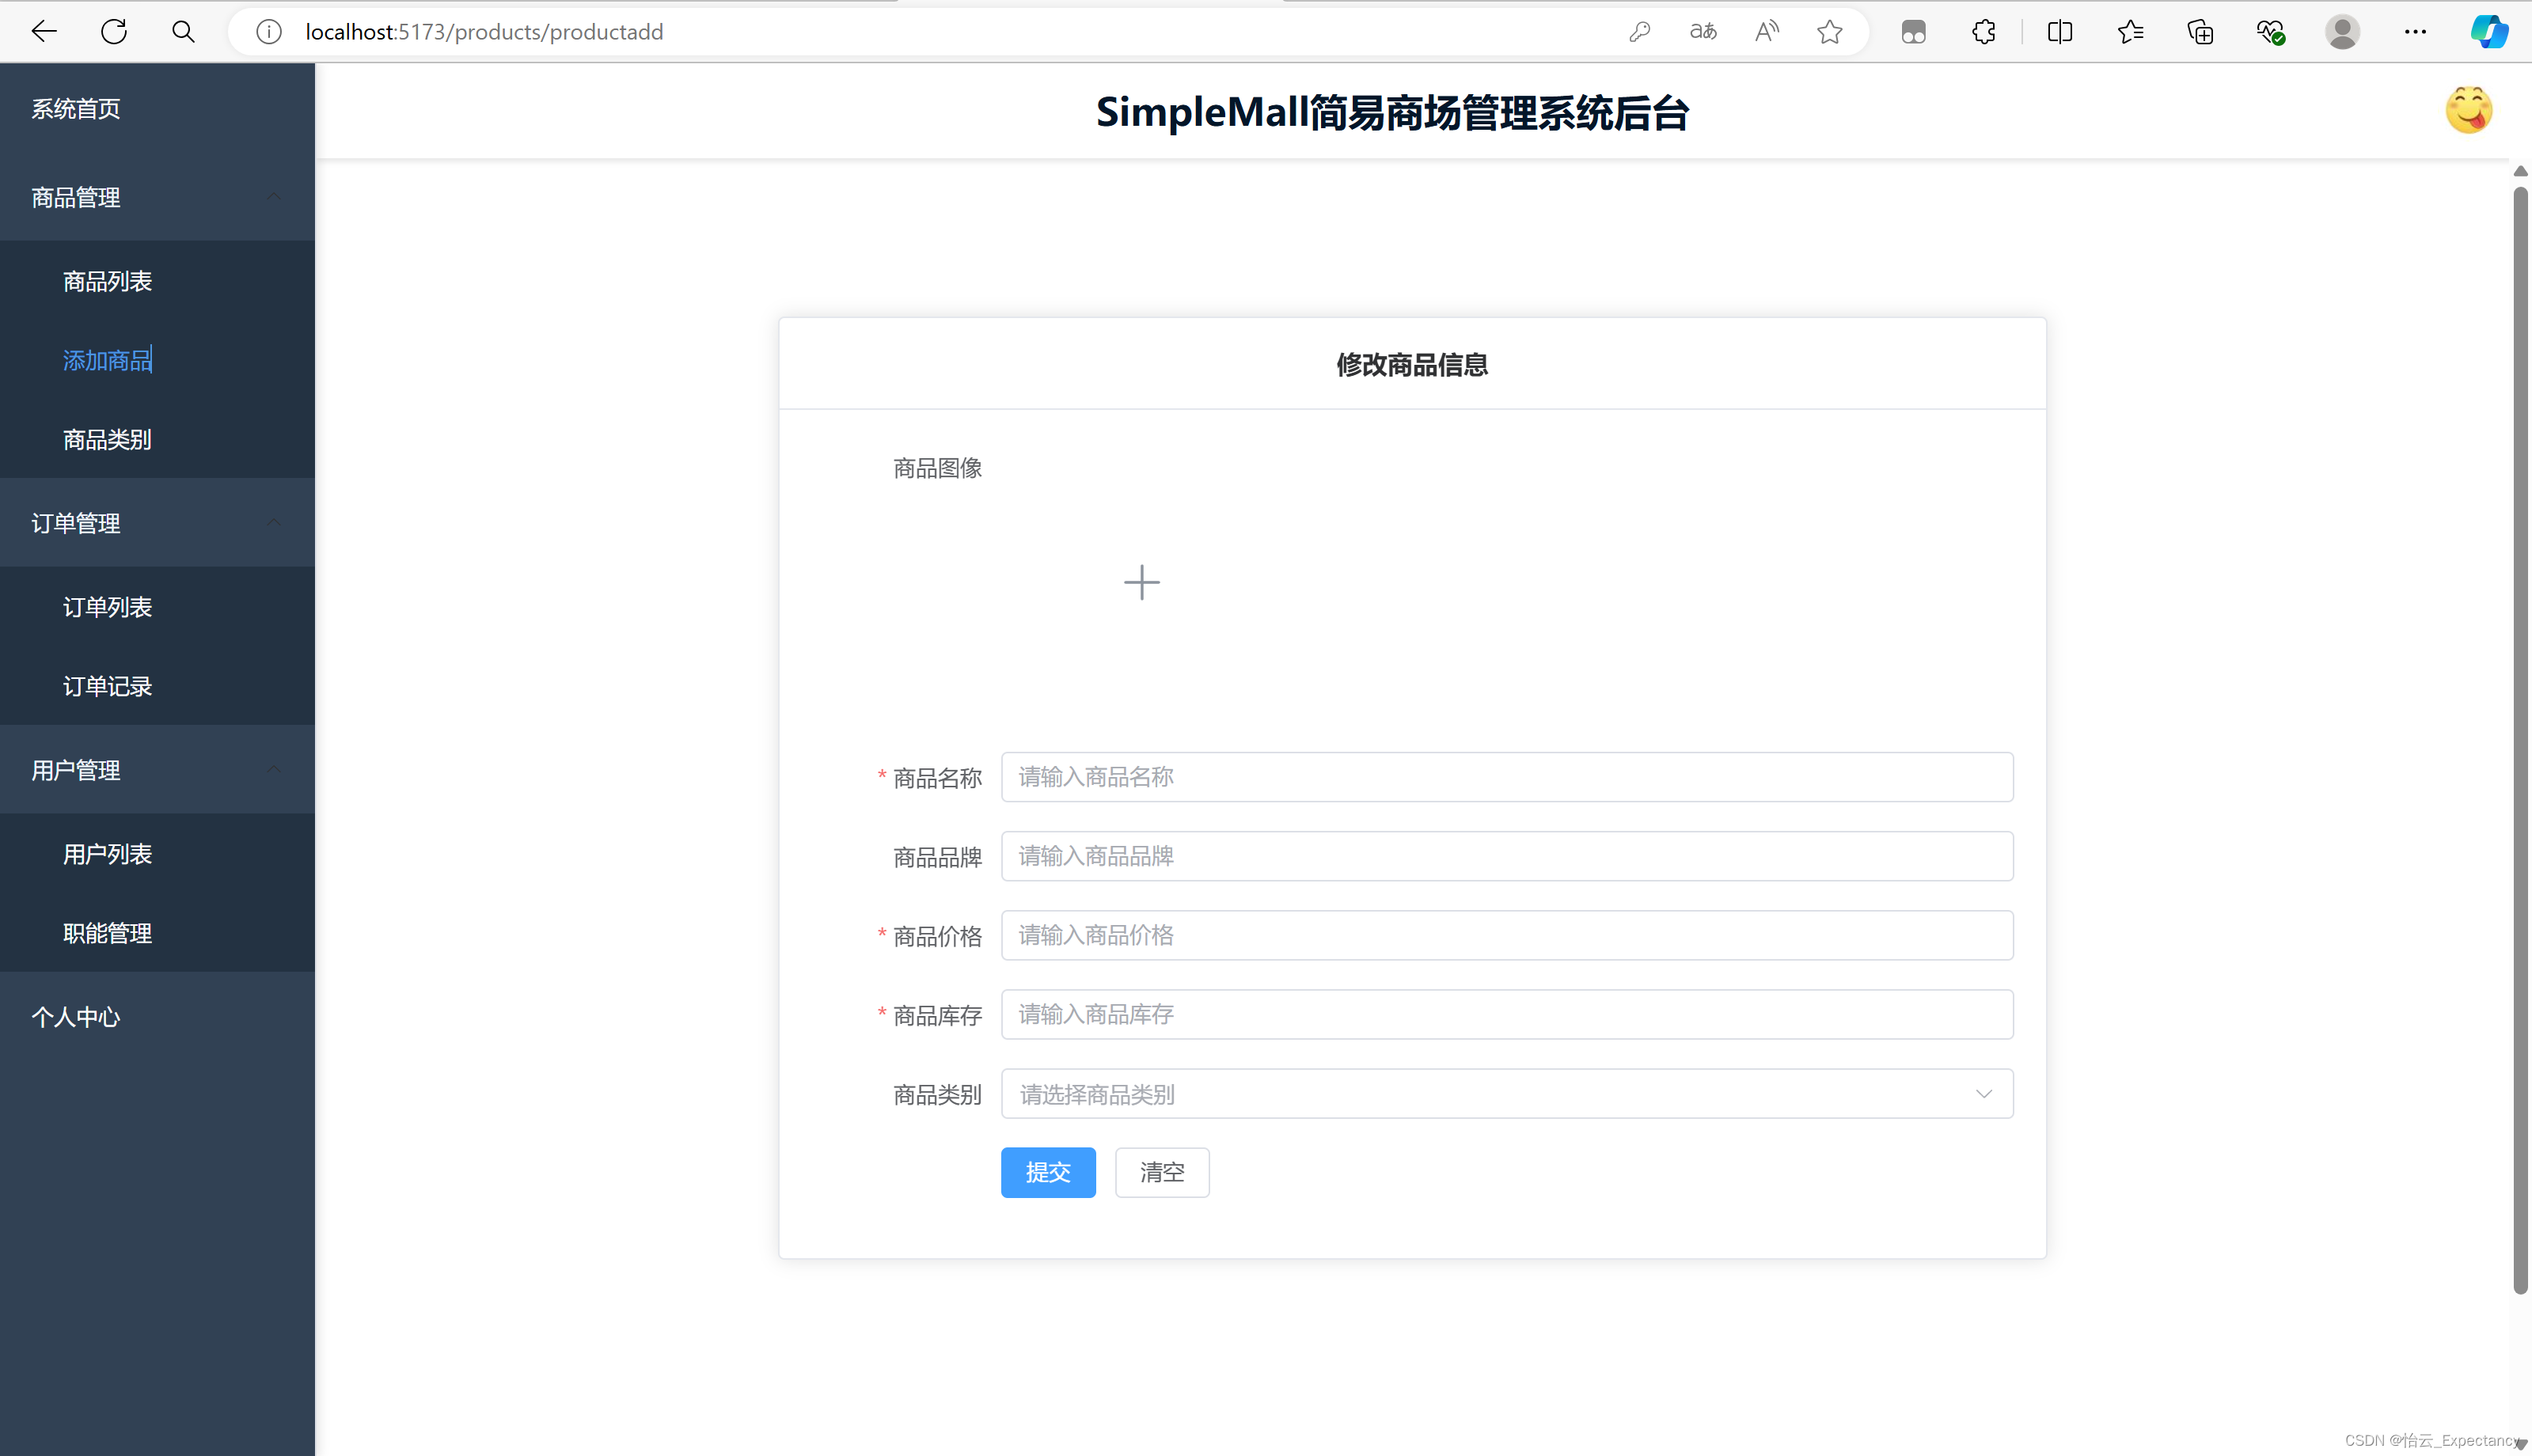
添加商品页面:
商品类别页面:
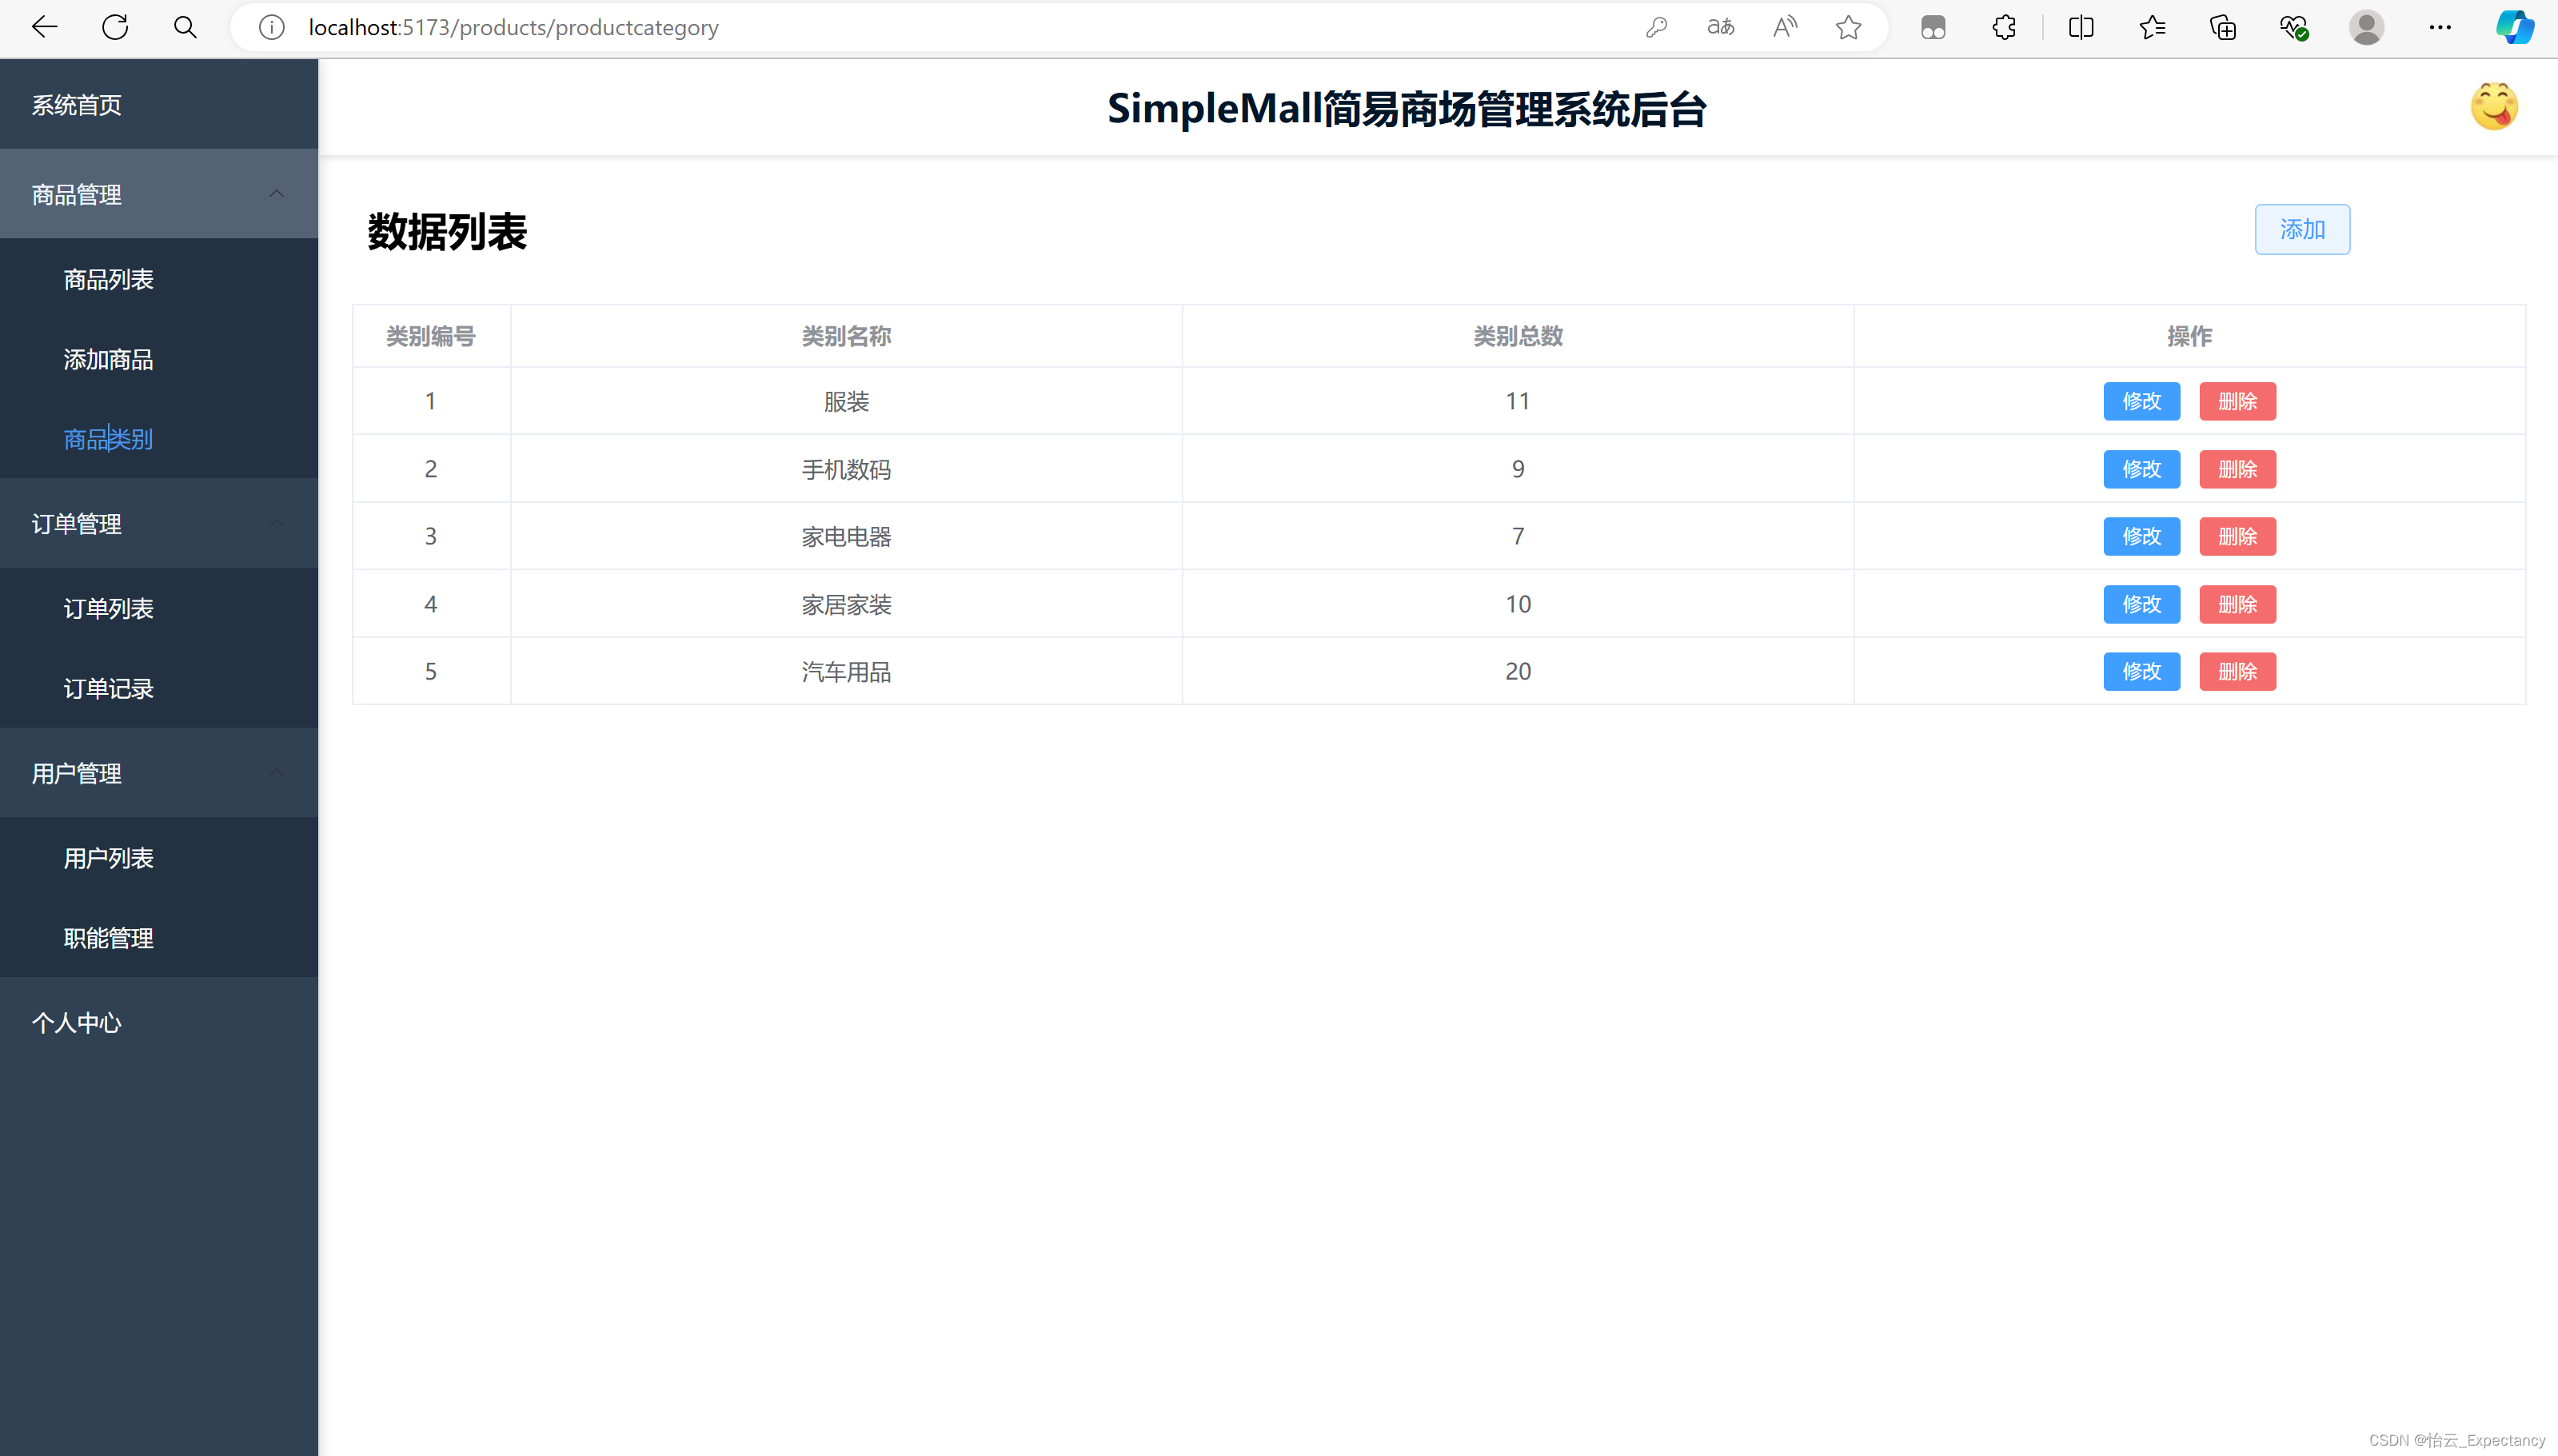 在商品类别页面进行增删改操作都会影响前面的商品列表中的数据展示。
订单信息查询页面:
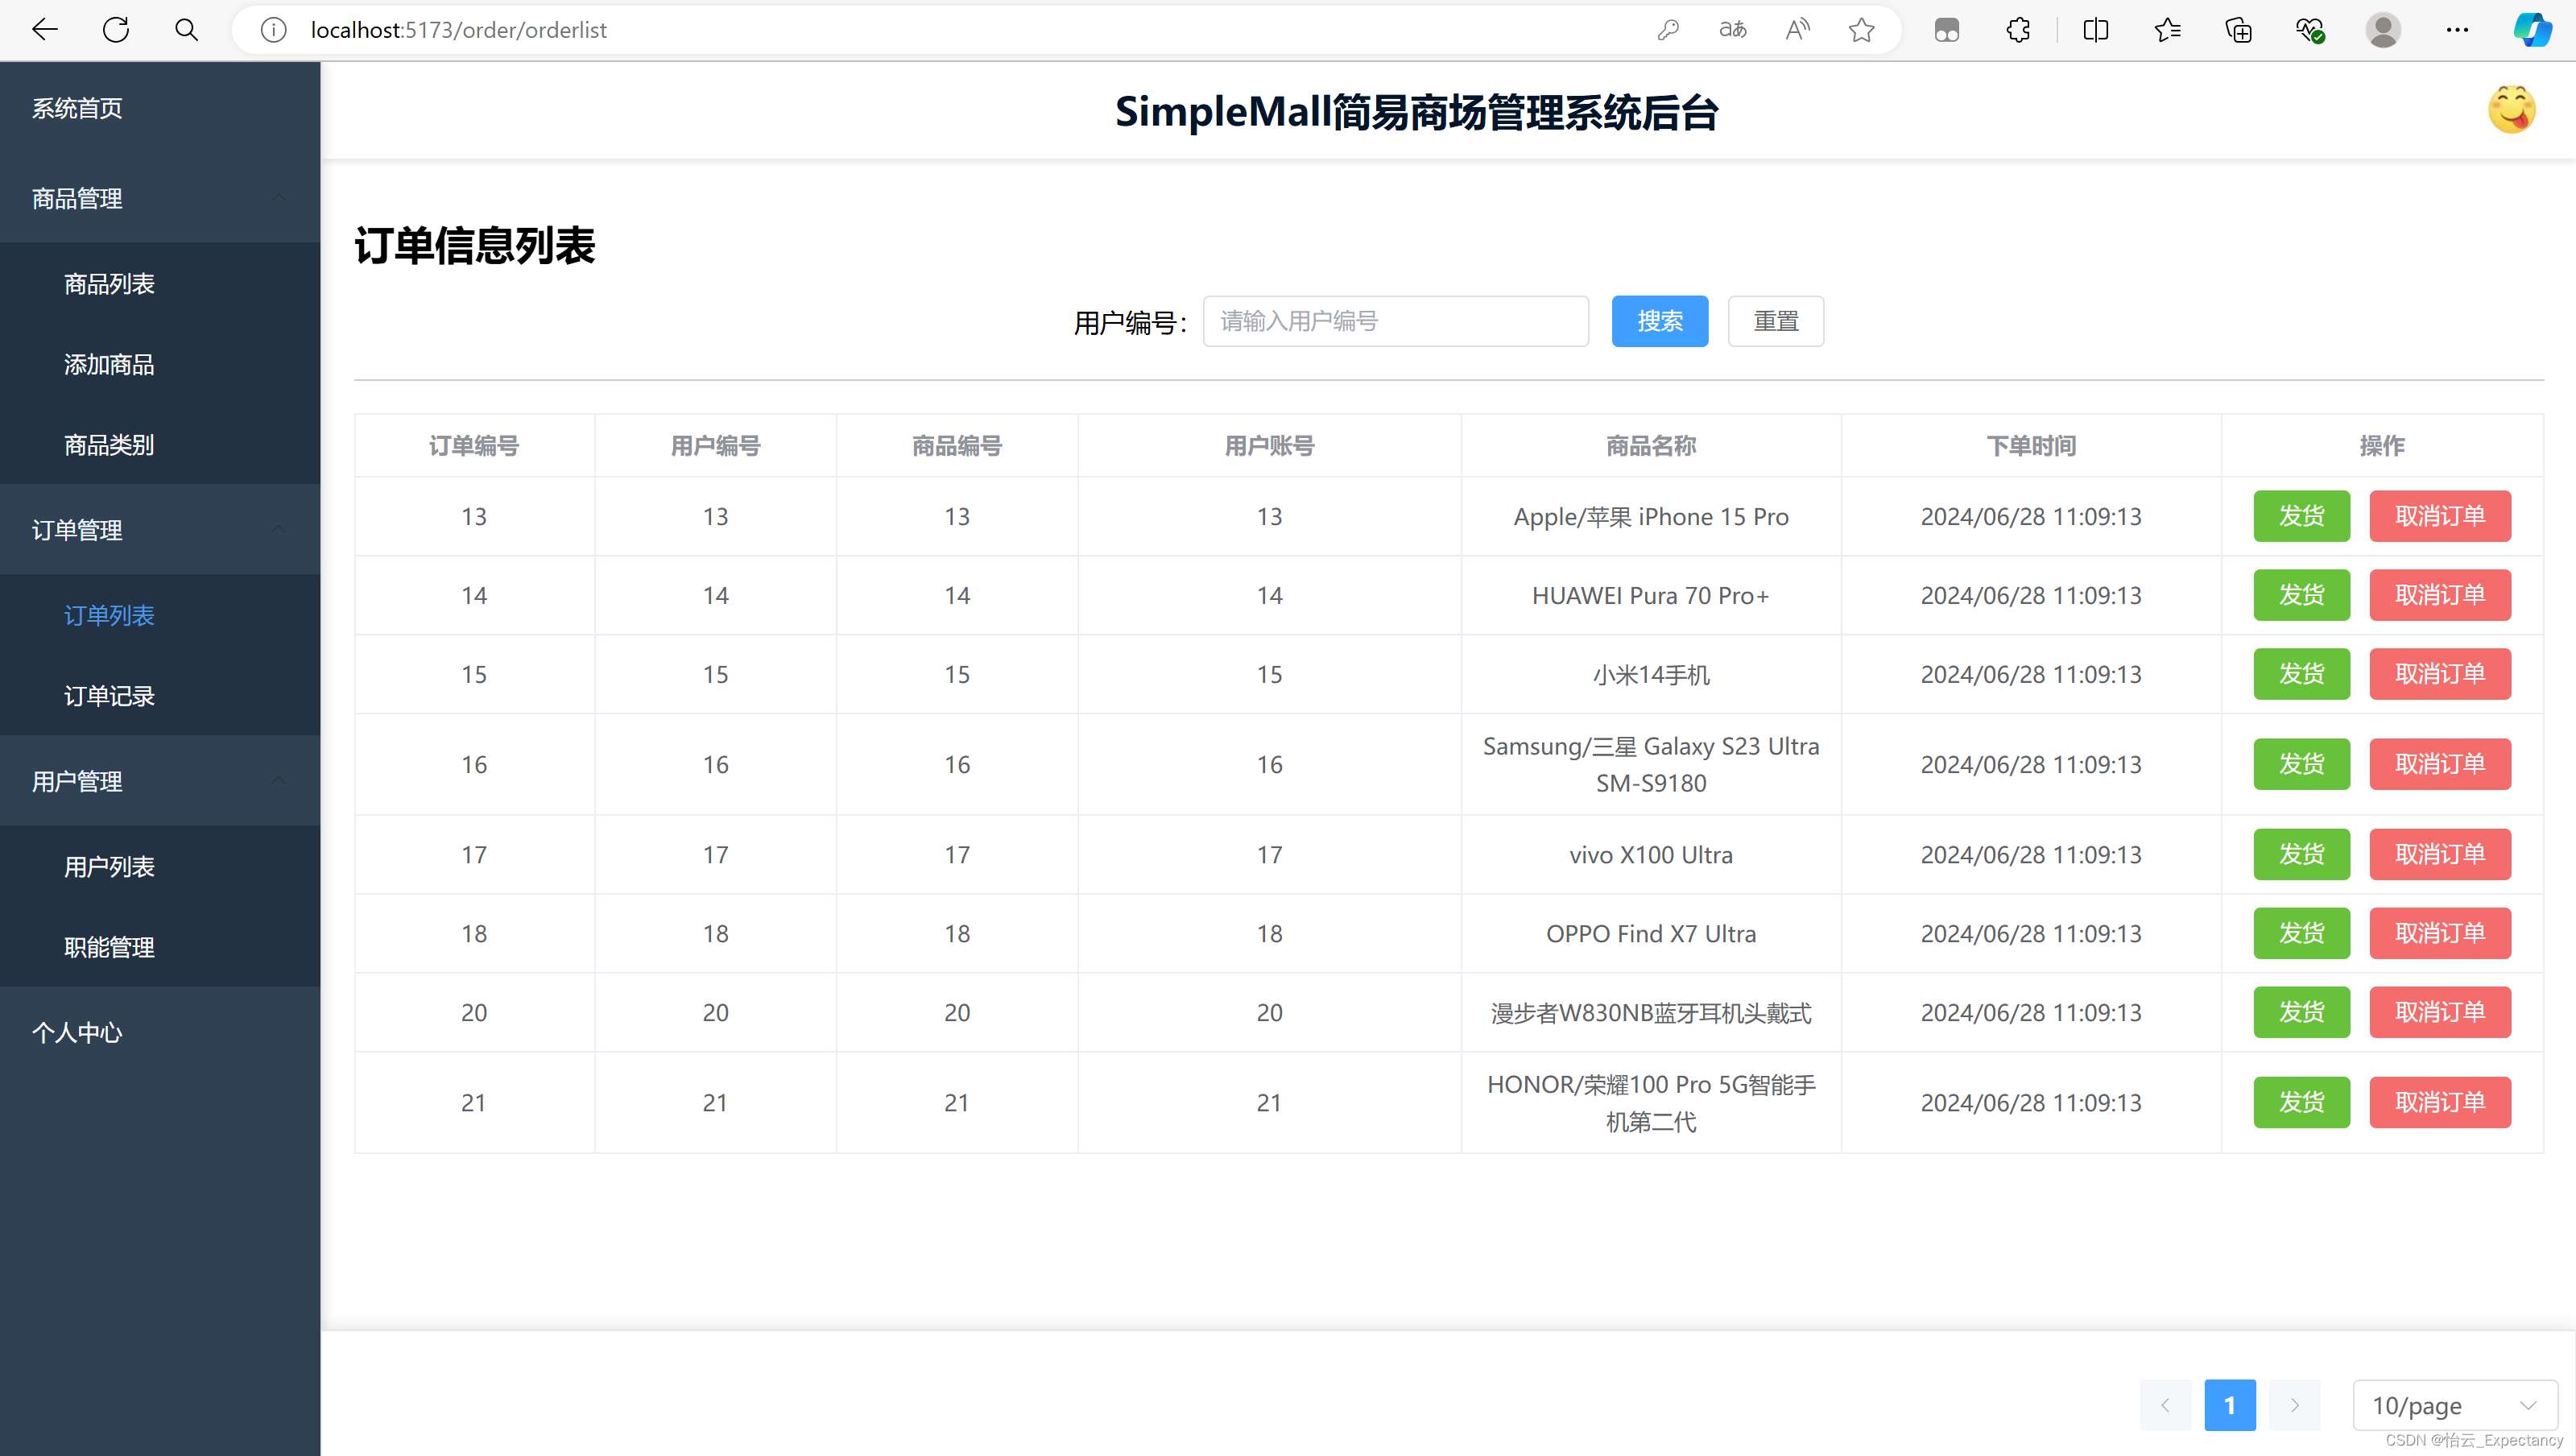
在用户下单后,订单信息会出现在订单列表中,由管理员进行发货或者取消订单操作,当管理员进行操作之后,订单信息会被记录在订单记录中。
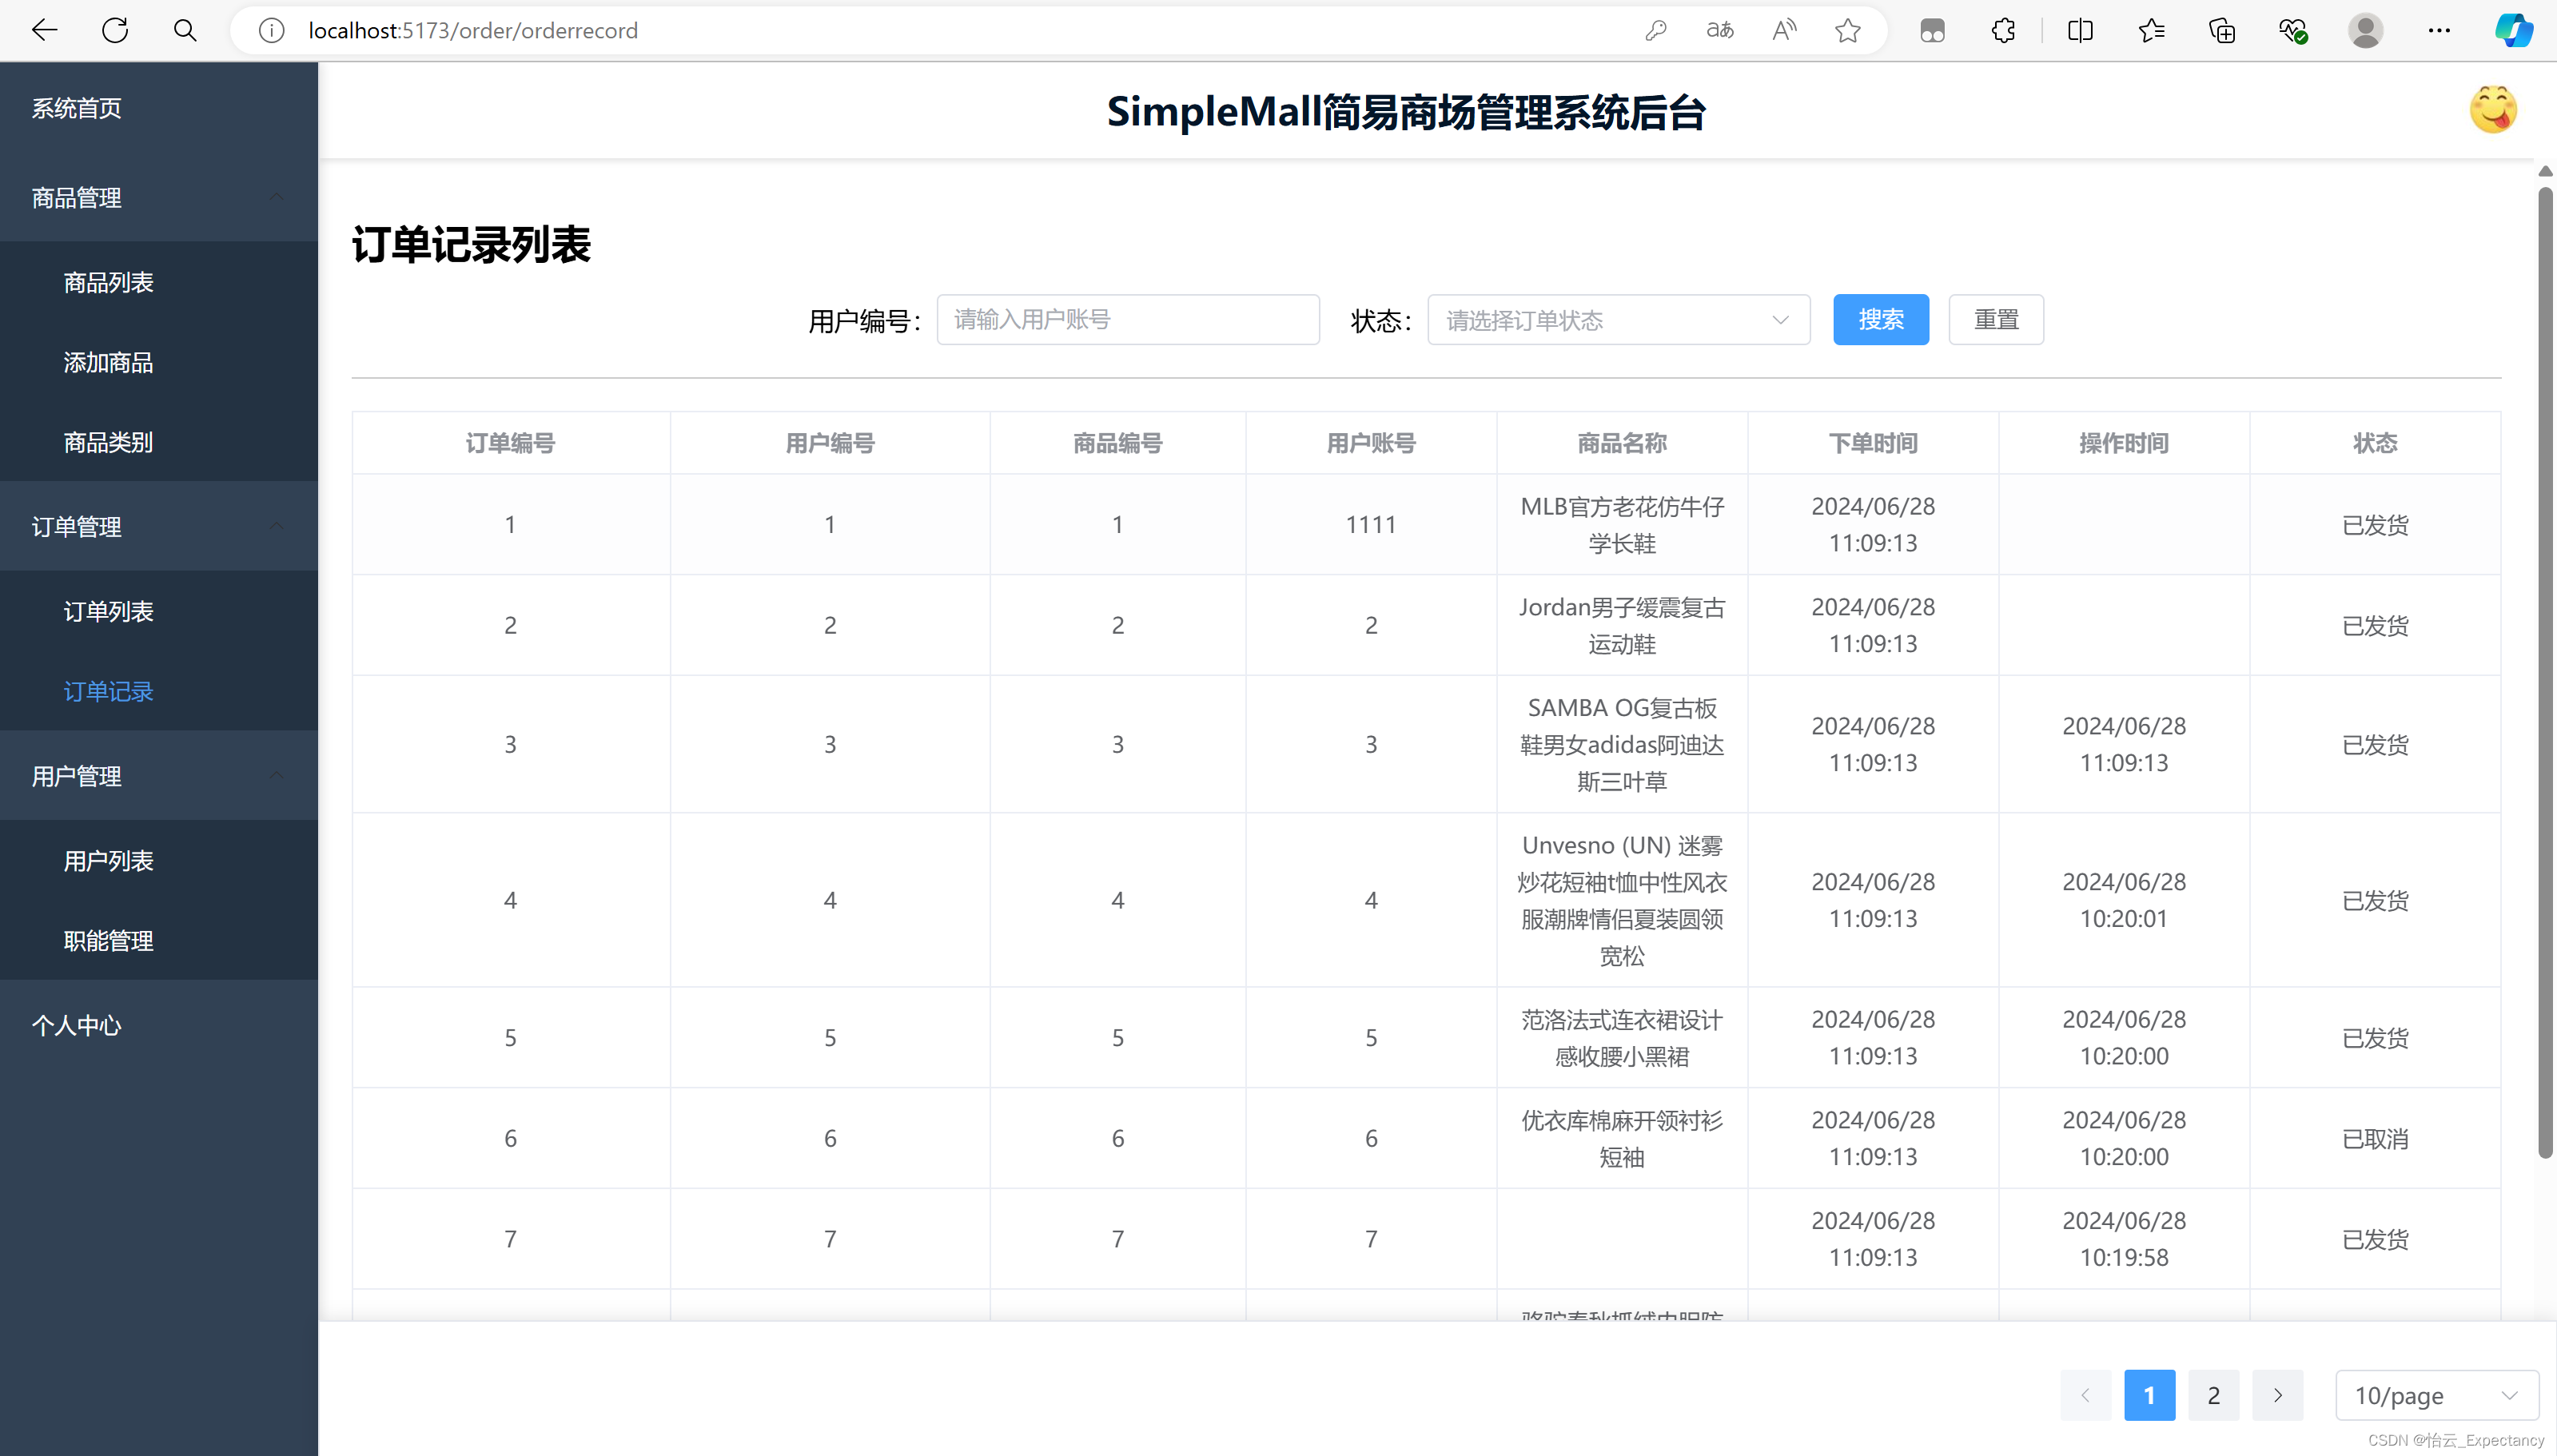
若是管理员将订单取消,仓库中的商品库存会相对应地进行增加。
用户信息列表:
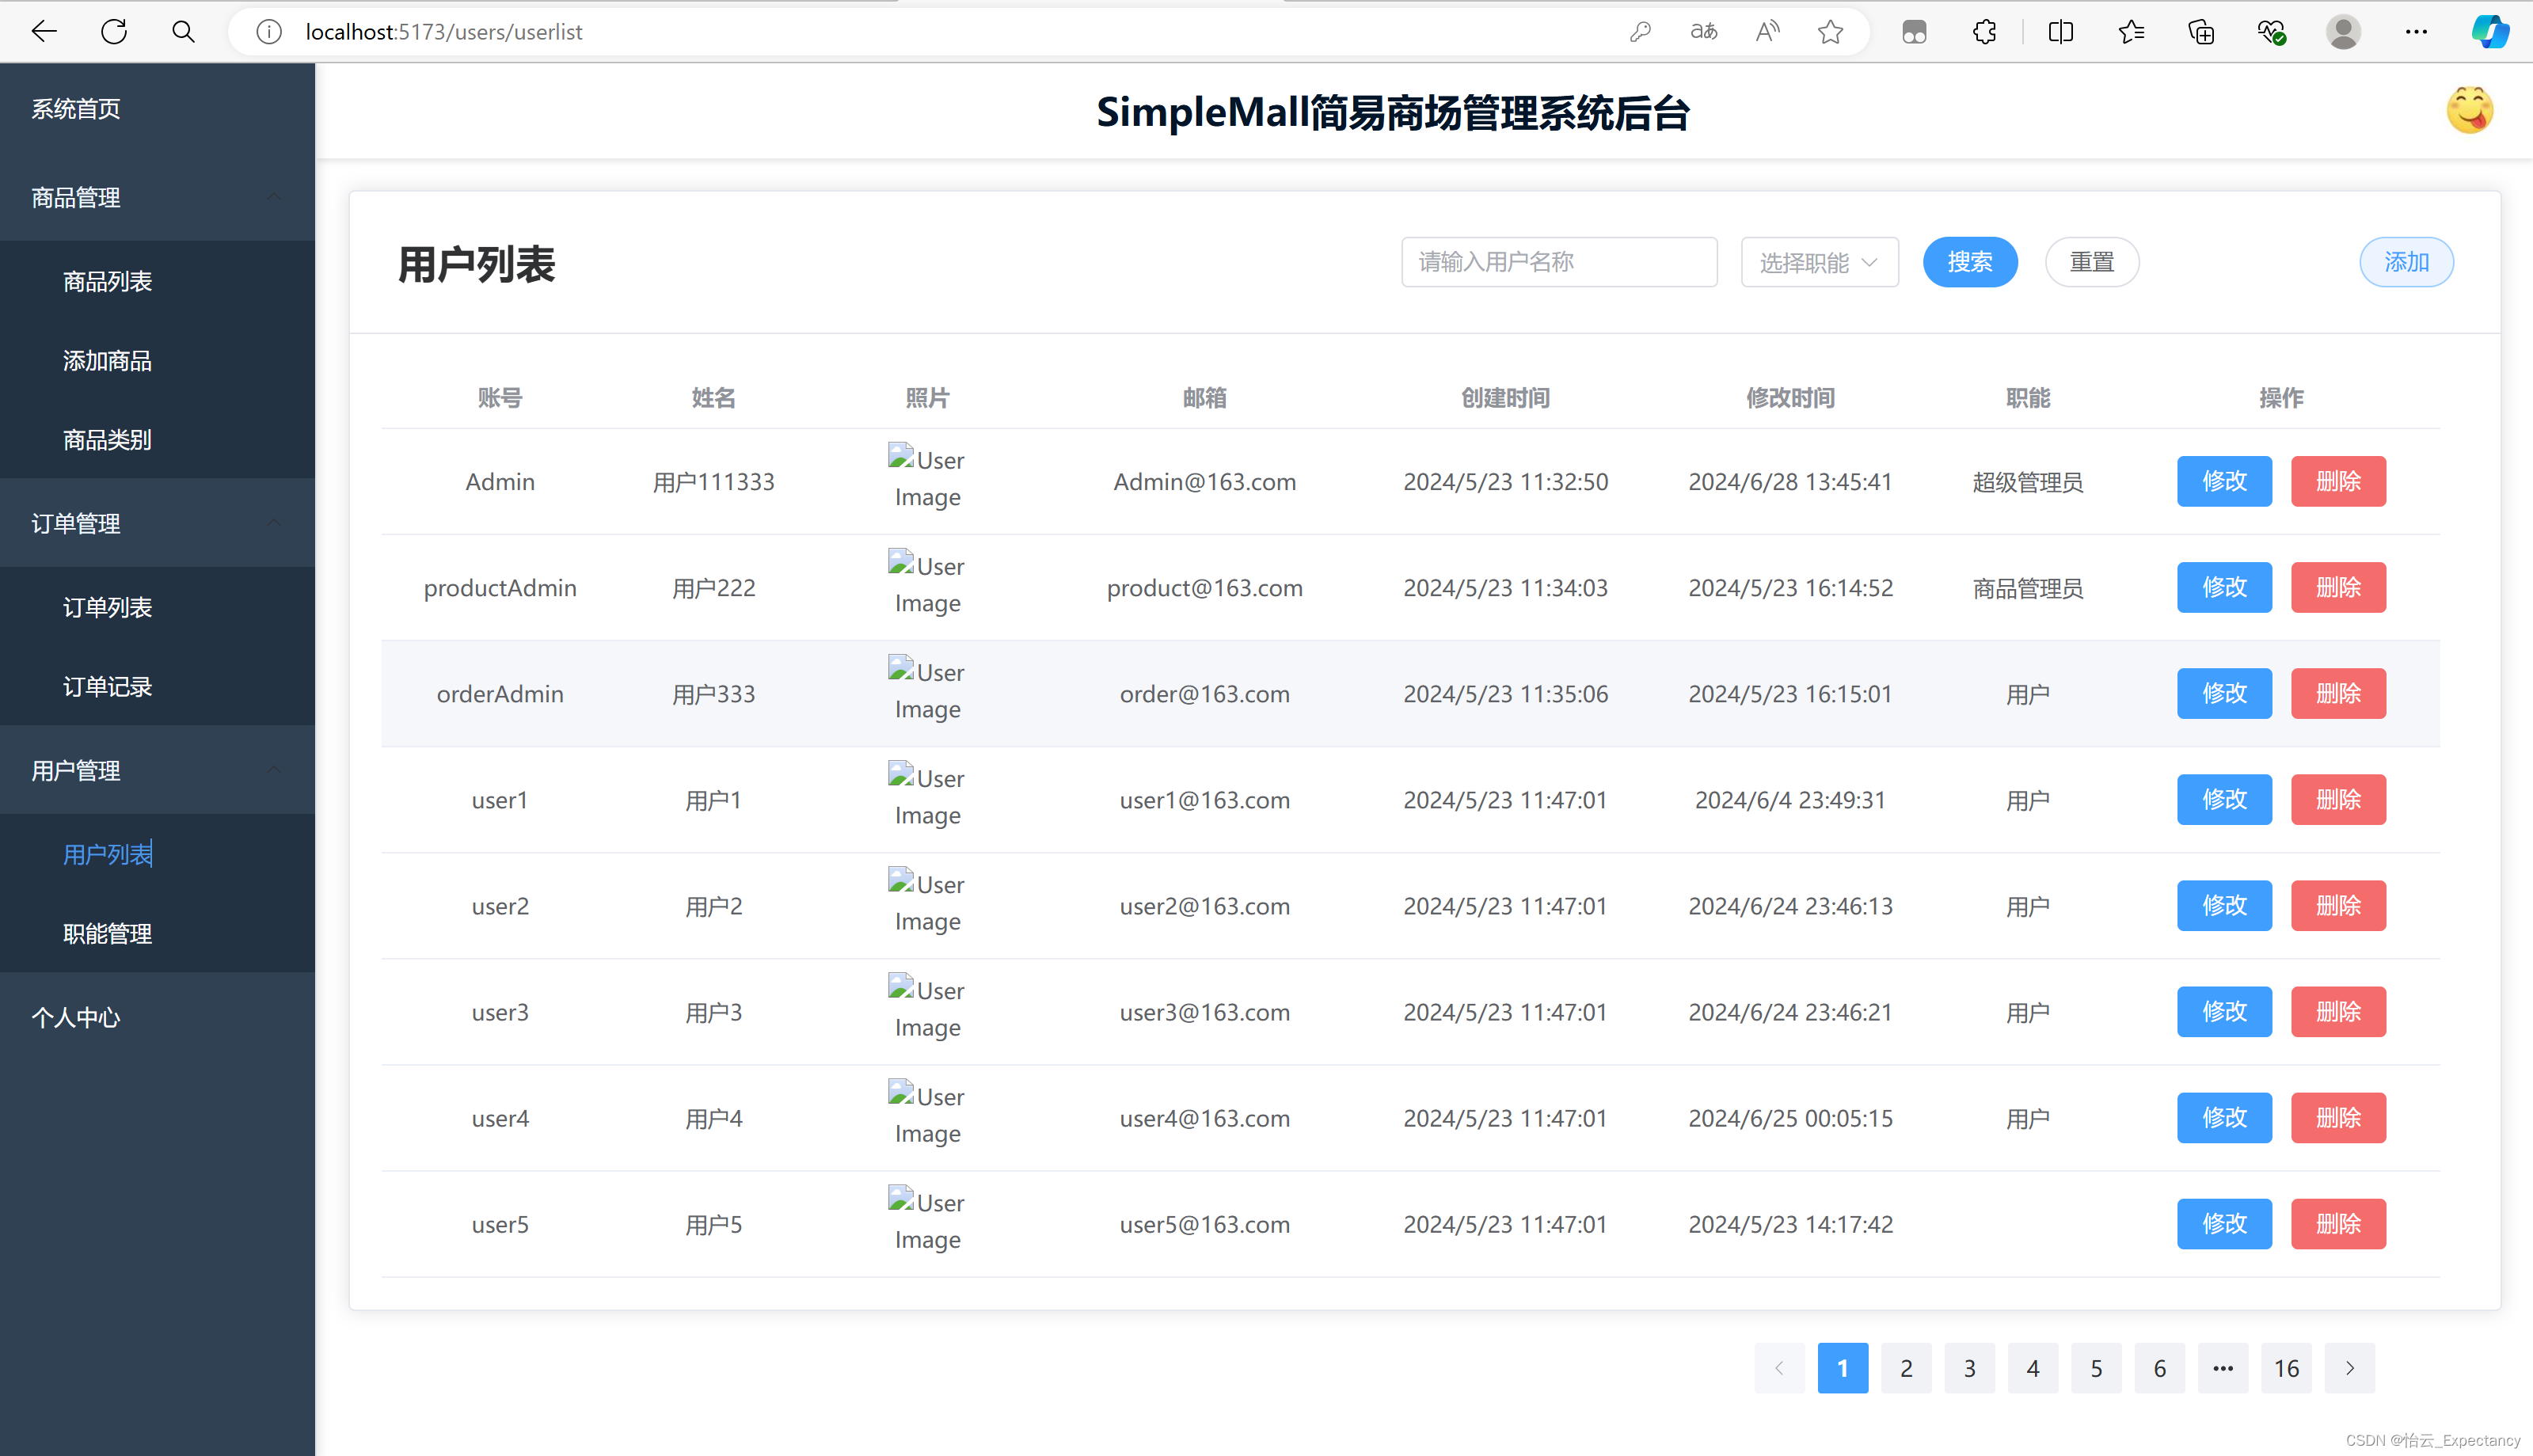
可以进行增删改查操作
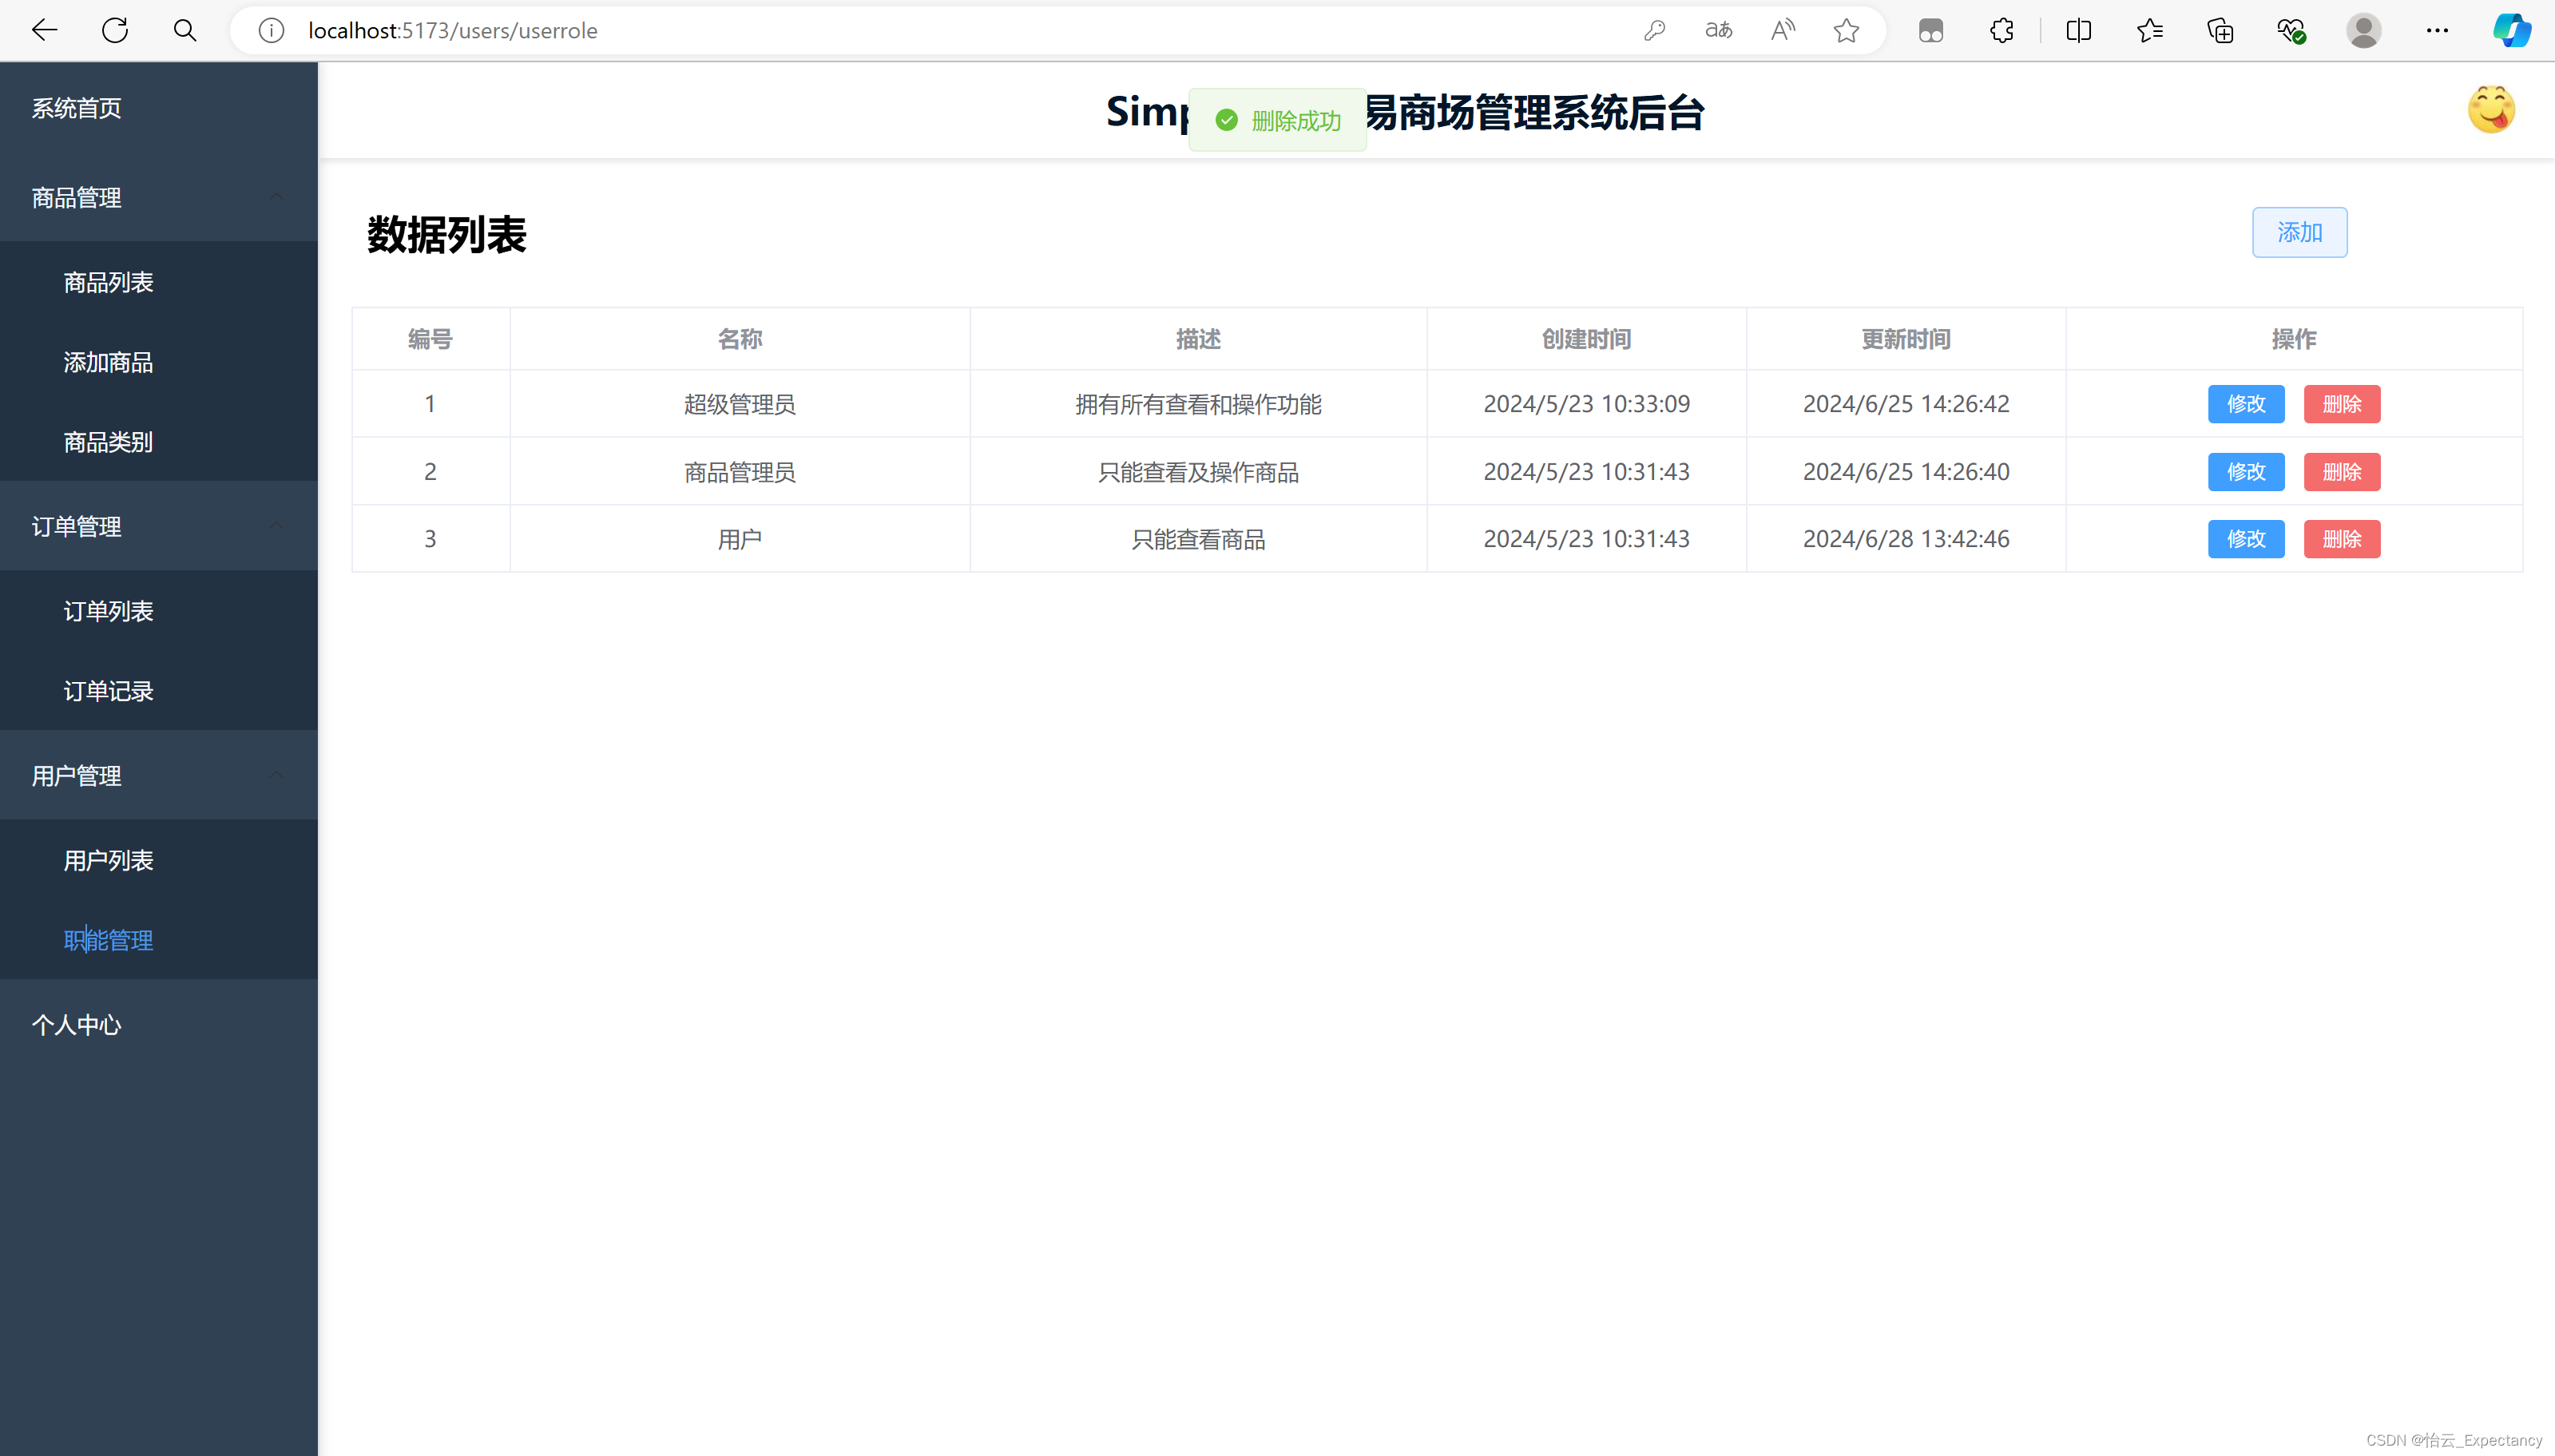
职能管理与商品类别实现思路基本一致:
以上就是页面基本情况
2.数据表设计
我们暂时仅设计了5张表,分别是:
产品表product:

类别表category:
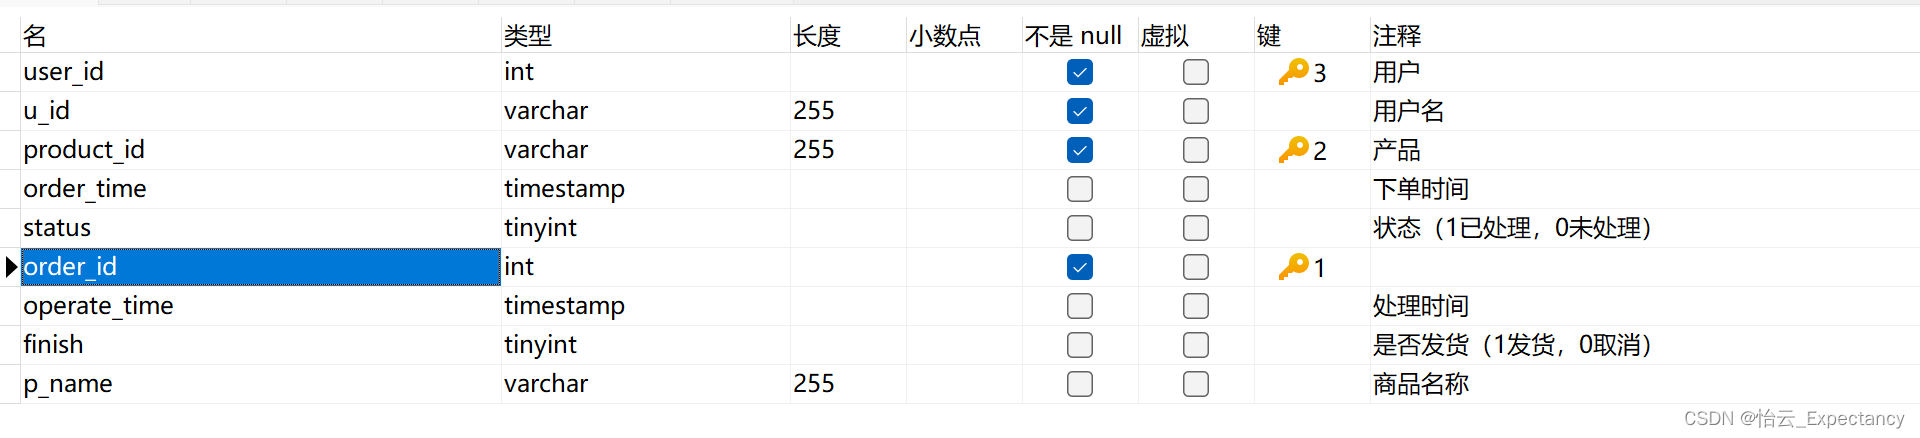
订单信息表order:
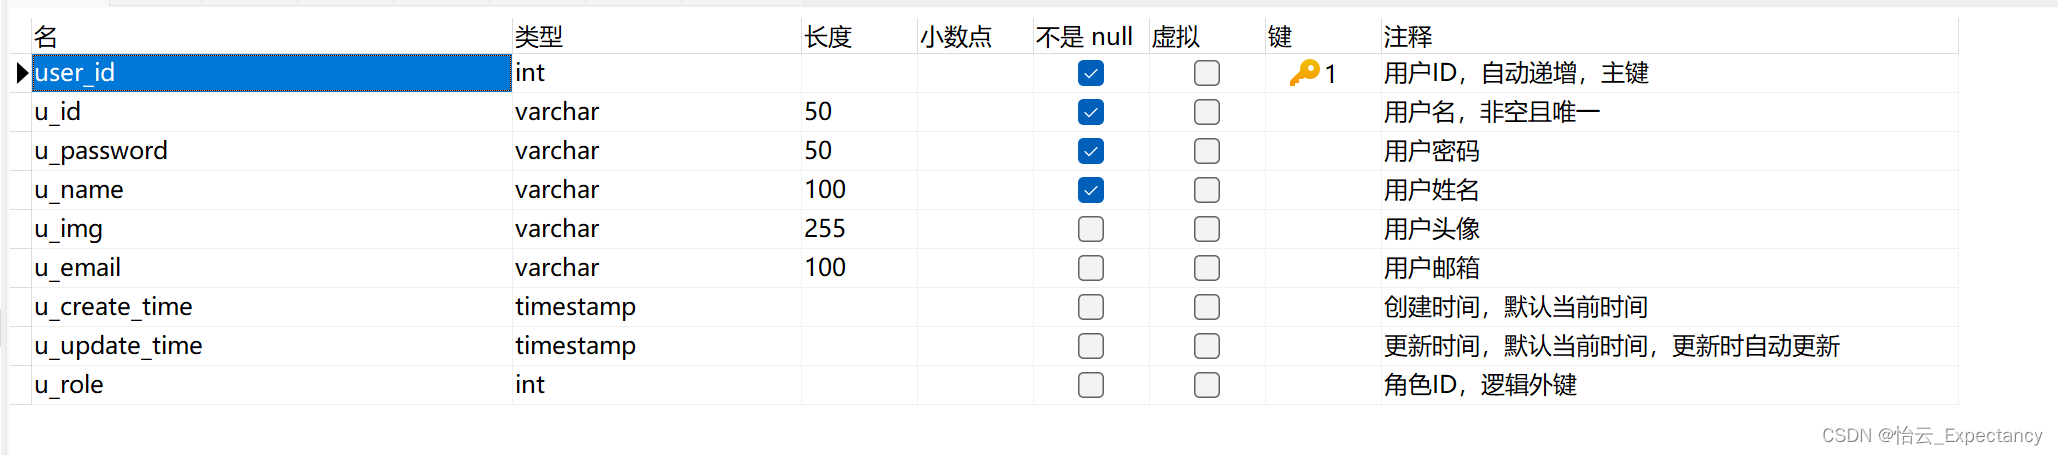
用户信息表user:
职能表role:
每张表的表名+下划线+id字段都设置唯一非空主键自增编号,用于定位每条数据。
product表中的category_id为逻辑外键,用于关联category表。
category表仅包含三个字段:编号、类别名称以及类别数量。其中类别数量为空值,由后端进行统计并显示在前端页面
order表中u_id与p_name均为空值,由后端根据user_id和product_id进行匹配并将所获取到的数据显示在前端页面。此外order_time和operate_time也为空值,order_time由用户进行下单操作时获取当前时间进行填入,operate_time由管理员进行订单操作时获取当前时间进行填入。status表示商品操作状态——0表示未处理,1表示已处理。未处理的数据显示在订单列表页面,已处理的数据显示在订单记录页面。finish字段可以为空,表示是否完成发货操作——0表示取消发货,1表示完成发货。当管理员进行相对应的处理时,后端会对数据表中的数据进行相对应的赋值。
用户表user中的u_role为逻辑外键,用于关联role表中的role_id字段
3.技术介绍
后端:JDK17、SpringBoot、Maven、Lombok、OSS、JWT、Nginx1.24、PageHelper
前端:Vue3、Vue-router、ElementPlus、Axios
4.代码详解
前端项目结构:

后端项目结构:

前后端联调思路:
nginx配置:
# 全局设置(Global Settings)
worker_processes 1;
events {
worker_connections 1024;
}
# HTTP块(HTTP Block):这是HTTP服务器配置的主要部分,包含了HTTP协议相关的设置
http {
include mime.types;
default_type application/octet-stream;
sendfile on;
keepalive_timeout 65;
# 定义服务器
server {
listen 80;
server_name localhost;
# 定义默认位置
location / {
proxy_pass http://localhost:5173;
proxy_set_header Host $host;
proxy_set_header X-Real-IP $remote_addr;
proxy_set_header X-Forwarded-For $proxy_add_x_forwarded_for;
proxy_set_header X-Forwarded-Proto $scheme;
}
# 定义 API 路径
location /api/ {
rewrite ^/api/(.*)$ /$1 break;
proxy_pass http://localhost:8080;
proxy_set_header Host $host;
proxy_set_header X-Real-IP $remote_addr;
proxy_set_header X-Forwarded-For $proxy_add_x_forwarded_for;
proxy_set_header X-Forwarded-Proto $scheme;
}
error_page 500 502 503 504 /50x.html;
location = /50x.html {
root html;
}
}
}
将所有含有api路径的链接替换为http://localhost:8080请求;反之替换为http://localhost:5173请求
前端配置:
// src/utils/axios.js
import axios from 'axios';

const service = axios.create({
  baseURL: 'http://localhost/api', // 所有请求的基本 URL
  timeout: 5000, // 请求超时时间
});
所有基本请求为http://localhost/api
后端配置:
package com.simplemall.filter;

import org.springframework.web.filter.OncePerRequestFilter;
import jakarta.servlet.FilterChain;
import jakarta.servlet.ServletException;
import jakarta.servlet.http.HttpServletRequest;
import jakarta.servlet.http.HttpServletResponse;
import java.io.IOException;

public class CorsFilter extends OncePerRequestFilter {

    @Override
    protected void doFilterInternal(HttpServletRequest request, HttpServletResponse response, FilterChain filterChain)
            throws ServletException, IOException {
        // 设置 CORS 响应头
        response.setHeader("Access-Control-Allow-Origin", "*"); // 允许所有来源的跨域请求
        // 或者允许特定来源的跨域请求,替换 * 为前端应用的地址
        // response.setHeader("Access-Control-Allow-Origin", "http://localhost:5173");
        response.setHeader("Access-Control-Allow-Methods", "POST, GET, OPTIONS, DELETE, PUT");
        response.setHeader("Access-Control-Max-Age", "3600");
        response.setHeader("Access-Control-Allow-Headers", "Content-Type, Authorization, X-Requested-With");

        // 继续执行过滤器链
        filterChain.doFilter(request, response);
    }
}
处理前端发来的请求,解决跨域问题
JWT令牌和拦截器:
引入依赖:
        <!--        JWT令牌依赖-->
        <dependency>
            <groupId>io.jsonwebtoken</groupId>
            <artifactId>jjwt</artifactId>
            <version>0.9.1</version>
        </dependency>
        <dependency>
            <groupId>javax.xml.bind</groupId>
            <artifactId>jaxb-api</artifactId>
            <version>2.3.1</version>
        </dependency>
这里使用的是JDK17,JDK17版本及以上需要引入jaxb依赖
JWTUtils:生成并解析令牌
LoginInterceptor:判断请求是否符合放行条件
RouterWebConfig:动态拦截
package com.simplemall.config;

import com.simplemall.interception.LoginInterceptor;
import org.springframework.beans.factory.annotation.Autowired;
import org.springframework.context.annotation.Configuration;
import org.springframework.web.servlet.config.annotation.InterceptorRegistry;
import org.springframework.web.servlet.config.annotation.WebMvcConfigurer;

/**
 * 配置拦截器,进行动态拦截操作
 */
@Configuration
public class RouterWebConfig implements WebMvcConfigurer {
    @Autowired
    private LoginInterceptor loginInterceptor;

    @Override
    public void addInterceptors(InterceptorRegistry registry) {
        // 只对需要认证的路径进行拦截
        registry.addInterceptor(loginInterceptor)
                .addPathPatterns(
                        "/user/**",
                        "/users",
                        "/role/**",
                        "/roles",
                        "/product/**",
                        "/products/**",
                        "/category/**",
                        "/categories",
                        "/firstpage",
                        "/order/**",
                        "/personal") // 需要登录认证的路径
                .excludePathPatterns("/login", "/register", "/notfoundpage", "/user/insert"); // 不需要登录认证的路径
    }
}
由于注册操作采用了插入用户的接口,因此这里直接放行
这里使用Authorization携带JWT信息:
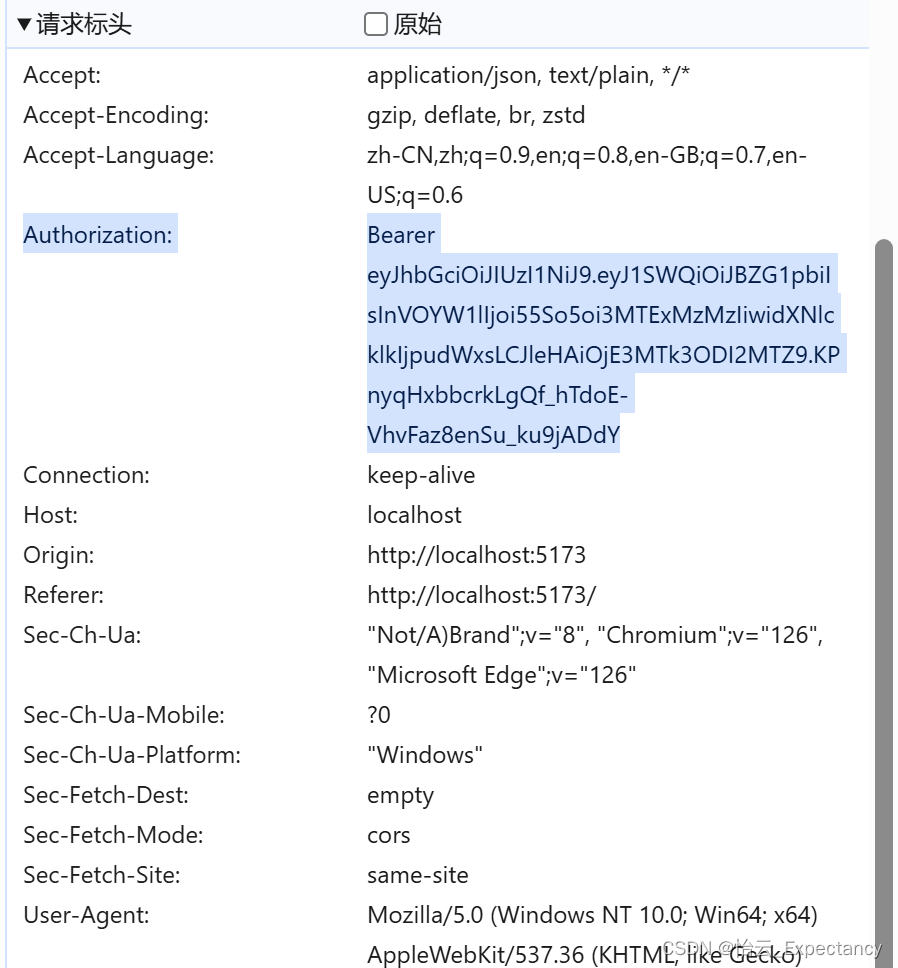
前端需要携带保留JWT信息并保存在Authorization当中:
axios:
// 请求拦截器
service.interceptors.request.use(
  config => {
    const token = localStorage.getItem('token');
    if (token && !config.url.includes('/user/insert')) { // 如果不是注册请求,则添加 token
      config.headers['Authorization'] = `Bearer ${token}`;
    }
    return config;
  },
  error => Promise.reject(error)
);
在请求头的Authorization中携带Bearer+{token}信息
login方法:
const handleLogin = async () => {
  try {
    const response = await login(loginForm.value);
    if (response && response.code === 1) {
      localStorage.setItem('token', response.data); // 存储 token
      ElMessage.success('登录成功');
      router.push('/');
    } else {
      ElMessage.error(response.msg || '登录失败');
    }
  } catch (error) {
    ElMessage.error(error.message || '登录时发生错误');
  }
};
在localStorage中携带token中的信息,也就是JWT
后续在每次访问页面时都会携带该信息通过验证,登录成功后跳转到 “/” 链接
分页操作:
引入依赖:
        <!--        pageHelper插件依赖-->
        <dependency>
            <groupId>com.github.pagehelper</groupId>
            <artifactId>pagehelper</artifactId>
            <version>5.0.3</version>
        </dependency>
SpringBoot3.X只能配置pageHelper依赖,并手动配置一个拦截器PageHelperConfig:
package com.simplemall.config;
import com.github.pagehelper.PageInterceptor;
import org.springframework.context.annotation.Bean;
import org.springframework.context.annotation.Configuration;
import java.util.Properties;

@Configuration
public class PageHelperConfig {
    @Bean
    public PageInterceptor pageHelper() {
        PageInterceptor pageInterceptor = new PageInterceptor();
        Properties properties = new Properties();
        properties.setProperty("offsetAsPageNum","true");
        properties.setProperty("rowBoundsWithCount","true");
        properties.setProperty("reasonable","true");
        properties.setProperty("helperDialect", "mysql");
        properties.setProperty("supportMethodsArguments","true");
        properties.setProperty("params","count=countSql");
        pageInterceptor.setProperties(properties);
        return pageInterceptor;
    }
}
在controller层中接收一个当前页和展示数参数即可:
例如商品分页条件查询:
@GetMapping("/products/search")
    public Result productListSearch(
            @RequestParam(defaultValue = "1") Integer page,
            @RequestParam(defaultValue = "7") Integer pageSize,
            @RequestParam(required = false) String pName,
            @RequestParam(required = false) Integer pCategory,
            @RequestParam(required = false) BigDecimal minPrice,
            @RequestParam(required = false) BigDecimal maxPrice) {

        PageBean pageBean = productService.productListSearch(page, pageSize, pName, pCategory, minPrice, maxPrice);
        return Result.success(pageBean);
    }
多表联合查询与修改:
通常在xml文件中通过SQL语句进行实现。
以取消订单为例:
 @Update("UPDATE `order` o " +
            "JOIN product p ON o.product_id = p.product_id " +
            "SET o.status = 1, o.finish = 0, p.p_number = p.p_number + 1, o.operate_time = #{operateTime} " +
            "WHERE o.order_id = #{orderId}")
    void cancel(Order order);
order表需要获取product表中的p_name和user表中的u_id数据,JOIN ON语句进行多表联合查询修改操作。
前端全局布局组件CommonLayout:
采用侧边栏——页头——中心内容区 布局
右上角头像个人中心与退出登录:
const handleAvatarCommand = (command) => {
  console.log(`Received command: ${command}`); // 添加日志调试信息
  if (command === 'personal') {
    router.push('/personal');
  } else if (command === 'logout') {
    ElMessageBox.confirm('您确定要退出登录吗?', '提示', {
      confirmButtonText: '确定',
      cancelButtonText: '取消',
      type: 'warning',
    }).then(() => {
      localStorage.removeItem('token');
      ElMessage({
        type: 'success',
        message: '退出成功',
      });
      router.push('/login');
    }).catch(() => {
      ElMessage({
        type: 'info',
        message: '已取消退出',
      });
    });
  }
};
跳转对应页面,如果执行退出登录操作则删除token值
路由:
// src/router/index.js

import { createRouter, createWebHistory } from 'vue-router';
import CommonLayout from '../components/CommonLayout.vue';
import FirstPage from '../views/FirstPage.vue';
import ProductList from '../views/products/ProductList.vue';
import ProductCategory from '../views/products/ProductCategory.vue';
import ProductAdd from '../views/products/ProductAdd.vue';
import OrderList from '../views/order/OrderList.vue';
import OrderRecord from '../views/order/OrderRecord.vue';
import UserList from '../views/users/UserList.vue';
import UserRole from '../views/users/UserRole.vue';
import ProductEdit from '../views/products/ProductEdit.vue';
import UserEdit from '../views/users/UserEdit.vue';
import UserAdd from '../views/users/UserAdd.vue';
import Login from '../views/Login.vue';
import Register from '../views/Register.vue';
import NotFoundPage from '../views/404page.vue';
import Personal from '../views/Personal.vue';

const routes = [
  { path: '/login', name: 'Login', component: Login },
  { path: '/register', name: 'Register', component: Register },
  { path: '/notfoundpage', name: '404Page', component: NotFoundPage },

  // 使用 CommonLayout 的页面
  {
    path: '/',
    component: CommonLayout,
    children: [
      { path: '', redirect: '/firstpage' },
      { path: 'firstpage', name: 'FirstPage', component: FirstPage },
      { path: 'products/productlist', name: 'ProductList', component: ProductList },
      { path: 'products/productcategory', name: 'ProductCategory', component: ProductCategory },
      { path: 'products/productadd', name: 'ProductAdd', component: ProductAdd },
      { path: 'products/productedit/:id', name: 'ProductEdit', component: ProductEdit, props: true },
      { path: 'order/orderlist', name: 'OrderList', component: OrderList },
      { path: 'order/orderrecord', name: 'OrderRecord', component: OrderRecord },
      { path: 'users/userlist', name: 'UserList', component: UserList },
      { path: 'users/userrole', name: 'UserRole', component: UserRole },
      { path: 'users/useredit/:id', name: 'UserEdit', component: UserEdit, props: true },
      { path: 'users/useradd', name: 'UserAdd', component: UserAdd },
      { path: 'personal', name: 'Personal', component: Personal }
    ]
  },

  // 捕获所有未知路径并重定向到404页面
  { path: '/:catchAll(.*)', redirect: '/notfoundpage' }
];

const router = createRouter({
  history: createWebHistory(import.meta.env.BASE_URL),
  routes
});

// 添加全局路由守卫
router.beforeEach((to, from, next) => {
  const token = localStorage.getItem('token');

  if (!token && to.path !== '/login' && to.path !== '/register' && to.path !== '/notfoundpage') {
    // 如果没有令牌并且不是去登录、注册和404页面,则跳转到登录页面
    next('/login');
  } else {
    // 否则放行
    next();
  }
});

export default router;
除登录、注册和404页面之外,全部添加至全局布局的子路由中并加入全局路由守卫,判断请求是否含有JWT信息,若不含则跳转至登录页面。
个人中心:
package com.simplemall.controller;

import com.simplemall.pojo.User;
import com.simplemall.service.PersonalService;
import com.simplemall.utils.JwtUtils;
import io.jsonwebtoken.Claims;
import org.springframework.beans.factory.annotation.Autowired;
import org.springframework.web.bind.annotation.*;

@RestController
@RequestMapping("/personal")
public class PersonalController {

    @Autowired
    private PersonalService personalService;

    @GetMapping("/userinfo")
    public User getUserInfo(@RequestHeader("Authorization") String authorizationHeader) {
        // 获取 token
        String token = authorizationHeader.replace("Bearer ", "");
        // 解析 token
        Claims claims = JwtUtils.parseJWT(token);
        // 获取用户 ID 或用户名(根据你的 JWT 负载内容)
        String userId = (String) claims.get("uId");

        // 根据用户 ID 或用户名获取用户信息
        User user = personalService.findUserById(userId);

        return user;
    }

    @PostMapping("/updateuserinfo")
    public String updateUserInfo(@RequestHeader("Authorization") String authorizationHeader, @RequestBody User user) {
        // 获取 token
        String token = authorizationHeader.replace("Bearer ", "");
        // 解析 token
        Claims claims = JwtUtils.parseJWT(token);
        // 获取用户 ID 或用户名(根据你的 JWT 负载内容)
        String userId = (String) claims.get("uId");

        // 设置用户ID
        user.setUId(userId);
        // 更新用户信息
        personalService.updateUser(user);

        return "用户信息更新成功";
    }
}
解析JWT值并从数据表中获取全部个人信息
5.不足
1.页面设计感不足,元素单调
2.缺乏文件上传功能,需要后续进行继续补充
3.部分多表联合方面考虑欠缺
4.程序不统一。最初的页面是使用Vue2进行构建的,后续使用Vue3,程序杂乱,此外代码中含有部分无用变量与样式,后续可能需要进行代码重构。
5.权限部分未编写,导致职能划分并不明确,所有人都可以对数据表进行操作,没有用户端,只有后台操作系统
6.部分未知bug暂时不知道如何解决。例如鼠标悬停在侧边目录项会泛白色高光,这并非程序的样式,应该是默认样式或者其他原因,也Vue2语法与ElementPlus样式不兼容导致的bug,暂时原因不明,有待进一步分析。


 4078
4078


 被折叠的 条评论
为什么被折叠?
被折叠的 条评论
为什么被折叠?
 到【灌水乐园】发言


