


Andorid UI篇——RecyclerView
上一篇文章简单的介绍了ListView,如果没有一些技巧来提升它的运行效率,它的性能就会非常差,并且它不能实现横向的滚动。
为此,Android提供了一个更强大的滚动控件——RecyclerView。
RecyclerView的基本用法
由于RecyclerView是新增的控件,所以他要在build.gradle中添加相应的依赖库:
在app/build.gradle中的dependencies闭包中添加如下内容(写博客时所用的依赖库,可能由于时间问题依赖库不同):
implementation 'androidx.recyclerview:recyclerview:1.1.0’
更新同步后,我们修改activity_main.xml中的代码:
<?xml version="1.0" encoding="utf-8"?>
<LinearLayout xmlns:android="http://schemas.android.com/apk/res/android"
    android:layout_width="match_parent"
    android:layout_height="match_parent">

    <androidx.recyclerview.widget.RecyclerView
        android:id="@+id/recycler_view"
        android:layout_width="match_parent"
        android:layout_height="match_parent"/>

</LinearLayout>
这里我们做出上一篇文章葫芦兄弟的同样效果,我们把Brothers类和brothers_item.xml以及用到的图片也复制过来:
Brothers类:
package com.example.listviewtest;

public class Brothers {
    private String name;
    private int imageId;

    public Brothers(String name,int imageId){
        this.imageId = imageId;
        this.name = name;
    }

    public String getName() {
        return name;
    }

    public int getImageId() {
        return imageId;
    }
}
brothers_item.xml:
<?xml version="1.0" encoding="utf-8"?>
<LinearLayout xmlns:android="http://schemas.android.com/apk/res/android"
    android:layout_width="match_parent"
    android:layout_height="wrap_content">

    <ImageView
        android:id="@+id/brothers_image"
        android:layout_width="wrap_content"
        android:layout_height="wrap_content"/>

    <TextView
        android:id="@+id/brothers_name"
        android:layout_width="wrap_content"
        android:layout_height="wrap_content"
        android:layout_gravity="center_vertical"
        android:textSize="18sp"/>

</LinearLayout>
接下来我们同样需要为RecyclerView准备一个适配器,新建一个BrothersAdapter类,让它继承RecyclerView.Adapter,并将泛型指定为BrothersAdapter.ViewHolder。BrotherAdapter代码如下:
package com.example.listviewtest;

import android.view.LayoutInflater;
import android.view.View;
import android.view.ViewGroup;
import android.widget.ImageView;
import android.widget.TextView;

import androidx.annotation.NonNull;
import androidx.recyclerview.widget.RecyclerView;

import java.util.List;

public class BrothersAdapter extends RecyclerView.Adapter<BrothersAdapter.ViewHolder> {

    private List<Brothers> mBrotherList;

    static class ViewHolder extends RecyclerView.ViewHolder{
        ImageView brotherImage;
        TextView brotherName;

        public ViewHolder(View view){
            super(view);
            brotherImage = view.findViewById(R.id.brothers_image);
            brotherName = view.findViewById(R.id.brothers_name);
        }
    }

    public BrothersAdapter(List<Brothers> brothersList){
        mBrotherList = brothersList;
    }

    @NonNull
    @Override
    public ViewHolder onCreateViewHolder(@NonNull ViewGroup parent, int viewType) {
        View view = LayoutInflater.from(parent.getContext()).inflate(R.layout.brothers_item,parent,false);
        ViewHolder viewHolder = new ViewHolder(view);
        return viewHolder;
    }

    @Override
    public void onBindViewHolder(@NonNull ViewHolder holder, int position) {
        Brothers brother = mBrotherList.get(position);
        holder.brotherName.setText(brother.getName());
        holder.brotherImage.setImageResource(brother.getImageId());
    }

    @Override
    public int getItemCount() {
        return mBrotherList.size();
    }
}
这段代码比起ListView更容易让人理解,我们在内部定义了一个ViewHolder类继承于RecyclerView.ViewHolder。然后在这个ViewHolder的构造函数中传入RecyclerView子项的最外层布局,这样我们就可以通过findViewById()方法找到对应的控件实例。
这里我们的BrothersAdapter继承于RecyclerView.Adapter,所以我们必须重写三个方法,onCreateViewHolder(),onBindViewHolder(),getItemCount(),这三个方法分别对应的作用是:创建ViewHolder实例,对 RecyclerView中的子项进行数据赋值,告知RecyclerView共有多少子项。
这样我们适配器就做好了,接下来我们修改MainActivity中的代码:
package com.example.listviewtest;

import androidx.appcompat.app.AppCompatActivity;
import androidx.recyclerview.widget.LinearLayoutManager;
import androidx.recyclerview.widget.RecyclerView;

import android.os.Bundle;
import java.util.ArrayList;
import java.util.List;

public class MainActivity extends AppCompatActivity {

    private List<Brothers> brothersList = new ArrayList<>();
    @Override
    protected void onCreate(Bundle savedInstanceState) {
        super.onCreate(savedInstanceState);
        setContentView(R.layout.activity_main);
        initBrothers();
        RecyclerView recyclerView = findViewById(R.id.recycler_view);
        RecyclerView.LayoutManager layoutManager = new LinearLayoutManager(this);
        recyclerView.setLayoutManager(layoutManager);
        BrothersAdapter brothersAdapter = new BrothersAdapter(brothersList);
        recyclerView.setAdapter(brothersAdapter);
    }

    private void initBrothers(){
        Brothers dawa = new Brothers("我是大娃",R.drawable.dawa);
        brothersList.add(dawa);
        Brothers erwa = new Brothers("我是二娃",R.drawable.erwa);
        brothersList.add(erwa);
        Brothers sanwa = new Brothers("我是三娃",R.drawable.sanwa);
        brothersList.add(sanwa);
        Brothers siwa = new Brothers("我是四娃",R.drawable.siwa);
        brothersList.add(siwa);
        Brothers wuwa = new Brothers("我是五娃",R.drawable.wuwa);
        brothersList.add(wuwa);
        Brothers liuwa = new Brothers("我是六娃",R.drawable.liuwa);
        brothersList.add(liuwa);
        Brothers qiwa = new Brothers("我是七娃",R.drawable.qiwa);
        brothersList.add(qiwa);
    }
}
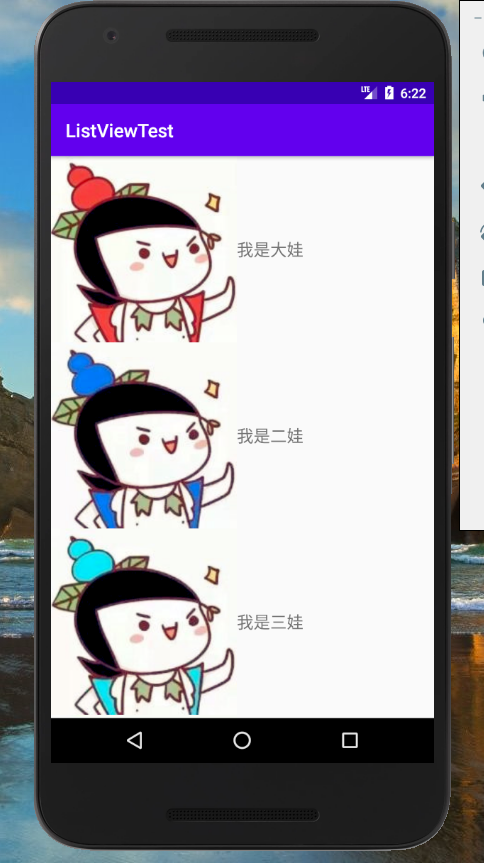
这里的LayoutManager用于指定RecyclerView的布局方式,这里我们默认用的是线性布局,也就是竖向滑动。
最后我们看一下效果吧:
实现横向滚动
RecyclerView能做到ListView做不到的横向滚动。
首先我们修改brothers_item中的代码:
<?xml version="1.0" encoding="utf-8"?>
<LinearLayout xmlns:android="http://schemas.android.com/apk/res/android"
    android:orientation="vertical"
    android:layout_width="100dp"
    android:layout_height="wrap_content">

    <ImageView
        android:id="@+id/brothers_image"
        android:layout_width="wrap_content"
        android:layout_height="wrap_content"
        android:layout_gravity="center_horizontal"/>

    <TextView
        android:id="@+id/brothers_name"
        android:layout_width="wrap_content"
        android:layout_height="wrap_content"
        android:layout_gravity="center_horizontal"
        android:textSize="18sp"
        android:layout_marginTop="10dp" />

</LinearLayout>
接下来修改MainActivity中的代码:
protected void onCreate(Bundle savedInstanceState) {
        super.onCreate(savedInstanceState);
        setContentView(R.layout.activity_main);
        initBrothers();
        RecyclerView recyclerView = findViewById(R.id.recycler_view);
        LinearLayoutManager layoutManager = new LinearLayoutManager(this);
        layoutManager.setOrientation(LinearLayoutManager.HORIZONTAL);
        recyclerView.setLayoutManager(layoutManager);
        BrothersAdapter brothersAdapter = new BrothersAdapter(brothersList);
        recyclerView.setAdapter(brothersAdapter);
    }
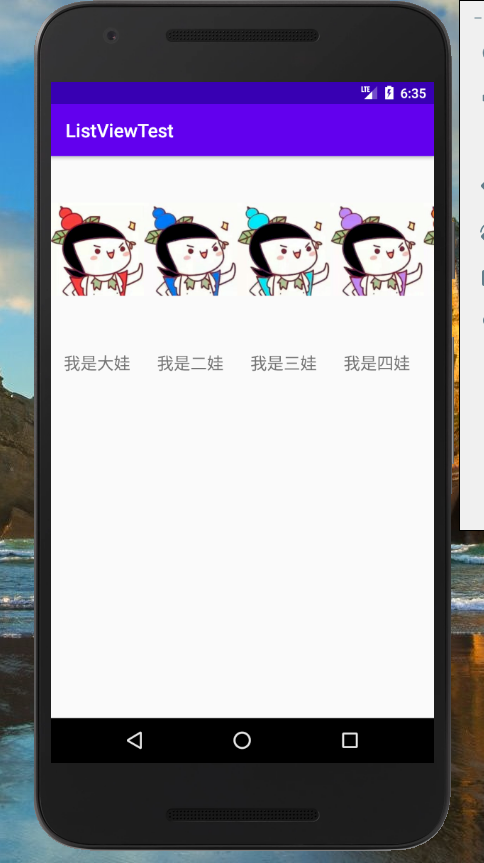
我们在layoutManager实例中设置了滚动方向。重新运行程序,如图所示:
RecyclerView的点击事件
如果我们为RecyclerView设置点击事件,我们不能像ListView一样直接利用setOnItemCliclListener()方法注册监听器,而是需要我们为每一个子项注册点击事件,这要比ListView麻烦一点。
RecyclerView直接摒弃了子项点击事件的监听器,所有的点击事件都由具体的View去注册。
package com.example.listviewtest;

import android.view.LayoutInflater;
import android.view.View;
import android.view.ViewGroup;
import android.widget.ImageView;
import android.widget.TextView;
import android.widget.Toast;

import androidx.annotation.NonNull;
import androidx.recyclerview.widget.RecyclerView;

import java.util.List;

public class BrothersAdapter extends RecyclerView.Adapter<BrothersAdapter.ViewHolder> {

    private List<Brothers> mBrotherList;

    static class ViewHolder extends RecyclerView.ViewHolder{
        View brotherView;
        ImageView brotherImage;
        TextView brotherName;

        public ViewHolder(View view){
            super(view);
            brotherView = view;
            brotherImage = view.findViewById(R.id.brothers_image);
            brotherName = view.findViewById(R.id.brothers_name);
        }
    }

    public BrothersAdapter(List<Brothers> brothersList){
        mBrotherList = brothersList;
    }

    @NonNull
    @Override
    public ViewHolder onCreateViewHolder(@NonNull ViewGroup parent, int viewType) {
        View view = LayoutInflater.from(parent.getContext()).inflate(R.layout.brothers_item,parent,false);
        final ViewHolder viewHolder = new ViewHolder(view);
        viewHolder.brotherView.setOnClickListener(new View.OnClickListener() {
            @Override
            public void onClick(View view) {
                int position = viewHolder.getAdapterPosition();
                Brothers brothers = mBrotherList.get(position);
                Toast.makeText(view.getContext(),"You clicked view "+ brothers.getName(),Toast.LENGTH_SHORT).show();
            }
        });
        viewHolder.brotherImage.setOnClickListener(new View.OnClickListener() {
            @Override
            public void onClick(View view) {
                int position = viewHolder.getAdapterPosition();
                Brothers brothers = mBrotherList.get(position);
                Toast.makeText(view.getContext(),"You clicked image "+brothers.getName(),Toast.LENGTH_SHORT).show();
            }
        });
        return viewHolder;
    }

    @Override
    public void onBindViewHolder(@NonNull ViewHolder holder, int position) {
        Brothers brother = mBrotherList.get(position);
        holder.brotherName.setText(brother.getName());
        holder.brotherImage.setImageResource(brother.getImageId());
    }

    @Override
    public int getItemCount() {
        return mBrotherList.size();
    }
}
这里我们分别为最外层的布局和ImageView注册了点击事件,我们先通过position拿到了Brothers实例,再利用Toast分别弹出两种不同的提示内容。


 266
266

 被折叠的 条评论
为什么被折叠?
被折叠的 条评论
为什么被折叠?
 到【灌水乐园】发言


